CDs
In many homes there are storage media such as CDs. The products are quite fragile, subject to demagnetization, scratching and rapid failure.
But don’t rush to throw the shiny round pieces in the trash. You can make an amazing mosaic from disk fragments. It is used to make frames for mirrors, stained glass windows for interior doors and much more.
You can decorate any large surface with disc mosaics, be it the body of a guitar or the area of a table.
Materials
What can you use for DIY waste crafts? Any things that are not needed will be used, even the most non-standard options:
- cardboard boxes of all sizes;
- glass and plastic bottles;
- containers for food or chocolate, kinder surprises;
- computer disks, records;
- candy wrappers, foil, beautiful pictures, postcards;
- old magazines;
- foam rubber and polystyrene;
- plugs, caps;
- buttons, beads, fringe, sequins.
It is important that the materials are clean, bright and intact; you should not take old and worn-out items.
Plastic bottles
Almost all drinks, especially those larger than 1 liter, are poured into plastic bottles.
A special accumulation of this container is observed in the hot summer period. This garbage must be sorted and sent to a special, separate container.
And also from plastic bottles you can make a beautiful craft from waste material for the garden, for example, an exotic palm tree.
A tree where the trunk is made from brown bottles and the leaves from green bottles will become a real decoration of the yard.
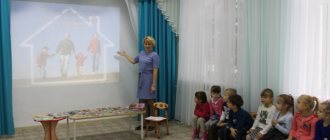
Consultation for parents on the topic: “Waste material in children’s crafts”
It is known that artistic and aesthetic development plays a huge role in the comprehensive development of a child’s personality, in the formation of his aesthetic attitude to the world, to social reality. And the sooner a child is involved in the creative process of learning about the world around him, the more actively mental processes such as perception of the world around him, imaginative thinking, imagination, attention, memory, speech will be formed and developed.
Today, FGT is aimed at achieving the goals of developing cognitive interests and intellectual development in preschoolers through the development of cognitive, research and productive activities (clause 3.3.6).
Children's visual creativity is precisely aimed at achieving these development goals for preschool children. After all, classes in drawing, modeling, appliqué, design, and manual labor contribute to the development of the child’s cognitive interests, contribute to his intellectual development, and this, in turn, is expressed in the creation by children of various crafts, drawings, individual and collective works of artistic creativity.
Children like to tinker and create crafts from waste materials, things no one needs. Making crafts requires a variety of actions from the child. And if at first children make more imprecise movements, some uncertainty is still felt in working with waste material, then later, in the process of systematic work, children gain confidence, accuracy, and their fingers become more obedient. All this is important for preparing the hand for writing and learning activities. Manual labor contributes to the development of sensory skills - consistency in the work of the eyes and hands, improvement of coordination of movements, flexibility and accuracy of movements in performing actions. V.A. Sukhomlinsky wrote: “The origins of children’s abilities and talents are at their fingertips. From the fingers, figuratively speaking, come the finest streams that feed the source of creative thought.”
Crafts made from waste materials satisfy children's curiosity; this work contains novelty, creative exploration, and the opportunity to show their imagination and achieve certain results. After all, thanks to skillful hands, imagination and ingenuity, you can create interesting crafts. Construction from waste material encourages children's creativity and imagination. Children use the created crafts in games, as gifts, and as decorations for the group. We advise parents of their students not to throw away used plastic bottles of shampoos and creams, boxes, lids, beautiful packaging, and stoppers. You can use various beads, seed beads, mosaics, broken rattles and many other items to decorate crafts.
It is better to place all this “good” in a special container or box. The main thing is not to extinguish children’s initiative and desire to find interesting solutions themselves when creating crafts. The task of adults is to show the simplest and most accessible ways to connect parts of future homemade products.
In our work with children on art activities, we often use the plasticineography method. The plasticineography method allows the child to discover new possibilities for using the constructive properties of plasticine and encourages children to experiment with it. Plasticine is a universal material that makes it possible to realize the most interesting and complex ideas.
So, when introducing children to the fairy tale by A.S. Pushkin’s “The Tale of the Golden Cockerel”, the collective work “Fairytale Palace” was performed. When creating this work, the plasticineography method was also used. By spreading plasticine onto the finished mold, the child subsequently independently decorated his blank with various structural elements. To decorate the details of the fairy-tale palace, straws from children's juices and pieces of colored plastic from shampoo bottles of various shapes and sizes were used. While creating a fairy-tale palace, the children had great pleasure, because in the process of work they experimented with materials familiar to them, and came to the conclusion that they can make crafts not only from traditional materials for needlework, such as colored cardboard and paper, plasticine, but and from waste material.
In the collective works “Space” and “Firebird”, made in the same technique as the collective work “Fairytale Palace”, small and large buttons were used to decorate individual elements: spaceships, stars, planets, feathers of the Firebird, beads, sparkles, straws for cocktails and juices. The works turned out to be bright, unusual, and were awarded certificates at creative exhibitions and competitions within the garden and at international competitions for the originality of the solution and the creative approach to creating the work.
The favorable emotional mood of children during the making of crafts, the joy of communication in joint work, are very important for the overall development of the child. It's nice to see how much sincere joy funny toys made with your own hands bring to children. These are funny, cheerful people, various houses, boxes, clocks. The work of making such crafts contributes to the development of the child’s personality, nurturing his character, and forms such strong-willed qualities as determination, perseverance, and the ability to complete the work he has started. In this type of work, children develop real opportunities to control and evaluate their own actions. The task of adults is to maintain the child’s interest and desire to create, to create something new and unusual with their own hands.
This type of activity will help the child better understand and appreciate the surrounding nature, and not pollute it, since unnecessary objects and waste material can be used in creative activities, in creating interesting and original crafts and toys.
Lids
There are lids on any container with liquid contents. That’s why people often throw small products, tin and plastic, into the trash without thinking.
If you show your imagination, this waste material can serve as raw material for creating decorative items or refrigerator magnets.
You can use the caps to make a chic garland or even a curtain. From tin ribbed lids you can lay out a path in a mosaic, thus decorating a tree stump, table surface, bench or walls of outbuildings.
LiveInternetLiveInternet
Birds made from dried flower petals. Application on the wall Birds made of flower petals. Application on glass. Very beautiful. Let's see!!! In this case, I decorated a glass plate and a flat earthenware vase with Two Duck Birds. It was necessary: - dried flower petals - PVA glue - dried maple inflorescences - acrylic paint - acrylic varnish
and a crane. And now, in order, with details. There is nothing complicated. Just in case, I’ll repeat how I dry the petals. I lay out individual petals on writing paper, in this case petals from a chrysanthemum
I cover the top with another piece of writing paper and iron it with an iron. The color of the white petals changed slightly, becoming beige, ocher-golden depending on the temperature
Here you can see the two types of chrysanthemums that I used: burgundy and white-yellow.
And this “palette” was obtained after processing the petals:
Now let’s get to work: using white paint I painted the outline of the birds. I glued the petals along this contour on top; in addition, the white background served as the basis, a substrate for the light petals. Otherwise, the light yellow, ocher chrysanthemum petals would have been lost on the light, translucent, and also yellow, background of the plate itself. We take a “palette”, white glue, a brush, patience - and “draw” with the petals like paint, making strokes! I laid out the feathers on the wings, overlapping, carefully placing the petals one above the other.
The tail and long feathers of the wings are of different colors, from the dried petals of a plant similar to a lily.
The entire chest and belly of the birds are lined with overlapping beige chrysanthemum petals, the petals are rounded, and I didn’t have to trim anything, just select the desired shapes and lines of the petals. All I had to cut out were round pieces of green chrysanthemum leaves for the eyes.
I glued the grass above and below the birds with Moment glue. The role of the “Chinese” grass is played by the inflorescence of the maple: I cut off the “spouts” themselves, similar to dragonfly wings, and the remaining two-horned blades of grass completely satisfied me with their “overseas” appearance. As you can see, there is not an gram or centimeter of underdrawing or cutting out - only petals. All I had to do was paint the birds’ noses with orange paint, and draw the pupils and irises of the eyes on the petal green rounds.
The result was a decorative plate with dried flower petals instead of paints, and not a single petal was cut out. I simply varnished the two-horned maple blades of grass and did not paint them, as I originally wanted, in a golden color to match the plate. The birds themselves are also covered with several layers of acrylic varnish. Another bird, a crane, appeared on this flat earthenware vase; using carbon paper, she transferred the design she liked onto the surface of the vase. And she also began to select a “palette” - to look for petals that were suitable in color and size.
I also glued the petals using PVA glue. I had to work on the crane a little more, keeping in mind that some - literally two or three petals - had to be cut with scissors to the shape I needed.
Otherwise, everything is the same as with ducks. Everything was “drawn” by the petals themselves, from my painting with paints - only the eyes, beak and thin legs of the crane. And the background, of course. The bird is coated with several layers of varnish. The vase is quite small, not high, and also quite flat. This is what it looks like half sideways.
On the back, sides and front I painted something vaguely reminiscent of bamboo. I painted individual leaves with gold paint, but the photo does not convey how the gold glitters... I must say, this is a very exciting, meditative activity - selecting petals according to shades, shapes, curves, lines, and putting them together like a puzzle into a picture. Considering that this is a natural material, with which I worked extremely carefully, it was not the material that obeyed me, my hands and my idea, but I followed the natural beauty, color, shape and until the end of the work I did not know how it would turn out.
I had some dried chrysanthemum petals left over that I used in previous projects, and wonderful little hydrangea flowers were added to them. They dried up on their own, I just collected the inflorescences... I needed: - dried, dry petals - PVA glue - varnish - paints - printout with a drawing And this is what happened: Owlet from hydrangea petals -
and a kitten made from hydrangea petals. It is assumed that these beer glasses can now be used as vases.
I degrease the glass and cut out the design I like. I make my life as easy as possible: I don’t draw anything in advance, I don’t outline anything, I just place the drawing inside the glass - and that’s it! Previously, I “painted” with petals on opaque surfaces, and I had to use carbon paper and draw an outline to transfer the drawing, but in the case of a transparent surface everything is much easier! I don’t care about the similarity - the drawing inside allows me to see the outline along which I lay out the flower petals. Actually, these crumbled hydrangea inflorescences struck me with the beauty of their color and texture. This color of dried hydrangeas - beige, gray, brownish, so muted, with almost skeletonized, translucent inclusions, ideally, in my opinion, conveyed both the feathers of an owl and the fur of a kitten.
I glue each small petal from the inflorescence onto PVA, slightly overlapping. I “draw” the entire body, legs, with hydrangea petals, and the head and muzzle with chrysanthemum petals.
Here they are, my “paints”.
This is how the silhouette turned out: a photo taken in the light. Now all that remains is to draw the eyes, glue the petals in the right places on the face and body, and just a little, very lightly, brush along the contour of the body, ears and cheeks.
This is what the kitten looks like from the back, held up to the light. Texture. Here the petals are not tinted - this is their “native” coloring, only the outline is slightly outlined.
Kitten's paw: the claws are painted on with tiny strokes of brown paint. And here the texture of the leaves is clearly visible, very beautiful, embossed, partly skeletonized. The face itself: forehead, nose, cheeks - a combination of dry petals, which I “edited” a little: I cut it to the desired size and contour. Everything else is just the petals themselves, and nothing more. I thought that the kitten might be hunting for a butterfly - here it is, also petal-shaped.
Behind the kitten, on the other side of the glass, I drew grass. Since the drawing is visible from all sides, the image appears three-dimensional when viewed through light. Here the photograph was taken from the grass side: the kitten and butterfly are drawn on the side farthest from us, and it seems that the animal is hiding among the grass. Glass with an owl. Everything follows the same scheme: low-fat containers; your favorite image embedded inside. And again I glue the flower petals according to the pattern. I alternate hydrangea petals with chrysanthemum petals: I simply draw with these petals and glue them, as if I were laying down strokes. Some of the petals also had to be adjusted: I cut the chrysanthemum petals into tiny strips and glued them in a circle around the eye sockets. I applied a few tiny strokes of white paint on the back and wings. Here is an owl in the light, still in the process of sticking. I draw the eyes and glue the petals in the missing places: on the forehead and body.
This is what the owlet looks like from the back of the glass, from the inside. I painted twigs and touched the sponge, dipping it in green and bronze paint, along the entire glass.
Wine corks
Wine corks are an environmentally friendly waste material, as they are made from natural raw materials. Due to its safety, it can serve as an excellent option for creating household items.
Wine corks make wonderful decorations, comfortable bath mats, coasters, key chains and wall compositions.
Auxiliary Tools
It is unlikely that you will be able to make crafts from free waste material without additional costs. To work you will need pencils, paints, colored paper, and decor. The basic tools are:
- glue;
- scissors;
- plasticine;
- scotch;
- stapler
To work, you may need a flame (to melt the plastic), a drill for drilling holes in solid materials, and a hacksaw for dividing into parts.
Cans
When you come across photos of crafts made from waste material online, the variety is amazing. For example, what can be made from tin cans? Very, very much!
Skilled in handling malleable tin, they can make real masterpieces out of ordinary containers - animal figures, surrikens, spinners and much more.
It’s easier to cut the container and change its purpose: stand, baking dish, vase, etc.
Paper applications
Children at any age love working with colored paper, which opens up great possibilities for creativity. Bright and unusual applications will help to reveal the child’s creative potential, teach him to work with small objects, plan his actions, and choose the right colors and shapes of individual elements. You can start working with paper appliques from the age of 3-4, using foil, special kits or cutting out individual elements from magazines. Working with colored paper helps a child learn to distinguish and combine shades and gives the first lessons for developing a sense of color. From colored paper you can create not only applications, but also three-dimensional figures. A thicker packaging cardboard is suitable for this; in addition, you can use dry twigs, markers for drawing, and beads. Unlike appliqués, three-dimensional figures help develop spatial thinking and learn how to work with dimensions.
Newspapers and magazines
Paper publications - catalogues, magazines, newspapers, advertising brochures - can become material for the realization of almost any idea. They are used to make voluminous New Year decorations, garlands, and origami figures.
You can often find insect crafts made from waste paper. A separate industry is products made from newspaper (magazine) tubes. These can be baskets, boxes, boxes.
To obtain tubes for weaving, the paper must be cut into strips up to 5 cm wide and twisted diagonally into a tube using a knitting needle or pen ampoule.
To prevent the finished tube from unwinding, the tip must be coated with glue.
Original crafts from things that have served their purpose
Dream catcher and homemade key holder
Before making them, it is recommended to familiarize yourself with photos of the most successful similar products posted on the Internet.
Scenic pendant
To make it you will need:
- glue gun;
- paper plate;
- old unnecessary beads;
- plastic debris and straws;
- hole puncher;
- wool threads;
- pumpkin seeds;
- knife.
Make a hole in a disposable plate using a hole punch. Pre-drawn petals are cut out of plastic. Glue the petals and pumpkin seeds around the perimeter of the plate. Then glue pumpkin seeds to the beads, hang each resulting flower on a thread and attach it to the plate. This craft gives the home individuality and unique charm.
Clock for a country house
What you may need to make them:
- unnecessary periodicals;
- working clock mechanism;
- glue.
Old magazines or newspapers must be cut into strips, then rolled into tubes and, if necessary, painted with watercolors or other paints. When using magazines with bright illustrations, coloring is not required
Cut a circle out of cardboard and glue rolled paper strips to it as tightly as possible. Before gluing, the rolls should be thoroughly coated with glue. Gluing should be done so that there is no free space between the elements.
The finished dial and hands are attached to the clock mechanism. Such unusual watches can attract attention and surprise even many guests.
Interesting lanterns made from unnecessary things
The tradition of New Year's gifts is very common not only in our country, but also in many other countries of the world. These gifts are eagerly awaited, and after delivery both the giver and the recipient are satisfied.
The idea of New Year's lanterns is not original, but it never goes out of style. To create lanterns you will need:
- knife;
- braid;
- paints.
Paint empty bottles with bright colors and further decorate them using any methods known to you. Dry them and then use a knife to make slits. Unbend the strips and then compress the structure. Thread a ribbon through the hole in the lid and use it to hang the finished product.
Egg packaging
Among the things that go into the trash container, egg cartons are often found. Meanwhile, this is an excellent material for decorating vases or flower pots.
The only condition is that after securing the packaging around, for example, a vase, it is necessary to open it with varnish. You can pre-apply paint.
It’s also easy to make a bird feeder from egg cartons. Just coat it with varnish, fasten the threads on four sides, hang it on a branch and pour in some grains.
DIY crafts for a country plot
Peacock
An exotic bird will be able to transform and make your garden plot memorable and unlike others.
The stylized peacock is made from a five-liter bottle, wire and film. The film should be cut into small strips to form a fringe. Attach it to the bottle with glue to imitate the wings and tail of a bird.
Flower pots made from old boots
From old rubber boots you can make unusual flower pots. To do this, they are painted in the colors you like, a hole is made with which the pot can be hung, fertile soil is poured in and your favorite flowers are planted.
Crafts from old flower pots
Old, useless flower pots can find a new life with the help of your hands and imagination. To gain additional experience, it is recommended that you familiarize yourself with the numerous photos of beautiful flower pots made by craftsmen posted on the world wide web.
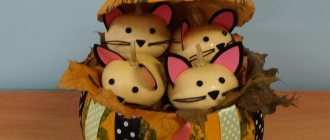
Piglets
This simple craft, made by children under the guidance of their parents, can be taken to kindergarten or school. Together with your child, paint a five-liter bottle light pink, make slits for eyes and ears and place it in your area. The interest of others in the craft is guaranteed.
Crafts from bottles
There are many options for crafts made from boring empty bottles. Glass bottles are an excellent material for making stylish lamps. Plastic ones are suitable for making decorative wood for the garden. Covers are used to decorate the walls of the house and the fence on the site.
Country sculptures made from old tires
By painting them in bright colors in accordance with the intended theme, you will not only get rid of junk, but will create a festive atmosphere in your area.
Using junk items for crafts can become a lifelong hobby. This hobby begins in childhood, continues with your child, and then with your grandchildren. Over time, the understanding comes that any thing intended for disposal can be used. In this creativity, new ideas and flights of imagination, not restrained by any boundaries, are important. By being creative and bringing joy to yourself, your children and grandchildren, you, among other things, significantly improve the environmental situation by reducing the amount of waste.
The information you have read in this article, when working together, will help strengthen family relationships, create conditions for the creative development of a child, teach him responsibility and perseverance, and improve memory and intelligence. In addition, you will reduce the amount of waste and rid the environment of some polluting garbage.
Natural materials
In various educational institutions, crafts made from natural and waste materials are popular for children.
Craft mug: 135 photos and video master class on how to make beautiful crafts with your own hands- Crafts from spoons - 125 photos and videos, tips and tricks with step-by-step instructions on how to make crafts
- Crafts from cotton pads - 125 photos of beautiful crafts, features and videos of new cotton crafts
We are talking about cones, acorns, leaves and chestnuts. You can create amazing compositions from these simple ingredients lying around under your feet.
The leaves are useful for applications. You can weave a decorative wreath from them.
Chestnuts, cones and acorns are widely used to create figurines of animals, mushrooms and trees.
To secure the parts together, glue, toothpicks, and plasticine are used. Painted pine cones make bright New Year's garlands.
If you look around, you can see a lot of different waste materials suitable for making crafts.
Even from ordinary cardboard, if desired and diligent, you can build a set of excellent decorative cubes, a house for cats and many other items. The main thing is to have good imagination and perseverance.
What can be made from cardboard tubes
Ordinary cardboard rolls from paper towels or toilet paper can be used as the basis for colorful and useful crafts. This option is suitable for ages 5 and up; it helps not only to learn how to work with various materials, but also to express your imagination and plan every stage of your actions.
To work you will need:
- cardboard sleeves,
- colored paper,
- markers,
- glue.
The sleeves can be covered with paper or painted, used as a basis for a cup for pencils or to create bright figures of butterflies and other insects.
Photos of crafts made from waste material
- Cardboard crafts - 135 photos of useful and beautiful crafts for children and adults
- Unusual crafts: we make cool and original things from scrap materials (120 photos and videos)
- Beautiful crafts: examples of very stylish and unusual options for homemade crafts (125 photos)
Material created with the support of: https://svoimirykami.guru/category/podelki
Tell your friends