Books, webinars
Do you know that according to the Federal State Educational Standard there is a general education program for preschoolers? Do you want your child to receive excellent creative development in kindergarten? I hope everyone responds positively, right? Then read this article and get acquainted with unconventional drawing methods for kindergartens. Before I offer a plan for unconventional drawing for educators, teachers and parents, as always, I want to introduce you to literature, which has become an indispensable assistant for me.
There is a sufficient amount of literature that allows teachers to master and diversify drawing methods.
In the class notes of Davydova G.N. “22 drawing lessons for preschoolers”, non-standard techniques for painting pictures, games, exercises and other interesting means, is addressed to teachers of kindergartens, primary schools, leaders of circles, as well as parents. So, for older children who have some skills, you will find the use of a variety of literary and musical works, gaming and folklore material. They will make classes interesting, accessible, and meaningful.
On the website https://www.kniga.ru teachers will find a large number of materials for those in the younger group. One of these books is Pavel Linitsky’s book “How to Draw Anything in 30 Seconds,” which provides an accessible step-by-step guide with interesting plots - stories for creating interesting pictures. This book is especially useful for those who do not know how to draw at all, and especially for children studying in the second junior group.
You can find notes and a lesson plan for the school year, a description of artistic and graphic techniques for children with underdeveloped motor skills in the book “Non-traditional drawing techniques”, authored by Nikitina A.V.
You can also take part in all-Russian webinars on the topic of classical and non-traditional materials in children's fine arts on the website https://www.uchmag.ru.
Dear readers, please tell me what is the incentive for a child to draw? After answering my question, let's look together at what the goals and objectives of non-traditional drawing classes are.
Preparing for a drawing lesson in the preparatory group
Preparation for a drawing lesson in the preparatory group is carried out with the development of artistic creativity. During the class, unconventional drawing techniques are improved using watercolors and wax crayons. Children should be able to distinguish between warm colors and shades.
How to prepare a preschooler for a drawing lesson
Types of drawing for preschoolers 6–7 years old
At the age of 6-7 years, children have a well-developed imagination. The teacher introduces them to the basic tools needed to create a drawing. Many talented children have a desire to improve their skills. They start drawing beautiful pictures. In the preparatory group, drawing on the theme “March” is carried out using an unconventional technique.
Important! When choosing a technique for creating drawings for children 6-7 years old, it is necessary to take into account that the use of paints, crayons, and pencils requires possession of certain skills, so in the first stages of creativity it is better to choose what will be easier for the child.
The teacher selects art material in advance. A preschooler can draw objects, favorite characters, decorative patterns, and pets. Teachers use colored pencils, watercolors, and gouache paints. Using a pencil you can create a linear shape. The child begins to draw one part after another, gradually adding various elements. After this, the outline should be colored with colored pencils.
Gouache and watercolor create shapes from a spot of paint, rather than from an outline. With the help of paints, a child can convey the richness of the environment, for example, the sea, the sun, the stars, etc. To create a masterpiece using a pencil, you need to be well versed in unconventional drawing techniques.
The preparatory group uses additional materials to create the drawing. Among them are the following:
- pastel;
- sanguine;
- colored crayons;
- charcoal pencil.
Using charcoal and sanguine, you can get a one-color design. Therefore, you need to focus on the form and conveying the texture of a certain object. Colored crayons greatly facilitate the process of painting large surfaces and large shapes. Pastels are designed to convey a variety of shades.
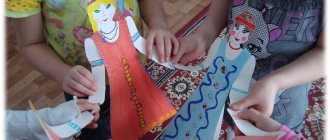
Modeling is a kind of children's fun that adds fun to the process of completing a task. Children love animals, cartoon characters, transport, toys. Modeling will allow you to master technical techniques. That is, the child first sculpts the object in a static position, and then bends its parts in accordance with the plan.
The appliqué activity introduces the preschooler to simple and complex shapes of various objects. The guys begin to create silhouettes that they cut out and paste. This method promotes the development of mathematical concepts.
An open drawing lesson is often conducted using a cotton swab and gouache. In the process of doing work, children learn to mix paints and get different shades.
Mathematics classes with children 6-7 years old in preschool educational institutions and at home
Handouts needed for the lesson
To develop the ability to create drawings, it is necessary to prepare handouts, which consist of the following:
- template,
- gouaches,
- thin brush,
- jars of water,
- napkins.
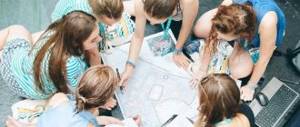
Individual approach and team work with children
During the lesson, an individual approach is provided. The need for physical activity is realized through physical education sessions.
The teacher tells the children that guests have come to them, so they need to say hello. This technique is aimed at developing communication skills. Children should know how to behave with adults and peers. In addition, the teacher cultivates independence and accuracy. Every child who attends kindergarten should know how to monitor their posture.
Note! Before doing the work, the teacher introduces each child to the illustrations, looks at books with them, and also tells new material.
Purpose and objectives of the classes
The main goal of classes at a preschool educational institution is to develop imagination, creativity, uniqueness, and individuality in children. It is necessary to instill in a child faith and confidence that he was born to do good, create beauty and bring joy to people.
In order for children to well master the skills of non-traditional drawing, it is necessary to take into account the age of the children, their individual qualities, interests and desires.
Teachers, using a long-term plan, should:
- teach children the choice of material for non-traditional drawing;
- help kids master various technical skills;
- use unconventional techniques to instill interest in drawing;
- develop their imagination and creativity;
- teach children how to choose a topic;
- develop a sense of collectivism, friendship and helping each other;
- teach empathy for the mood conveyed in the drawing.
Teaching techniques and methods
- creating a game situation;
- teacher demonstration;
- comparison of techniques;
- sequence of work;
- teacher diagnostics.
Using unconventional drawing techniques, riddles, games, and poems are used.
When using this method you need to use:
- paper sheets;
- gouache;
- stencils;
- a brush with short bristles;
- tampon;
- glass or plastic;
- threads;
- brush and stack;
- cereal;
- trays;
- used markers;
- stamps, seals, leaves, plants.
My dear readers, I think that you will be interested in which method of unconventional drawing is more correct to use in each of the groups. Let's take a look together.
Structure of an art outline
When drawing up a plan for an art lesson, you should adhere to a certain form and structure. It should reflect everything that is presented in Figure 9.
Figure 9. Structure of a visual arts lesson outline
an art lesson plan should include
.
1. First of all, you need to decide on the type of lesson. At the very beginning of drawing up a lesson plan, you need to indicate what type of lesson it will be devoted to:
- drawing from life (drawing or painting),
- decorative drawing,
- thematic drawing,
- conversation about art.
2. Then we decide on the formulation of the theme of the art lesson. Here we indicate the content of the educational work. For example, for drawing from life – “Drawing of a plaster vase”, for painting – “Still life from household objects”, for decorative drawing – “Making a pattern in a circle”, for thematic drawing – “Autumn in the forest”, for conversations about art – “ Types and genres of fine art."
3. After formulating the topic of the lesson, you need to write concisely and clearly the purpose of the lesson and its objectives.
4. The next step in drawing up an outline of an art lesson is a list of equipment. For example: two plaster vases, two natural tables, etc. In your notes you can also outline a diagram of the location of full-scale performances in the classroom.
5. Using a chalkboard. The chalkboard is included in the lesson equipment, but the specifics of our work require a special method of using it. Therefore, we highlight this issue in particular. The teacher needs to think about how to use the blackboard more rationally, how to compositionally place didactic material on its surface.
6. Each teacher must first draw up a plan and systematize the course of an art lesson. The content of the lesson should be presented in the form of a methodological note including the following:
- what material will be covered in the lesson,
- in what sequence it will be presented and how teaching time will be distributed.
Literature
- Volyavko N.N. Technological lesson map as a modern form of planning pedagogical interaction between teacher and students // URL: https://festival.1september.ru/articles/630119/
- Podlasy I.P. Pedagogy: 100 questions – 100 answers – M.: VLADOS, 2014
Nina Kharlamova
Summary of an open drawing lesson
“
Frosty patterns ”
Topic: “ Frosty patterns
«
Goal: to promote children's interest in winter natural phenomena;
1. Develop visual observation, the ability to notice the unusual in the world around us and the desire to reflect what we see in our creativity;
drawing skills
;
drawing materials
.
Lesson materials
: Material to choose from: wax, candle, watercolor, tinted album sheet in the shape of a window, white gouache, thin brush No. 2, glass of water, presentation
“
Frosty patterns ”
.
Middle group
Lesson Plan for Middle Ages
In the middle group, you need to start classes with drawing with your palms or fingers. They are very familiar with this technique and really like it. Then you need to gradually draw with cotton wool sticks, a sponge, crumpled paper, a pipette, and a stencil. You can also make a stamp using foam plastic, use monotype and spray. Scientists believe that the program of drawing methods at this age should introduce children to threadography and blotography.
In the first lessons, it is necessary to introduce children to the features of this or that technique, and only then create images or interesting stories. Since the work plan is carried out in the middle group, in the classroom it is necessary to use gaming techniques, artistic expression, finger games, physical education, outdoor games, and music playing.
Lesson plan for the senior group
| Months by weeks | Subjects | Program content | Work, view |
| September (1 week) | Butterflies. | To introduce children to monotype, teach them to create a clear image, develop accuracy and expressive thinking. | Monotype technique and its development. |
| September (2 weeks) | Beautiful autumn bouquet | Introduce children to blotography and show its capabilities. Learn to add details of flowers to give them completeness. | Blotography technique and its development |
| September (3 weeks) | Balloons | It is good to reinforce children’s understanding of color diversity and familiarize them with chromatic and achromatic colors. Give them a complete understanding of the color scheme by introducing new shades. | Mixing primary colors to obtain more complex shades and mastering it. |
| September (4 weeks) | Jam and compotes | Introduce children to fruit typing, a new type of visual art, and practice typing. Develop light perception and observation skills. | Printing with fruits and its development. |
| October (1 week) | Fairy forest | To cultivate interest and emotional responsiveness to beautiful autumn nature. Introduce plant printing. To develop in children the representation of an artistic image through the forms of nature. Develop a sense of composition. | The technique of printing with plants - as a new type of fine art technique and its development. |
| October (2 weeks) | Little kitten | Introduce the guys to poking - pointillism. Learn to paint with gouache using a cotton swab, then mix paints. Develop aesthetics. | Pointillism and its development. |
| October (3 weeks) | Red currants | To cultivate an aesthetic attitude towards nature, presenting its image in personal creativity. Expand children's knowledge about the outside world, show the appearance of red currants. To develop a sense of rhythm and composition and teach how to combine various creative techniques in one work. | Combining pointillism and leaf printing in one work and mastering them. |
| October (4 weeks) | Undersea world | Introduce children to soap bubbles. Continue learning with gouache. To foster interest in fine arts and promote the development of thinking, imagination, artistic skills, and attention. | Drawing with soap bubbles and mastering it. (Prepare a background for the future collage). |
| November (1 week) | Colored fish | Using watercolor pencils, arouse children's interest in drawing. Achieve an expressive image of a fish. Introduce children to collage. Strengthen the ability to use stencils, glue, scissors. Develop independence. | Painting with watercolor pencils, collage and mastering it. |
| November (2 weeks) | It's a sad time! Eyes charm | Teach children the ability to reflect autumn signs in a picture that correspond to poetic lines. Use different methods of drawing trees (a spot that is closed by a contour, a tree depicted with a palm, a fist). Develop emotional feelings and imagination. Strengthen the ability to distinguish a landscape from paintings of other content. | Drawing with fingers and palms. |
| November (3 week) | Draw according to the model | Expand children's horizons about complex subjects, develop the ability to find the relationship between the main and the secondary. Teach children to look at the same shape from different angles and help them see a variety of objects and develop their imagination. Methods of depicting various objects are taught by drawing ready-made samples of various geometric shapes. Develop hand motor skills. | Painting a picture based on a model and mastering it. |
| November (4 weeks) | Inconspicuous animal | Introduce the children to the technique of drawing with a candle and continue to teach samples. Strengthen the ability to use different materials and an idea of color combinations. Develop imagination and independence in choosing an interesting plot. | Drawing with a candle and mastering it. |
| December (1 week) | Bullfinches on the branches | Introduce children to the technique of poking with a semi-dry hard brush. Teach bullfinches to draw. Renew knowledge about the wintering birds of our country. Foster care and love for birds. | Drawing with a poke with a hard, dry brush and mastering it. |
| December (2 weeks) | Winter patterns | Introduce children to monotype (prints) and thread drawing. Show the possibilities and features of drawing using these methods. Develop imagination, imaginative thinking, color perception and arouse interest in creativity. | Continued development of monotype. |
| December (3 weeks) | Letter to Santa Claus | Create New Year's chaos. Teach children to imagine their desires in a drawing and use the technique they like to do the work independently. | Independent work of the guys. |
| December (4 weeks) | The Forest Raised a Christmas Tree | Continue to teach children various non-traditional methods of depiction, introduce them to new unusual visual material. Develop the ability to select color combinations for your composition. Teach how to carefully use glue, lay out the thread clearly along the drawn contour, and also develop coordination of hand movements. | Drawing with threads. |
| January (2 weeks) | Enchantress winter | Introduce spray painting. Teach new imaging techniques. Develop attention. | Drawing technique - spraying and its development. |
| January (3 weeks) | Magic winter forest | Continue teaching children to independently convey the plot of a winter landscape using techniques. To develop children's interest in visual arts. Learn to depict objects with a cabbage leaf print and include Christmas trees and snowmen in the picture. | Technique – imprint (cabbage leaf) and its mastering. |
| January (4 weeks) | Snowmen and their family | Introduce children to fabric imprinting. Create a cheerful mood, instill positive feelings in children and continue to develop imagination. | Fabric imprinting and its development. |
| February (1 week) | Melodic drawing | Develop color perception through music and drawing. Improve the ability to relate color to music by comparing the differences in the most colorful ways of musical expression, such as dynamics, tempo, rhythm. Teach children to improvise with a color spot. | The guys' work based on their opinions of the music they listened to. The technique is chosen according to the wishes of the children. |
| February (2 weeks) | Colored sky | Teach children to draw on wet paper. Develop a sense of composition, color form. Instill a desire to admire nature. | Drawing on wet paper and mastering it. |
| February (3 weeks) | Salty sea | Learn a new painting technique: sprinkle salt over wet paint to add dimension to the image. Continue to develop children's imagination. Review painting skills with paints, as well as the ability to mix paint on a palette to obtain the desired shade. | Mastering the technique of painting with salt on wet paint. |
| February (4 weeks) | Pictures made from colored thread | Introduce children to drawing with thread (nitcography). Develop color perception and the ability to select color combinations for a composition, develop creative imagination. | Nitography and its development. |
| March (1 week) | View by the lake | Review knowledge about landscape with children. Continue to introduce the monotype technique of depicting landscapes and show its features. Explain to children that you can create a landscape yourself, and not just draw it from life. To develop children’s skills in creating a composition, with independent selection of colors in accordance with the plot. | Continued acquaintance with monotype. |
| March (2 weeks) | Palm transformation | Improve your ability to make handprints and draw them into a clear image. Develop creativity. | Drawing with palms. |
| March (3 weeks) | Beautiful gift for mom | Improve children's skills in various visual techniques. Develop a compositional and rhythmic sense. | Independent work of the guys. |
| March (4 weeks) | Spring imagination | Teach drawing by washing paints on glass and imprinting glass onto a sheet of paper. Identify the colors of “Spring”, develop your imagination. | Drawing technique - glass imprinting and mastering it. |
| April (1 week) | Tree in spring | Continue to introduce the children to “blotography”. Teach them to combine two techniques in one drawing (blotography and pointillism). Strengthen the ability to use familiar techniques to create a drawing, develop color perception, and the ability to make conclusions. Develop the respiratory system, imagination and thinking. | Blotography, pointillism and their development. |
| April (2 weeks) | Planets | Repeat the collage technique with the children. Improve the ability to use stencils, scissors, and glue. Develop independence and accuracy. | Preparing parts for a collage, practicing cutting. |
| April (3 weeks) | Dali to the universe | Learn to create an image of the sky with stars, using mixing paints and spraying. Develop color perception. Practice drawing using this technique and collage. Learn how to arrange pictures on a piece of paper yourself. Develop a sense of beauty. | Collage and its development, as well as continue spraying. |
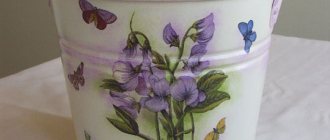
| April (4 weeks) | Festive willow | Explain why the willow is a symbol of Easter. Introduce children to pastels. Learn to draw a willow with pastels on toned paper. | Drawing using pastel technique. |
| May (1 week) | Festive fireworks | Introduce children to wax crayons + watercolors. To consolidate children's knowledge about the holidays of May 1 and 9, teach them to draw fireworks, and observe color schemes. | Wax crayons + watercolor and its mastering. |
| May (2 weeks) | Dandelions - an easy miracle of nature | Continue to develop children's artistic abilities with the help of "splattering". To teach the features of depicting objects using this technique, to develop fine motor skills, the perception of beauty, to develop a caring attitude towards nature with the help of art. | Continuing to master the technique - spraying. |
| May (3 weeks) | Summer has come | Repeat the children's ability to portray using the technique they like. Develop interest in individual artistic activities. Develop perseverance, accuracy, and aesthetics. | Individual work, image technique of the children's choice. |
In the preparatory group, teachers will have to do almost the same as for the middle group. Only children in the preparatory group are subject to more complex requirements, but their work program for non-traditional drawing techniques is the same.
If you do not agree with me, then suggest your plan, which I can publish on this blog. I will be very glad to see new planning options, let's share our experience! By the way, if you propose a plan, article, lesson development, etc. for publication, then you will not only be published in the media, but also receive a reward in monetary terms)).
But let's return to the conclusion.
Thus, children will receive additional education in drawing before entering school, and the general education program, taking into account the requirements of the Federal State Educational Standard, will help in the development and nurturing of the creative abilities of preschoolers.
I say goodbye to you, dear readers. I hope my long-term plan will help you and if you have any questions, feel free to ask directly in the comments. Subscribe to blog updates and recommend reading the article to your friends. I wish all the best!
Sincerely, Tatyana Sukhikh! Till tomorrow!
By the way, I recommend reading:
Introductory Art Lesson
State Institution "House of Children's and Youth Creativity of Mendykarinsky District"
Topic: Introductory lesson
1 year of training
PDO Mitchenko
Irina Viktorovna
2017-2018 academic year
Date of:
Subject:
Introductory lesson.
Goals:
To develop students’ interest in visual arts classes. Introduce safety precautions when conducting classes.
Tasks:
- To form children’s ideas about work in a circle.
- Develop skills in working with artistic materials.
- Develop imagination and sense of color by drawing using the “wet” technique.
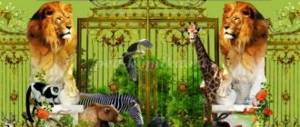
- Cultivate an interest in creativity and the surrounding wildlife.
Equipment and material:
multimedia installation, laptop, screen, handouts: A4 drawing paper, a large and thin cyst for drawing details, a sponge for wetting the paper, napkins for removing excess moisture, watercolor paints, a glass of water.
Progress of the lesson
I. _ Organizing time:
- Hello guys. My name is Irina Viktorovna. I will give you an introductory lesson in fine art. The purpose of our lesson is to introduce you to the content of the “Magic Paints” circle program, materials and tools used in visual arts, safety precautions for the lesson and we will perform with you the drawing “Flower Meadow”, we will draw on wet paper with watercolor paints.
I see that you are all ready for class. In order for our lesson to be successful, we need to get to know each other. I have prepared sticky houses for you, which are attached to the edge of the table; you will write your names on them (children write names).
- Let's wish each other good luck, smile and start the lesson.
II . Main part:
- Let's continue our journey through the presentation, she will show us and tell us about the “Magic Paints” mug. (view presentation)
— In our circle, the guys get acquainted with fine arts, work with a variety of materials, and create beautiful paintings. We draw in different techniques (showing slides
of children's work)
.
— I will introduce you to the tools and materials that are used in my class. We also have drawing rules
:
1. The brush should be held between three fingers (thumb and middle, holding it on top with the index finger).
2. To draw a thin line, hold the brush with the stick up and touch the paper with the tip of the brush.
3. You cannot use a dry brush with hairs sticking out in different directions.
4. If a large amount of paint has accumulated in the drawing - an unnecessary smudge has formed, then you should squeeze out the brush or wipe it with a cloth, apply it to the smudge, and it will immediately absorb the excess paint.
5. You can’t taste paint.
6. Work carefully with paints, brushes, and pencils. Don't wave them in front of your face or your neighbor's face.
7. Proper fit is of great importance. If the position is incorrect, the painter quickly gets tired; he makes a lot of unnecessary movements and makes mistakes.
Conversation.
- So we got acquainted with our rules, and now we will talk about flowers and try to draw them, and when we put the works together, we will get a flower meadow. And then each of you will take home this wonderful bouquet.
— Guys, what do you think is the most beautiful thing about flowers? ( showing illustrations of flowers).
The children's answer
is
the flowers themselves, not the stems.
— Let's take a close look at the flower heads. What will we notice?
Children's answer -
All flowers have a center and petals.
—
What colors can we use to depict flowers?
The children's answer
is
red, yellow, blue, except green. You will need it to depict leaves.
—Can only one flower grow in a clearing?
Children's response
- No.
– Do we see all flowers equally well?
The children's answer
is
No. Some flowers are hidden behind others, only their halves are visible.
III. Practical part.
- Well done boys! And now you and I will draw magical flowers, but not on plain paper, but on wet paper. When drawings are made on wet paper, it gives the effect of blurred edges and the infusion of one color into another. This technique will make our drawing magical, amazing and fabulous. See how I do it, and then try to draw these wonderful flowers yourself.
Demonstration and explanation by the teacher.
— An important tool today will be a sponge. We will wet our sheet with it. This is the most important thing in the technique of drawing on a wet sheet. You need to find a middle ground: a sheet that is too dry will not allow the paint to flow beautifully. If there is too much water, the paint will spread all over the sheet and the drawing may not work out. The sheet is wetted with quick movements, the hand moves freely. You don’t have to wet the entire sheet at once, but wet only the place where you will now draw. Do not forget that when working on a damp background, the paint will spread as it pleases, this is the essence of the work - to get an unpredictable image.
Draw a circle of any color with a brush. Now, while the paper is not dry and the “first” color flows, put a spot with a contrasting color. Here we have a flower. You can add a few more color strokes or spots. The brush lightly touches the sheet, the paint lays down beautifully, forming magical shimmers. It spreads...that's how it should be! Next, draw a few more colors in the same way. Let's draw the stems and
leaves. It is better to apply thin lines when the work is still damp in places, but has dried enough so that the contours do not spread too much. At the end of the work, we add depth between the flower stems - the stamens. You can add a background.
Physical exercise “Flowers grow in the meadow.”
Flowers of unprecedented beauty grow in the meadow.
(turns - arms to the sides)
Flowers are reaching towards the sun.
Stretch with them too. (stretching - hands up)
The wind blows sometimes, But it’s not a problem.
(children wave their hands, imitating the wind)
The flowers bend down and lower their petals.
(leans)
And then they get up again And still bloom.
- We rested. Now let's get to work.
The guys work independently. Music is playing.
The teacher provides assistance to students if necessary.
IV. Summing up the lesson.
- Guys, our lesson has come to an end.
The teacher about and “-” the children’s work is interested in who liked the lesson and vice versa, who faced what difficulties.
— Guys, what interesting work did we have? Each of you tried to complete the drawing. Well done today!
—
Let's lay out our work on the table so that we get a large flower meadow. Look how different our flowers have bloomed, how beautiful they are.
The lesson is over. We're getting our workspaces in order.
- All the best! Goodbye!
Examples of finished works
Children put their finished work on the table so that the teacher can evaluate their talent. Most often, children like to draw images on the theme “Defender of the Fatherland Day”, “March 8”, “Autumn”, “Spring has come”, “The coldest month”, “Profession”, “Forest”, “Why day follows night”, “Clothing” ", "Our kindergarten is like a home."
Works of preschoolers
The most popular theme for children is “Headdress”. The children learn to correctly name hats and their parts, telling what types they come in. For example, to come to the beach, you need to wear a Panama hat and a hat. When late autumn comes, women wear scarves and light scarves. And already in February and January you need to wear a warm pompom.
Plan of educational work according to the Federal State Educational Standard