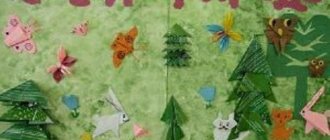
Kids
There are several simple ways to create original drawings for those who are not yet quite confident in handling drawing tools. To ensure that nothing interferes with the creative process, you need to properly prepare for drawing.
Advice.
As a base, it is better to take thick paper that will not tear, wrinkle or get wet, which can greatly upset the baby.
Special paper for watercolors, for drawing, or cardboard is suitable. Kids love bright colors and the ability to touch them with their fingers: there are hypoallergenic finger paints
, which are safe even for newborns.
With their help, your child can create a real work of art without using brushes. The child will be happy to show his imagination, depicting simple scenes, among which he can then choose the best one: the sun in the clouds, a colored rainbow or lush buds .
The advantage of this option is that the child does not need to be controlled and helped in creating a masterpiece if fine motor skills are not yet sufficiently developed.
But an adult can help with the design of the gift: prepare a special stencil and a piece of foam sponge
. By attaching a stencil to his drawing, the child can independently “sign” his work without the help of adults, in even, beautiful letters: “To Mommy.” Simply dip the sponge in the paint and apply it to the stencil.
Using a stencil you can create the most incredible patterns
You can draw not only with your fingers on paper, but also with your palms. Printed palms around the core circle
is a simple technique for depicting a flower that even the smallest can handle. Using your palm, you can depict the branches of a bush or a tree trunk, then filling it with finger-like leaves of various shades of green or red-yellow.
- Use eraser on the back of the pencil as a “poke”
and to create a scattering of multi-colored circles.
- With a small spray bottle you can create bright colored splashes,
Just fill the container with water with paint of the desired color dissolved in it.
- You can draw with anything, even wheels of your favorite car
. By painting them in different colors, you can create a very original gift for mom!
Postcard for mom
In order to make a fairly simple postcard for March 8, we will need:
- thick colored cardboard;
- colored paper in white, green and yellow;
- pencil.
The work progress will be as follows. First, take some cardboard and fold it in half to form the base for the card. It is best to choose cardboard in neutral colors, not too bright.
Don’t forget to press the fold well; you can gently press it and run it with a ruler or scissors so that the card does not unfold.
Without unbending the card, we will draw two circles on the front side - a large one at the bottom and a smaller one at the top - so that they seem to form a figure eight. You can use a compass or circle round objects of the required size.
According to the size of the top circle, cut out a circle from green paper and glue it so that the pencil outline is not visible.
Now our task is to cut the white paper into identical short thin strips and use a pencil or scissors to curl their edges. These will be chamomile petals.
Related article: Rooster from origami modules: master class with photos and videos
Glue them to the center of the green circle, with the curled edge down, so that the daisy turns out voluminous.
Next, take yellow paper and cut it into several long thin strips. These will be the centers of the daisies. We twist the longest of them like a roll and glue it onto the daisy on the card with glue. It should look like in the photo.
The top of our eight is ready, we can move on to designing the bottom circle. To do this, cut out leaves from green paper, bend them in half and glue them, placing them in a circle.
Now we make small loops from the white stripes, that is, we glue the beginning and end of the strip together. And glue the resulting loops to the green leaves.
We need to make the yellow centers again. We also twist long strips and glue them to the daisies.
You can also cut out small leaves from yellow paper and glue them between the small daisies on the bottom circle and a little around the top daisy.
Inside the card, the child can write his congratulations, draw his mother’s portrait, or ask the teacher for a printed or cut-out text and paste it inside. The postcard is ready!
Lovers of miracles
Preparing congratulations can be turned into a real magical game. Little wizards can surprise their mother in different ways. The child will probably want to feel like a real artist; everyone wants to draw beautifully. Using window glass and a bright picture, pre-printed by an adult on a printer or cut out from a magazine, the child will be able to reproduce his own masterpiece along the lines of the original.
If you can’t draw beautifully, you can print the blank on a printer and decorate it
The best gift for a mother's birthday is a drawing of a baby who can draw anything in this way: mother's favorite flowers ,
the dress of her dreams , a country house , and even her own portrait .
Advice. The sheet on which the child will “translate” the image should be quite thin, and it is best to draw on a sunny day.
Even the most ordinary drawing can be turned into a magical work of art. Girls will definitely like this method! Lubricate the desired areas of the design with glue, and then sprinkle dry multi-colored glitter on it.
.
For those who like finer work, sequins
or
decorative elements made of paper or fabric
.
The frame for the picture can be made using fabric frill or lace.
Any child will be interested in having his drawing on the wall or on a mug.
An adult will help you prepare such a gift.
You can ask your child to draw a gift for mom on a regular piece of paper, then an adult will digitize it and take it to a photo studio. A cute design can be presented in the form of a keychain, a magnet,
printed on
a pillow or T-shirt, or self-adhesive film
.
Children's creativity transferred to circles
It will come in handy!
If you have golden hands or original gifts for the New Year
There are a couple more unusual ways to make a simple drawing for your mother a truly original gift:
- Use stained glass paints for creativity
.
Little artists can draw a picture using a ready-made stencil, if they are included in the set. The resulting drawing needs to be dried, then carefully removed from the base and pasted on mom’s mirror or window through which she likes to look outside. Using stained glass paints it is not necessary to create complex designs. You can draw a beautiful heart
or write the word
“mom”,
which can also be glued to glass, tiles or painted wood. - Use fluorescent paints.
Modern luminous paints are safe even for the little ones. The starry sky and planets, drawn with luminous paints on a large-format sheet, will serve as an excellent gift for mom. The unusual property of the drawing can be a surprise for the baby himself - he will feel like a real wizard and will definitely share his joy and emotions with his mother.
- You can draw on white paper with a candle or wax pencils. The “invisible” drawing can be revealed using paint or ink diluted in water and applied to the sheet with broad strokes. You can do this together with your mother to keep the intrigue.
Captivating pattern with reflective paints on canvas
Note!
Interesting gifts for Teacher's Day with your own hands from sweets - everyone will make
Practical part of the lesson, drawing a mother's portrait
This type of drawing is considered difficult for a child. He creates it under the supervision of the teacher. Before drawing, preparatory exercises are done.
Distracted attention syndrome in children with mental retardation, hearing and vision impairment
What techniques can be used
The kids, under the guidance of the teacher, redraw the image from a photograph they have. At the first stage, they draw a drawing with a pencil and fix the main lines. Then the kids color the drawings using watercolors or gouache.
Drawing process step by step
The lesson takes place in several stages:
- At the preparatory stage, the teacher, involving children in the game, motivates them to create a drawing. At the same time, the kids are shown several reproductions of paintings, poems about their mother are read, and discussions are held about what they saw and heard. 3 minutes are allotted for this.
- In the main part of the lesson, the teacher talks about drawing a portrait. He sets specific tasks for the kids: what and how they should draw, and gives step-by-step instructions. Physical education is required. Then the children do drawing. 17 minutes are allotted for this.
- In the final part, evaluation and discussion of the images taken take place for 5 minutes.
Children prepared gifts for mothers
Approximate course of the lesson:
- The teacher places four reproductions of paintings on the easel. Moreover, three of them are portraits, and one is a landscape depicting, for example, a garden. Children are asked which one is the odd one out.
- The children's responses are discussed in detail and conclusions are drawn about what portraiture is.
- Riddles may be offered in which the answer is the word “portrait”.
- Kids are told how to draw people and what details should be depicted.
- They are reminded that Mother's Day is coming soon and are asked to draw a portrait of their mother.
- Read poems on this topic.
- Let's move on to the practical part. Show a portrait image and note how to draw it correctly.
- A physical education session is held with the recitation of poems about mother.
- The teacher tells you how to make a portrait correctly and helps you choose the right paints.
- The portrait is drawn according to the template proposed earlier.
On a note! In the final part, the drawings are discussed, and the children talk about their mothers.
Gallery of drawings
Bouquet of lilacs
As a rule, on March 8, girls are given flowers. And we will give your mother or grandmother a whole bouquet of lilacs made with your own hands. Such a bouquet will not wither, but will delight your beloved women for a long time.
We will make the application “Bouquet of Lilacs” using napkins. To make an application we will take:
- napkins of lilac or soft pink colors;
- paints (watercolor or gouache) and brush;
- green cardboard or corrugated paper;
- brown paper;
- scissors;
- glue;
- a sheet of baby blue cardboard (or white cardboard and watercolor paints) for the background.
When all the materials have been collected, we can get to work. First, let's take a sheet of cardboard. If you have already taken a sheet of soft blue color, then proceed to the next step, and if you have a white sheet and watercolors in front of you, then let's tint the cardboard to match the spring sky.
Related article: DIY cat toy made of paper with photos and videos
Next we need to cut out the silhouette of a vase from brown paper. In fact, you and your child can choose the color of the vase yourself. Glue the vase to the cardboard.
Now we will cut out several thin stems from green corrugated paper and also glue them to the vase, as shown in the figure.
Let's move on to the lilac flowers themselves. First, cut out the outlines from napkins. They resemble rounded triangles. Glue the silhouettes to the green stems.
Cut the remaining napkins into equal squares, and then roll each of them into a small ball.
Glue is used. Using a brush, carefully coat the contours of the silhouettes of lilac flowers with a thick layer of glue, and place napkin balls on the glue.
To prevent the glue from drying out prematurely, you should not cover large areas with it at once; it is better to work on small areas of our flower.
In this way we fill all the lilac branches.
Then we must glue leaves cut from green corrugated paper to the base of each branch. You can take a green color that is a shade darker than what we used for the stems. Let's wait until the glue has completely dried and check whether all the elements of the picture are glued.
Now let’s teach the kids how to add volume. To do this, take a brush and apply paint of a darker shade to the upper and middle flowers of each lilac branch. This will make the lilac more vibrant and lush.
The application is ready, all that remains is to insert it into a frame and give it to your mother or grandmother!
Thanks to this application, the children probably gained new skills, for example, they learned how to add volume with paint. We hope this knowledge will definitely be useful to them!
The simplest postcard using the quilling technique
Older kids can make a creation using the quilling technique. They will love twisting different shapes to create a beautiful composition.
Quilling is a type of paper rolling. Most often, colored paper is taken and cut into strips of different lengths and thicknesses, then rolled.
Such spirals are glued to the surface with ordinary glue. You can make various cards and crafts using interesting techniques. It would be very good to buy ready-made materials for quilling in stationery stores or hobby and creative markets. Standard kits include: various colorful ribbons, several awls for twisting, a stencil, glue, pins and tweezers.
Special small awls are used to twist the parts. But for kids, take a round pencil for safety.
Let's watch a short video on how to make simple elements.
- Cute card "Eight"
The easiest option for mastering quilling is this craft. We are gradually mastering the new technology with the kids, and then we can move on to more complex options.
- Forget-me-nots in a vase
Once you get the hang of it and practice, you can make more complex compositions.
- Bright bouquet
With a little imagination and experimenting with spiral elements, you can easily create your own masterpieces. And the children will help with interest and joy. Then the children will happily create on their own. After all, quilling is so fun!