Construction for kids: first buildings, stages of teaching a child to design, how to introduce a child to the details of a construction set, game situations.
Very often, having bought a construction set, adults immediately offer the child all the parts from it, hoping that the child will immediately build something from them. But this doesn't happen. The child gets lost in their abundance. He doesn't know what to do with the parts or what they are called. The baby mechanically sorts and throws the parts of the construction set, builds and immediately destroys the building, throws the parts at his mother or pets, acts monotonously with cubes for one minute and immediately switches to other activities that are more interesting to him. What is the reason? Does he just not like this toy? Or do we, adults, need to first teach the baby to play with the construction set?
In this article about designing with children 1-2 years old you will learn:
- How to get your child interested in playing with construction sets?
- What will the baby's first buildings be like?
- How to introduce a child to the parts from the set and name them?
- How to play with your child’s buildings?
- How to use construction set parts to familiarize your child with the shape, color, and size of objects?
Before reading this article, learn from the previous article in the series about games with kids how to choose the right construction set for the little ones and what requirements it must meet. So, we already have a designer, and it meets all the requirements and was chosen correctly by us. Now we’ll talk about games and activities with construction kits for kids.
Section 1. Introducing the baby to the designer
How to name construction kit parts for a child
From 1 to 3 years old, children become familiar with the basic, simplest parts of a construction set. The names of construction set parts are difficult for a child, so children are given their “childish” names that are understandable to them:
- Brick (parallelepiped)
- Cube (cube)
- Plate
- Roof (triangular prism)
- Cap or hat (hemisphere)
- Column (cylinder)
It is better if you first give your child a construction set with parts of different shapes, but of the same color, so that it is easier for the baby to distinguish their shape and navigate it. Then the baby is given a colored construction set with multi-colored parts of different shapes and sizes, and he learns to distinguish not only the shape, but also the color and size of the parts.
Do not give your little one all the parts of the construction kit at once (there can be from 50 to 100 or more in a set); it is enough for him to have 10-12 parts for the first buildings. First, we will introduce the baby to cubes, then to bricks, and after that we will introduce additional elements from the construction set - roofs, plates, and then pillars and caps (I write in “children’s” terminology, as we will call these parts to the child).
How to introduce your child to the names of construction set parts
— In order for the baby to begin to navigate the names of the parts, we constantly use these words in conversation with him: “Where is the big hat? Here it is!”, “Give me a cube”, “Put a cube on a cube - there will be a turret”, “Here is the roof! Let’s put a roof on the cube,” etc.
“We name the parts not only when we play with the construction set with the baby, but also at the moment when we put the construction set back in place and put the parts of the construction set in a box. For example, you can tell your child that now we are only putting cubes in the box. And from all the details he will select only the details of this shape. Then also assemble the bricks into the box. So, in the course of ordinary life, the child will gradually remember the names of parts of different shapes. And the baby will easily remember them.
— In the third year of a child’s life, you can play “Guess what’s hidden in my wonderful bag” games with your baby. You hide a construction piece in a beautiful opaque bag, and the child examines it with his hands and tries to determine by touch what it is and call it: “Cube!” or “Brick!” Be sure to compare these details - let's run our fingers along the edges. The cube has all the same sides. And a brick has this long side (we run our finger along it), and there is a short side.
Helpful advice: Always give your child the opportunity to first get acquainted with the new construction set on his own - touch, examine, name the details. And only when the designer is already familiar to him, can he begin to build buildings from it. Otherwise, the baby will be too focused on the new object, he will have a great desire to examine the new object from all sides, and the construction will not work :).
Section 2. What can a child from 1 to 3 years build from a construction set?
At an early age, the baby learns from his mother not only the names of parts, but also how to operate with them - elementary methods of construction. Let's get acquainted with these design methods for the little ones, I give them in order with a gradual complication of the tasks:
Method 1. Place the construction parts horizontally and vertically and see that this changes their stability.
For example:
- The cubes can be placed horizontally to create train carriages. Or you can put it vertically - make a turret.
- The bricks can lie horizontally on the table, and then we will have a path. It may be different. You can make a narrow path if you connect the bricks with the narrow side. Or you can use a wide path if you connect them to each other with their long side.
- If you place the same bricks vertically on a table next to each other, you will no longer get a path, but a fence!
- If you place a brick vertically next to the cube, you get a chair. And if you put the same brick horizontally on the same cube, you will get a completely different building - not a chair, but a table!
Method 2. Lay the parts one on top of the other, make overlaps. This is how we get houses and gates.
Method 3. Close the parts into one ring, forming a closed space.
Examples:
- Example 1. From bricks placed on edge, we build a fence for chickens, cows, make a park, make a yard for walking nesting dolls and other small figures of people and animals.
- Example 2. We can also build a garage for a toy car, into which it will drive through a gate.
- Example 3. You can even take a tram or bus with your child. To do this, we build a closed space from bricks, and after that we place seats for passengers and a place for the driver in it. We can move one of the bricks to the side when passengers enter the cabin. This will be the door. You can come up with many options for “arranging” such a bus.
Our main task is for the child not just to repeat after us some new method of action, but to begin to use it in his own independent games. Therefore, we vary the games and show one way of design using the example of different buildings and different game plots.
Section 3. Stages of games with a construction set for the little ones
It is very important to maintain consistency in complicating your child’s buildings. Then he will feel skillful and successful, and will be happy to learn new things. We move to a new stage with the child when he has already mastered the previous stage.
The main stages of complicating buildings for kids are as follows:
- Stage 1. We build from parts of the same shape, for example, only from cubes (tower, train) or only from bricks (paths, fences).
- Stage 2. Combining parts of two shapes in one building (for example, a building made of cubes and bricks - a chair, table, car, etc.)
- Stage 3. Using parts of different shapes in construction - not only the cubes and bricks already familiar to the baby, but also “roofs” (prisms), “columns” (cylinders), and plates. At this stage, in one child’s building there are parts of three shapes (cubes, bricks and another new shape).
- Stage 4. Construction of buildings using floors (gates, arches, bridges). For example, you can build a bridge from cubes and a plate, and decorate it at the top with prisms - “roofs”.
- Stage 5. Subject compositions with different buildings from many details.
Now let's take a closer look at games and activities with construction toys at different age stages of early childhood development. In each section for each age you will find:
- a brief description of the features of designing with a baby of this age,
- the main tasks of familiarizing a child with the color, shape, size of objects using the example of design at a given age stage,
- games with a constructor and examples of buildings.
"Cockerel - a golden comb"
Goal: to teach how to design through a simple plot, to distinguish between materials.
Material: a set of building materials - cubes, matryoshka dolls, cockerel toy.
Class.
Continue the story game with Mashenka, who has a cockerel. It is necessary to build a turret for it.
Ask your child to help you in construction: take blue cubes and place them on top of each other.
Praise your baby by saying: “What a tall blue tower the cockerel turned out to be!”
The cockerel flew up and shouted: “Ku-ka-re-ku.” Ask how the cockerel crows?
Offer to build a turret in red, then yellow, etc.
Section 4. How children from 1 year to 1 year 6 months play with the constructor
Features of games with a constructor at this age
Why do children from 1 year to 1 year 6 months often break toys? Why do they build and then destroy buildings, separate and reconnect parts of the construction set, put them in and take them out of the box again and are ready to repeat this endlessly?
At this age, any child is an explorer of the world. He learns the physical properties of the objects that surround him. This is why children at this age love to assemble and disassemble toys. It is in such seemingly meaningless games that there is a very deep meaning for the development of a child. They develop the baby’s sensorimotor intelligence, visual and effective thinking, and the ability to establish internal connections between objects. This is not pranks, not a lack of attentiveness, but this is an experience that a little man really needs - a serious acquaintance with the world around him. Give him the opportunity to do this! Give the opportunity to build a tower and destroy it, build it again and destroy it again - this is the process of learning about the world for the baby. Breaking a tower is the first stage of playing with a construction set, which all children go through and which cannot be avoided :).
Familiarity with designer parts, color, shape, size
Already before the age of one and a half years, we begin to correctly name the parts of the construction set to the child. As a result, the baby can distinguish a cube from a ball or a cube from a brick. He can give the same item to an adult (“Give me the same!”), finding the item among 3-4 options.
For example:
- The baby can give his mother a yellow brick (the mother holds a brick in her hands and asks to find the same one), selecting it from bricks of three different colors.
- The child can give his mother a large cube (the same one his mother is holding in her hands), selecting it from three other different parts of the construction set. It distinguishes big cubes from small ones.
Playing with the constructor
The baby cannot yet build from a construction set himself, but uses construction blocks in games with his mother - for example, transporting them in the back of a toy car. Or she puts the doll to sleep on the crib that her mother built for her from builder’s parts.
Also, the baby can use the parts of the construction set as substitute objects in games. For example, instead of soap, he can wash a doll with a brick from a construction set if his mother teaches him to use substitute objects in the game. And a narrow long column - a “stick” - can serve as anything in the game depending on its length - from a thermometer that we put on a bear to a spoon or a comb for combing a doll’s hair.
A mother can show her child how to build the simplest buildings - a tower from identical cubes or a train from cubes (each cube is one train carriage, chug-chug - chug, the train is moving!), paths from bricks, or a table (we put it on top of the cube brick).
Section 5. Design for children from one and a half to 2 years old
Getting to know the details of the designer and their names, color, shape, size
At this age, great changes occur in the baby’s mental development. As a result, if earlier he could only fulfill the request “give me the same as mine,” then by 1 year 9 months - 2 years he can fulfill the more complex request “Give me the same brick, but red,” i.e. can identify 2 characteristics of an object at the same time. This does not come immediately, but gradually, as a result of the baby becoming familiar with the shape of the parts, their color and size.
We can offer the child tasks with construction set parts, such as “Find the blue bricks. Where is the big brick? Where is the small brick (we call the size and shape - 2 signs at the same time)?”, “Find the yellow hats - large and small” (the shape of the part, its color and size are called simultaneously).
The baby can already distinguish the size of parts well, and therefore we can teach him to compare and find three parts of the same shape, but of different sizes: “big cube” - “smaller” - “small cube”.
At our request, the baby will give a large cube to a large toy, and a small cube to a small toy.
From 3-4 pieces of different shapes, the child will choose and give, at the request of an adult, a cube, a roof, a column, a brick: “Give me a roof. Where is our brick? Give it to me, please.”
Of course, this is only possible if an adult names these parts while playing with the construction set and introduces the child to them.
Playing with the constructor
Very often, children from one and a half to two years old repeat the same action many times in a row. They enjoy it, as if they are convincing themselves: “I can already do this!” After all, the main thing for a child is not the result, but the process; if he repeats it, it means he gets great pleasure from it! Do not disturb the baby, let him repeat, he really needs this for his development. The time will come - and he himself will move from the old, learned, to the new.
At this age, the baby will not be able to build the building himself. Therefore, it is not the child, but the adult who starts the game with the constructor and leads it. At this age, we build one building at a time. For example, just a house. Or just a bench.
Mom plays out a game story with toys - for example, she builds a path out of bricks for a matryoshka doll, along which the matryoshka will run to her house: stomp, stomp, stomp, stomp, stomp. The baby joins in the construction, repeats his mother’s actions - helps build a path for the nesting doll, imitates his mother. Now the path is ready. The child can pick up the nesting doll and show how it walks along the path.
I will give an example of one of the first games with a construction set for children of the second year of life. Author – S. L. Novoselova.
For the game you will need: a chicken figurine, a chicken figurine (or one toy chicken, the size of the cubes and the chicken), 8 identical cubes.
Helpful advice: It is very important that the cubes that we give the child for this game are familiar to him. Otherwise, he will examine them instead of listening to the story, and he will not build a tower for the chicken.
Progress of the game situation:
— An adult shows the children a toy – a chicken. And he acts out a scene. The hen has lost her chicks and can’t find them.
— An adult invites the child to help the chicken and builds a tower of 4 cubes, placing them one on top of the other. The chicken flies up to the built turret, sees her chickens from it, and is very happy: “Chickens have been found!” (the adult, unnoticed by the child, places a figurine of chickens on the table).
- The chicken jumps from the turret and runs to the chickens (we put the chicken figurine in our pocket unnoticed by the child, the turret remains on the table).
-Where is the chicken? The chickens are alarmed, don’t see her, and are lost again! They write “pee-pee-pee” and look for mom. We need to build turrets for them, let them fly up on them and see their mother.
— The child is given 4 cubes. A child builds a turret, the chickens fly up to it and see their mother! How they rejoice! (we take out a chicken figurine). And here comes the chicken! The chickens found their mother!
The next time, to consolidate, you can repeat the construction of the turret, but always with a different plot. For us it will be a repetition, but for the child it will be a completely new story!
What buildings can be built with a baby from one and a half to two years old?
By the age of two, the child will already be able to build the simple buildings he knows on his own.
Building options
: path, bench, ladder of 6 cubes (the first step is one cube, the second step is two cubes and the third step is three cubes), a fence, a gate, a slide, a tower and other very simple and very quickly realized buildings from parts of two shapes ( cubes and bricks).
For example:
- turret (put cube on cube,
- house (prism - “roof” is placed on the cube),
- machine (we place the cube and brick on the plate),
- brick path
- table (put the brick flat on the cube),
- chair (we place a brick on the back of the cube - “the back of the chair”),
- bench (we place a plank or brick on two cubes),
- gate (we place the bricks vertically and place a bar on them).
Progress of the game.
The teacher shows the children a small doll:
- This is Katya. Katya wants to run on the track. Let's make a path for Katya. (This is a brick. We will make a path for Katya from the bricks, she will run along the path).
He builds a path out of 4-5 bricks and says: “An even path.”
.
He puts the doll down and leads it along the path: “Top-top, Katya, top-top!”
Children are given 4-5 bricks and asked to build a path.
The teacher makes sure that the children place the bricks tightly together. Tom. who built it. Gives a doll to play with. Encourages children to say: “Top-top”
.
The teacher makes sure that the children build the path, as they often begin to pile brick upon brick in the form of a tower.
In the next lessons you can drive cars along the tracks. In this case, it is better to build on the floor from large wooden or plastic bricks. Large bricks make the paths longer, making it easier to drive and roll toys along them. In addition, such buildings are then readily used in independent games.
If you don’t have small toys at hand, you can “stomp”
along the path with your fingers. Children also like this technique. But actions with toys are more varied and longer.
3. Construction of a fence.
Objectives: introduce children to the color green. Teach to place bricks vertically to the table surface on a long edge, consolidate children’s knowledge about shape (brick, size (large, small, color (red, blue), teach to play with the building, name it.
Dictionary enrichment: green (to active dictionary)
.
Consolidating and activating vocabulary: brick, red, blue, big. Small, fence, dog. Cat, chicken, aw-aw, meow, co-co.
Methodological techniques.
Lightweight option.
Game, display with naming (this is a brick, a green brick, repetition of the words “brick, green”
by children , demonstration-alternate action, individual help for children. Questions (what is this? Where is the brick? Where is the red brick, etc., onomatopoeia, game,
a more complicated version.
Questions (instead of showing with naming, showing with explanation (instead of showing with alternate actions)
.
Material 3 colors.
Junior subgroup: 4-5 bricks of the same color, small toys for each child.
Senior subgroup: 5-6 bricks.
For the teacher - the same large-sized material.
Complication for 3-4 weeks.
1. Light version:
a) methodological techniques of a complicated version for the first two lessons;
b) fix 2 colors.
2. Complicated version:
a) building a fence according to the verbal instructions of the teacher (without demonstration)
;
b) fix 3-4 colors.
3. Construction of a fence from bricks placed vertically on the smaller edge.
Questions.
Light version:
- Who is this? Where is the big brick? Where is the little brick? Where is the red brick?
If possible, ensure that children name the object and its signs with a simplified word, or repeat after the teacher, or point with their finger to the question “where?”
.
Complicated option.
Get children to say the words “brick, fence, red”
and so on.
Build a fence according to verbal instructions.
Explanation:
1. Demonstration-alternate action - this is when the teacher places the first and second bricks, the third and fourth bricks are placed by the child, then the teacher again.
2. Demonstration with explanation - the teacher completely builds it himself, the children observe, then the teacher invites the children to build a fence, providing individual assistance.
Section 6. Design for children from 2 to 3 years old
Getting to know the details of the designer and their names, color, shape, size
By the age of 2, the child’s frontal parts of the cerebral cortex are intensively developing. That is why children at this age can already play more focused, are less distracted, act more purposefully, and better distinguish the shape, size and color of objects.
A child can choose from a box of construction set parts only columns or only cubes, i.e. the parts are of the same shape, but they will be cubes of different sizes and colors.
The child can easily navigate the details of the construction set and knows their names well, does not confuse them (if he was introduced to their names before, in the second year of the baby’s life).
If you work with a child, then by the age of 2.5 years the child understands the request “Give me the same color” and clearly distinguishes yellow, red, blue and green colors. And by the age of 3, he can also distinguish some other colors - orange, purple, blue and can correctly name all seven colors of the rainbow. And also distinguishes shades of colors: “Where is the dark green cube? Where's the light green one? The child also distinguishes achromatic colors: white, gray, black.
By the age of 3, a child can already name 2-3 characteristics of a construction set: “Yellow big cube” or “small brick”.
In the third year of life, you can introduce a new task - start using colored cubes to lay out multi-colored patterns from them (like a mosaic) and multi-colored paths with alternating colors (for example, yellow and red bricks alternate in a path to make a pattern).
Playing with the constructor
To play with a 2-year-old child, we do not take the entire set of construction set parts, but 10-12 pieces of parts of different shapes and sizes that are already familiar to the child.
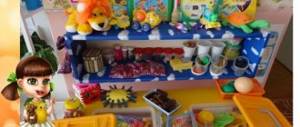
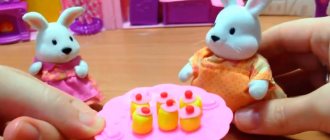
To the designer set, be sure to add a box with small toys commensurate with the details of the designer. These are toys with which your baby will play with the building together with you. For example, he will be able to place a toy cockerel on a newly built fence, saving it from a fox. Or your child will help a toy cat climb a ladder made of bricks. Or he will place the bunny in a house built for him. These can be small figurines of fairy-tale characters, animals, nesting dolls, and family figurines.
In this box we will also put natural materials: cones, acorns, sticks, which the child may need when playing with the construction set and which can become substitute objects. For example, you can make a man out of a pine cone, and use the caps of acorns as bowls for food to play out the plots.
You can print pictures of fairy tale characters on cardboard, put them on stands and use them to act out stories. Or use figurines commensurate with the details of the designer for a tabletop theater.
A two-year-old child cannot build for the sake of learning something; he definitely needs a game plot. He must see the toy for which he is building and understand why this toy needed his construction.
For example, mom plays out a scene. A little matryoshka comes to visit a child, it’s her housewarming party and you need to help her arrange her room. Matryoshka really needs a table and a chair, because she loves to drink tea with her girlfriends. Mom and child build a table from cubes, and then chairs (a brick is placed behind the cube so that it stands vertically like the back of a chair). The buildings are ready! And the main thing for the child began - playing with them. Matryoshka receives guests, seats them at the table, treats them, everyone drinks tea from toy cups. The guests play or dance with the child and the performance of the scene ends there.
You can further vary this scene in different ways. For example, the nesting dolls were tired and decided to lie down. But there are no beds! Let's build them. We build our own bed for each nesting doll.
Another option is also possible: after drinking tea, the nesting dolls decided to go for a walk, and then we, together with the child, will build a park for them, make a long walking path in it and make benches from bricks placed on cubes.
Or maybe next time we will build not a table and chairs, but a long sofa, on which our nesting doll girlfriends will sit and talk with each other.
If a child makes a mistake,
then it is also corrected in a playful way. For example, a child built a gate, but it turned out to be too narrow for a toy car to pass through. What should I do? Toy - the driver of the toy car tells the child that he cannot drive through the gate built by the child. The gate was too narrow! How to fix it? The kid must figure out how to make the gate wider. The car will pass through them, and the driver will definitely thank him for his help. If the child is upset because of failure and cannot find a solution to the problem, then an adult helps him and suggests a way out of the situation, completes the building together with the child to ensure the child’s success. The car drives through the gate, and the baby is happy.
Consultation “Features of teaching design in an early age group”
Marina Bachkina
Consultation “Features of teaching design in an early age group”
Prepared by: teacher Bachkina Marina Nikolaevna
Tasks.
Educational:
1. Introduce materials for construction (natural, waste, construction and paper)
.
2. Introduce three-dimensional geometric shapes (brick, ball, cube, cylinder, cone, pyramid, which are part of building kits or construction .
3. Learn to place various geometric bodies in space.
4. Learn to identify geometric shapes in familiar objects.
5. Introduce the techniques used in design .
6. Learn to experiment with paper, natural and waste materials in the process of creating basic crafts.
7. Learn to connect parts using additional materials (plasticine, clay)
.
8. Learn to identify familiar images in buildings and crafts.
Educational:
1. To develop a sense of form when creating elementary buildings and crafts.
2. Develop visual-effective and visual-figurative thinking.
3. Promote the development of attention and memory.
4. Develop the ability to attach craft parts to each other.
Educational:
1. Arouse interest in constructive experimentation .
2. To develop the ability to hear the teacher’s verbal instructions, his instructions, characteristics.
3. Develop the ability to see beauty in designs and crafts .
Features of training.
Construction for young children resembles an experimenting game in which children study the properties and characteristics of geometric shapes and various materials. The three-dimensional volume of construction allows children to more carefully examine all the parts from which they plan to create a structure .
In the learning , where the leading method is play, it is advisable not only to demonstrate various figures, but also to name them as often as possible and give them figurative characteristics, which helps children quickly incorporate the materials being examined into their own plan. It is important to activate all analyzers in order to form a more complete picture of the design .
At an early age, children , starting from the 1st year, children are able to identify geometric shapes without naming them, but selecting a given shape from many others. This fact indicates that three-dimensional geometric bodies can not only be objects of manipulation and play for children at this age , but also an object of study. The ability to identify a form, and subsequently name it, facilitates the process of learning to design at later stages, where the teacher will not need to conduct training in two directions: familiarization with forms and the development of the ability to create various buildings from them. In this case, the teacher can use verbal instructions, indicating the necessary forms, rather than a detailed demonstration, explaining the meaning of choosing certain forms for a particular building. After all, children are already prepared to work with these forms, since they know their properties and signs. More time is left for the creative design . There's no point in making things easier that are already so simple. As practice shows, in play children acquire multiple skills that we, adults, do not always wisely use for their creative development. We are always afraid that children will not understand, will not be able to, will not cope. But at the same time, sometimes we don’t even try to give them what they need so much. Often, in order to meet the time allotted for a lesson, we try to reduce the child’s activities to a minimum, and this is a fundamentally wrong approach. You should not sacrifice the opportunity to develop some skill for the sake of the effectiveness of the craft. Let the design (craft)
initially it will have a clumsy appearance, not much reminiscent, perhaps, of a real object, but it will testify to the path that the child has traveled. And here it is important to highlight his achievements, pointing out the prospects for further movement.
Lesson developments
Education for children from 1 year old . 6 months up to 2 years old takes place in classes that are held once a week for 10 minutes (in subgroups )
.
From 1 year 6 months. up to 2 years old, children learn to place bricks first on the long narrow side (fence), then on the short side (high fence, make the simplest ceilings on a stable base (bench)
and less stable
(gate)
.
Consolidation of constructive skills in children is carried out in games of free activity. We must strive to ensure that children learn how to construct the same building in different ways.
The teacher teaches the kids to play without interfering with each other, share toys, and move on to brief interactions.
b:
1. Introduce children to building materials without “objectifying” them
his.
2. Develop the ability to use building materials.
3. Encourage children to play with buildings together with an adult and use story pictures for games.
4. Teach children to pronounce the onomatopoeia “ku-ka-re-ku”
.
The teacher builds the first two lessons himself, and the children, sitting around the table, observe and help: they take and place the parts in the indicated place. “Who is it that sings so loudly: ku-ka-re-ku? This cockerel came to visit us. That's what he is - an oily little head, a silken beard! Where will he live with us? Let's build him a house." The teacher is building a house without focusing yet on construction methods and names of parts . After the construction is completed, it is played out.
Lesson 3.
Getting to know the cube.
Target:
1. Introduce children to the shape of a building material - a cube.
2. Encourage children to play around with buildings together with an adult.
3. Pronounce onomatopoeia.
In the third lesson, kids are taught to perform basic actions with parts. Children sit at the table, red cubes are placed in front of them. The teacher takes a cube and invites everyone to find the same one and place it in front of them. Then he places a cockerel on the cube, and the children repeat his action. “And now all your cockerels are singing: cuckoo-re-coo. My cockerel heard the song and came to visit your cockerels. Hello, Olechka's cockerel! Hello, Tanya’s cockerel!” Etc.
Lesson 4.
Construction of a tower.
Target:
1. Teach children to place cube on cube steadily and evenly.
2. Make it clear to children that the building can be used for play.
3. Strengthen the understanding of the words “build”
,
"cube"
,
"tower"
.
4. Learn to perform actions based on a verbal signal.
In the following lessons, the teacher teaches children how to build a tower by demonstration, explaining in detail the process of its construction (blue cubes are used)
: “I take a cube and place it in front of me on the table. Now I take another similar cube and place it like this on that cube and trim it. Now I take another one and put it on top, and also trim it. This is what a tower turned out to be! Who wants to build one?”
Lesson 5
Continued construction of the tower.
Children continue to learn how to build a tower using three yellow blocks. The teacher once again shows and explains in detail how to do this: “Cube on cube, cube on cube - that’s how you get the tower.”
.Kids should practice naming the building: “Tanya, what is this I have?
That's right, tower, what do you have? That’s right, also a tower.” You can use the method of step-by-step construction : “I took the cube, and Natasha took it, and Sasha...”
Lesson 6
Continued construction of the tower.
Building a tower from four green cubes.
Lesson 7
Getting to know the brick.
Target:
1. Introduce children to the form of building material - brick
2. Teach children how to place a cube on a brick.
3. To consolidate the understanding of the word “turret”
.
4. Learn to perform actions based on a verbal signal.
Children are taught to build a tower from four red bricks and decorate it with a red cube. At the same time, note that the bricks are red and the cube is also red. They are the same color. In this lesson, the step-by-step design technique can no longer be used.
Lesson 8
Construction of the path
Target:
1. Teach children to firmly apply brick to brick and spread the building over the surface.
2. To consolidate the understanding of the word “brick”
.
3. Activation of children's speech.
4. Learn to perform actions based on a verbal signal.
Building a path (from green bricks)
for a doll or bunny.
The teacher explains in detail how to apply bricks to each other (with a short narrow edge, how to align them. Having laid out the path, the child places Christmas trees along the edges. The teacher emphasizes that the paths and Christmas trees are the same color. Offers to lead the doll along the path (takes it by one hand, and the child - for another)
or a bunny. Constantly activates the children’s speech:
“What have you built, what is the name of your doll, what does your doll do?”
Lesson 9
Continued construction of the path.
Construction of narrow long paths from yellow bricks.
Lesson 10
Continued construction of the path.
Construction of a wide red carpet. First, the teacher lays out two paths - one yellow, narrow (as they built in the last lesson, the other red, wide (from six bricks)
.
The children's attention is drawn to the fact that the paths are different; today they will build a different path - a red one. Working methods are shown, it is explained that now you need to apply the bricks to each other in a different way (with a long narrow edge)
:
“Brick to brick, brick to brick - this is the path!”
Lesson 11
Continued construction of the path. A game
Target:
1. Consolidation of acquired skills.
2. Form contacts between children and each other.
1. Learn to perform actions based on a verbal signal.
Each child is asked to build a path of a certain color and pick up a ball (ball, ball)
the same color. At the end of the lesson, the teacher offers to play with balls: “All the guys will now be kittens, and kittens love to roll balls, I’ll be a mother cat.
Vovochka the cat, catch your little ball.” Children usually enjoy this game. The game can be played immediately after class. Children build tracks on the floor, sit at opposite ends and roll balls (balls)
towards each other. Thanks to such techniques, children learn to communicate with each other.
Independent construction of a familiar object (table, chair, armchair)
.
Target:
1. Consolidation of acquired skills.
The teacher places pieces in front of each child (one is red, the other is yellow, etc.)
and offers to build whatever they want: “Look at Tanya’s red chair, and Vova’s blue table!” Guess what I built." (Builds a piece of furniture known to the children, places a matryoshka doll on it and invites the children to build the same one).
At the end of the lesson, the teacher connects three chairs built by the children and puts down a doll: “Guess what I built”
. If the children don't guess, it tells them it's a sofa. He offers to build the same one and put the doll to sleep on it. (Toys are selected so that they match the size of children's buildings).
Building a sofa
Target:
1. Learn to build a sofa.
2. Learn to understand and name the word “sofa”
.
3. Learn to play with buildings.
4. Learn to perform actions based on a verbal signal.
The building is made of two large bricks. One is placed flat on the table, the other is placed on a long edge and moved close to the first.
Building a crib
Target:
1. Learn to build a crib.
2. Learn to understand and name the word “bed”
.
1. Learn to play with buildings.
2. Learn to perform actions based on a verbal signal.
The building is made of three large bricks - one is laid flat, the other two are placed on a smaller edge and moved on both sides in the form of backs.
Building a car
Beforehand, the children look at toy cars, illustrations, and play the game “Sparrows and the Car”
.
Target:
1. Teach children to place a cube on a brick steadily and evenly.
2. To consolidate the understanding of the word “machine”
.
3. Make it clear to children that the building can be used for play.
4. Learn to perform actions based on a verbal signal.
A teacher teaches children to build a car (red)
and cargo
(green)
cars: “I put a small cube on a small brick.
The result was a small machine. The little car is moving! (Promotes her)
.
And now a big car will come towards the small car. Here’s how to build it: put a large brick, and a large cube on it. Let's go my cars! How do cars hum? Beep beep!” Having built the cars, the children “ride”
little nesting dolls on them.
Building a bus
Target:
1. Teach children to place cubes on a brick steadily and evenly.
2. To consolidate the understanding of the word “bus”
.
3. Learn to play with buildings.
4. Learn to perform actions based on a verbal signal.
Children are taught to build a bus after examining a sample. The teacher continues to teach how to place cubes on a brick, placing them next to each other: “I’ll take this red brick, put one yellow cube on it first, next to it another similar cube and another one. I will trim it so that the cubes on the brick lie evenly, close to each other. What a bus it turned out to be! My bus has arrived!” Invites the kids to make the same one and name their building.
Building a bus and a car based on the model
Target:
1. Consolidation of acquired skills.
The teacher builds a bus and a truck from blue parts in advance. If at the last lesson the children completed the task, then the construction methods need not be explained , but helped with questions, advice, action (if necessary)
.
At the end of the lesson, the children “roll”
small toys on their cars.
Building a train
Target:
1. Teach children to place cubes on a brick steadily and evenly.
2. To consolidate the understanding of the word “train”
.
3. Learn to play with buildings.
4. Learn to perform actions based on a verbal signal.
The last lesson on this topic is conducted in the form of a game “Guess what I built”
.The teacher places two cubes on the brick: “This is a trailer.
Let's all build the same trailers. (At the end of the lesson, the teacher moves them, maintaining an interval of 1 cm)
.
What did we build together?” Children usually guess: “Train”
.
You can play an outdoor game “Train”
, accompanying it with a song.
Building a fence
Target:
1. Teach children to place cubes and bricks in a row steadily and evenly.
2. To consolidate the understanding of the word “fence”
.
3. Learn to play with buildings.
4. Learn to perform actions based on a verbal signal.
Construction of a fence made of blue bricks standing on a narrow long edge. The teacher recalls with the children how they looked at the kindergarten fence, draws attention to the sample, analyzes it, and shows the design .
At the end of the lesson, he notes that everyone’s fences turned out to be even, and invites them to play: “The nesting dolls ran along the fence, and then back!”
Building a gate with a fence
Target:
1. Teach children to make floors on a less durable base.
2. Learn to understand and name the words “gate”
,
"fence"
.
3. Strengthen children’s ability to play with the building without destroying it.
4. Develop the eye in children.
5. Learn to perform actions based on a verbal signal.
The teacher makes a structure on his desk in advance and covers it with a screen (the gate is built from three bricks, and on the sides there is a fence made of bricks lying on a narrow long edge). Design methods may not be given . The teacher’s verbal explanation is of great importance. Having built their building, the kids immediately play with it (the matryoshka goes in and out of the gate)
.
Construction of a ladder
Target:
1. Teach children to build a ladder by placing and overlaying cubes and bricks.
2. Learn to understand and name the word “ladder”.
3. Teach children to pronounce the onomatopoeia “top-top”
.
4. Learn to distinguish the shape of a cube or brick.
5. Learn to play with the building: move the Katya doll along the stairs.
The teacher builds a staircase from three cubes, saying: “Let’s make a ladder: put a cube, a cube next to it and another cube on top - that’s the ladder!” What have I done? Ladder. And now our Katya will go “top-to-top”
and
“top-top”
. Then the children build and play with the structure.
Building a house
Target:
1. Introducing children to a new element - a triangular prism.
2. Learn to understand and name the words: “house”
,
"wall"
,
"roof"
.
3. Learn to distinguish the shape of a cube, brick, triangular prism.
4. Learn to perform actions based on a verbal signal.
5. Learn to play with the building.
Children are invited to build the simplest version of a house ( a trihedral prism )
. Analyzing the sample, the teacher pays attention to the house as a whole, then to its parts in the sequence in which it was built: “The walls are made of cubes that stand close to each other. The roof is placed on cubes. What a beautiful house!”
At the end of the lesson, children play with the buildings.