Simple work "Mushroom"
For the youngest craftsmen, creating simple flat crafts is a completely accessible activity that must be taken into account when planning GCD.
Kids can glue finished parts onto a paper rectangle with their own hands. You can make a creative activity more exciting for kids by accompanying it with a fairy tale about the hedgehog Timosha, who needs to help collect supplies for the winter.
Children can glue the finished parts of the picture onto a piece of paper. As the lesson progresses, they will learn what a mushroom is made of.
Options for simple tasks can be varied by offering a fly agaric stencil or adding a pre-cut autumn leaf to the picture.
Applications for the middle group
For slightly older children, tasks are available that have a larger number of elements, provided that these parts are large enough.
Autumn composition
The “picture” can be supplemented with details depicting grass and leaves. Creating such compositions will not take much time and will not tire the child, but will allow him to gain important knowledge about nature and initial work skills.
To work you need to prepare:
- paper of different colors,
- white cardboard (can be replaced with a landscape sheet),
- safety scissors with round tips,
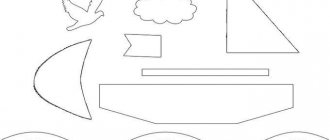
- composition detail templates,
- glue.
Parts for self-production should be of the simplest shape and sufficiently large in size. Templates for them must be copied or drawn and cut out in advance.
Step-by-step instruction.
- For the legs of the mushrooms, you need to prepare yellow or brown paper. When making a part, the paper should be folded in half, traced with a pencil and the workpiece should be cut out, rounding the lower part of the leg.
- To make the upper part, you can use a blank in the form of a circle, which is folded in half and cut with scissors along the fold line. To create a thematic composition, just cut out a couple of mushrooms.
- The element imitating grass should have smooth outlines. It is also made according to the model.
- The blanks are coated with glue on the reverse side and glued to cardboard. The leg is glued first, followed by the top. The grass is glued on last.
A similar composition can be supplemented with a drawing. For example, it’s easy to draw grass with paints or a felt-tip pen.
Direct educational activities involve talking about different plants that grow in the forest. It will be interesting and educational. Another easy option would be a mushroom basket. The basket should have a simple shape and consist of one or two parts. In this case, you should also follow the sequence in gluing the elements of the composition onto the base.
At home, you can prepare a hedgehog for a similar children’s craft, drawn and cut out yourself. The child can easily glue the figure on himself.
"Mushrooms in the Forest"
To introduce children to the most famous types of mushrooms, you can make an interesting thematic application with them.
To work you need to prepare:
- white paper
- simple pencil,
- paints,
- whole templates of several different mushrooms,
- brush,
- glue in the form of a pencil.
Creating a craft involves cutting out whole mushrooms from white paper and painting them. You can make fly agaric, boletus, and boletus and paint them in the appropriate colors.
If desired, finished mushrooms can be glued onto cardboard.
The creative process can be accompanied by a story about edible and inedible mushrooms growing in the area.
A fly agaric made from paper with an accordion step by step
In principle, only the fly agaric cap is folded like an accordion, so let's start with that. Prepare a rectangular piece of red paper.
Starting from the wide part, make small folds in the paper. Fold a strip 5-7 mm wide and passing through the entire area of the paper in one direction. Then make exactly the same fold in the opposite direction.
Repeat these steps until all the paper turns into an accordion.
Determine the middle of this accordion and bend it in half.
Apply glue to one of the inside sides, bend the paper further until both halves touch. Leave for a while until they stick together.
You will get something like a fan - the future fly agaric hat.
Draw a simple stem for the mushroom, correlating it with the size of the cap, and cut it out of white paper. In general, if such a fly agaric is glued to paper, that is, acts as an applique, then the leg can be made of paper. But if this is a craft, it should be more stable, so it is better to use white cardboard. The fly agaric cap itself needs white spots. Cut out a few peas from white paper or cardboard.
Cut a small rectangle from green paper, the width of which is slightly larger than the fly agaric leg, and the height is a quarter of it. On one of the long sides of the green segment, draw a random pointed line. Cut out the piece that will be the grass.
Glue white peas on the hat, grass and a hat on the leg. That's it, the accordion paper fly agaric is ready. This kind of work can be a craft.
Or appliqué, if all the parts are glued to a sheet of colored cardboard.
It can also be a room decor, a catchy garland. To do this, even at the stage of folding the hat in half, you need to place a thread in it. Or thread it afterwards using a needle.
Craft using the Origami technique
For students in the preparatory group, a fun activity will be making crafts on a mushroom theme with elements made using the origami technique. It’s easy to make an original mushroom with your own hands, following the step-by-step master class.
To work you need to prepare:
- colored paper,
- scissors,
- simple pencil,
- cardboard base,
- glue stick,
- colored pencils or paints.
Step-by-step instruction.
- The first step is to make a hat out of paper. To do this, a square sheet of colored paper is folded along both diagonals.
- Then 3 corners must be folded, bending them towards the middle.
- The bottom corner is left open and the workpiece is turned over.
- The corners are folded together in the middle.
- The side edges must be folded into the pockets of the hat.
- The leg is straightened by bending the lower corner.
- Bend the upper corners of the cap and turn the workpiece over. The work is completed.
It should be glued to the base. Additionally, you can glue leaves and grass. In addition, drawing additional details with pencils and paints is also a very exciting creative process.
Mushrooms have a fairly simple shape. For this reason, drawing them and making thematic applications are available to children from a fairly early age. Such creative activities are useful for the comprehensive development of a child and allow one to gain additional knowledge about the world around them.
Tear-out applique made of colored paper for primary schoolchildren “Mushrooms”
Tear-out applique made of colored paper for primary schoolchildren “Mushrooms”
Author: Natalya Viktorovna Suslova, primary school teacher, Municipal Educational Institution Secondary School No. 7 named after. Admiral F.F. Ushakov, Tutaev, Yaroslavl region. Description: this master class is intended for children from 6 years old, educators, additional education teachers, primary school teachers. Purpose: interior decoration, gift, work for the autumn exhibition, competition. Goal: making paper appliqué using the “tearing” technique. Objectives: - strengthen the ability to work with paper; — introduce students to a new technique for working with paper: “tearing”; — teach how to perform work using the cut-off appliqué technique; - develop children's creativity, imagination, and imagination; — develop fine motor skills and accuracy when working with glue; - cultivate patience and confidence in your affairs. Dear colleagues, today I would like to present a master class on making a “Mushrooms” applique from paper using the “tearing” technique.
It's autumn outside! The most beautiful, elegant time of the year! The generosity of autumn knows no bounds - fruits, vegetables, mushrooms! What a pleasure it is to go on a “silent” hunt! And there are apparently no mushrooms this year! Collect any - fry some, pickle others, dry others.
Each mushroom is a work of art! I really want to capture it.
- Under the pine tree by the path Who is standing among the grass? There is a leg, but there is no boot, There is a hat, but there is no head. (Mushroom)
- In a forest clearing, under a mighty pine tree, there stands an old man, wearing a brown cap.
Cap on the barrel. Anyone who visits the forest knows it. (Mushroom)
• I found mushrooms in the forest.
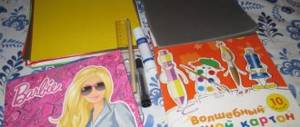
Right next to the stump... right next to the hummock. They looked at me and wanted to go to the basket. • I collected all the honey mushrooms and took them home with me. Delicious mushrooms Grew up near a hummock... Materials: - colored paper, - colored cardboard, - simple pencil, - glue, - frame.
Step-by-step description of the work:
1. Let's start working with mushrooms. On the back of colored paper (it's not white), draw the legs of 3 mushrooms.
On the back of the brown paper, draw 3 mushroom caps of different sizes.
Carefully “tear off” the stems and caps of the mushrooms. Place on the selected background.
2. Now let's take care of the grass. Draw blades of grass on the back of the green paper.
“Tear off” the blades of grass.
3. Decorate the mushrooms with blades of grass, placing them on the appliqué.
Glue the applique parts.
Other options for producing the work are possible.
To make the applique even, place it under a press (several books). Leave it like this until the glue dries. Frame it. Our work is ready! Mushrooms look wonderful in the interior!
Creative success!
We recommend watching:
Applique made of paper napkins for children 5 - 7 years old. Painting made of yarn for children on the theme: Autumn. Master class with photo Autumn birch using quilling technique. Master class with photo Application on self-adhesive film on the topic: Autumn for kindergarten
Similar articles:
Beaded applique for children over 6 years old on the theme of Autumn
Application on the theme Autumn for the younger group of kindergarten
Mushrooms applique. Master Class
Inlay technique. Patchwork
Application on the theme “Mushrooms” for the junior and middle groups of kindergarten