Unfortunately, children quite often become involved in various road accidents. And all this happens because many of them do not know the basic rules. It is not difficult to memorize the rules of traffic behavior on the roads and streets of the city. Parents and employees of educational institutions should help the child in this matter. Educational institutions often conduct traffic rules lessons. And these lessons end with the children making various crafts. Therefore, in this article we decided to bring you crafts on the topic of traffic rules for children. Children can easily make these crafts with their own hands if they look at the photo.
What crafts to make on the topic: Traffic rules
A traffic light is a simple craft. Several variants.
The simplest craft option is a traffic light. Indeed, even a child who attends kindergarten can make such a craft. In the process of creating such a product, do not forget to remind your child what the colors of the traffic light mean.
The basis of the craft will be a landscape sheet. It must be painted black. You can also draw a rectangle on the sheet and decorate it accordingly. Cut out circles from colored paper and glue them to your traffic light.
A traffic light can be made from a box.
In addition, you can use old CDs to create a traffic light. A kind traffic light who expresses his emotions can clearly explain the rules of behavior at a traffic light.
A traffic light that has the head of a policeman looks very interesting. Attach arms and legs to the traffic light.
An old bottle is a great option for making crafts. You simply paint it in a base color and draw traffic light circles on it. Don't forget to attach the legs to the bottle. Cut out pens from paper and insert the basic attributes of a police officer into them.
Applications on the topic of traffic rules.
The next simple crafts are applications. Preschool children can also cope with this task. Applications can be made of colored paper and cardboard.
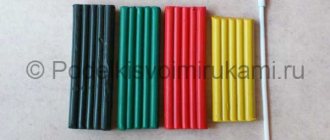
You can also make applications from plasticine. First, you should apply a drawing on thick paper, after which you should decorate it with plasticine.
Another picture made of plasticine. She looks very unusual and bright.
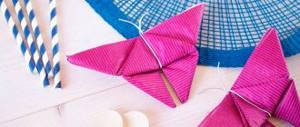
Paper figures.
Crafting traffic rules for children should be interesting. From paper you can make a wide variety of crafts on this topic. And they will all be interesting in their own way.
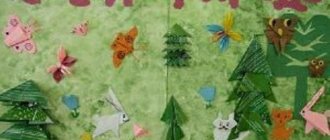
Complex applications.
It is worth saying that crafts about traffic rules for children can be not only simple. And if children use the help of their parents, then together with them they will be able to make more complex applications that will clearly explain the rules of behavior on the roads.
Finally
As you can see, making crafts on the topic of traffic rules is very simple. In this case, the child fantasizes and remembers important rules that will help him maintain his health and life in the future.
Application with children of the senior group “Road signs”
Tasks :
Strengthen children's knowledge about the rules of behavior on the street.
Remember the famous road signs - “Pedestrian crossing”, “Caution children!” .
Cultivate attention and observation skills in children.
Continue teaching children how to make compositions from colored paper;
Strengthen paper cutting skills;
Strengthen skills in working with scissors and glue;
Develop attention and creativity.
Vocabulary: road signs, traffic lights, pedestrian crossing, zebra crossing, warning signs, directional signs.
Material: road signs, street layout, sheets of paper with outlines of road signs.
Preliminary work: looking at illustrations, conversations, reading art. literature, outdoor and didactic games, learning poetry, solving riddles.
Progress of the lesson:
Guys, you ride with your moms and dads on the bus, go to kindergarten, to shops, and you often have to cross the road. You are road users, which means you must know the rules of the road.
Guys, what is the correct way to cross the road?
Children: At a traffic light. What if there is no traffic light nearby?
Children: We cross the road at the pedestrian crossing.
Educator: Absolutely right! Look at these signs, are they pedestrian crossing signs?
Children: (children's answers)
Educator: Well done! Right!
Educator: What kind of sign is this? The teacher shows the sign “Caution, children!”
Children: (children's answers)
Educator: Good guys! Where is this sign usually installed?
Children: (children's answers)
Educator: Correct.
Parents and kindergarten teachers teach children traffic rules from an early age. The study continues at school. Crafts on the topic “Road Rules” will be an excellent teaching tool; the photos will clearly show how to make them correctly. Participate in the creative process with your child, accompanying the work with stories about how to cross the road correctly, what traffic light colors mean “stop,” “get ready,” and “go.” When creating crafts, a variety of materials are used: colored paper and cardboard, paints and plasticine. Let's look at some of them.
Invite your child to make cards from colored paper. For work, prepare the following materials:
- cardboard;
- colored paper;
- glue;
- white sheets of paper;
- scissors;
- glass of water;
- acrylic paints or colored pencils;
- brush.
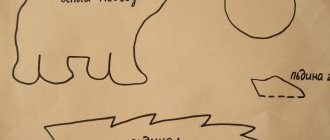
After you have prepared the materials, print out the finished template.
Progress:
Step 1: Place the stencil on black paper.
Step 2: Trace it.
Step 3. Cut out the traffic light with scissors.
Step 4: Draw three circles on a black piece of paper.
Step 5. Cut them out.
Step 6. Place a red, green and orange leaf in front of you.
Step 7. Draw three circles on it with a diameter equal to the template.
Step 8. Cut them out.
Step 9. Glue the colored circles onto the black ones.
Step 10: Fold them in half.
Glue 3 circles to the traffic light. But only apply glue to one half so that the other can move. By lifting the half up, you will cover the colored circle with the black circle. This way the traffic light will turn on and off.
DIY cards on the topic “Traffic” with photo instructions
Very often, in lessons and classes on traffic rules, cards are used that depict road signs. The teacher or educator asks a thematic question, and the children hold up a card with the correct answer. This method promotes rapid learning. Therefore, invite your child to make such cards.
Progress:
Step 1. Take a white sheet of paper and print out the blanks.
Step 2. Let your child color the signs in the desired color. The adult’s task is to check the correctness of the actions.
Step 3. Glue the sheet of painted signs onto the cardboard to make them last longer.
Instead of pencils, you can use acrylic paints. By doing something like this, the child will better understand the rules of the road.
"Be careful on the road"
Useful crafts on the topic “Road Rules” for school will be an excellent tool for classroom teaching.
For the first acquaintance, make a three-dimensional figure. For work, prepare the following materials:
- colored paper;
- a box of candy;
- brush;
- scissors;
- plasticine;
- acrylic paints;
- toothpicks;
- glue;
- sippy cup;
- small boxes (you can take them from medicine boxes).
Progress:
Step 1. Take a large box and place it in front of you, having first cut off one side part. You will build a road in it.
Step 2. Paint the bottom of the box with green paint - this will be the lawn.
Step 3. Take black paper and cut out several strips from it. Glue them as you wish. For example, make a road with an intersection.
Step 4: Make a crosswalk. To do this, cut out several thin strips of white paper and stick them on the place where the transition will be located.
Step 5. Decorate your composition with trees that will be located along the road. Take a toothpick and brown plasticine. Draw a crown on green paper and cut it out.
Step 6. Roll the plasticine into a sausage and insert a toothpick into it.
Step 7. Attach flat plasticine to the other side of the toothpick to prevent the tree from falling.
Step 8. Fix the crown.
Step 9. Find traffic signs on the Internet, print them out or draw them yourself and place them on the road.
Step 10. Make a stand out of plasticine, stick a toothpick into it and attach a sign to it.
There must be a traffic light on the road.
And place houses far from the road.
Step 1. Cover the medicine boxes with colored paper.
Step 2. Cut out the windows from thick colored paper.
Step 3. Place all the elements in their places.
Step 4. If there is a road, then there must be cars. Make them out of plasticine or arrange small models.
Using your imagination, you can make boxes with a variety of movement trajectories. We offer you several options.
Video selection of crafts on traffic rules.
By creating crafts on the theme “Road Rules,” you can teach your child seriousness and guide him on the right path. This way you will show him how traffic rules affect a person’s life. By performing various crafts, the child will be able to safely participate in thematic competitions. Using colored paper and cardboard, plasticine and other additional materials, you can make decorative elements for your crafts.
There are many ideas that will teach your child the rules of the road. Themed crafts will tell a small audience how to behave on the road.
ELENA MOROZOVA
(decorating a corner in a group)
I bring to your attention a master class on the topic
:"
Traffic rules
"
(decorating a corner in a group with your own hands)
. A week passed in our kindergarten according to
traffic rules
.
And what we didn’t do together with the children: had conversations about the rules of behavior on the roads
, read S. V. Mikhalkov’s fairy tale “Uncle Styopa the Policeman,” played situation games: “How to
cross the road correctly
,” “Is it possible to play with a ball?” on the roadway?”, they repeated
the road signs
.
We consolidated children's knowledge about traffic lights and pedestrian crossings. The children and I came up with various riddles on traffic rules
.
The children enjoyed participating in various games and competitions. Many children and their parents from our group made crafts
.
So, to decorate the corner we will need: colored paper
, scissors, glue, boxes
(can be medicine or washing powder)
.
to make houses from these boxes
pasting them with colored
paper
.
Now we cut out and glue the windows and door onto the finished house.
If you want, you can outline the windows with a felt pen
.
The roof of the houses can be different, it depends on the size of your house, here you need to choose the color of colored paper and size
.
You can make several such houses.
Then we make a pedestrian crossing (zebra crossing)
.
Glue white stripes (3 pieces)
5 cm wide.
The result is "Zebra".
In order to make a roadway we will need: gray cardboard and white paper
.
We cut out thin strips 1 cm wide
from white paper (4 long and 8 short).
We glue the long strips in the middle of our
road
, leaving a distance between them.
On one side of the road
and on the other add short strips and glue.
We place houses, cars, zebra crossings, and auto-trikes on our roadway.
Some children from our group also made crafts
.
My master
-class has come to an end, thank you for your attention!
Publications on the topic:
Physical training minutes in the middle group “Road Rules” I bring to your attention physical training minutes on the topic of traffic rules. I took poems about traffic rules as a poetic basis, selected exercises, etc.
Summary of an open lesson in the 2nd junior group on traffic rules “Pinocchio teaches traffic rules” Goals and objectives: 1. To develop knowledge about the road, road signs and their purpose. 2. Learn to recognize and name a traffic light, its signals and actions.
I thought for a long time about how to transform the information corner for parents in order to get rid of moving folders and free up space on children's lockers. Here.
Children are joyful, impressionable people who never cease to be surprised by everything and everyone. To create interest in children and better assimilate what they receive.
This spring our kindergarten took part in a district design competition
Road safety for children is the most important social problem, and often the protection of children is not so much the concern of parents as the attentive attitude of the children themselves on the streets.
For this reason, original, interesting and colorful DIY crafts based on traffic rules are the best visual aids for kids.
Entertaining classes, held in a playful way, perform 2 functions - children are exposed to an interesting type of creativity, which allows them to competently teach traffic rules in a relaxed manner.
Most kids love cars and are interested, if not in cars, then in KAMAZ vehicles, trucks and excavators.
Despite the fact that children daily participate in traffic together with adults (crossing the road or riding in vehicles), the topic of traffic rules is unfamiliar to them and they are the most vulnerable part of the population to road accidents.
Therefore, creating crafts on the topic of traffic rules for school or kindergarten has become part of the requirements of modern educational institutions.
Composition from plasticine
As practice shows, teaching children to cross the road competently and use pedestrian crossings and zebra crossings is not at all difficult. Kids quickly grasp new information presented in a creative form.
In turn, playful moments give lessons a direct character: DIY road safety crafts allow children to quickly remember how to behave on the roads.
Craft options
The many different forms allow children to become familiar with many examples of traffic rules, both for pedestrians and as passengers in vehicles.
Crafts for traffic rules in kindergarten or school are a broad topic: these include examples on the topic of safety, rules for pedestrians and drivers, and even creating cars and pedestrians with your own hands.
The most popular options are:
- application on the theme of traffic rules - simple models, perfect for young children;
- drawings created on paper or cardboard using colored pencils, felt-tip pens or crayons;
- a simple ABC of safety - thematic sections (car, bus, tram, trolleybus, metro, railway, bus stop, pedestrian zebra crossing, etc.).
Crafts on the theme of traffic rules for a kindergarten or school can cover their own plots, as well as those taken from popular animated series, such as “Smeshariki”, “Toropyzhka”, “Lessons from Auntie Owl”, “About the kitten Zhenya and the rules of the road”, “Naughty family” " and others.
Positive points
Numerous do-it-yourself traffic rules crafts for a schoolchild or kindergarten child help children understand why road users should give way to each other, what dangerous situations can be, and what non-compliance with traffic rules can lead to.
An easy and relaxed manner is the best way to convey the topic of “safety” to children from various perspectives. Crafts on the topic of traffic rules for kindergarten aim not only to show dangerous situations, but also to explain how they can be avoided.
Traffic safety applique
The heroes of educational products - funny little animals and their helpers - help little ones and school-age children quickly remember the required rules.
Crafts for kindergarten
A craft for kindergarten on the topic of traffic rules must be easy so that children 3–4 years old can master it.
Traffic light No. 1
Take a landscape sheet of paper and colored pencils (markers or crayons).
An elongated rectangle is drawn with 3 circles on it (the top one is green, the middle one is yellow and the bottom one is green).
The simplest craft for kindergarten (traffic rules for the younger group) - a minimum of effort and time.
Paper traffic lights
Traffic light No. 2
You will need colorful paper, scissors and glue.
Preparation stages:
- You need to cut out a rectangular shape (the base of the traffic light) and three circles (red, yellow and green).
- Glue the prepared forms in order of priority.
You can take a box of suitable size and paste it with the necessary colored elements.
What are children's crafts made from? What about pasta? - an unusual type of creativity.
For useful tips for parents on how to teach their child to read syllables, see.
Plastic bottles can be found in any household. By the way, they can become material for children's crafts. You will find ideas for creativity.
Pedestrian zebra crossing - road sign
You will need a landscape sheet of paper. The future do-it-yourself traffic rules craft for kindergarten will be created in a vertical form. In the middle you need to draw a triangle, inside it, at the bottom, 3 elongated rectangles (“zebra”) and paint them over with a black pencil. A little man (pedestrian) is drawn above the pedestrian path. The background should be painted blue (imitation sky).
Traffic sign symbols
You should take cardboard (colored and white), multi-colored paper, crayons, gouache in white, blue and black shades.
- Drawing the outlines of road signs (No Road, Stop, Parking, Straight and others) on cardboard.
- Drawing road sign symbols on colored paper and then cutting them out
- Gluing prepared samples onto the contours.
- Cutting out road signs and preparing cardboard stands.
The sizes of road sign models can vary from a few centimeters to a meter or two.
You can modify this model and prepare cards: the teacher will ask a question, and the children will raise the appropriate sign.
In a similar way, you can prepare other fakes of traffic rules for kindergarten from plasticine, appliques, old toys, etc.
Creative techniques for learning the rules of the road
The selection describes effective, inexpensive types of crafts. These are techniques that kids can understand and use accessible materials.
Craft games
Applications
Application according to traffic rules is an important method in the preparatory group. Through this technique, children are introduced to the structure of traffic lights, the meanings of road signs, and street layouts. To build a paper traffic light, prepare:
- white and colored sheets;
- markers;
- rulers;
- pencils;
- glue;
- scissors (for older preschoolers).
Developmental activities for children 2 years old - how to do them
The basis of the craft is a blank sheet with a drawn rectangle and three circles inside. Paper figures are glued on top in the correct order. The rectangle can be shaded or painted over. At the end of the work, the little master explains the order of the colors and what they mean. The student uses a ruler or draws lines with his naked hand, improving concentration and fine motor skills.
Important! Before classes, a conversation is held about safety rules.
Modeling from plasticine
Three-dimensional figures are molded from plasticine and spread over the shape. This is how road signs are made. Use:
- stencils;
- rolling board;
- stacks;
- white plasticine.
Step-by-step instruction:
- Knead the plasticine with your hands.
- Pinch off pieces.
- Attach them to the base and rub.
- Fill in the signs by smearing white plasticine over the template.
- Plasticine that has gone beyond the contour is removed in stacks.
The group makes the same sign to consolidate knowledge about it.
Drawings
Younger preschoolers in kindergarten draw scenes based on traffic rules, objects, and explain them. Children, if desired, depict signs, zebras, cars on the road. Drawings can be used as a basis for game layouts. In this case, they are supplemented with structures, toys, figures made of plasticine and other materials. In the kindergarten, in warm weather, images are painted with crayons outside in a designated area. Older children invent and draw correct and incorrect situations and comment on them.
Crafts from cereals and pasta
Cars, houses, plants, and animals are made from pasta of various shapes. They choose interesting types: horns, shells, straws, long noodles. Purchase products in natural colors and with dyes. Prepare a flat, roomy base on which the figures will be fixed. It could be a board, cardboard. In groups, the children create a didactic panel in the form of a town. Multi-colored cereals are used as a material for modeling and drawing. Dry porridge is sprinkled on the “streets” and “roads” of the compositions.
Master class on making a pasta truck:
- Prepare liquid glue, pasta in the form of horns, short tubes, flowers, “ruffles”.
- Assemble the “cabin”: glue 3 tubes together to form a rectangle. Repeat the action.
- The rectangles are glued together with the flat side.
- On one side of the product, two more are attached to the lower tube, one after the other.
- Glue another rectangle from 6 of the same pasta. It is glued to the back of the cabin. This is the body.
- The body walls are made from “ruffles”.
- Wheels—horns—are attached to the bottom of this structure.
- There are 2 “flowers” installed in front of the body - headlights.
Note! The child, analyzing the shape and structure of cars, comes up with his own versions of pasta technology.
Organizing a crafts exhibition in kindergarten
Exhibitions of children's creativity are mandatory educational events. Their goals:
- improving the baby's self-esteem;
- developing a sense of responsibility;
- formation of taste;
- strengthening the connection between children and parents through joint creativity;
- familiarizing participants with each other’s creativity, stimulating healthy competition.
Exhibition on traffic rules
Exhibitions are joint celebrations where the entire school and parents are invited. They are held several times a year. Families take pictures and communicate. The best exhibits are sent to a permanent exhibition.
Calendar plan in the preparatory group for each day according to the Federal State Educational Standard
During the organization of the event:
- set a date;
- choose a topic;
- notify children;
- Invitation leaflets are prepared upon request.
To summarize, posters are prepared with photographs of the works and masters.
Important! During the exhibition, discipline is controlled by the teacher. Crafts on traffic rules for parents and kids
The selection includes master classes on creating game panels on various topics. They will serve as an illustration of traffic rules.
Crossroads
You will need:
- toy cars;
- rulers;
- pencils, felt-tip pens;
- glue;
- scissors;
- cardboard;
- multi-colored paper;
- base from the bottom of a cardboard box.
Stages of work:
- They construct buildings from boxes covered with colored sheets. You can make a school, a residential building, a store.
- They glue and draw windows and roofs.
- Cut the white sheet into strips 5cm wide. Glue them onto black cardboard to create a zebra.
- Cut off two long white stripes and 8 short ones. They are glued to gray cardboard - this is a road with markings.
- They are making trees, 4 traffic lights (on each side of the crossing).
- The crafts are attached to the base and the cars are placed.
You can use a real intersection known to your child as a model. Thinking through an idea is no less important than implementing it.
DIY crossroads
Parking
You will need:
- a pair of hard cardboard boxes;
- glue;
- scissors;
- blue, white paper;
- a simple pencil;
- cars, helicopter.
Stages of work:
- They create a three-story base: 3 identical sheets (from boxes) are attached horizontally to another vertical sheet. Make sure that the distance between floors is the same.
- A long, wide ribbon in the shape of a semicircle is cut out of cardboard. It should connect the 1st and 3rd floors. This road is connected to the lower floor on the right, and to the upper floor on the left.
- On the platform they place a cardboard tube with a “lid” - this is a place for a helicopter.
- Markings are made by gluing white stripes (spaces for cars) and blue tapes with arrows (traffic indicators).
- Cars are being arranged.
The process is discussed with the child so that the child sees the logic of what is happening.
Crafts for school
Do-it-yourself traffic rules crafts for school are most often prepared in a more complicated form.
Mini town
You will need:
- kinder figurines,
- Christmas tree branches (you can take artificial ones),
- cardboard,
- colored paper,
- plasticine,
- sketches of road signs.
Traffic layout
Blanks:
- several boxes of various sizes, covered with colored paper (at home, school, kindergarten);
- large rectangular cardboard or box lid;
- templates for traffic lights and road signs (can be printed from the Internet);
- thinking over the plan of the future street (drawing the contours on a landscape sheet of paper).
Performance:
- Markings are being prepared where the intersection, pedestrian zebra crossing, buildings, park and lawns will be located.
- All necessary applications on the topic of traffic regulations (roads, road signs, windows, doors, signs, buildings, trees, lawns, etc.) are cut out.
- Some samples are molded from plasticine (cars, people, pets). The visual aid is complemented by ready-made models from Kinder surprises.
Completion:
All parts are placed in their places. Vehicles, pedestrians and road signs are placed along the streets.
Wall newspaper
Ready-made photo instructions are the best solution for middle school students. High school students can create a product with exciting thematic materials and complement it with three-dimensional figures.
All that is needed is:
- Whatman paper, A1 format,
- markers, colored crayons,
- plain, colored and corrugated paper,
- natural materials (ice cream sticks, pasta, cones and other suitable elements).
The future wall newspaper is a craft of traffic rules for school. Before you start work, you should think through the plan down to the smallest nuances.
Each rule is supplemented with text (by hand or in printed form) explaining this or that requirement.
Wall newspaper on the topic of traffic rules
At the bottom of the product you can highlight separate sections:
- Traffic rules news,
- Latest incidents.
- Legislation.
The article introduces parents and adults to the most popular hand-made traffic rules crafts: the country of craftsmen is constantly replenished with new children, who must be taught the rules of the road.
How to make a traffic light with your own hands?
If you have a plumbing pipe lying around at home, and you also have shoulder straps, a cap, and a policeman’s baton, then you can make a character like this.
If you do not have such traffic police officer items, then make them from colored paper and cardboard. So, to implement your plan, take:
- plumbing pipe;
- wooden stick;
- acrylic lacquer;
- whistle;
- acrylic paints;
- cap;
- shoulder straps;
- a rod, and in the absence of this, colored paper and cardboard.
To work, you need tools such as a jigsaw and drill.
Cut the pipe in half crosswise. Draw with a simple pencil where the traffic light will have facial features, red, yellow and green circles. Paint it all with paints of the appropriate colors. Make two holes with a drill at the level of the character’s shoulders, insert a wooden stick here, and glue the shoulder straps. Place a cap on top of the pipe. Place a whistle on one hand of the character and a wand on the other. Here's how to make a traffic light. If there are no ready-made attributes, then glue black strips onto white cardboard, roll this blank into a tube, and glue the sides from the large edge. You will have a wand. Shoulder straps are also easy to create; we cut them out of blue cardboard. If we talk about how to make a traffic light, the easiest way to do this is to cover a rectangular cardboard box with dark colored paper and glue a red, yellow and green circle on each side.
If you have a dairy box left over, this is just what you need. Cover it with black paper and attach circles of the corresponding colors to the sides. To make your child better understand that you should never cross the road at a red light, draw a sad smiley face on a circle of this color. The yellow one will have a straight mouth, while the green one will have a smiling mouth, which means an invitation to move. Hide the top of the box under a cap, which is cut out of colored paper, its parts are glued together. If there is no such container, you can make a traffic light from a sheet of cardboard. The next photo shows how it should be cut and what dimensions it should be. Straighten the cardboard box, cut it out, cut out the circles. Glue black paper onto cardboard and cut out red, yellow and green squares. Glue them onto a dark base. Roll it up. Cut and glue a handle from cardboard, attach it to this roll. Insert this blank inside the glued traffic light. By turning the handle, you will change the color, thereby checking whether the children have correctly mastered the lesson about the rules of the road. The next traffic light is made of very interesting materials, for this one take:
- three laser discs;
- three juice caps;
- glue;
- lace;
- scissors;
- paints and brushes.
Let your child paint the juice caps the right colors.
If you have yellow or green ones, you don’t need to paint them. Glue these blanks to the center of the disks and connect the elements. Attach a cord of the required length to the back at the top, after which you can hang the craft. If you want to make a traffic light so that its elements are voluminous, then use the origami technique for this.
To do this, cut squares of green, yellow and red paper with sides of 5 cm, from them you need to twist the parts that are glued together. The finished balls need to be attached to the stand, after which the work is finished. A traffic light made from plastic bags is very interesting. For this craft you will need:
- garbage bags in red, yellow and green colors;
- cardboard;
- scissors;
- colored paper.
How to make pompoms is shown in detail in the following master class.
- To do this, first cut off the handles from the bags.
- Then, starting from the outer corner, cut into a long strip, as shown in photo number 2.
- After this, you need to wrap this tape around your palm or around two identical cardboard circles, in the center of which there is a lace.
- Now the coils on the outside are cut through. If you wound the ribbon around your hand, then tie the resulting blank in the middle with a piece of plastic bag, tighten it, and tie it.
- To make a traffic light, you will tie these loose laces, thereby connecting the structure. You can glue pens and a staff from cardboard to the exhibit, eyes from colored paper, and make a cap from the same material.
If mothers know how to knit, they can make this traffic attribute from threads.
You need to knit a black rectangle with knitting needles, wrap it around a kefir or milk bag, sew it on the side, top and bottom. To fit the bottom and top, knit rectangles the same size as these sides and sew them to the main fabric.
Crochet the circles and attach them in place. Cardboard and tinsel will also make a wonderful traffic light.