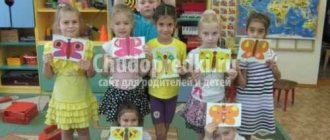
Childhood is a period when the foundations of a future personality are laid, when a child tries everything and tries to understand what he likes and what he doesn’t.
Creative activities - drawing, modeling from plasticine, etc. - play a significant role in this process.
Combine business with pleasure - invite your child to do crafts on a fairy tale theme.
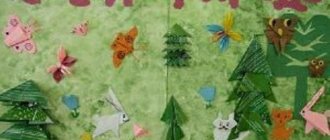
Origami
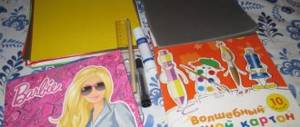
Cutting out of paper is the easiest way to embody any hero. Use colored paper, pieces of felt, and toy eyes to make the toy more complex and beautiful.
Turn her into a puppet by gluing a popsicle stick on the back: now you can give performances! And if you work hard, you can add moving parts: let the elephant move its trunk, the fox wave its tail, and the cat wash itself with its paw.
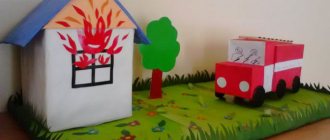
Make a craft in the form of a fairy-tale house from a shoebox, decorate and furnish it with furniture cut out of paper. Place Snow White and the Seven Dwarfs in it.
Origami will develop accuracy and fine motor skills: start with simple shapes, gradually becoming more complex.
Lesson summary - application, in the middle group, on the topic “Fairy-tale hero - WOLF”
Lesson summary - application, in the middle group, on the topic
"Fairy-tale hero - WOLF"
Completed by: middle group teacher Bessonova A.A.
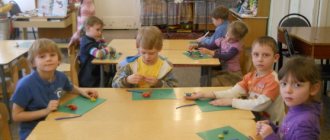
Applique classes in the middle group have a wider range of techniques that can be used in work. The most “fertile ground” for mastering new ways of creating crafts are topics related to animals - wild and domestic. Thus, kids not only master various practical skills, but also get acquainted with the world around them in all its diversity. It is only important that all stages of the lesson are clearly thought out and prepared by the teacher. What can middle school children do?
In the middle group, children already know how to cut paper in a straight line. So, for example, for a broken craft, in which the details for filling the outline of the figures are pieces of strips of colored paper, the little ones can independently cut the sheets into ribbons. As for more complex details, with small elements (for example, the back of a hedgehog with needles), it is better to provide such elements to the “authors” in finished form.
What size is acceptable?
The larger the size of the application, the more difficult it is to work with. So for the middle group, the recommended craft size is half an A4 sheet. In this case, the size of the backing can be A4, if the application is individual, or even A3, if the craft is collective. You should also take into account the complexity of the application: the more elements, the larger the base should be. For example, for a single cat or hedgehog you can get by with ½ A4, but for a zoo of this size it will clearly not be enough for the background.
Materials
In the middle group, as raw materials for crafts, children can use not only the usual paper and thin cardboard, but also thick cardboard (for example, for the base), since the kids will already be able to bend and straighten it; fabric, however, all fabric elements must be prepared in advance by the teacher, since due to the “flowability” of the material, it is quite difficult for children to work with them (at any age); natural materials (cones, acorns, leaves, chestnuts, etc.), which children can glue or, if we are talking about leaves, cut at an angle (only the part should not turn out small, that is, the leaves should be taken large); rhinestones, sequins for creating eyes for animals (important! the teacher gives these materials strictly according to the count, and children glue them under the supervision of an adult); tape, braid (such materials are convenient for creating a fence, forest or lawn). It is impossible to imagine making applique without glue and a brush. However, in addition to these important components, it is worth taking care of the presence of wet wipes (to remove excess glue from crafts and the hands of little creators); pencils, felt-tip pens, paints (for drawing small details, for example, eyes, antennae, etc.); glue in a stick (they are convenient for gluing large parts of crafts). Conversation and visibility
Crafts for older kids
If you're ready to trust your child with a needle and thread, try sewing together your favorite character from old clothes and scraps of fabric. Patterns for every taste are easy to find on the Internet or in special books.
Don't stop at simple crafts - embody a fairy-tale hero in the form of a fancy dress.
Teach your daughter to knit or crochet. Why doesn't she knit herself a warm hat with Winnie the Pooh ears? Show her photos of fairy-tale crafts and offer to knit a fluffy toy from soft yarn.
And hang a cross-stitched picture on the wall - many kit manufacturers produce simple patterns for children with fairy tale plots.
Complex crafts - the best ideas and a master class on how to make them using various popular techniques (100 photos)Crafts from plasticine - the best ideas for making stylish and beautiful crafts with your own hands (90 photos)
- Autumn crafts - the best ideas for crafts made from natural materials and making them yourself
Progress of the game.
Educator: - Listen to the riddle.
Straight from the shelf, beyond the threshold
The ruddy side ran away.
Our friend rolled away
Children, together with the teacher, tell and paste pictures with fairy tale characters .
As a complication “Sing Kolobok’s song”
5. "Find the odd one out"
Goal: development of attention and development of coherent speech.
Tasks:
Develop fine motor skills of fingers.
Develop children's speech activity and enrich their vocabulary
Dragon
Make three identical balls of green plasticine. Stretch one side to form a comma - this is the head and neck.
A larger drop-shaped ball will become the body. Four short sausages - future paws.
Assemble the details into the hero of Russian folk tales, add spikes - tiny balls from the same plasticine - to his back. Add wings from flattened balls into a leaf shape.
Work on the face: use a match to push through the nostrils, mouth, stick on yellow ball eyes.
Crafts on the theme of folk tales
Crafts on the theme of folk tales are a very exciting activity not only for children, but also for adults. Since children love to create things with their own hands, a variety of materials can be used to make such crafts. For example, it can be all kinds of decorative elements (buttons, beads, seed beads, multi-colored ribbons), threads, colored cardboard or paper, plasticine, all kinds of cereals and pasta.
Children's crafts on the theme of fairy tales
In principle, children's crafts on the theme of fairy tales can be created from any available material, but if you are doing a craft with your baby for the first time, it is best to use paper for this. Children love working with paper because they can crush it, tear it into pieces, draw on it, or cut something out of it.
Older children will surely enjoy creating children's crafts with their own hands from threads, and then decorating them.
For example, from threads you can make an original craft based on the Russian folk tale “Kolobok”.
In addition to threads, to make this craft with children you also need: a balloon, scissors, a little plasticine, PVA glue and colored paper. The balloon needs to be inflated to medium size and tied so that no air escapes from it. Pierce the jar of PVA glue right through and pull a thread through the holes. Place the end of the thread on the ball, and to prevent it from slipping, secure it with a piece of transparent tape. Then you need to carefully wrap the ball with thread dipped in glue. When the entire ball is wrapped in thread, cut the end of the thread and leave the ball until the threads are completely dry. After this, you need to pierce the ball and pull it out through the hole in the threads. When the preparatory work is completed, you can begin the most interesting thing for children - decorating the craft. You need to cut out a circle from colored paper and decorate it with a pompom made from plasticine. This will be the kolobok hat, which can be attached with glue. Also cut out the eyes, mouth and cheeks from colored paper and paste them onto the craft.
No less beautiful are crafts on the theme of an autumn fairy tale, which are most often made from natural materials. It’s very easy to make children’s natural crafts from acorns, nuts, chestnuts, various seeds, berries and, of course, bright autumn leaves. Autumn is very rich in such natural materials, and they are stored well for quite a long time, so such crafts can be made in winter.
Swan Princess
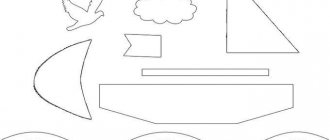
The simplest paper figurine. Fold the white sheet in half and draw the outline of a swan. Add a rectangle at the bottom for stability. Glue the figure together, leaving rectangles. Bend them in different directions.
Make an accordion from another sheet of paper and glue it in place of the tail and wings. Color it and add decorations worthy of the heroine of Pushkin’s fairy tale.
Creative project “Do-it-yourself fairy tale”
- February 7, 2014
Conference “Project activity in an educational institution - 2014”
Nomination “Children’s project in elementary school”
A project on the theme “Do-It-Yourself Fairy Tale” was submitted for the competition. The relevance of the project is determined by increasing the independence of younger schoolchildren in educational and everyday activities, the development of their imagination and creativity.
An attempt was made to independently make a model based on the plot of a favorite fairy tale and develop a technological map for making the model for further use in the work of other students. This determines the novelty and practical significance of the project.
The type of project is creative. During the work, the author thinks through the composition of the layout, finds in the literature and Internet sources the technology for manufacturing the necessary attributes. As a result of the research, the author proves that thanks to your perseverance and diligence, you can not only make a new attribute for the game, but also increase the level of your skill in your favorite activity.
The work may be of interest to technology teachers, primary school teachers, children and their parents.
I really love the fairy tale “The Gray Neck” by D. Mamin-Sibiryak. The book based on this fairy tale has bright and beautiful illustrations. Looking at the book again, I wanted to play this fairy tale. I don't have any suitable toys. And then a wonderful idea came to my mind. What if I make a fairy tale with my own hands? But how?
First I need to think about what I can do. I go to the “Design” club and at home in my free time I make bead figures. This means that beads will be the main material of my work.
Problem: is it possible to make attributes for the game from the book yourself?
The goal of the project: to create a layout - an illustration based on the fairy tale “The Gray Neck”.
Object of study: fairy tale layout.
Subject of research: beaded figures.
Hypothesis: if you apply maximum perseverance and hard work, you can create a beautiful attribute for the game.
I set myself the following tasks:
- Re-read the fairy tale carefully.
- Choose a plot based on which I will make the layout.
- Develop the composition of the layout.
- Create a layout.
Stages of project activity:
- Reading the fairy tale “The Gray Neck” and coming up with a composition for the layout.
- Creative work on creating layout elements.
- Presentation of results in the form of a layout.
My conclusions:
- Illustrating a fairy tale yourself is not difficult if you know what you will do, what to make it from and how to make it.
- I can play my favorite fairy tale.
- No one has such attributes for the game except me.
Application. Creative project “Do-it-yourself fairy tale.”
Author: Temlyantsev Vladimir, 8 years old, student 2 “A” class MBOU “Secondary School No. 5”, Usinsk, Komi Republic. Interests: design, vocals, English. Participant in the “Golden Handicraft – 2013” competition. The work was sent by my mother: Temlyantseva Elmira Khanifovna, teacher of the 1st category of the Municipal budgetary educational institution for children of preschool and primary school age “Elementary school - kindergarten”, Usinsk, Komi Republic.
Baba Yaga
Sew a famous witch in a mortar. The hardest part here is the head. Take flesh-colored nylon tights, cut out the tube part and pull it off one side.
Fill with padding polyester, draw or sew button eyes. Embroider the mouth with red thread. Form a nose and tighten the thread around it.
You can also tighten the corners of the mouth and eyes to give the face a lively look, and define the fingers.
For a dress and a scarf, take old rags, torn shreds - the old woman is far from fashionable. Embroider the gray hair that escapes from under the scarf with white thread. Hand her a broom made of twigs.
Crafts from cucumber - master class and photo
This is also a very popular vegetable for creativity. It is dense, so it is easy to shape. If your Cheburashka is made from potatoes, then Gena’s crocodile is made from cucumbers. Cut off the tip of one cucumber so that the vegetable turns into the head of Gena the crocodile. The second cucumber will become its body, make a cut at the bottom to install this part. Add a hat, paws and scarf.
If you decide to act out the fairy tale “The Frog Princess” with your child, then look at how to make one of the main characters in this story.
Cut a piece from the cucumber; this will be the body of the frog. Make Christmas trees from halves of cucumber slices, and make a head from the same vegetable. The eyes will be two halves of a plum. Make an arrow from a wooden skewer by gluing the tip on one side and the stop on the other side. Make a crown and decorate the place with greenery.
A fairy tale from the garden will also allow you to make magic shoes from a cucumber.
First, outline these two vegetables with the point of a knife, then remove all excess. Make bright details from radishes or leaves.
So that your child knows the fairy tale “The Golden Key,” show him how to make a turtle Tortilla. Take a head of cabbage and attach cucumber slices to it with toothpicks. You will attach the tip of the cucumber to the side of the face to make the nose of this character. Bend glasses from wire and sew a cap for this character from fabric.
You can also make a car out of a cucumber. To do this, cut a round hole and remove the pulp. Plant radishes here, which will turn into a cheerful bird. The wheels will be cucumber slices.
If a magical story requires a character like a shark, you can also create one from a cucumber. Look where you need to cut off the excess, and where to attach pieces of this vegetable in the form of fins and a tail.
This is the kind of doodle shark you will get. With its help you can recreate the famous works of Chukovsky. Here's another option that will help create this character. While walking through your garden, look for a crooked cucumber. If you want, the tail and fins will be pieces of green pepper.
If you want to read Chukovsky’s poem about Tatosha and Kakosha to your child, make these characters out of a cucumber. To do this, you need to create teeth with a small knife blade, and then attach the paws and tail. The tongue will become a piece of carrot or pepper.
- See also what crafts you can make from bark and other natural materials
Photos of fabulous crafts
Help the project, share on social networks

0
