Every thrifty housewife has a small supply of various cereals in her kitchen. But not all young mothers know that cereals and seeds can be used not only for food, but also as a material for creating applications.
In today's master classes we want to tell you how you can make unusual applications using natural materials . Working with cereal products will help kids develop fine motor skills , perseverance, attentiveness and, of course, will bring them a lot of positive emotions!
Application with semolina “Winter”
You can even make crafts from semolina with children in the junior group of kindergarten.
Children aged 3-4 years are quite capable of drawing a design they like with glue, and then covering it with semolina crumbs.
To learn more about how to make a wonderful winter landscape with your own hands with your child, you can watch a short educational video.
After carefully studying the step-by-step lesson, you will be able to make any winter-themed semolina applique yourself. And your child will get a unique chance to feel like a real wizard and learn how to create snowdrifts even in the hot summer!
Fly agaric from plastic bottles
For this you will need:
- two plastic bottles of different sizes;
- acrylic paint;
- scissors;
- iron, glue;
- small bottles of imunele or actimel.
- Cut off the bottoms of the bottles and tuck the edges with a hot iron.
- We place the hat on the remaining white plastic and draw a circle.
- We paint the inside of the caps with acrylic paint.
- Glue the circle to the hat, it is ready.
- Then we glue the fly agaric skirt to the middle of the actimel bottle. We make it from a piece of plastic: we make small cuts along the entire length and glue it to the fly agaric leg.
- We connect the hat to the leg using glue.
- We draw white dots on the outside of the cap.
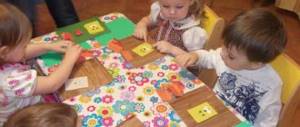
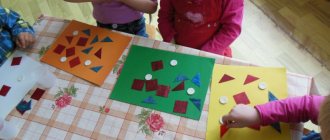
Animal applications from cereals and seeds
If semolina is mainly used for crafts on a winter theme, then other cereal products can be used to create various animals, birds, flowers and even mushrooms. If you are interested in what needs to be done in order for the applique of cereals and seeds to become one of the main decorations of the children's room, we invite you to study several MKs.
Application from cereal “Hedgehog”
To make such a wonderful craft yourself, you need to prepare in advance:
- glue;
- millet;
- buckwheat;
- a thick sheet with a hedgehog drawn on it.
Description of work:
- The creation of the picture will be stage-by-stage, so first you need to smear the hedgehog’s face with glue.
- After this, you need to sprinkle millet on top.
- Then you need to treat the body with glue and pour a layer of buckwheat on top.
- When the adhesive dries, the excess materials can be carefully shaken off.
To form a hedgehog, you can use various templates:
Using template images, you can make a hedgehog not only from cereals, but also from seeds. So, for example, in kindergarten classes, using buckwheat, poppy seeds, peas and caraway seeds, you can make a hedgehog with two mushrooms:
Video examples of hedgehog appliqué made from natural materials
Teddy bear applique made from cereals
Before you start creating a teddy bear, prepare:
- rice, buckwheat;
- PVA glue;
- brush;
- a sheet of thick A4 paper;
- stencil with a bear cub.
Step-by-step instructions for making a funny teddy bear:
- Draw a bear or print its image on a printer:
- Spread the outline of the picture with a teddy bear with PVA and sprinkle with buckwheat:
- Wait until the work dries.
- Shake off excess material.
- Spread the free space inside the figure, then pour rice on top.
- After the adhesive has dried, carefully shake off any excess cereal.
- To make the teddy bear look more elegant, you can place several bows or hearts next to it:
When creating a teddy bear, you can use the following types of templates:
Application from cereals “Turtle”
To create an application you will need:
- some types of cereals: buckwheat, rice, barley;
- sheet of colored cardboard;
- eyes, mouth made of colored paper;
- "PVA";
- brush;
- image of a turtle.
Scheme of work:
- First, form a rice pattern on the turtle's shell.
- Then “color” the free space of the shell with buckwheat.
- After this, generously coat the turtle's head and paws with glue and sprinkle barley grits on top.
- At the same time, do not forget to leave free space on the head for gluing the eyes and mouth.
Application from cereals “Giraffe”
Instructions:
- First prepare a suitable image of a giraffe:
- To decorate the giraffe's body, use corn grits.
- And form the muzzle, hooves, spots and tail from buckwheat.
Small home decor items
It's easy to make topiary that will decorate the interior of your home. Before you make a craft from cereal at home, stock up on the following materials:
- a small flower pot, bowl or mug;
- a strong but short tree branch or stick for the trunk;
- foam ball;
- cereals or coffee beans;
- small decor, ribbons;
- glue;
- gypsum.
First you need to strengthen the trunk in a container by pouring gypsum into it. Then use glue to secure the foam ball to the barrel. Using glue and grains, form a ball. You can pre-paint the base with acrylic paints.
Attach the decor: voluminous flowers and butterflies, leaves. Wrap the topiary trunk with floral tape or satin ribbon or tulle. Decorate the container in the same style. You can use burlap, sisal, etc.
The simplest master class on crafts from cereals:
- take a bottle or small vase made of transparent glass;
- pour a little grain of one type on the bottom;
- Carefully, so that the grains do not mix, pour a layer of other cereals or seeds on top, preferably of a contrasting color and a different texture;
- fill the container layer by layer. It can become a kitchen decoration or a vase for a composition of dried flowers.
Be inspired and impressed, come up with your own ideas for crafts from inexpensive and always available materials. Involve children in creativity, and your home will become unique, filled with the warmth of the soul invested in every craft.
Application from cereals “Nimble little sparrow”
From cereals for children you can form not only pictures depicting various animals, but also birds.
So, for example, to make a sparrow you will need:
- peas, buckwheat, rice;
- "PVA";
- brush;
- thick cardboard;
- pencil sketch with a sparrow.
Lesson for beginners:
- Fill the breast, as well as the head of the sparrow, with buckwheat.
- “Draw” the beak with split peas.
- The wings will be rice:
Pasta angels
From such an angel you can assemble a garland or toys for the Christmas tree.
Materials:
- small wooden ball;
- approximately 30mm;
- pasta (stars, wheels, cones and small ones);
- liquid Nails.
We perform the actions step by step:
- Using liquid nails, glue the wheel to the tube to form a collar.
- Then the ball to the center of the wheel, the head will come out.
- Stick bows under the wheel - these are wings.
- Glue horns-hands to the sides of the tube.
- Hair from tubes on the head.
- There will be a mantle on the star wheel and several on the bottom.
- Paint it with your favorite color.
Golden chicken from cereals
Technique:
Chicken template for cereal applique
- Prepare a pencil sketch of the chicken:
- Spread the chicken's body with glue and sprinkle corn grits on top:
- Wait 5 minutes, then turn the painting over so that the excess falls down.
- “Draw” the beard and comb with red lentils.
- The chicken's eyes will be replaced by watermelon seeds, and the beak will be made from persimmon seeds.
- The wings are dried leaves, the tail is a few maple seeds, and the legs are a couple of date seeds.
Rice crafts - picturesque clocks
For the watch you will need:
- rice;
- arrows;
- numbers;
- glue gun;
- watch mechanism;
- scissors;
- cardboard.
Instructions:
- Cut out any clock shape and any size from cardboard.
- Make a small hole in the middle for the mechanism to exit.
- Attach the clock mechanism to the reverse side using a glue gun.
- Apply glue to the front side.
- Add rice.
- Attach the arrows to the mechanism.
- Glue the numbers in the correct order.
The work is completed. The clock can be hung on the wall.
Application of cereals and seeds “Sunny sunflower”
Educational lesson for children studying in the middle group:
- Preschoolers aged 4-5 years can try to independently draw a sunflower on a thick sheet of paper:
- After completing a pencil sketch of a sunflower, the children will be able to start laying out the seeds:
- The core of a sunflower is seeds, the petals are corn, and the trunk with leaves of a sunflower is replaced by peas.
- When the details of the sunflower are dry, the children will be able to paint the background of the picture with colored pencils or paints.
Mushrooms made from natural materials
When you walk in the forest, pay attention to dead trees or trunks of old trees.
Most likely, you will see a tinder fungus, from which you can make a real mushroom craft with your own hands. It is advisable to find two tinder fungi of the same size.
Friendly mushrooms in cereal applique
Despite its apparent simplicity, the application with mushrooms is quite complex. Therefore, we recommend starting to perform it together with children studying in the older group.
To make such wonderful mushrooms you need to prepare in advance:
- "PVA";
- brush;
- green cardboard;
- millet, buckwheat, rice;
- hairspray or clear adhesive;
- scotch;
- scissors;
- transparent plastic bag;
- press.
Application of cereals with mushrooms:
- Children studying in a senior or preparatory group can try to make a pencil sketch of mushrooms on their own.
- Having completed this task, children will be able to begin gluing the cereal. The photo shows that the legs of the mushrooms are made of rice, the caps are made of buckwheat, and the pores are made of millet. It is more convenient to glue the cereals one at a time, this way the craft turns out neater and the work “goes” faster.
- The finished painting must be sprayed with varnish or coated with transparent glue. Thanks to this, the cereal will crumble less.
- In order for the “canvas” to retain its natural attractiveness for a long time, it can be covered with a transparent plastic bag. To do this, you need to drop PVA onto the picture in several places, then stretch the polyethylene, while additionally securing it on the back side with tape.
- After this, the craft must be placed under a press.
With the help of applications from seeds and cereals, almost any idea can be brought to life. The main thing during the creative process is not to be afraid to experiment, fantasize, dream!
Plasticine - there is only one warrior in the field
A child can easily make a plasticine “mushrooms” craft without the help of an adult. This material is so versatile that nothing else is needed to make any mushroom.
To create a porcini mushroom, you need to roll out a cylinder - this will be the leg, make a cap from brown plasticine, add white plasticine to the bottom of the cap.
We connect the stem and the top of the mushroom. You can make a green leaf and put it on the hat. Repeat the craft and make another mushroom a little smaller.