Applique is one of the types of fine art. They begin to get acquainted with this type of activity in the nursery group of the kindergarten. The application develops all senses. The child learns to distinguish the colors and qualities of paper and other materials. While doing the work, children begin to think about how to complete the task correctly, how to place the parts, and how to use glue. Tactile fingers feel the thickness of the paper, its structure. Fine motor skills of the hands and fingers develop during the actions performed, as well as finger strength when using scissors.
The sense of beauty, aesthetic perception of reality, creative abilities and the ability to create a composition from individual details develop. In the fall, kindergarten often plans to study the gifts of nature. Children learn what fruits adults collect in fields, vegetable gardens, and orchards. During this period, classes on the application “Vegetables and Fruits” are also conducted.
Nursery group
Young children first study the properties of paper and master it tactilely. Then, following the example of the teacher, in a playful way they learn to lay out the finished parts on a sheet of paper. Don't use glue yet. Later, individual small pieces begin to be glued on. For example, when making an application “Vegetables”, a teacher can plan the topic “Canned food”. Children are given a sheet of paper cut out in the shape of a bottle and ready-made parts - vegetables. The kids put them in a jar and “preserve” them.
When teaching gluing is carried out with children, you can take the following options for topics. For example, plan an application “Vegetables on a plate”. To do this, the teacher prepares round sheets of paper, and the kids lay out the prepared vegetables so that they do not overlap each other. Give no more than two details. For example, a red circle is a tomato, and a green oval is a cucumber.
MAGAZINE Preschooler.RF
Summary of GCD in the junior group “Compote from apples”Goal: developing interest and a positive attitude towards drawing.
Tasks:
- Educational: introduce the “stamping” .
- Developmental: develop communication skills, verbal and logical thinking, reveal the possibilities of using various objects in visual activities.
- Wellness: enrich children’s motor experience, develop fine motor skills, strengthen visual muscles, vocal apparatus.
- Educational: to develop independence, the ability to listen to each other and
work in a team, cultivate emotional responsiveness.
Vocabulary work: sweet, tasty, sour, compote, leaf fall, red, yellow, green.
Methodological support:
- handout: drawing kit according to the number of children: stamps. Small dishes with paint, album sheet, hand napkins;
- demonstration material: jar, lid, apples, sugar, hot water, jar template with printed apples;
- audio recording of L.V. Beethoven's "Moonlight Sonata" (for kids),
- easel.
GCD move.
Game motivation.
Children enter the group and sit on chairs.
Autumn is coming (with a basket of apples covered with a napkin).
- Hello guys! I am Autumn.
If the leaves on the trees have turned yellow, If the birds have flown to a distant land,
If the sky is gloomy, if it rains, This time of year is called autumn. (M. Khodyakova).
— Guys, tell me, what happens in nature in the fall? (Children's answers).
- Well done boys!
— You know, in the fall they harvest vegetables and fruits. What do you think is in my basket?
Guess the riddle:
Round, ruddy, fell from a tree. (Apple).
That's right, it's an apple. I have apples in my basket. Look how beautiful they are (takes an apple). What color is the apple? What shape? (Children's answers). Sasha, what does an apple taste like? That's right, the apple is sweet and juicy (individual repetitions).
— Guys, what can you make from apples? (Children's answers).
- Yes, make jam, dry apples for the winter and cook compote! To remember the taste of fresh fruit on cold winter evenings, apples are placed in a glass jar, filled with hot water and covered with a lid. I'll show you how this is done now.
Autumn comes to the table:
- Now we will put apples in a jar (puts apples in a jar), and then pour in sugar (pours in sugar) and fill it with hot water (pours in water, then closes the jar with a lid.)
- The compote is ready! Did you like it? (Children's answers).
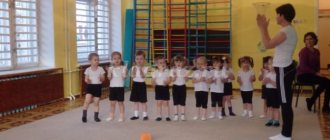
Physical exercise.
Fruits.
We will cook compote. March in a circle.
You need a lot of fruit. Here. Show with your hands - “a lot.” We will chop apples, we will chop pears, we will squeeze lemon juice,
We'll put in some drainage and sand. Imitate how they crumble, chop, squeeze, lay, pour sand. We cook, we cook compote, Turn around yourself. Let's treat honest people. Clap. The children sit at the tables.
- Guys, do you want to learn how to close a compote? (Children's answers).
- I'll teach you. We will draw the apples with a foam pad, that is, we will print them.
Demonstration of drawing techniques.
- Guys, your jars are already ready, all that remains is to fill them with apples.
But first, let's prepare our fingers.
Finger gymnastics.
Apple tree.
There is an apple tree by the road, hands clasped above your head, fingers unclenched. An apple hangs on a branch. Place your wrists together. I shook the branch vigorously, hands above my head, moving back and forth. Here we have an apple. Palms in front of the chest, imitate holding an apple.
I’ll dig into the sweet apple, join my wrists, spread my palms. Oh, what a pleasant taste.
- Now, you can start drawing!
Independent activity of children. Individual assistance.
- Well done! This is the compote you got!
Children get up from the tables and, together with Autumn, walk like a snake along the tables, looking at all the work.
- Guys, I’ll take all the jars of compote with me and give them to the animals, bear cubs and bunnies. And it’s time for us to say goodbye, but finally, I want to treat you to apples!
Autumn distributes apples to children from a basket.
The children say goodbye to Autumn and leave.
| Next > |
Junior group
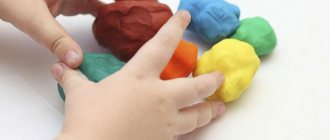
For three-year-old children, program tasks deepen and expand. Children begin to experiment with ways to influence paper. For example, when making the “Vegetables” applique, they can use the technique of tearing paper or using crumpled paper to make the image three-dimensional.
The number of parts is gradually increasing. Since the beginning of the year, the teacher has completely prepared the forms for appliqué, cutting them out of paper himself. Then he begins to introduce children to scissors, how to use them, and safety precautions when working with the tool. But for now this is taking place in the form of individual tests. Self-cutting is not yet used for this lesson.
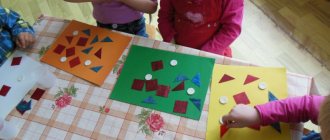
Children learn to correctly place parts on a sheet of paper, following the example of the teacher. Fix colors and their shades. They learn to navigate in space. Repeat geometric shapes learned in math classes.
Once a month, joint work is planned on a large sheet of whatman paper. For example, to make a collective “Vegetables” appliqué, children can distribute them among the beds. Tomatoes and cucumbers on a bush, pumpkin in a garden bed, potatoes below ground level, beets and carrots in the middle. The roots are under the line, and the tops are on top. Children repeat where things grow, reinforcing their knowledge about nature.
Food basket
A fruit basket can become not only an interesting craft, but also a decoration for a summer table. To make it we will need:
- Large watermelon;
- Sharp knife;
- Fruit for filling.
Let's get to work!
The base of our basket will be a watermelon, so the first thing you need to do is carefully inspect it for damage. Then you need to rinse it well and wipe dry with a towel. Now we take the prepared template for the handle of the future basket so that we know how to cut it out correctly. And carefully cut it out according to the template.
Next, you need to clean the insides of the watermelon from pulp and seeds.
Please pay special attention that this must be done very carefully and carefully, trying not to damage the base.
After the watermelon is cleared of pulp, it must be thoroughly dried from the inside. To do this, first wipe everything with paper towels, and then put newspaper or paper inside to absorb moisture. It is best to change the paper several times until the watermelon is completely dry from the inside.
Related article: Do-it-yourself bookcase from scrap materials with photos and videos
While the watermelon is drying, you can start decorating its exterior. You can cut out various elements directly on the peel, or you can use paints and paint the watermelon in any color.
And finally, we move on to the last step. Fill the basket with fruits and berries.
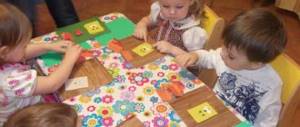
Application "Vegetables" in the middle group
Children at the age of 4 already begin to learn how to use scissors. First, it’s about holding the tool correctly in your hand and cutting the fringe. Children at this age learn to create compositions using plot appliqué. They use work with design elements from geometric shapes, add elements made by drawing individual parts, with the addition of seeds or cereals.
For example, let’s take the “Vegetables” applique on the “Carrot” theme. The teacher prepares the following details for the children:
- orange triangle;
- stripes to match the color of the vegetable;
- green trapezoid.
The guys first do the work with scissors, cutting the fringe of the green tops, making cuts on the trapezoid not completely. Then the green part is glued on first with the cut parts facing up. Next, the main triangle of carrots is glued so that it is located on top of the tops. Only the fringe should be visible. The last part of the work will be to add volume to the vegetable. To do this, take orange strips and crush them in your hand. Next, without completely smoothing the parts, glue the strips across the carrots. The work is done from top to bottom.
Theme "Fruits on a plate"
In the middle group, when working with paper, they use different options. These include thin napkins, cardboard, smooth glossy paper, and structured thick paper.
In the fall, it is also interesting to propose a “Fruit on a plate” theme. Using paper of different quality and thickness, you can achieve the effect of a three-dimensional picture. Such paper can be purchased at a children's art store. Before starting work, children should hold the parts in their hands and learn to distinguish between grooved and compressed paper. The children also learn to arrange the composition so as to create a beautiful still life: some details first, the rest on top of them, and only then the plate itself. Children understand the spatial arrangement of parts.
Work in the senior group
In making the “Vegetables” appliqué, the senior group uses new ways of working with various materials: natural and waste materials, quilling strips and fabric. The methods of work are also new. Children cut out the parts themselves using scissors from prepared geometric shapes. For example, in order to cut a tomato, the teacher gives the child a square, for a cucumber - a rectangle. A five year old should be able to trim corners.
Children also fold a sheet of colored paper using the origami method. The results are voluminous figures. To make a “Vegetables” applique for children, you can also use symmetrical cutting of paper by folding it in half. Then the part turns out to be the same on both sides.
Quilling
Nowadays, the technique of creating pictures using the quilling technique is gaining popularity. It is very interesting for children to make the “Vegetables and Fruits” applique from strips of paper by twisting them. Many sets of different colors and thicknesses are sold.
You will need PVA glue, a thin stick and quilling kits. Children quickly understand how to use this technique.
Parents, after reading the article, can try to make an autumn gift for their grandmother or teacher this weekend, taking into account the age requirements of the kindergarten curriculum.
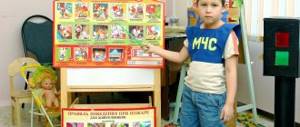
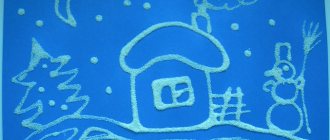
Children's drawings with seals and stamps
Children love to draw using stamps and seals. One movement - and a drawing suddenly appears on blank paper, as if by magic. Seals and stamps expand a child’s capabilities – with them, even a one-year-old baby can create a beautiful picture without much effort.
This is another interesting way of drawing, which will be even more interesting if you use not quite ordinary stamps: for example, stamps from apples and other fruits, from vegetables, from berries. From all this you can make very original stamps of varying degrees of complexity.
I'll start with the easiest thing: with prints of fruit halves. You can simply make such prints for the sake of the process itself, or you can use this method to make a postcard or craft: cardboard jars with compote and jam.
These jars can then be used to decorate the shelves of a real or toy kitchen. Can be used for games or pretend treats for relatives. Or dolls and other toys, if relatives say that they are already full and don’t want to treat themselves anymore;)
How to make a “Compote” craft using fruit stamps
For kids, making this craft can be divided into two parts:
- Paint the cardboard blank in the shape of a jar in the desired color (the color of the syrup). You can skip this point if you cut the blank out of light yellow or light pink cardboard)
- Make imprints of fruit halves on this blank.
Older children can do this craft in one go. They can wait for the painted “can” to dry and then make prints of the fruit. They can also cut out a jar-shaped blank from cardboard using a template on their own (adults do this for kids).
Especially for the readers of my site - a jar template I drew (a three-liter jar, in which compotes are usually sealed, is enlarged by clicking):
It can be printed on A4 sheet, but my daughter and I made these smaller jars, two per sheet.
It is better to take small fruits for this craft so that more prints can fit. Rita and I found a suitable small apple in our garden. I cut it in half.
Stamp – half an apple can be dipped into a saucer with paint or applied with a brush (this way you can make two-color prints, for example, one half of the apple is yellow, the other is orange, etc.)
Rita painted over the poorly printed areas with a brush of the same color. After the paint had dried, she used a felt-tip pen to add seeds to the apples.
We cut out the lid for the jars from foil with a paper base (from chocolate) to make it look more like a real jar of compote.
Rita did not like the compote with bright red apples. She was even upset that the color of her apples turned out to look more like tomatoes than apples. Well, that’s okay, it happens;) But the next compotes turned out better.
In the same way, we made pear compote and even a jar of strawberry jam (we could also make cherry and plum jam, but we didn’t have enough patience for them).
We decorated the lid of the jam jar using a white napkin (we made the top part from the same one) and a satin ribbon.
Our “stocks for the winter” 
Other ideas for making and using crafts using this technique
- This jar of compote can be made using the appliqué technique (blog “Creating with Children”): https://tvorchestvo.wordpress.com/2012/08/03/%D0%B7%D0%B0%D0%B4%D0% B0%D0%BD%D0%B8%D0%B5-%E2%84%96-11%D1%8F%D0%B1%D0%BB%D0%BE%D0%BA%D0%B8/
- Using similar stamps, you can make a pizza by cutting out a circle from beige or light brown paper or cardboard and making imprints on it with halves of a tomato, pepper and mushroom.
- You can make such prints on fabric using an apple, pear, or lemon. But celery prints look especially beautiful.
Happy creativity! © Yulia Sherstyuk, https://site Copying site materials is prohibited and is punishable by law.
All the best! If the article was useful to you, please help the development of the site by sharing a link to it on social networks.
Posting site materials (images and text) on other resources without the written permission of the author is prohibited and punishable by law.
.
Today I will share with you our
fall canning recipes
.
This children's craft
took pride of place on our creativity wall.
With the beginning, mothers and grandmothers begin to prepare for the winter
.
Our kids are always hanging around. Maybe even something. But, as a rule, autumn canning - marinades and compotes - is somewhat dangerous for children. But why not make it safe, useful and interesting? Well, for example, in the form of an application
?
For application autumn canning
We will need the following products materials:
- White paper
- Colored paper
- Pencil
- Multi-colored cheerful cardboard
- Paper ribbons
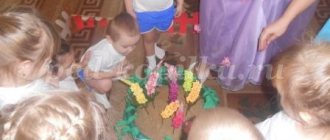
For this craft, I first made some preparations: I drew a jar for future marinades and compotes, cut out cucumbers, tomatoes, apples and pears from colored paper. And also lids for jars.
Having caught Arseny’s mood for creativity, I laid out all the preparations in front of him. I suggested that he not smear each vegetable separately with glue, but rather lubricate the jar with it, so to speak, pour the marinade, or syrup. When the jar was thoroughly greased with glue, Arseny placed cucumbers in it in random order. Then he glued the lid on. And with my mother’s help – a ribbon.
This is the jar we got with cucumbers:
At this point, Arseny’s interest cooled, and the whole matter had to be put aside for a while. Imagine my surprise when in the evening my little son, seeing where I had put the empty jars away, asked me to take it all out again. Now he made a jar of strawberry compote.
Alyosha also didn’t want to stand on the sidelines, and packed pickled tomatoes tightly into his jar, so that his mother’s preparations were not enough.
I must admit that for such a children's craft
I was inspired by the cover from a set of colorful fun cardboard.
From the first minute, this picture stuck in my head for a long time until I realized it. But then, I found out that there is no less amazing canning with imprints
of real fruits and vegetables. Julia, the author of the blog “Sea of Creative Ideas,” offered such a delightful option for creativity. We decided to try this “recipe”. And they made this unusual postcard:
On the outside it is a compote of pears and apples in the form of an appliqué, and on the inside there are apple prints. It turned out very interesting and unusual. At least we liked these DIY crafts. And you? Share your impressions in the comments!
Good luck to everyone and happy autumn preparations!
Love and take care of yourself and your children!
With love,
Application for children 5-6 years old “Fruits on a plate.”
Master class with step-by-step photos. Author: Golovatov Ivan, pupil of the senior group of MBDOU "Cherlak kindergarten No. 2" Head: Teacher of the 1st category Shaikina Liliya Aleksandrovna. Description of the material:
I offer you a master class on making appliques from colored paper; this material will be useful for kindergarten teachers for individual work with children, for parents and even for grandparents!
Purpose: The master class can be used to decorate a child’s room, as a gift to someone, to decorate an exhibition in a kindergarten or a group room. Goal:
Making an application from colored paper “Fruits on a plate”
Program tasks
: Learn to cut symmetrical fruits from paper folded in half, as well as from paper folded like an accordion. Strengthen the ability to think logically when solving riddles. Cultivate accuracy and patience. Develop a sense of composition.
Progress of the master class:
Educator:
Do you like solving riddles?
Child: Yes Teacher:
Guess the riddle: Pear, apple, banana, Pineapple from hot countries.
These delicious products are collectively called... Child: Fruits Teacher:
This fruit in a bright shirt Likes it to be hot. Doesn't grow among aspens Round red...
Child: orange Teacher:
There is a pile of sweet berries on a string-stalk. You can put them on a large dish.
Child: Grapes Teacher:
The fruit looks like a tumbler, wears a yellow shirt.
Having broken the silence in the garden, it fell from the tree... Child: Pear Teacher:
Who hid His ruddy, strong side under a leaf?
They hide under the sheets in the heat... Child: Apples Teacher
: How quickly you solve my riddles!
Look at the plate I have with fruits that you guessed, which fruits are in the illustration? Child: Pear, grapes, orange, apple! Educator:
Look how bright and beautiful they are, you just want to eat them!
Do you like working with colored paper, glue and scissors? Child: Yes! Educator:
Would you like me to help you make an applique of such fruits on a plate?
Child: I want! Educator:
What do we need to prepare for work?
Child: Colored paper in yellow, purple, brown, pink with polka dots for the plate, orange and red, glue, scissors, pencil for drawing a cut line. We prepare everything you need. Educator:
To make the work easier, I suggest first cutting out approximately identical squares from colored paper for an apple, a pear and an orange, and rectangles for a plate, grapes and a stand for a plate. Cut out squares and rectangles. Then we fold the squares and rectangles in half or corner to corner, putting the rectangle for the grapes aside for now. To the right of the fold I draw silhouettes of an orange, a pear, an apple, a plate, and leaves for decorating fruit. The child cuts (I remind you of the rules for working with scissors) Put it aside. We take a purple strip, fold it like an accordion and cut out oval grapes (if the child finds it difficult, I suggest first drawing with a pencil on the first fold). We lay out the fruit on the sheet, discuss how best to distribute. Let's start working with glue (discussing the sequence of work)
We carry out the application.
1. Glue the plate stand at the bottom of the sheet (make sure the applique is in the middle of the sheet)
2. Glue a plate a little higher.
3. Glue the pear 4. Distribute the grapes and glue them one by one, starting from the bottom 5. Glue the orange. 6. Glue the apple. Decorate the fruit with leaves made from strips of green paper. This is the applique Vanya and I came up with! Fruit patterns
Goals:
Give children basic knowledge about fruits. Enrich children's vocabulary on the topic “fruit”. Form stable ideas about size (high-low), quantity (one, two, many), color. Clarify knowledge about the concept of “half”. Teach children to compare collections of objects. Practice sculpting, gluing, drawing with pencils and fingers. Develop the ability to coordinate movements and lyrics. Develop thinking, motor skills, visual and auditory concentration, coordination of movements, tactile and taste analyzers.
Equipment:
A wonderful bag with fake fruits. Paired pictures “Fruits”. Background picture with a tall and low tree and a broken ladder, color silhouette pictures of six apples and four pears, counting sticks. Pictures showing boxes with four rectangular sections (for pears) and six square sections (for apples). Educational game “Worms in Apples” according to the number of children. Educational game “Cut in half.” Blank picture “Apple tree”, red and green napkins, PVA glue Blank picture “Pear”, yellow and green finger paints. Blank picture “draw a line from the fruit to the basket”, pencils. Blank silhouette picture “jar”, colored silhouette pictures “fruit”, glue. Yellow and orange plasticine, stacks, modeling boards, apricot kernels. Balls of different sizes, a watermelon ball, baskets (or other containers) of different sizes. Silhouette pictures of “fruit”, cut out of thick cardboard, multi-colored clothespins. Double pourers with water, with pictures of “orange orange” and “yellow pear” pasted on them, brushes, orange and yellow gouache. Real fruit cut into pieces. Audio recordings: “Clap with us.”