Methodological basis for teaching design in the younger group of kindergarten
Construction in a preschool educational institution is the process of children creating crafts and buildings from various materials (paper, plasticine, natural and waste materials, special construction kits and construction sets).
Goals and objectives
Children aged 1.5–3 years are introduced to various construction sets and construction sets and taught how to work with them. They explain the features of construction set elements and how to use them in buildings for various purposes (what is a brick, pyramid, cone, ball, plate, etc., how to use them in building models). Develop the ability to approach a given task creatively. They teach children to build according to a ready-made model, according to the image in the picture, and encourage the desire to build something on their own.
From a very early age, a child needs to develop creative abilities.
One of the goals of design classes is to develop the eye and the ability to evaluate spatial relationships (build a small garage for a small car, a large bed for a large toy). The teacher teaches the children to use what they have built in further play and develops the children’s imagination. For example, a path made of plates can be a path through a forest, a highway, a railroad track, an airplane runway, etc. Various natural materials from which you can build a variety of crafts will also help develop children’s imagination.
An indispensable condition for conducting design classes is cleaning the workplace after yourself. This teaches kids to be neat.
Suitable materials for construction
For design classes in the younger group, it is best to use various construction kits and sets: plastic cubes, wooden sets, Legos, various building kits.
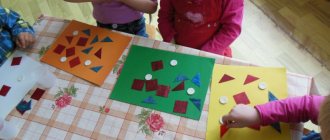
In addition to building with blocks, you can use other age-appropriate techniques and materials. So, multi-colored paper napkins are an excellent material for design. Traditionally, colored paper, cardboard and plasticine are used. Seasonal natural materials are also not ignored.
All parts of any construction sets for children 1.5–3 years old must be large
If the teacher wants to use appliqué elements in the lesson, then he will need to prepare the necessary details in advance, since children, due to their age, cannot yet do this on their own. It is also necessary to use a glue stick - children will have less opportunity to get smeared from head to toe and stain everything and everyone around them.
In the younger group, it is better not to give children tasks of varying difficulty. The element of competition is also inappropriate here. The only thing that can be used is slightly different tasks, but of the same complexity when working in a group. For example, students design furniture for a room. Some of the children make a bed, some make a chair, some make a table, etc.
All parts of any construction sets for children 1.5–3 years old should be large. This also applies to other materials - safety first!
Elements of play and learning in design classes
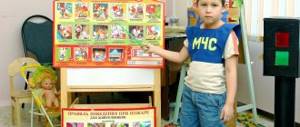
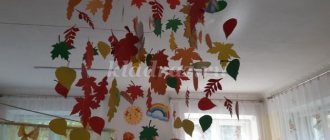
Design classes should also be educational and informative. Therefore, an introductory part is required at the beginning of the lesson. For example, the teacher is going to use autumn leaves. This is an excellent opportunity for kids to not only collect leaves for crafts on a walk, but also find out which leaf belongs to which tree, understand the difference between trees and shrubs, listen to poems, fairy tales and stories about nature.
If you are planning a lesson on designing furniture, it is worth showing pictures in advance, telling the children how furniture was made before, how it is made now, what materials are used to make furniture.
Children of any preschool age perceive information best during play. Therefore, it is advisable to play out every moment of the lesson, use rhymes, songs, fairy tales, and toys. Evaluation of work should also be carried out in a playful way.
Methodological aspects of design in the second junior group
Construction is a rather complex activity for preschoolers, in which one can find a connection with the constructive, technical and artistic activities of adults. Here a plan is preliminarily outlined, suitable material and work technique are selected, and the result of the activity is aimed at practical application, for the child it is a game.
At 3–4 years old, children already become more independent, active mentally and physically. Thanks to this, children’s ideas about objects and phenomena of the world around them are significantly enriched, which is necessary for design activities.
Tasks of teaching design relevant for the second junior group
- Continue to learn to distinguish and name the main building elements (cubes and bricks, plates and cylinders).
- Develop the ability to combine parts of different colors in buildings.
- Learn to place building materials (bricks and plates) vertically in different ways: in one row, along the perimeter of a quadrangle, in a circle.
- Encourage them to create structures from different parts: alternate posts with cubes, decorate gate posts with triangular prisms.
- Learn to change buildings in different ways: by replacing parts or by building them up in length or height (add carriages to a train, make the tower taller).
- Lead the kids to analyze the created buildings.
- Encourage preschoolers to create buildings according to plan (independent choice of theme, selection of material), learn to play with them, combine them into a story game (the path and houses are a street, a table, a chair and a sofa are doll furniture).
- Develop in children the habit of carefully putting items in a box after finishing an activity or game.
- Teach kids to transform paper blanks into three-dimensional forms in various ways: bending, tearing, crumpling, twisting.
Types of design in the junior group
When working with pupils of the second junior group, 2 types of design are used:
- Technical (or model) - design from building materials (parts of various geometric shapes: cubes, bricks, bars, plates, cylinders, arches) and Lego. In this way, the children model the simplest real objects, trying to achieve structural and functional similarity (a house with a roof, a gate with a flat ceiling or an arch, a sofa with a back and armrests, etc.). As experience is gained, designs become more complex by adding new elements. The parts of the sets are regular geometric bodies, which makes it possible to obtain a building with a proportional and symmetrical arrangement of parts with the least difficulty.
Model design involves the use of ready-made building material
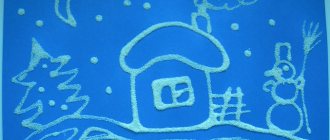
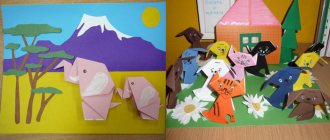
- Artistic is designing from paper and natural materials (in the younger group this is creating buildings from snow and sand on the site). Such activities no longer involve precise geometric shapes; crafts can only vaguely resemble real objects and objects. However, their aesthetic value is more valuable: the child is given more opportunity for improvisation and decoration. Such crafts do not always have a functional purpose: for example, you can’t always play with a paper heart, but you can give it to your mother or hang it on the wall at home so that your baby can admire his creation. When creating an image in artistic design, preschoolers express their attitude towards it, easily violating proportions, color and shape (for example, the body and head of a bird or animal are just 2 circles of different sizes).
Artistic design involves improvisation
Construction from natural materials in the younger group is practiced not in class, but during a walk. Children make paths, slides, and bridges from sand using molds and buckets, and prepare Easter cakes and pies. In winter, snow makes wonderful slides, snowmen, animal figures, and fortresses. Thus, construction fits organically into the gameplay. Here children quietly become acquainted with the properties of materials: they understand that sand can be loose and damp, but buildings can only be made from the latter. Snow is also not always suitable for sculpting: when it is too cold outside, it crumbles in your hands, and only sticky snow is suitable for creating buildings.
Snow constructions are often collective in nature due to their scale
What materials are appropriate to use in the younger group
For the lesson to be successful, the teacher must carefully consider what material to use. For model construction, individual building kits are best suited, including parts of various shapes and sizes (parts can be either wooden or plastic). After all, it is more convenient for children of the fourth year of life to create buildings one by one.
The best option for working in a younger group is to provide each student with a separate construction set
Any material that children work with should attract them with its appearance.
For Lego construction, sets with large parts and simple connections are selected. You can use special thematic kits (for example, LEGO Duplo, which includes arches, semicircular shapes, beaks, animal figures, etc.).
The Lego Duplo set includes specific pieces that can be used to build interesting structures.
As for paper construction, the teacher uses paper of different colors and qualities (thin and cardboard, matte and glossy) and glue in classes. Also, to complement the craft, children are provided with additional materials: colored pencils, plasticine, foam rubber, toothpicks, cotton wool, yarn, etc.
Paper crafts using foam rubber and toothpicks are quite feasible for younger preschoolers
Natural material is the easiest to use, since it does not require material costs, but is located right under the children’s feet. On the other hand, the construction of buildings depends on weather conditions and the season.
Dimensions of crafts, preliminary production of parts
Buildings made from building material are usually associated with some kind of toy (for example, a gate or garage for a car, furniture for a doll, a corral for a toy horse). In accordance with this, the size of the structure is determined.
The size of the constructed structure must correspond to the size of the toy
Paper art crafts are usually not large. Let the bird, heart or sun not exceed the size of a child's palm. As for buildings made from natural materials - snow and sand, they can be quite voluminous. Kids love big snow buildings that they can wrap their hands around. They also like to compare sand cakes by size, even if they are made using a large children's bucket.
As for preparing the material for the lesson, children should have more details available than necessary. For example, when building a gate, let the kids think about it and choose the necessary elements from a variety.
It is very convenient when the material is provided to each child in a separate container or box: this organizes the preschooler and teaches him order and neatness.
Construction from paper requires the preliminary production of initial parts. In the younger group, this is entirely the responsibility of the teacher. He cuts out blanks of different shapes and, if necessary, makes folds and cuts. The task of little constructors is to fold and glue the elements. If crafts require decoration with applique details, then the teacher will also provide them.
Auxiliary techniques for creating crafts (drawing elements, applique)
The teacher can invite children to decorate the finished craft with architectural elements. This will not affect its functional purpose, but will make it more aesthetically valuable. For example, a fence made of cylinders can be decorated with cones.
Paper construction is closely related to activities such as drawing, applique and sculpting. Applique details will add expressiveness to the craft. For example, a Christmas tree can be decorated with multi-colored plasticine balls and garlands, and spots can be made on a butterfly in the same way. For animals and birds made of paper, you can draw eyes, antennae, spots with a pencil or felt-tip pen (the nose looks good from plasticine).
As for the snow buildings on the site, the children really like to paint them (of course, this is done together with the teacher). For these purposes, it is best to use gouache.
A snow figure will become more expressive if you paint it with gouache
Individual approach in class
In the second youngest group, preschoolers still differ greatly in their abilities. After all, some of them attended a nursery group, while others only recently came to kindergarten. And the teacher must take this point into account when organizing constructive activities. Some kids need special attention and guidance (for example, once again demonstrate the sequence of actions when building a bridge, gate, fence, etc.).
For children who quickly complete the task, it is necessary to complicate it or give it something additional (for example, build another gate for a taller car, or build a wider sofa so that not 2, but 3 dolls can be placed on it, or decorate a fence of cylinders with cones). The same applies to paper crafts: fast-achieving preschoolers can decorate it with applique details or make another one, but of a different size or color.
Techniques for working in a design class
When teaching junior group students how to design, the teacher uses various methods and techniques.
The teacher demonstrates to the children the sequence of creating the structure. At this age, you can already begin to use the simplest schemes, explaining them in detail to preschoolers.
In the younger group you can already start designing according to diagrams
The teacher consolidates the skills acquired in the nursery group, and at the same time develops new, more complex ones. So, the guys already know how to place bricks and plates horizontally (in one row - a road) and vertically (at a certain distance or close to each other - a fence for a house, an enclosure for animals). But now the task becomes more complicated: children are asked to think about how to make a large car pass along the road (lay the parts in 2 or 3 rows or place them across, next to each other).
When working with children 3–4 years old, much attention is paid to the preliminary examination of the sample and the identification of its components. So, the house is made up of walls and a roof, and the gate is made up of cylinders (bricks) and a ceiling.
The teacher should not give preschoolers ready-made solutions, but push them to independently solve a constructive problem. For example, a large car cannot pass through this gate; you need to think about how to rebuild it. Or the cow pen is tall and large, but the calves are smaller in size. What kind of pen should we build for them?
To arouse preschoolers’ interest in buildings, the teacher shows how to play with them, provides the children with suitable toys, helps to give the game new content, and direct its plot.
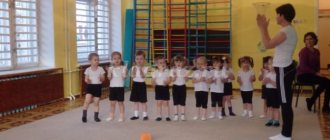
In order for constructive activities to captivate children even more, the lesson should include poems, songs, fairy tales, and physical education on relevant topics. For example, when the guys are building a wide road for trucks that will carry fruits and vegetables, you can sing them a verse from the song “Harvest” (music by A. Filippenko, lyrics by T. Volgina):
- We're going, we're going home by truck. Open the gates, the harvest is coming from the field. Oh, yes, open it, the harvest is coming from the field!
When constructing a tower, you can tell a short fairy tale about a princess who was imprisoned in a high tower by an evil sorcerer.
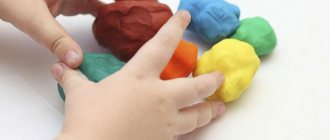
When creating crafts from paper, first the teacher simply introduces the kids to this material: lets them touch it, feel its smoothness or roughness. The next stage is for preschoolers to develop basic techniques for working with paper: it turns out that it can be crumpled, folded, twisted, and torn off large and small pieces. Of course, kids will be interested in such manipulations, especially since they are accompanied by characteristic sounds.
For many artistic crafts, the teacher can use a universal template - a large and a small circle (one is cut out from the other). The large one, folded in half, is the body of an animal or bird. A small circle is glued to it - the head. Next, the design is supplemented with details - spots or stripes are drawn, eyes, antennae, and wings are glued on. The result is a tiger, dog, cat, elephant, bird, etc.
In the younger group, animals and birds can be made from paper using a simple blank
You can also use the method of creating crafts from paper strips of different thicknesses and lengths. This way you can make a sun, an octopus, a heart, a bird’s tail, etc.
When creating buildings from snow, the teacher guides the actions of preschoolers - teaches them how to work with a shovel. So, to make a slide, the snowdrift is first compacted, and then a slope is formed: you need to move the shovel several times from the top of the slide to its foot.
Preparing and conducting design classes for the younger group
Let's look at examples of several design classes in the younger group of kindergarten.
Cubes and building sets
Using cubes and various building sets, you can conduct many thematic activities. This includes getting to know furniture, building bridges and arches, building fences, laying paths, and using various shapes for construction.
At the beginning of classes, you can explain what this or that part of the designer is used for, and what can be done with its help. Tell us that if you are going to build a staircase out of cubes, then the more steps you plan, the more cubes you will need. To explain the concepts of width and height, you can use small and large machines and build suitable gates for them.
When making furniture, also use different sizes: a small mouse sleeps on a small bed, and an elephant sleeps on a large one. Teach children to make benches - high and low.
Using cubes and various building sets, you can conduct a number of interesting thematic activities
Be sure to build paths - narrow, long, wide, short. Then let the kids figure out how to use them in play. You can collectively come up with a story or fairy tale and act it out using small toys.
When building fences, tasks need to be made more difficult from lesson to lesson. First, children build a fence from identical parts, then they use parts of different sizes, alternating them, then they can take not only parts of different sizes, but also those that differ in color. You can build fences according to a model made by the teacher, or according to a picture.
The pens can also be played out using, for example, bird figurines. Here the birds hid in a pen. They sat down on the posts. They flew outside. But a bird of prey is flying - you need to quickly hide back.
Application of autumn leaves “Lion Cub”
Before this lesson, it is necessary to carry out preliminary work. You will need to print out an image of a lion cub from the cartoon “How the Lion Cub and the Turtle Sang a Song” on a piece of paper. You will also need plasticine and wide double-sided tape. You need to stick the tape along the edge of the paper without tearing off the top protective layer - the guys will do this.
On the eve of class, while walking, you need to collect beautiful autumn leaves and leave them to dry between sheets of newspaper and under pressure (otherwise the leaves will shrink and become brittle). Children can handle this quite well.
Immediately before class, children watch a cartoon. The teacher discusses with the kids how beautiful the lion cub’s mane is and how they will now make one from the prepared leaves.
Applique of autumn leaves will require a little preliminary work
The teacher gives the children sheets with a picture of a lion cub and plasticine. You need to spread a thin layer of plasticine over the mane on the sheet with your fingers, kneading it well. The teacher shows the children how to do this. Then beautiful yellow, red and orange leaves are glued on top of the plasticine. Then the protective layer is removed from the tape and the leaves are glued on top - you get a picture frame.
The amount of work in this task is too large for children of this age, so you can conduct as many as 4 lessons:
- We collect the leaves and lay them out to dry.
- Distribute the plasticine over the mane.
- We make a mane from leaves.
- Let's make a frame.
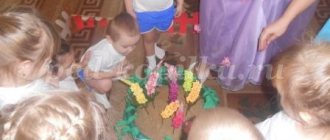
Application made from colored napkins “Umbrellas”
Napkins are an excellent material for children's creativity, which perfectly develops fine motor skills. To work, you will need to pre-print the outlines of the umbrellas on halves of an A4 sheet.
Necessary materials:
- glue stick,
- colored napkins,
- plates for balls.
Before the start of the lesson, the teacher tells the children why it rains, what an umbrella is for, the history of umbrellas, offers to listen to songs about rain or reads rhymes.
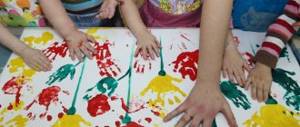
First, children tear the napkins into approximately equal pieces, and then roll them into balls with their fingers. Having made the blanks for the applique in this way, proceed to the main stage. The outline of the umbrella is filled with glue, and napkin balls are glued there.
Application made from paper napkins develops fine motor skills and color perception of preschoolers
Let the children show their imagination - let them make different umbrellas.
Dots of glue are applied around the umbrella and blue balls are glued - this is rain. When parents arrive, you can arrange an exhibition of children's works.
Craft "Peacock"
For the lesson on making a peacock you will need:
- colored napkins,
- plasticine,
- glue stick,
- halves of cotton swabs,
- tail blanks made of cardboard.
Before the lesson, the teacher tells the children about peacocks and shows pictures.
The “Peacock” craft will delight both children and their parents
Let the children make a peacock figurine. Then prepare napkin balls as described above. Glue is applied to the tail blank, then napkin balls are glued onto it. Let the children figure out what kind of tails their peacocks will have.
Table: card index of design topics in the junior group
| Author | Sharypova T.V., teacher MBOU NSHDS No. 77, Arkhangelsk |
| Subject | Description |
| Table for a gnome | Goal: development of creative thinking, the ability to see the possibilities of transforming objects, design skills. Materials:
The teacher suggests transforming the available materials in such a way as to make a table for the gnome. He helps the children apply glue to one side of the cork and put a matchbox on it (to make a table). After work, children play with gnomes (Kinder Surprise toys). |
| Bed for a gnome | Goal: development of creative thinking, design skills, the ability to transform an object, change its purpose. Materials: two matchboxes. The teacher suggests coming up with ways to use matchboxes. Then he shows the finished result of his work - a crib for a gnome - and explains how to make it: insert one box into another (perpendicularly). |
| Wardrobe for a gnome | Goal: learn to carefully glue parts, develop creative skills and the ability to transform an object, change its purpose. Materials:
The teacher invites the children to make a cabinet for the gnome. Shows a sample and then the sequence of actions: apply glue to the side of one matchbox, glue the matchboxes on the sides. |
| Fence | Goal: to develop in children the ability to follow the teacher’s instructions; consolidate the ability to close a space by rhythmically placing bricks on a plane with their long narrow side. Materials:
The teacher, turning to the children, asks what is on their table. Then he says that he will show them how to build a fence for the garden using bricks. “The bricks need to be placed so that the garden turns out to be large. (At the same time, the teacher himself builds the fence, placing bricks on a long narrow plane, and says that the bricks should be placed on the narrow long side. He first remembers with the children where the long narrow side is.) Now the fence is ready. Let's make a garden now. Trees grow in the garden. (Places toy trees.) There is a bench under the tree. (Places a bench.) Matryoshka Tanya will go for a walk in the garden. Now you will build a fence from bricks for the garden where your dolls will walk. There are trees and benches in the garden. When you make the garden, you can play.” The children begin to build a fence. The teacher makes sure that they place the bricks correctly. As a result of the lesson with finished buildings, the game unfolds. Similarly, you can build a garden fence by placing the bricks vertically. |
| Furniture for dolls (chair, table, sofa) | Goals:
Materials:
At the beginning of the lesson, the teacher shows samples: a table, a chair, a sofa, and finds out with the children what parts each of them is made of, how the parts are arranged, and in what sequence the work should be done. The teacher encourages the children to talk about what they saw. For example, he draws children’s attention to a sample and asks them to tell how a sofa can be made, from what parts; what to make the seat and back from, how to place the bricks. Of course, children will not tell everything right away, but they will be able to answer questions. After the teacher finds out with the children what and how the furniture samples are made of, you can invite the kids to build them themselves. At the same time, the teacher distributes the work so that the children sitting at the same table perform different samples: one builds a table, the other builds a sofa, etc. The teacher monitors the work and encourages the diligence of the kids. At the end of the lesson, the teacher says: “We have dishes on the table. Think about how you can play. Take dolls, dishes and play. The dolls will come to visit and sit at the table; What will you treat them with, what will you talk to them about?” Children combine their buildings, and a game unfolds, during which they become convinced of the practical need for their work. |
| Doll house | Goals:
Materials:
At the beginning of the lesson, the teacher draws the children’s attention to a new detail - a prism - and informs them that today they will learn how to build a house for their nesting doll. The teacher reads a poem:
Then the teacher builds a model and shows the children what a house for a nesting doll should be like, where it has walls, windows, a door, and a roof. He explains how to build a house: “First, let’s put a brick. (Places the brick on a long narrow edge.) This will be the back wall of the house; Let's put 2 more bricks on each brick, put them next to one side and the other. We will make a roof of prisms on top of the house. (Places 2 prisms.) Here is the house. There is a window at the back of the house and a door at the front. A nesting doll will live in the house. Now you build houses for your nesting dolls. What will you do first? (The walls are made of bricks, then the roof.) That’s right.” The children build, and the teacher watches their work, ensuring that they do it in the suggested sequence. Those who finish building the house are allowed to play. If the child cannot come up with anything, the teacher advises how to develop the game. |
| Ladder for cockerel | Goal: to teach children, focusing on a model, to carry out construction and name individual parts. Materials:
The teacher reads the riddle:
Shows a toy cockerel and tells the fairy tale “The Cockerel and the Bean Seed.” At the end of the story, he invites the children to build a ladder for the cockerel so that he can fly higher and wake everyone up. Children construct ladders from blocks and plasticine and then play with them. |
| Truck | Goal: to teach how to build buildings and make them stable. Materials:
The teacher reads A. Barto’s poem “Truck” and shows a truck with a toy cat in it. The teacher invites the children to make a truck for the cat from a construction set, having first asked them:
The teacher shows how to make a car. Children complete the task. |
How long should a design lesson last in a junior group?
Young children cannot concentrate on one task for long. And this must be taken into account when preparing classes. The recommended lesson time for the first junior group is 15 minutes. If it is difficult to manage during this time, it is necessary to provide a play break in the middle of the lesson, but even then the lessons for children of this age should not exceed 20 minutes.
Sample summary of the lesson “Build a path”
Purpose of the lesson: to teach children to use the “brick” part.
Lesson objectives:
- teach how to place objects end to end,
- teach children to work together,
- develop a desire to help those in need.
Subjects for classes:
- “brick” parts from building kits,
- toys (bunny and small trucks),
- carrots - cut out of paper and real, peeled and cut into pieces.
- Start of class. The bunny has collected a lot of carrots, but cannot take them home, since there is no road to his house in the forest. And there are so many carrots that they can only be transported by car, so the bunny came to ask the guys for help.
- Direct construction. The teacher asks: “Do you think we can help the bunny? How can we do this? What can we use to build the road to the bunny’s house?” Children answer and express their proposals for building a road for the bunny. The teacher offers to build a road out of bricks and explains how to do it. Next, the children take one brick at a time and build a road.
- Game moment “Transporting the harvest.” Children put carrots cut out of paper into small trucks and take them to the bunny's house. The bunny thanks them and gives the kids pieces of real carrots as a reward.
When constructing paths, children learn to place objects end to end
Is it possible to conduct open classes in a younger group?
It is not recommended to conduct open classes in junior kindergarten groups, since children are distracted by strangers and cannot concentrate on educational activities. There is also no need to conduct demonstration lessons for parents. Firstly, for the reason stated above, and secondly, due to the fact that parents begin to actively interfere in the process, and the teacher runs the risk of conducting a lesson not for the children, but for their parents. Based on experience, it is much more difficult to calm unruly parents than their children.
Preparation for design classes and self-education of educators
Of course, you can use the same standard practices for design classes. But in fact, if you approach your work creatively, this is a very exciting activity for the educators themselves, as well as a lot of work on self-education. This is also an opportunity to come up with something interesting based on your own skills, and learn new handicraft techniques. All you need is desire.