Master class “Training in foil plastic technique”
Master Class
“Training in foil plastic technique”
Target:
Improving the professional skills of master class participants in the process of active pedagogical communication to master the work experience of a master teacher.
Tasks:
Construction (recreation) by the teacher-master in front of the master class participants of his own model of the educational process in the mode of demonstrated pedagogical technology.
Training participants in the master class with the foil-plastic technique, which forms the basis of the transmitted pedagogical experience, and how to achieve the intended results.
Demonstration of a master teacher’s ability to design successful activities.
Materials and tools needed for work
:
1. 2 pieces of wire 30 cm each, 4 pieces of wire 8 cm each.
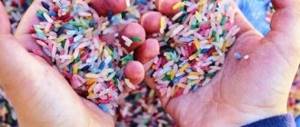
2. strips of food grade foil 3 cm wide.
3. scissors
Progress of the master class:
1. Introductory part (5 min)
Dear colleagues! We invited you to a master class on teaching foil plastic techniques. Preschool age is a favorable period for the development of creativity. Each child is talented, individual, he can become a “star” and “light up” those around him with his uniqueness, energy, and ability. A creative child is a thinking child; he has a developed perception of the world around him.
Therefore, there is an idea to get children interested in the most interesting type of artistic creativity - foil plastic. Mastering this technology will allow for better development of fine motor skills, and will also awaken interest and imagination in creating unusual creative works.
Foil plastic
(a type of artistic design) is a productive creative activity, as a result of which an image or three-dimensional image is created from a variety of materials.
Foil plastic
is a synthesis of different types of visual activities: appliqué, experimentation, construction from foil.
Foil
– an excellent material for making crafts. It looks interesting in itself, and the combination of imagination and skill gives rise to amazing DIY crafts. Activities with foil turn children into little wizards who can create wonderful products: amazing flowers, photo frames or frames for children's drawings, a fairy lantern or funny animals and birds, jewelry that will look almost like real jewelry. Foil helps children show a variety of abilities: creative, constructive, and design. Available material, simple technique for performing the work. When working with foil, as with other non-traditional materials, there is no rigid assignment, strict control, which is present in ordinary classes, but there is creative freedom and joy, the result is usually effective and almost does not depend on the skill and ability of children
Foil plastic is a type of artistic design. Foil can be used for applications and experimentation. An unusual type of activity for preschoolers, during which problems in educational areas are solved:
“cognitive development” - children develop creative activity, interests, and form ideas about the world around them;
“speech development” - by discussing images that can be created using foil, conducting experiments with foil, developing fine motor skills, children develop their speech;
“artistic and aesthetic development” - children develop independent creative activity - constructive and model;
“physical development” - fine motor skills of the fingers develop;
“social-communicative” - independence is becoming established, a positive attitude towards various types of work and creativity is being formed.
Techniques for making crafts (presentation demonstration):
Wrapping crafts.
Drawing on foil using the stamping method.
Sculptural modeling or modeling (volume crafts made from foil).
Coinage.
Application.
Embossing.
Flagellar (lace) weaving
The whole variety of foil crafts is based on a fairly simple technique. Aluminum foil is cut into strips, which are subsequently twisted into a kind of wire. Almost anything can be made from such twisted blanks - from a bouquet of flowers or a pine branch to a wide variety of animals and insects. You can even weave decorative interior items, such as an openwork vase.
Foil weaving allows children, starting from preschool age, to master this simple but extremely interesting type of creativity. Foil crafts made by children look bright and elegant and can decorate any interior and be a source of pride for parents. Joint weaving of foil by children and parents helps bring family members closer together, improves mutual understanding between different generations, and strengthens trusting relationships in the family.
The foil weaving technique, based on twisting strips and interweaving the resulting blanks, promotes the development of fine motor skills in children, which, as is known, is associated with the development of thinking and creative abilities. That is why foil weaving can rightfully be called a hobby that is most useful for versatile children.
2. Main part (35 min.)
I offer you a technological map for making an original “Fairy Tale” foil candlestick (distributing maps for your reference). For work we will need the following materials - wire from which we will make the frame of the candlestick, strips of foil, scissors. Review the map and prepare all the necessary equipment. You can start working.
The master class leader provides individual assistance, advice and assistance.
3. Final part (5 min.)
After finishing the work, the presenter invites all participants to present their work.
-What feelings did you experience while working?
-Did you like the result?
-Would you like to teach your students this technique?
Offer to share your impressions.
Master class on making a bracelet
To make a beautiful original hoop for your hand, you don’t need any special skills. Thanks to this, handmade jewelry on the wrists, or better yet several pieces at once, have become popular recently.
To make one chain you will need:
- Spandex
- Beads
- Accessories
It is very interesting to do such things yourself, because you can fully take into account all the wishes - color, shape, degree of transparency, choose the right accessories (rings, separators, all sorts of danglers).
For one simple model, measure 20 cm of gutta-percha thread and tie a large knot so that the beads cannot slip off. Next, we collect stones and accessories in the order in which they should be. Locks are not needed, because the product is stretchable.
To more clearly imagine what the design will be like, it is better to draw an approximate diagram. You can design a structure with an even distribution of beads, or insert one of the brightest details to mark the center.
Once the chain is assembled, try it on your hand and make sure the size is appropriate. We tie the ends, cut off the rest of the thread and hide the knot inside the bead.
Master class on making beads with your own hands from natural stones
How to make beads from natural stones in the shape of a leather collar and tie from several threads? You need: 3 meters of leather cord, moment glue, 1300-1440 faceted beads of 3-5 mm each, 2 rings of 5 mm each, a lock, a bead needle, crimps and a crimper. All metal parts must match in color.
First we assemble the “collar”. We cut 5 pieces of 480 mm, and the sixth - 540 mm. We bend the long cord at the tip, forming a 150 mm loop, and secure it with thread. For additional strength, fill it with “Moment”. The glue will thicken (3-5 minutes), and then we glue the ends of the remaining five strips here in the form of a ladder, where the middle one is long, 2 and 4 are slightly shorter, and 1 and 5 are very short. We carefully fix everything with thread and, using glue, hide it under the lacing. After a few minutes it had already thickened enough.
We decorate the second edge in the same way. We install rings in the loops, to which we attach a lock.
When one part of the necklace is ready, you can start stringing. The fishing line needs to be 165 cm long. We pass it through the first pebble and populate both ends of the rope. Next, string the beads one by one. Having put on a 70 cm strip in this way, we slightly change the pattern in front of the bead, put on a crimp, clamp it with a crimper, after it another one and pull the needle into the first one. We cut off the rest and tie a couple of knots, otherwise the thread may stretch out.
One is ready. You can collect as many such chains as you wish. You can tie them to the collar with a knot all together or each separately. It is very easy to assemble beads from natural stones, and the result will be incredible.