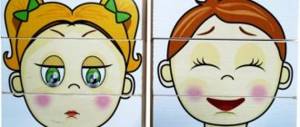
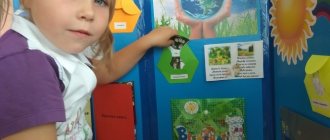
The popularity of educational stands, busy boards and other similar toys is very high among parents of children from 6 months of age due to the interest shown by babies. Children spend quite a lot of time looking at, touching, and performing various manipulations with objects placed on the educational toy. Most often, objects that interest the child are placed on busy boards, but for safety reasons, latches, latches, handles, sockets and various panels with buttons are prohibited.
Why do you need a stand or business board?
The answer is simple. By playing with objects that the baby sees around him, he learns to use them. Develops fine motor skills. Spends a sufficient amount of time in independent play.
Educational boards were introduced into the world of children's toys by Maria Montessori. A well-known teacher noticed that children develop most quickly if the skill they are learning comes into their lives through sensory sensations (feeling with their hands). The author of the sensational technique invited children to play with things that parents usually forbid touching. Having secured the parts by placing them on a wooden surface, she offered to play with them and study them. The result was not long in coming. Over time, the technology for creating touch boards has changed, various options have appeared, but the meaning remains the same.
Busyboard is considered part of Maria Montessori's developmental environment, but it is also successfully used by parents who do not adhere to certain approaches and methods. By giving the child the opportunity to educate himself, adults resolve the difficult issue of constantly banning certain things. After all, instead of repeating thousands of “not allowed” a day, it’s easier to offer an alternative (you can’t play with a socket on the wall, but you can play with the same one on a stand).
An additional advantage of such boards is the need to use your fingers during the game, opening doors, attaching Velcro, tying laces. All of the above actions are a kind of finger gymnastics that allows you to develop fine motor skills.
Why do board elements consist of household items and various accessories? Children are very interested in elements from the lives of adults. Locks and switches always come first for a child. Musical, bright objects captivate the baby, but not for long, because it is much more interesting to study the adult world, the objects that parents use.
Master class No. 3: How to make wall letters from cardboard and fabric
Interior letters have long been in fashion, why not make up the child’s name from such letters and decorate the walls of the children’s room with them?
Materials:
- Cardboard;
- Pencil;
- Scissors;
- Several pieces of beautiful fabric (if you don’t have fabric, you can use paper wallpaper);
- PVA glue.
Step 1. Choose a beautiful font and print the baby’s name (or any word) in large size so that each letter fits on a separate A4 sheet. If you don’t have a printer at hand, then you can simply place a sheet of office paper on the computer screen and trace the outline of a translucent letter. To make the letter shine through better, you need to increase the brightness of the screen and turn off the lights in the room so that it becomes dark enough.
Step 2. Now you need to transfer the outline of the letters onto the cardboard. You can do this in two ways:
- Carefully cut out each letter of the name/word using scissors or a utility knife, then place the resulting templates on the cardboard and trace them.
- Use carbon paper.
Next, we cut out letters from cardboard and get blanks (left photo below).
Step 3. It’s time to cut out the same blanks, but a little larger in size and from fabric. To do this, place a cardboard blank on the material and, making an indent of 1-2 cm from it, draw the outline of the letter by eye (right photo above), and then cut it out as shown in the next left photo.
Step 4. So, we have “patterns” made of fabric with allowances of 1-2 cm. All we have to do is “cover” the cardboard letters with them and fix the folds with glue, and then attach small loops and hang the panel on the wall.
Here is a selection of photos of other examples of decorative letters, including: letters cut out of plywood, cardboard letters with soft filling under the fabric, letters wrapped in thread, decorated with ruffles, pom-poms and other materials.
What does a busy board develop?
In addition to fine motor skills, stands and panels develop:
- Coordination of movements. The baby needs to learn to cope with small objects in order to open a window, close a latch, etc.;
- Logic. Seeing how a process occurs thanks to a certain sequence of actions, the baby receives high-quality experience in logical thinking. Having opened the doors and found a photo or picture there, he forms a chain of events, thereby stimulating his own development;
- Perseverance and patience. Working with game elements captivates the child and requires him to concentrate on a specific action. In conditions where the child cannot yet hold his attention for a long time, a busy board allows him to develop the ability to concentrate and maintain attention on the action. This is especially important for children over 4 years old who are starting to prepare for school life.
How to make a development stand
The process of creating a busy board begins with determining the type of product you want to receive and the age of the child. Children from 6 months to 1 year are usually offered a soft option on which the baby can lie or sit. After 1 year, you can begin to study a solid board screwed to the floor or wall.
The size is selected based on the area on which the development board or mat will be located. You can make a miniature board 50x50 or a huge one up to 1.7 meters long. It all depends on your imagination and capabilities.
Depending on the type of future toy, you can take as a basis:
- An old pillow or blanket (soft version);
- Board or plywood (hard).
For small products, thick cardboard, hardboard or plastic board are suitable.
Depending on the type of base chosen, items for placement are selected. For a soft version, suitable:
- Buttons and large beads of various shapes;
- Overlays and applications in the form of various objects or animals. You can buy them at a craft store or make them yourself by cutting them out of scrap fabric;
- Velcro, hooks and loops;
- Fabric cuts sewn in the form of pockets;
- Small soft toys;
- Laces, ribbons, ribbons;
- Small household items that will interest the baby (curtain rings, furniture fittings, etc.).
For solid options:
- Latches, latches, latches;
- Switches, buttons;
- Reels and laces;
- Chains, toggle switches;
- Lightning;
- Dials;
- Doorbell with battery;
- Locks with keys;
- Plug and socket;
- Keypads, disk from an old telephone, remote control;
- Flashlights and light bulbs;
- Abacus;
- Wheels and other rotating elements;
- Images;
- Faucet valves;
- Furniture fittings.
You can use other items at your discretion. Just check their strength so that the baby cannot break or swallow small parts.
Tools for creating a development board
For the soft version:
- Thread and needle;
- Sewing machine for creating the base and sewing on elements;
For the hard version:
- Jigsaw or hacksaw;
- Drill. Fastening large objects requires screwing them from the reverse side;
- A screwdriver or screwdriver for screwing in self-tapping screws;
- Wire cutters. Secure the board from protruding sharp ends of screws;
- Sandpaper;
- Glue and paints, for covering the base, varnish. Small elements and pictures are attached with glue.
Creating a business board has several stages:
- Planning and preparation of all materials;
- Creating a board;
- Painting and varnishing for solid versions of the product.
At the planning stage you need:
- Determine the size of the required product. The size can be very different, depending on the type and intended location in the apartment. If you periodically take out the product and offer it to your child, it is better that it is not very large (50x50); there are no restrictions for wall-mounted options. With a mobile option, you should immediately think about securely mounting it in a certain place so that the baby cannot drop or move the development board;
- Draw an approximate layout of the game elements. For floor options, consider the length of the baby’s arms so that it is convenient for him to reach for various parts, without having to lean on the board itself;
- Collect or purchase the necessary game elements. Buttons, beads, laces can be bought at a craft store; chains, switches and latches - in a construction hypermarket or a DIY store. Some items are difficult to find on sale (phone disk), but you can ask relatives of the older generation if they may still have such a device;
- After collecting the necessary materials, arrange them on the base and mark the places where the elements will be attached, evaluate the ease of use and harmony of the resulting sketch;
- If everything is ready, you can start creating a development board or rug.
Creating a soft panel or bodyboard
To create a soft version of the development board, take the base and all the necessary elements.
If you don’t have an unnecessary old pillow or blanket, you can sew the base for the rug yourself.
The most convenient way is to buy the required size of felt or other dense fabric, sew from the wrong side, leaving space only for your hand, and turn the product inside out. For stuffing, you can use cotton wool, special fillers, or even waste fabric, which must first be cut into small pieces. When working with a base made by yourself, you can easily choose the required color and size, and it is easier to sew elements onto it.
When using an unnecessary pillow or blanket, first wash and dry it well, and check the stuffing for possible allergies on the part of the baby. Additionally, iron well.
Having marked the approximate location of the elements, you can begin to work. Using a thread and a needle, sew buttons, beads and other details according to the intended pattern.
If you are working with a base made by yourself, then various pockets, overlay figures and other soft elements can be sewn on a machine.
Check each sewn part for strength: twisting, pulling. All parts of the soft panel must be carefully attached so that the baby cannot tear them off, break them, or swallow them.
Having finished sewing the elements to the base made by yourself, fill the inside with soft filling and sew.
The product is ready!
Panel ballerina
The bright composition will perfectly decorate the room of a girl of any age. The image of ballerinas in light, floating positions visually increases the space. The panel can be made in any colors. The main thing is that it contains motifs that symbolize fragility and tenderness. It is necessary to think through the basic concept in advance, choose a picture and suitable materials.
To make a panel you will need:
- thick cardboard;
- acrylic paints;
- volumetric mesh or pink organza;
- pink satin ribbons;
- needle and thread;
- decorative decorations.
Master Class:
- Choose a template. You can paint it yourself on thick cardboard using acrylic paints. If you don’t have artistic skills, then it’s better to use a ready-made image. Finding it on the Internet is not difficult. The panel is performed on a plain background of pastel colors. The most suitable colors for a dancer's silhouette are white or black.
- Make a skirt. To do this, cut out a suitable piece of fabric (depending on the size of the ballerina). Then collect the upper part of the skirt and tighten it with a needle and thread. Cover the seam and edges with tape. Using glue, attach the finished skirt to the ballerina's waist.
- Decorate the panel with decorative ornaments. Using glue, attach flowers or beads to the hair, and glitter to the skirt. You should also glue wavy ribbons, starting from the dancers’ hands.
You should not make the panel too large. Measurement is important here. A small painting with such an image has some piquancy and attracts interest.
Creating solid versions of a busy board or stand
Prepare the basis for the future product. If you use a board with raw edges, then they must be sanded and covered with a special tape for edges (sold at a hardware store). If you want to paint the product later, you can also use a paint primer.
Check the base for integrity, smoothness and safety. You should not offer your child a product for play that could cause scratches or splinters!
If you want to make your stand brighter, then after preparing the base you need to paint it. At this stage, invite the children to help you. You can use acrylic, gouache, and finger paints. After the board has dried, to fix the pattern, you can coat the surface with varnish and let it dry.
After the base has completely dried, place all the main elements on it. Their location depends only on your imagination. This could be a house with windows that are locked with a bolt, or randomly located elements. You can initially divide the board into zones, placing parts in certain groups to study certain groups of knowledge. For convenience, mark the locations for each element with a cross or other convenient symbol. The base is ready for parts to be attached to it.
In what order should you attach the elements:
- Drill holes for screwed game elements;
- Attach the prepared parts to the board. Screw the large ones from the back through the drilled hole, attach the latches and bolts with screws, glue the small flat ones;
- Check all elements for strength;
- If desired, add various stickers and decorations;
- The product is ready and can be placed on the wall or floor.
Master class No. 2: How to make a panel depicting the silhouette of a child
Here is another master class on how to make a simple but very original panel for a nursery with your own hands.
Materials:
- Canvas on a stretcher (in this lesson we use a square canvas measuring 30x30 cm);
- Acrylic paint (red, white and blue colors are used here);
- Any Oracal vinyl self-adhesive paper;
- Foam rubber or any other brush.
Step 1. Buy a ready-made canvas on a stretcher in the desired size or make it yourself. If desired, the canvas can be repainted in the color you want, for example, with water-based acrylic paint.
Step 2. Decide on a photo that will become a template for the future image.
Step 3. Using Photoshop, Corel Draw or any other photo editor, resize the photo so that it fits on the canvas. You can also use a program (for example, the Magnetic Lasso tool, Pen tool, or eraser) to remove the background and leave only the desired image. How to do this, see the following video tutorial:
Step 4. Print the photo on regular office paper, cut out the silhouette and secure it to the canvas using pins or masking or double-sided tape (which will peel off easily and will not leave marks).
Hint: you can also transfer the outline first to the back of vinyl self-adhesive paper (copy paper will help here), then cut out the silhouette, glue the resulting template onto the canvas, paint it (more precisely, the background part of the panel) and only then peel off the paper. The result will be neat and the process will be fast.
Step 5. Carefully and very lightly trace the outline of the silhouette with a pencil.
Step 6. Now paint over the background and leave the silhouette unpainted. Or vice versa - paint the silhouette and leave the background the same. The third option is to paint both the silhouette and the background with different colors.
Silhouettes can be placed not only on canvas, but also on any paper (wallpaper is perfect), and then frame the picture with a beautiful frame, as in the following examples.
However, such a panel in a nursery cannot necessarily be made based on a photo of the owner of the room, but also on images of his favorite cartoon characters or animals.
See also the material: “Kindergarten” or 13 best plants and flowers for a child’s bedroom.
Safety rules when playing with a stand
When you make an educational stand or board for your baby, do not forget about the safety rules.
- When using, the item must be well secured so that the baby cannot move or drop it;
- The finished product must be completely safe: all sides are sanded, sharp corners are sealed with a soft cloth or covered with foam rubber, screws should not protrude, all parts are firmly fixed (check several times);
- If you use removable pieces, be sure to tie them to the board;
- When attaching electrical devices (light bulbs, bells), choose battery-powered ones rather than mains-powered ones. The battery should be hidden under the cover with a screw and located on the back side of the board;
- Regularly check all elements for integrity, and replace cracked or broken parts if necessary.
It’s easy to create a development board or panel; the main thing is to have a little time and desire. The child will be happy to study such desirable objects, and at this time you will be able to relax a little.
If you liked the article, please share a link to it
Ideas for panels made from popular materials
Felt and cardboard are most often used to make children's crafts. With older children, for whom working with small details is no longer dangerous, you can make bright compositions from buttons.
Felt
An interesting version of a felt panel is a composition of letters of the child’s name. The craft can be supplemented with felt animals and inscriptions with the date when the child was born, the baby’s height and weight at birth.
A boy's room will be well decorated with panels with cars and cartoon characters.
And the next craft will not only transform the room of girls and boys, but also help them learn the alphabet.
Cardboard
To make it you only need colored cardboard, scissors, glue and paints. Even children can make simple cardboard crafts; parents can help with complex tasks.
Floral motifs will bring an atmosphere of harmony and security to the room.
Paintings based on prints of children's hands or feet evoke particular affection.
Button
Buttons are often used to decorate crafts. But there are many ideas for panels where they are the main material. From them you can come up with a composition for children of different ages on any topic.
The little ones will be interested in images of cute animals, birds, and flowers.
Older girls will not only appreciate the composition depicting Disney princesses, but will also be happy to participate in the manufacturing process itself.
Using buttons you can depict a colorful tree on a panel. The quadriptych with images in different seasons looks interesting.
A panel in a nursery is not just a decorative element. Bright and interesting compositions from the very birth of a child attract his attention and develop his imagination. And if the age of the children allows them to participate in making crafts themselves, then this process will not only bring benefits, but will also give positive emotions.
- Author: Vasily
Rate this article:
- 5
- 4
- 3
- 2
- 1
(0 votes, average: 0 out of 5)
Share with your friends!