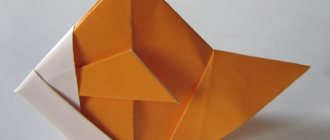
Making a paper dog in origami style
Required materials:
- Paper square;
- Scissors;
- Markers.
Steps of the creative process:
- Fold a square piece of paper diagonally and smooth the crease line with your fingers. Explain to your child as you go along that the resulting triangle is the simplest shape in origami.
- Fold the triangle in half, crumple it in the middle, and unfold it. On the right and left sides, bend the sharp corners down and iron the folds - these are the ears.
- Fold the double triangle up and shade its tip with a black felt-tip pen to get a nose.
- Draw oval eyes and, if you want, glue a red tongue made of colored paper. But even without it, the puppy will have a cute and cheerful face.
Variety of origami types
Experts distinguish several types of folding art:
- classic. For it, take one square sheet, and the figures are folded without scissors and glue;
- modular. Several sheets of different shapes and sizes are used, from which modules are assembled according to the origami scheme. Then the individual figures are connected using the nesting method;
- kusudama. A type of modular assembly, as a result of which a large figure in the form of a ball appears. You can put souvenirs or aromatic herbs inside it, using the ball as a sachet;
- Kirigami. This version of origami allows the use of scissors and glue.
Create a frog out of paper
Before you begin, show your child pictures of a wah, paying attention to the large mouth, bulging eyes and green coloring of the animal.
You will need:
- A sheet of colored (green) paper A4;
- Scissors, glue;
- Oval eyes drawn and cut out of paper.
Procedure:
- Fold the sheet in half and fold the side strips towards the center fold. Open the first strip and fold the top corners towards the center like a checkmark bird.
- Turn the part over and repeat the same manipulations.
- Fold the resulting hexagon in half horizontally, and the resulting trapezoid vertically, then open it and make small cuts (0.5 cm) in the center of the base and on the outer spouts.
- Fold the sides up (there are 4 of them).
- Glue on the prepared eyes, then grab the frog's head with your index finger and thumb, open the huge mouth with pressure, and the frog will sing his croaking serenades.
Penguin
Mark both diagonals of the square of paper and turn the corner down, and then turn the bottom top up, not reaching 1-2 cm from the center. Lower the tip back - this will be the penguin's beak. Turn the origami over to the reverse side and fold the sides of the pentagon so that they completely overlap each other. Using a ladder, bend the edges back to form wings, turn the piece over again and draw the eyes.
Step-by-step master class on making an airplane
A paper airplane is a great way to spend time usefully, and after creating models, it’s also fun by organizing a competition between young designers.
You will need: a sheet of A4 paper
Let's start creativity:
- Fold the sheet in half vertically, then unfold it and bend the top right and left corners to the wrinkled line.
- Bend the resulting nose into a triangle.
- Turn it over again, bend the upper corners towards the center, and bend the small middle corner towards the body of the figure.
- Bend the wings along the central axis and first turn one wing towards you, then, turning it over, the second wing.
- Straighten the workpiece and send the aircraft into flight.
Simple origami airplane
There are many schemes for making an origami airplane out of paper. Megamaster.info advises you to start viewing the manufacture of airplanes, preferably with a simple and well-known model. Even if you know how to make it, repeating the design will help show your child the manufacturing process, and “warm up” your hands before more serious crafts.
Let's start building a simple airplane:
- fold the sheet of paper vertically, then unfold it;
- We bend the corners located on top towards the center, focusing on the line obtained in the previous paragraph;
- fold the resulting corners again, making sure that the edges do not connect or intersect with each other on the center line;
- bend the sides from top to bottom from each top;
- spread your wings.
The toy is ready, we trust a little designer to decorate the airplane.
Making an origami boat out of paper
Making a boat is easy even for little ones, and our photo tips will help them with this.
Required: white sheet of A4 paper.
Let's get started:
- Fold the sheet in half widthwise and unfold. Mark the midline with a dotted line.
- Fold the top corners into a bird-tick shape. Press the folds with your fingers.
- Separate the lower rectangular parts, bend one of them to the main part. Place the upper right and left triangles behind the main figure.
- Turn the piece over and fold the second rectangle up, closing the protruding corners. Open the craft and then compress it, giving it a square shape.
- Place a dot with a red felt-tip pen, stepping back about 1 cm from the upper corner, and bend the upper nose to it. Turn the part over to the other side and bend the same fragment.
- Expand the detail. Grasp the ends of the resulting truncated pentagon with your fingers and pull to the sides. Straighten the folds of the bottom, stern and bow, unfurl the sail and the boat is ready to sail towards adventure.
Paper sailboat
A paper sailboat can be called a simple one. It will be interesting for a child from six to nine years old to construct such a structure out of paper, but if the child wants to make a boat on his own, he will need your tips. To make a sailboat you need a landscape sheet.
Manufacturing process:
- Take an A4 sheet and make a square out of it. We bend the square along both diagonals. As a result, we get a triangle. It must be placed so that the corner located in the upper part is parallel to the edge of the table.
- We turn the craft over and move the workpiece to the free side. We identically turn the free side into a square and draw a horizontal line on it.
- We bend the top layer of our workpiece and the resulting fold to the horizontal line, fold it again, but in a downward direction. Turn the craft over and bend the top corner towards you. We tuck the left corner into the middle.
- Next, raise the bent triangle. We bend the upper and lower free corners into it and lower the upper part of our sailboat.
The craft is ready. What is quite surprising is that you can make a motor ship from such a sailboat, but this will require scissors, which can be used to cut off the upper corner of the sail and get a pipe.
Creative lesson on creating a Christmas angel from paper
A child will be happy to work on a magic toy, however, the support of an adult is necessary here.
Must have:
- A4 colored paper;
- Ruler;
- Scissors;
- A simple pencil.
Go:
- Prepare in advance two squares of paper - 10 by 10 cm and two strips with a width of 0.5 cm and a length equal to the length of a sheet of paper.
- Bend both sheets alternately with a fan, making pleating folds equal in width to the prepared strips.
- Step back 3 cm from the edge of the fan at the top, bend it in this place and straighten it - there will be a wing. Bend the second part in the opposite direction and straighten it.
- Glue the wings to the body, each on its own side.
- Twist one narrow strip into a ball, applying glue as you twist. Glue the second one to it and twist further.
- When there are about seven centimeters left to the end of the ribbon, pull out the halo with a loop and secure the head ball on it with glue.
- Coat the strip with glue and fix both parts of the corrugated blank on it, then straighten the wings and robe of the angel.
To reinforce the material, watch the video:
New Year's master class - Santa Claus using origami technique
Santa Claus is made from paper in a few minutes, the main thing is to follow the instructions.
- Before starting the lesson, prepare a square of colored single-sided paper - 10 x 10 cm.
- Bend a triangle from the workpiece. Turn it inside out and bend the bottom corners towards the vertical diagonal.
- Unfold the resulting cup with the triangular part facing down, then fold it over to cover the top.
- Turn the wide part downwards, not reaching the end half a centimeter. Fold the rim of the resulting white triangle on top.
- Bend the sides of the trapezoid back, and the grandfather’s white beard and his red cap already appear in front, and a stable stand at the back.
- Use a red marker to color over the white paper showing on the header. On the face, mark the nose with a red circle, the button eyes with black circles, and you can decorate the beautiful Christmas tree.
Making a paper headdress for Santa Claus
Make a mini-hat to try, and once you get the hang of it, make a larger one, the size of the child’s head. Prepare: a square sheet of red paper – 15 x 15 cm.
Started:
- Fold the shape in half with the light side facing in. Make 0.5 cm cuffs at both ends of the part, crease them and straighten them.
- Place the workpiece in front of you, narrow side up. Fold the corners on both sides to the wrinkled fold.
- Lift the flaps up, iron them, and bend the protruding ends back and insert them inside the cap.
Senior group. Senior preschool age. Children 5-6 years old
A bouquet of flowers using the origami technique for children over 6 years old. Master class with step-by-step photos
A bouquet of flowers using the origami technique for children over 6 years old . Master class with step-by-step photos Author: Oksana Seitievna Seitmedova, teacher, GBOU School No. 1503 Description of the material: This material will be useful for educators, additional education teachers, parents, designed for…
Photo report on the lesson on constructing an “Apple” craft in the senior group using the origami technique
Goal: introducing preschoolers to origami , various techniques and ways of working with paper . Objectives: - develop creative abilities, creative imagination, development of memory, attention; — develop teamwork skills and cooperation skills; - develop…