How to make a real papier-mâché balloon with your own hands so that it can then fly? What is required for such a craft, how complicated is the process? In reality, most products of this type do not require a long time or special knowledge.
Thanks to the detailed master class, any beginner can handle it. But the finished craft will amaze everyone around you. You can make bright colorful balls, put them in baskets or paint them to make laughing faces. Whatever you want, you are limited only by your imagination.
Step-by-step master class
To make a papier-mâché ball into an inflatable balloon, you will need the following materials:
- a stack of unnecessary newspapers;
- liquid paste;
- ordinary rubber ball;
- several brushes.
Detailed instructions:
- Prepare the paste by diluting it in some unnecessary container of decent size.
- Tear the newspaper sheets into strips 2.5 cm wide each.
- Inflate the balloon, making sure that it does not exceed the dimensions of the finished craft.
- Carefully cover the finished ball with paper strips previously soaked in paste.
- Important: after wetting the paper, immediately remove all excess liquid by rubbing it with your fingers. This should be done in advance, before gluing.
- When gluing the strips, carefully straighten the folds with your fingertips. It is more convenient to do this with a brush. Proceed step by step, then the toy ball will turn out beautiful and smooth.
- When finished, leave the product to dry. Now carefully pierce the ball inside the newspaper strips and remove it through the small remaining hole at the bottom (this must be left in advance, even before gluing the newspaper).
If you need a white ball, simply paint the dried workpiece with paint of the required color.
How to make non-woven tapestries?
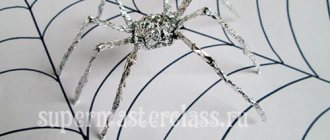
On felt, inexpensive drape, cloth or inexpensive non-woven materials, the basis of the plot of the drawing is glued from similar fabrics, only in different colors. Example: on felt 1.5 x 1 m, a sun, a house and something reminiscent of a forest cut out of a drape of a different color are glued. Then the synthetic cord is unraveled and something similar to trees and branches is made from it, superimposed on the forest area, and some branches - in the foreground. Then clouds are made from synthetic threads of various colors and placed near the sun. To give the product a marketable appearance, you only need to spread synthetic threads of different colors throughout the felt, in some places shapeless pieces of other materials, and also pieces of ropes and laces. For convenience, it is better to strengthen all this with thread and a needle.
We begin to make seams along the length of the felt, the distance between them should be 2-5 mm. The lower thread bobbin does not fit into the machine. This results in a seam with only 1 top thread, but this is quite enough to secure the pattern. Depending on the ornament, the bobbin can be changed to a different color. Upon completion of the work, holes with a diameter of 10 mm are punched in the felt on 3 sides, and multi-colored tassels made from ordinary threads are inserted into them. You just need to secure the crossbar with the cord. The tapestry is ready.
Globe or moon made of papier-mâché
How to make a ball - a planet from papier-mâché? I want to create something special. For example, planet Earth or the Moon. Here the basic principle of making a ball will remain unchanged.
Step-by-step instruction:
- Make a newspaper ball, trying to make it as smooth as possible (without wrinkles) and medium in size. Inflate a regular rubber ball, then gradually cover it with strips of newspaper soaked in glue. Wait until the product is dry, then deflate the balloon. The preparatory part is finished.
- Now for the example you will need a real globe. It is more convenient than flat pictures. To make the globe look as realistic as possible, you need to redraw the outlines of the continents, individual islands and oceans of the Earth onto the finished paper ball. To do this, arm yourself with acrylic paints.
- Is it convenient to color a newspaper or is it worth additionally covering the top of the ball with white paper? You can paint it first with white paint and then apply the outline of the Earth onto it. Or cover it with A4 paper, cutting it into strips as well. The technology seems more complicated, but in practice everyone can cope, even beginners.
INTERESTING: How to make a paper tunnel cube
This way you can create any planet from the solar system and then hang them together, creating a composition. It is important to maintain the dimensions, remembering that Jupiter is large, Mars is small, and Earth is medium.
Balloon with basket - master class
Here you can choose the manufacturing technique.
Option number 1. Beautiful ball. If you need to create a craft quickly, then look for a beautiful small colored ball. Preferably round in shape. Weave it from a thick thread or take a ready-made mesh. Make sure that the ball fits comfortably inside and that the edges of the mesh remain free. Trim carefully if necessary.
Creating a cart. You can cut it from a regular plastic cup and paste it on the outside. Or glue it from a sheet of cardboard. If you have a ready-made basket, even better. Tie it using the loose ends of the threads to the ball. Ready.
Option No. 2. Volumetric balloon with a fabric basket. A great New Year's surprise that even a child can make if given some prompting.
Required:
- unnecessary newspapers;
- ordinary rubber ball;
- diluted paste;
- brush;
- pieces of multi-colored fabric (preferably one type);
- cardboard;
- a ball of rope or braid.
Step-by-step instructions:
This papier-mâché balloon will turn out beautiful, large, and can then be hung from the ceiling.
- Making a paper (newspaper) ball. Following the instructions described above, inflate the ball, then sequentially cover it with thin strips of newspaper, dipping them into the paste. Do not tape the space below, around the tail. Leave a hole.
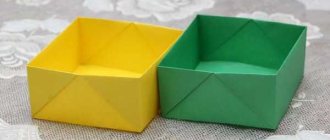
- While the workpiece is drying, you can make a basket. To do this, take cardboard and glue a small basket step by step, focusing on the ball.
- Carefully make 4 small identical holes in the top of the finished basket. Make sure they are symmetrical.
- Decoupage ball. It has dried, now deflate and remove the rubber base (inflated ball). Cover it with strips of fabric/colored paper (whichever is preferable). Carefully make 2 holes on top, placing them close. The papier-mâché ball is ready.
- Measure 2 pieces of rope. You take one, put the tip through one of those holes at the top of the ball, then pull it out through the second. Center so that two identical ends hang down. Tie them by securing them in two opposite holes in the basket. Do the same with the second remaining rope. Tie the ends alternately to two of the four holes (see picture).
- At the top of the children's toy you can make an additional loop through which it can then be hung from the ceiling.
INTERESTING: Paper airplanes: TOP 12 creative ideas
The creativity will be completed with a small doll or man with Lego, ready to fly.
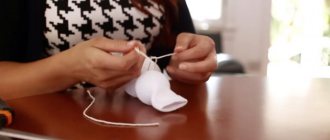
Handmade tapestry manufacturing technology
- Decide on the type and size of the tapestry. By type we mean not only the design, but also the type of fabric, the method of attaching the tapestry to the wall. The approach to choosing the size is very important, because for creating large tapestries with your own hands, some fabrics and designs are more suitable, for small tapestries - others.
- Think about how best to process the fabric: on a sewing machine or by hand. The choice is based not only on the presence of the machine, it is also necessary to take into account the type and density of the fabric. Determine whether finishing materials, lining or padding material, and the method of attaching the tapestry will be used.
- Depending on the weight and density of the fabric, it may be necessary to use a lining made of dense fabric or padding material, which can provide rigidity and thanks to which the work will not bunch up. If you plan to hang the tapestry on a cornice, then you need to purchase it, and you also need to not forget about the edging (if the edges of the work will be processed with an overlocker).
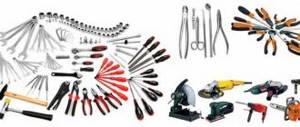
- Lay out all materials with tools at the workplace. Make sure again that you haven't forgotten anything.
- Turn the fabric inside out on the sides and bottom. Sew by machine or sew by hand. If you are using a blank for a tapestry (there are some), turn up the edges without a pattern, which the manufacturer specifically leaves free. The width of the bottom and side edges is usually 15 mm, with a slightly larger margin on top to make it possible to make a pocket for the cornice.
If you plan to hang the tapestry on a cornice, then you need to fold back the top edge and stitch it, removing the excess fabric inside the pocket. When making a pocket, you must take into account the thickness of the cornice, otherwise you will need to spend money on 1 more cornice or spend a lot of time redoing the work.
- If the fabric used to make a handmade tapestry is not very dense, you need to use a lining. The size of the lining should correspond to the size of the tapestry. Thick fabric is placed on the wrong side of the tapestry and then sewn on. It is necessary to ensure that the lining is smooth and does not lead to the appearance of folds on the front side of the product. If the tapestry is placed in a frame or hung directly on the wall, then its top edge is processed in the same way as the bottom and sides (in this case, a pocket is not required).
- If the fabric backing does not provide the necessary rigidity, you can use plywood. You need to cut the plywood to the size of the finished work. It should be taken into account that if you mount tapestries on a cornice with your own hands, then you need to leave a gap of 10-15 mm wide between the beginning of the pocket and the top edge of the plywood. Attach the tapestry to the plywood using glue, buttons or a stapler.
- Stiffness can also be added using padding. Place the padding on the right side of the tapestry fabric and place the lining on top. Sew along the bottom and side edges, turn inside out and finish the top edge. If the product will be placed in a frame or mounted on a wall, then the top edge must be sewn by hand using a stitching stitch. If you wish, you can trim the edges with edging.
- Finish the painting using ribbons. You can also combine a tapestry with a photo or use other decorative elements.
We wish you good luck and creative success!
Balloon - Smesharik made of papier mache
It's easy to do. To create a cute Smesharik you will need:
- dye;
- several brushes;
- sheet of cardboard;
- scissors;
- finished picture.
The first step is to make a regular paper ball, pasting it with newspaper strips. Then, when it dries, decorate the product by painting it like a Smesharik. Draw a smiling face in front, and attach the missing parts such as ears, arms and legs separately.
Cut them out of a sheet of cardboard or “blind” them using a napkin soaked in glue. Some people take plasticine. The paper ball is quite dense, so you can attach various parts without fear of its destruction.