Card index of experiences and experiments experiments and experiments (preparatory group) on the topic
Card index of experiences and experiments
(school preparatory group)
SEPTEMBER
EXPERIENCE No. 1
"Rostock"
Target. Consolidate and generalize knowledge about water and air, understand their significance for all living things.
Materials. Tray of any shape, sand, clay, rotted leaves.
Process. Prepare the soil from sand, clay and rotted leaves; fill the tray. Then plant the seed of a quickly germinating plant (vegetable or flower) there. Pour water and place in a warm place.
Results. Take care of the sowing together with your children, and after a while you will have a sprout.
EXPERIENCE No. 2
"Sand"
Target. Consider the shape of grains of sand.
Materials. Clean sand, tray, magnifying glass.
Process. Take clean sand and pour it into the tray. Together with the children, look at the shape of the grains of sand through a magnifying glass. It can be different; Tell the children that in the desert it is shaped like a diamond. Let each child take sand in his hands and feel how free-flowing it is.
Bottom line. Sand is free-flowing and its grains come in different shapes.
EXPERIENCE No. 3
"Sand Cone"
Target. Set the properties of sand.
Materials. Dry sand.
Process. Take a handful of dry sand and release it in a stream so that it falls in one place. Gradually, a cone forms at the site of the fall, growing in height and occupying an increasingly larger area at the base. If you pour sand for a long time, drifts appear in one place, then in another; the movement of sand is similar to a current.
Bottom line. Sand can move.
EXPERIENCE No. 4
"Scattered Sand"
Target. Set the property of scattered sand.
Materials. Sieve, pencil, key, sand, tray.
Process. Level the area with dry sand. Sprinkle sand evenly over the entire surface through a sieve. Immerse the pencil in the sand without pressing. Place a heavy object (for example, a key) on the surface of the sand. Pay attention to the depth of the mark left by the object in the sand. Now shake the tray. Do the same with the key and pencil. A pencil will sink approximately twice as deep into scattered sand as into scattered sand. The imprint of a heavy object will be noticeably more distinct on scattered sand than on scattered sand.
Bottom line. Scattered sand is noticeably denser. This property is well known to builders.
EXPERIENCE No. 5
"Vaults and Tunnels"
Target. Find out why insects caught in sand are not crushed by it, but come out unharmed.
Materials. A tube with a diameter slightly larger than a pencil, glued together from thin paper, pencil, sand.
Process. Insert a pencil into the tube. Then fill the tube with a pencil with sand so that the ends of the tube protrude outward. We take out the pencil and see that the tube remains intact.
Bottom line. Sand grains form protective arches, so insects caught in the sand remain unharmed.
EXPERIENCE No. 6
"Wet Sand"
Target. Introduce children to the properties of wet sand.
Materials. Wet sand, sand molds.
Process. Take wet sand in your palm and try to sprinkle it in a stream, but it will fall from your palm in pieces. Fill the sand mold with wet sand and turn it over. The sand will retain the shape of the mold.
Bottom line. Wet sand cannot be poured out of the palm of your hand; the backwater can take any desired shape until it dries. When sand gets wet, the air between the edges of the sand grains disappears, and the wet edges stick to each other.
EXPERIENCE No. 7
"Properties of Water"
Target. Introduce children to the properties of water (takes shape, has no smell, taste, color).
Materials. Several transparent vessels of different shapes, water.
Process. Pour water into transparent vessels of different shapes and show the children that the water takes the shape of the vessels.
Bottom line. Water has no form and takes the shape of the vessel into which it is poured.
Taste of water.
Target. Find out if the water has a taste.
Materials. Water, three glasses, salt, sugar, spoon.
Process. Before experimenting, ask what the water tastes like. After this, let the children try plain boiled water. Then put salt in one glass. In another sugar, stir and let the children try. What taste does the water have now?
Bottom line. Water has no taste, but takes on the taste of the substance that is added to it.
The smell of water.
Target. Find out if the water has an odor.
Materials. A glass of water with sugar, a glass of water with salt, an odorous solution.
Process. Ask the children what does the water smell like? After answering, ask them to smell the water in the glasses with solutions (sugar and salt). Then drop a fragrant solution into one of the glasses (but so that children cannot see). Now what does the water smell like?
Bottom line. Water has no odor, it smells of the substance that is added to it.
Water color.
Target. Find out if the water has a color.
Materials. Several glasses of water, crystals of different colors.
Process. Have the children put different colored crystals into glasses of water and stir until they dissolve. What color is the water now?
Bottom line. Water is colorless and takes on the color of the substance that is added to it.
EXPERIENCE No. 8
"Living Water"
Target. Introduce children to the life-giving properties of water.
Materials. Freshly cut branches of quickly blossoming trees, a vessel with water, the label “Water of Living”.
Process. Take a vessel and label it “Water of Living.” Look at the branches with your children. After this, place the branches in the water and remove the vessel in a visible place. Time will pass and they will come to life. If these are poplar branches, they will take root.
Bottom line. One of the important properties of water is to give life to all living things.
EXPERIENCE No. 9
"Evaporation"
Target. Introduce children to the transformation of water from liquid to gaseous state and back to liquid.
Materials. Burner, vessel with water, lid for the vessel.
Process. Boil water, cover the vessel with a lid and show how the condensed steam turns back into drops and falls down.
Bottom line. When water is heated, it changes from a liquid state to a gaseous state, and when it cools, it changes from a gaseous state back to a liquid state.
EXPERIENCE No. 10
"Aggregative states of water"
Purpose: To prove that the state of water depends on air temperature and is in three states: liquid - water; hard – snow, ice; gaseous - steam.
Procedure: 1) If it’s warm outside, then the water is in a liquid state. If the temperature outside is sub-zero, then the water turns from liquid to solid (ice in puddles, instead of rain it snows).
2) If you pour water on a saucer, then after a few days the water will evaporate, it will turn into a gaseous state.
EXPERIMENT No. 11
"Properties of Air"
Target. Introduce children to the properties of air.
Material. Scented wipes, orange peels, etc.
Process. Take scented wipes, orange peels, etc. and invite the children to smell the odors in the room one by one.
Bottom line. Air is invisible, has no definite shape, spreads in all directions and has no odor of its own.
EXPERIMENT No. 12
"The air is compressed"
Target. Continue to introduce children to the properties of air.
Materials. Plastic bottle, uninflated balloon, refrigerator, bowl of hot water.
Process. Place the open plastic bottle in the refrigerator. When it is cool enough, place an uninflated balloon on its neck. Then place the bottle in a bowl of hot water. Watch the balloon begin to inflate on its own. This happens because air expands when heated. Now put the bottle in the refrigerator again. The ball will deflate as the air compresses as it cools.
Bottom line. When heated, air expands, and when cooled, it contracts.
EXPERIMENT No. 13
"The air expands"
Purpose: Demonstrate how air expands when heated and pushes water out of a container (homemade thermometer).
Progress: Consider the “thermometer”, how it works, its structure (bottle, tube and stopper). Make a thermometer model with the help of an adult. Make a hole in the cork with an awl and insert it into the bottle. Then take a drop of colored water into a tube and stick the tube into the cork so that a drop of water does not jump out. Then heat the bottle in your hands, a drop of water will rise up.
EXPERIMENT No. 14
"Water expands when it freezes"
Goal: Find out how snow retains heat. Protective properties of snow. Prove that water expands when it freezes.
Procedure: Take two bottles (cans) of water of the same temperature for a walk. Bury one in the snow, leave the other on the surface. What happened to the water? Why didn't the water freeze in the snow?
Conclusion: Water does not freeze in snow because snow retains heat and turns into ice on the surface. If a jar or bottle where water has turned into ice bursts, then we can conclude that water expands when it freezes.
EXPERIENCE No. 15
"Life cycle of flies"
Target. Observe the life cycle of flies.
Materials. Banana, liter jar, nylon stocking, pharmaceutical elastic band (ring).
Process. Peel the banana and put it in a jar. Leave the jar open for several days. Check the jar daily. When the fruit flies appear, cover the jar with a nylon stocking and tie it with an elastic band. Leave the flies in the jar for three days, and after this period, release them all. Close the jar again with the stocking. Monitor the jar for two weeks.
Results. After a few days you will see larvae crawling along the bottom. Later, the larvae will develop into cocoons, and eventually flies will appear. Drosophila are attracted to the smell of ripe fruit. They lay eggs on fruits, from which larvae develop and then pupae are formed. Pupae are similar to cocoons into which caterpillars turn. At the last stage, an adult fly emerges from the pupa, and the cycle repeats again.
EXPERIMENT No. 16
“Why do the stars seem to move in circles?”
Goal: Find out why stars move in circles.
Materials. Scissors, ruler, white chalk, pencil, adhesive tape, black paper.
Process. Cut out a circle with a diameter of 15 cm from paper. Draw 10 small dots at random on the black circle with chalk. Poke a pencil through the center of the circle and leave it there, securing it at the bottom with duct tape. Holding the pencil between your palms, quickly twist it.
Results. Light rings appear on the rotating paper circle. Our vision retains the image of white dots for some time. Due to the rotation of the circle, their individual images merge into rings of light. This happens when astronomers photograph stars using long exposures. The light from the stars leaves a long circular trail on the photographic plate, as if the stars were moving in a circle. In fact, the Earth itself moves, and the stars are motionless relative to it. Although it seems to us that the stars are moving, the photographic plate is moving along with the Earth rotating around its axis.
EXPERIMENT No. 17
“Dependence of snow melting on temperature”
Target. Bring children to understand the dependence of the state of snow (ice) on air temperature. The higher the temperature, the faster the snow will melt.
Procedure: 1) On a frosty day, invite the children to make snowballs. Why don't snowballs work? The snow is powdery and dry. What can be done? Bring the snow into the group, after a few minutes we try to make a snowball. The snow has become plastic. The snowballs were blinding. Why did the snow become sticky?
2) Place saucers with snow in a group on the window and under the radiator. Where will the snow melt faster? Why?
Conclusion: The condition of the snow depends on the air temperature. The higher the temperature, the faster the snow melts and changes its properties.
EXPERIMENT No. 18
"How does a thermometer work"
Target. See how the thermometer works.
Materials. Outdoor or bathroom thermometer, ice cube, cup.
Process. Squeeze the liquid ball onto the thermometer with your fingers. Pour water into a cup and put ice in it. Stir. Place the thermometer in the water with the part where the liquid ball is located. Again, look at how the liquid column behaves on the thermometer.
Results. When you hold the ball with your fingers, the bar on the thermometer begins to rise; when you lowered the thermometer into cold water, the column began to fall. The heat from your fingers warms the liquid in the thermometer. When the liquid is heated, it expands and rises from the ball up the tube. Cold water absorbs heat from the thermometer. The cooling liquid decreases in volume and falls down the tube. Outdoor thermometers usually measure air temperature. Any changes in its temperature lead to the fact that the column of liquid either rises or falls, thereby showing the air temperature.
EXPERIENCE No. 19
“Can a plant breathe?”
Target. Reveals the plant’s need for air and breathing. Understand how the respiration process occurs in plants.
Materials. Houseplant, cocktail straws, Vaseline, magnifying glass.
Process. An adult asks if plants breathe, how to prove that they do. Children determine, based on knowledge about the breathing process in humans, that when breathing, air should flow into and out of the plant. Inhale and exhale through the tube. Then the hole in the tube is covered with Vaseline. Children try to breathe through a straw and conclude that Vaseline does not allow air to pass through. It is hypothesized that plants have very small holes in their leaves through which they breathe. To check this, smear one or both sides of the leaf with Vaseline and observe the leaves every day for a week.
Results. The leaves “breathe” on their underside, because those leaves that were smeared with Vaseline on the underside died.
EXPERIENCE No. 20
“Do plants have respiratory organs?”
Target. Determine that all parts of the plant are involved in respiration.
Materials. A transparent container with water, a leaf on a long petiole or stem, a cocktail tube, a magnifying glass.
Process. An adult suggests finding out whether air passes through the leaves into the plant. Suggestions are made on how to detect air: children examine a cut of a stem through a magnifying glass (there are holes), immerse the stem in water (observe the release of bubbles from the stem). An adult and children conduct the “Through a Leaf” experiment in the following sequence: a) pour water into a bottle, leaving it 2-3 cm empty;
b) insert the leaf into the bottle so that the tip of the stem is immersed in water; tightly cover the hole of the bottle with plasticine, like a cork; c) here they make holes for the straw and insert it so that the tip does not reach the water, secure the straw with plasticine; d) standing in front of a mirror, suck the air out of the bottle. Air bubbles begin to emerge from the end of the stem immersed in water.
Results. Air passes through the leaf into the stem, as air bubbles can be seen releasing into the water.
EXPERIMENT No. 21
“Do the roots need air?”
Target. Reveals the reason for the plant’s need for loosening; prove that the plant breathes from all parts.
Materials. A container with water, compacted and loose soil, two transparent containers with bean sprouts, a spray bottle, vegetable oil, two identical plants in pots.
Process. Children find out why one plant grows better than another. They examine and determine that in one pot the soil is dense, in the other it is loose. Why dense soil is worse. This is proven by immersing identical lumps in water (water flows worse, there is little air, since less air bubbles are released from the dense earth). They check whether the roots need air: to do this, three identical bean sprouts are placed in transparent containers with water. Air is pumped into one container using a spray bottle, the second is left unchanged, and in the third, a thin layer of vegetable oil is poured onto the surface of the water, which prevents the passage of air to the roots. Observe the changes in the seedlings (it grows well in the first container, worse in the second, in the third - the plant dies).
Results. Air is necessary for the roots, sketch the results. Plants need loose soil to grow so that the roots have access to air.
EXPERIMENT No. 22
“What does the plant secrete?”
Target. Establishes that the plant produces oxygen. Understand the need for respiration for plants.
Materials. A large glass container with an airtight lid, a cutting of a plant in water or a small pot with a plant, a splinter, matches.
Process. The adult invites the children to find out why it is so pleasant to breathe in the forest. Children assume that plants produce oxygen for human respiration. The assumption is proven by experience: a pot with a plant (or cutting) is placed inside a tall transparent container with an airtight lid. Place in a warm, bright place (if the plant provides oxygen, there should be more of it in the jar). After 1-2 days, the adult asks the children how to find out whether oxygen has accumulated in the jar (oxygen is burning). Observe the bright flash of flame from a splinter brought into the container immediately after removing the lid.
Results. Plants release oxygen.
EXPERIMENT No. 23
“Do all leaves have nutrition?”
Target. Determine the presence of plant nutrition in the leaves.
Materials. Boiling water, begonia leaf (the reverse side is painted burgundy), white container.
Process. An adult suggests finding out whether there is nutrition in leaves that are not colored green (in begonia, the reverse side of the leaf is painted burgundy). Children assume that there is no nutrition in this sheet. An adult invites the children to place the sheet in boiling water, examine it after 5 - 7 minutes, and sketch the result.
Results. The leaf becomes green, and the water changes color, therefore, there is nutrition in the leaf.
EXPERIENCE No. 24
"In the Light and in the Dark"
Target. Determine the environmental factors necessary for the growth and development of plants.
Materials. Onion, a box made of durable cardboard, two containers with soil.
Process. An adult suggests finding out by growing onions whether light is needed for plant life. Cover part of the onion with a cap made of thick dark cardboard. Draw the result of the experiment after 7 - 10 days (the onion under the hood has become light). Remove the cap.
Results. After 7–10 days, draw the result again (the onion turns green in the light, which means nutrition has formed in it).
EXPERIENCE No. 25
“Who is better?”
Target. Identify favorable conditions for the growth and development of plants, justify the dependence of plants on the soil.
Materials. Two identical cuttings, a container of water, a pot of soil, plant care items.
Process. An adult offers to determine whether plants can live for a long time without soil (they cannot); Where do they grow best - in water or in soil. Children place geranium cuttings in different containers - with water, soil. Watch them until the first new leaf appears. The results of the experiment are documented in an observation diary and in the form of a model of the dependence of plants on the soil.
Results. The first leaf of a plant in the soil appears faster, the plant gains strength better; The plant is weaker in water.
EXPERIMENT No. 26
“Where is the best place to grow?”
Target. Establish the need for soil for plant life, the influence of soil quality on the growth and development of plants, identify soils that differ in composition.
Materials. Tradescantia cuttings, black soil, clay and sand.
Process. An adult chooses soil for planting (chernozem, a mixture of clay and sand). Children plant two identical cuttings of Tradescantia in different soil. Observe the growth of cuttings with the same care for 2-3 weeks (the plant does not grow in clay, but grows well in chernozem). Transplant the cuttings from the sand-clay mixture into black soil. After two weeks, the result of the experiment is noted (the plant shows good growth).
Results. Chernozem soil is much more favorable than other soils.
EXPERIMENT No. 27
"Labyrinth"
Target. Determine how the plant seeks light.
Materials. A cardboard box with a lid and partitions inside in the form of a labyrinth: in one corner there is a potato tuber, in the opposite there is a hole.
Process. Place the tuber in the box, close it, place it in a warm, but not hot place, with the hole facing the light source. Open the box after potato sprouts emerge from the hole. They examine, noting their directions, color (the sprouts are pale, white, curved in search of light in one direction). Leaving the box open, they continue to observe the change in color and direction of the sprouts for a week (the sprouts are now stretching in different directions, they have turned green).
Results. A lot of light - the plant is good, it is green; little light - the plant is bad.
EXPERIMENT No. 28
"How a shadow is formed"
Goal: Understand how a shadow is formed, its dependence on the light source and the object, and their mutual position.
Procedure: 1) Show the children a shadow theater. Find out whether all objects provide shadows. Transparent objects do not give a shadow, since they transmit light through themselves; dark objects give a shadow, since the rays of light are reflected less.
2) Street shadows. Consider the shadow on the street: during the day from the sun, in the evening from lanterns and in the morning from various objects; indoors from objects of varying degrees of transparency.
Conclusion: A shadow appears when there is a light source. A shadow is a dark spot. Light rays cannot pass through an object. There may be several shadows from yourself if there are several light sources nearby. The rays of light meet an obstacle - a tree, therefore there is a shadow from the tree. The more transparent the object, the lighter the shadow. It is cooler in the shade than in the sun.
EXPERIENCE No. 29
“What does a plant need to nourish itself?”
Target. Determine how the plant seeks light.
Materials. Indoor plants with hard leaves (ficus, sansevieria), adhesive plaster.
Process. An adult offers the children a riddle letter: what will happen if light does not fall on part of the sheet (part of the sheet will be lighter). Children's assumptions are tested by experience; part of the leaf is sealed with a plaster, the plant is placed near a light source for a week. After a week, the patch is removed.
Results. Without light, plant nutrition cannot be produced.
EXPERIENCE No. 30
“What then?”
Target. Systematize knowledge about the development cycles of all plants.
Materials. Seeds of herbs, vegetables, flowers, plant care items.
Process. An adult offers a riddle letter with seeds and finds out what the seeds turn into. Plants are grown during the summer, recording all changes as they develop. After harvesting the fruits, they compare their sketches and draw up a general diagram for all plants using symbols, reflecting the main stages of plant development.
Results. Seed – sprout – adult plant – flower – fruit.
EXPERIMENT No. 31
"How to Detect Air"
Goal: To determine whether air surrounds us and how to detect it. Determine the air flow in the room.
Procedure: 1) Offer to fill plastic bags: one with small objects, the other with air. Compare bags. The bag with objects is heavier, the objects can be felt to the touch. The air sac is light, convex, smooth.
2) Light a candle and blow on it. The flame is deflected and is affected by the air flow.
Hold the snake (cut from a circle in a spiral) over the candle. The air above the candle is warm, it goes to the snake and the snake rotates, but does not go down, as the warm air lifts it.
3) Determine the movement of air from top to bottom from the doorway (transom). Warm air rises and goes from bottom to top (since it is warm), and cold air is heavier - it enters the room from below. Then the air warms up and rises again, which is how we get wind in nature.
EXPERIMENT No. 32
“What are the roots for?”
Target. Prove that the root of the plant absorbs water; clarify the function of plant roots; establish the relationship between the structure and functions of the plant.
Materials. A geranium or balsam cutting with roots, a container with water, closed with a lid with a slot for the cutting.
Process. Children examine cuttings of balsam or geranium with roots, find out why the plant needs roots (roots anchor plants in the ground), and whether they take up water. Conduct an experiment: place the plant in a transparent container, mark the water level, tightly close the container with a lid with a slot for the cutting. They determine what happened to the water a few days later.
Results. There is less water because the roots of the cuttings absorb water.
EXPERIMENT No. 33
“How to see the movement of water through the roots?”
Target. Prove that the root of a plant absorbs water, clarify the function of the roots of the plant, establish the relationship between structure and function.
Materials. Balsam cuttings with roots, water with food coloring.
Process. Children examine cuttings of geranium or balsam with roots, clarify the functions of the roots (they strengthen the plant in the soil, take moisture from it). What else can roots take from the ground? Children's assumptions are discussed. Consider dry food coloring - “food”, add it to water, stir. Find out what should happen if the roots can take up more than just water (the root should turn a different color). After a few days, the children sketch the results of the experiment in the form of an observation diary. They clarify what will happen to the plant if there are substances harmful to it in the ground (the plant will die, taking away harmful substances along with the water).
Results. The root of the plant absorbs, along with water, other substances found in the soil.
EXPERIMENT No. 34
"How does the sun affect a plant"
Purpose: To establish the need for sunlight for plant growth. How does the sun affect the plant?
Procedure: 1) Plant onions in a container. Place in the sun, under a cover and in the shade. What will happen to the plants?
2) Remove the cap from the plants. What bow? Why light? Place in the sun, the onions will turn green in a few days.
3) The onion in the shade stretches towards the sun, it stretches in the direction where the sun is. Why?
Conclusion: Plants need sunlight to grow, maintain green color, since sunlight accumulates chlorophytum, which gives green color to plants and for the formation of nutrition.
EXPERIENCE No. 35
“How do bird feathers work?”
Goal: To establish a connection between the structure and lifestyle of birds in the ecosystem.
Materials: chicken feathers, goose feathers, magnifying glass, zipper lock, candle, hair, tweezers.
Process. Children examine the bird's flight feather, paying attention to the shaft and the fan attached to it. They find out why it falls slowly, spinning smoothly (the feather is light, since there is emptiness inside the rod). An adult suggests waving the feather, observing what happens to it when the bird flaps its wings (the feather springs elastically, without unraveling the hairs, maintaining its surface). Examine the fan through a strong magnifying glass (on the grooves of the feather there are protrusions and hooks that can be firmly and easily combined with each other, as if fastening the surface of the feather). Examining the down feather of a bird, they find out how it differs from the flight feather (the down feather is soft, the hairs are not interlocked, the shaft is thin, the feather is much smaller in size); children discuss why birds need such feathers (they serve to retain heat).
Experimental lesson in kindergarten
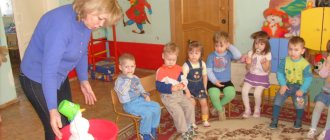
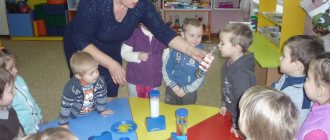
Experimental classes in kindergarten are structured taking into account the age characteristics of children in a time frame according to SANPiN standards:
- junior group - 15 minutes;
- middle group - 20 minutes;
- senior group - 25 minutes;
- preparatory group - 30 minutes.
To prevent overwork, various forms of activity are used: gaming (didactic games), physical (physical education, outdoor games), entertaining (singing), cognitive (studying visual material, conducting a conversation).
Practical work is preceded by a repetition of safety rules and a recitation of the sequence of actions during the experiment. At the end of the experiment, each student tidies up his/her workplace and helps the teacher put away the tools.
A reflection stage is required at the end of the lesson: the guys report the results of the experiment and share their emotions from the discovery process.
Card index of experiences and experiments - table
| Experimentation area | Lesson topic | Purpose of experimentation | Materials |
| Objects of inanimate nature | "Properties" | Introduction to the properties of sand | Jars of dry sand, water bottle, spatulas, plexiglass, magnet |
| "Water purification" | Introduce the method of filtering water | Glass with dirty water, empty glass, cotton filters for water purification | |
| "Fabrics" | Formation of ideas about the properties of various types of fabric | Containers with water, scissors, fabric samples | |
| "Metals" | Formation of ideas about the properties of metals | Alcohol lamp, matches, scissors, metal samples (demonstration experiment, conducted by a teacher) | |
| "Magnetic property of the Earth" | Introduction to the magnetic properties of the Earth | Magnet, glass, needles, model of the globe, magnetized safety pin, water, vegetable oil | |
| "Rainbow" | Introduce the mechanism of light decay into a color spectrum | Cut glass (part from a crystal chandelier) | |
| “How do I get a paperclip?” | Expanding ideas about the properties of a magnet and its use by humans | Container with water, paper clips, magnet | |
| "Polar Lights" | Expanding the understanding of the Earth's magnetic forces | Magnet, metal filings, two sheets of paper, cocktail straw, balloon, small pieces of paper | |
| "Space in a glass" | Finding out the factors influencing the shape of the planets | Glass with water, oil, alcohol, pipette | |
| Wildlife objects | "Roots Extend" | Establishing a connection between the modification of plant parts and the influence of external factors | Plants in pots with trays simulating various external factors |
| "Property of evaporating liquid" | Establishing the dependence of the amount of evaporated liquid on the size of plant leaves | Three indoor plants: with small leaves (Ficus retusa), with medium leaves (Ficus Benjamin), cactus | |
| "Light and Growth" | Establishing the relationship between lighting and plant growth | Houseplants, sheet of paper, pencils | |
| "Thrifty Plants" | Getting to know the ability of some plants to accumulate moisture | Container with water, food coloring, wooden blocks, sponges | |
| "Like a flower drinks water" | Forming an idea of the movement of water from the root of a plant along the stem to the leaves and flower | Glasses of water, food coloring, white carnations | |
| "Heat and Cold" | Establishing the influence of temperature on plant growth | Branches with unopened buds, cups of water | |
| "Plants breathe" | Establishing the plant's need for air | Houseplants, plastic tubes, Vaseline, magnifying glass | |
| "Living Piece" | Establishing the ability of a plant to feed and grow from the root | Root vegetables (carrots, radishes, radishes, turnips, beets) | |
| Human body | "Ear and nasopharynx" | Establishing a connection between the ear and the nasopharynx | Model of the structure of the ear and nasopharynx |
| "Smell and Breathe" | Establishing the need for inhalation to detect odor | A thick fabric bag with various aromatic materials: soap, orange peel, scented candle, perfume bottle. | |
| "Perception of cold and heat" | Determine the location of points on the human body that perceive heat and cold | Containers with hot and cold water, knitting needle | |
| "Eyes" | Introduction to the structure of the eye | Human eye model | |
| "Pupil" | Study the effect of light on the pupil | Mirror | |
| "Snore" | Learn about the causes of snoring in humans | Wax paper, scissors, ruler |
Children will learn experimentally how to remove metal objects from a container of water without getting their hands wet.
Summary of experimental activities in the second group of early age “Water, water...” - table
| Goals |
|
| Equipment | Toy “Luntik”, a transparent glass of water, scoops from a sand set, rags. A glass of cold water, a container with hot water (the teacher takes it out only during the experiment, without access for children). |
| Progress of the lesson | The children and the teacher go to the reception area. At this moment, a loud sound is heard in the group. When the teachers and children return to the group, they see a puddle of water on the table and “Luntik” next to it. Educator: Guys, what happened in the group? Who came to visit us? Do you know him? Children: Luntik! Educator: Hello, Luntik. Guys, let's say hello to Luntik. Children: Hello, Luntik. Educator: Guys, it seems that Luntik is upset about something. He said that he was in such a hurry to meet you, he didn’t notice a glass of water on the table and accidentally knocked it over. What happened to the water that was in the glass? Children: Spilled. Educator: We need to remove the water from the table. Shall we help Luntik? Children: Yes. Educator: Luntik just whispered to me that the water needs to be collected in a glass in the same way as we collect toys. Do you think it is possible to put water in a glass? We put the toys back into place with our hands, so we’ll collect the water too! Come out (Calls several kids), help us collect water. Children run errands. Educator: Did you manage to collect water in a glass? Children: No! Educator: Or maybe we can collect water with scoops. Let's collect sand! Calls a few more children to carry out the assignment. Educator: Guys, the water doesn’t return to the glass. How else can you collect water from the table? Children: With rags. Educator: Let's try. Children who have not yet participated in the experiment come out. Educator: Look, Luntik, the guys and I wiped everything off. Rags helped us with this. Do you know why we couldn’t collect the water with our hands and a scoop? Because water is liquid. When we spill something liquid, it turns out to be a puddle. And rags help to collect a puddle. What other liquids do you know? Children's answers. Educator: There is also liquid milk, tea, cocoa, soup. What does our nanny do when something suddenly spills? Children: Wipes with a cloth. Bottom line. Educator: Luntik thanks you guys for your help and says that now he definitely remembers that he will help him collect the liquid if he suddenly spills it. Luntik says goodbye to the kids. |
Children establish a way to clean up spilled water from the table surface
Recording the results of experimental activities of preschool students
Recording the results of practical research or observation is a mandatory stage of experimental activity. Children need to be taught to fixate gradually, since this type of work is considered difficult for preschoolers. And this stage is necessary in order for the results of the experimentation to be imprinted in the pupils’ memory (visual, sensory, auditory, motor, olfactory).
Ways to record the results of children's experimentation:
- Graphic. The simplest way to record results visually using ready-made forms: cards, pictures, graphic diagrams, photographs, three-dimensional images, audio recordings. This method can be used in experimentation with children 3–4 years old, asking them to choose from several ready-made forms the one that represents the results of practical work in the current lesson. With pupils of the middle group, simple graphic diagrams or mnemonic cards are used.
- Mental. To record the results of experimental activities, children's speech skills are used: the child talks about the results of practical research. The mental method is used in working with children of the middle group: pupils develop the ability to independently pronounce the results of the experiment, compare them with the results of similar experiments conducted earlier. During mental fixation, older preschoolers improve their ability to generalize and systematize knowledge about objects.
- Practical. It consists of recording the results of experimentation on paper - by sketching or writing. When working with preschoolers, schematic sketching and sketching with conventional symbols are more often used. For this purpose, children keep observation diaries, experiment logs, and fill out experiment cards. The teacher writes down a story about the results of practical research in kindergarten from the words of the children, for example, to secure a report on the work done in the group journal, on a stand in the knowledge corner.
Students sketch the results of the experiment on observation sheets.
Consultation for parents
It is recommended to hold meetings with parents several times during the school year, which highlight the work of children in the framework of experimental activities. Parents are informed of the goals and objectives of children's experimentation; they must understand its significance for the development of the child's personality. Cognitive activity and the desire to conduct practical research must be encouraged at home.
Support for experimental activities of children is carried out through the implementation of the following tasks:
- encouraging the child’s curiosity and initiative in experimentation;
- showing interest in kindergarten activities;
- motivate by personal example.
At consultations for parents, the teacher provides sample topics for joint experimental activities with children at home and on walks (for proactive parents - topics for short-term research projects): seasonal observations on the street, a description of performing experiments in the bathroom, in the kitchen. The importance of recording the results of practical research should be pointed out: parents together with their children can keep diaries and journals, draw posters, make collages from photographs and laptops (folding books on the topic of the experiments carried out - “Three forms of water”, “Conditions of plant growth”, “ Methods of soil purification", "Properties of air"). Experimenting with your family (with mom and dad, brothers and sisters, grandparents) is not only the acquisition of knowledge, but also positive emotions.
Conducting experiments at home creates a positive atmosphere in the family and is remembered for a long time
