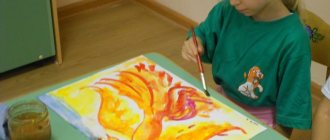
How to teach a child to use scissors with the help of games, and why this is necessary, read in our material.
Problems with scissoring in children indicate underdeveloped fine motor skills, muscle tone and proprioception in the child.
Among young children, you can often notice how a pencil breaks in their hands while drawing. Children with weak arms, fingers, hands, and elbows have problems with fine motor skills, making it difficult for them to hold a pen or pencil, erase with an eraser, write, or hold scissors. But besides this, children often also face the problem of proprioception, that is, the inability to calculate the pressure on an object, for example, a pencil, which causes it to break.
This problem can be noticed when a child throws a ball, holds a glass of water, turns the pages of a book, or kicks a soccer ball - the child does not know how much force and pressure it takes to perform the action.
Fine motor problem: proprioception
Proprioception is a sensation in muscles, joints and ligaments, so it directly affects the development of fine motor skills in a child. This type of problem is called proprioceptive dysfunction, causing poor handwriting, confusion about the direction of letters and numbers, and problems forming sentences.
A child with a proprioception disorder holds the scissors too tightly and cuts out of line because he does not know where to start and where to end. If your child has weak muscle tone and fine motor skills, it may be worth checking to see if your child has a delayed grasp reflex (Palmer reflex) before trying fun games to develop fine motor skills. If the suspicion is confirmed, the child may always have difficulty writing, lettering, cutting with scissors, and using fine motor skills unless steps are taken to transform the Palmer reflex into full grasping.
If your child has difficulty using scissors or has a hard time understanding how to use them, problems with vision and hand-eye coordination may also be the cause. He may appear clumsy, have difficulty handling objects in his hands, constantly change hands and switch scissors, and lack spatial awareness (not understanding which direction to cut). This point is worth discussing with your pediatrician.
If the only problem is that the child does not have the skill of how to use scissors, we offer several games to develop it.
Preview:
How to teach a child to cut with scissors
Scissors are familiar to children from a very early age, as they see how nails are cut with them. The very process of using them is of obvious interest to children, but parents have a lot of questions regarding how to teach their child to cut with scissors and protect them from injury.
Every mother sooner or later asks the question: when can she give her baby scissors? The answer to this question is very simple. It all depends on your child. Just take a closer look at your baby: if he shows interest, let him try, and teach your child to cut with scissors.
Buy special children's scissors for your child. They are small in size, suitable for children's hands, and also have rounded ends. Scissors for children do not allow them to prick themselves. It is not worth introducing your child to this subject at an early age; it is best to wait until he reaches two years of age.
Explain to your child how to hold scissors correctly and show the simplest cutting techniques. The first movements of opening the scissors can be practiced in the air, without paper. After your child understands how scissors work, take paper that is thick enough to hold in your hands, such as pages from old magazines.
Place your child on your lap and take his hands in yours, helping him move the scissors apart and move them apart. Over time, he will learn to do this on his own. At an early age, a child can simply shred paper into strips; at two years old, he cannot cut out shapes. A child begins to confidently cut along a contour closer to 4 years of age.
After three years, when scissors become obedient in the child’s hands, as an exercise, invite him to cut out the simplest shapes drawn on paper: a square, a triangle, a circle. You can make patterns and ornaments from them. Such activities develop coordination and eye skills well.
At the same time, immediately accustom them to the fact that when cutting it is necessary to move the paper, not the scissors. If you use colored paper and think about the theme of the future application in advance, the activity will be even more creative and interesting.
In this case, tasks can be different:
1) Glue four same-color quadrangles in one row.
2) Glue two red and two blue quadrangles, following a certain sequence: one quadrangle is red, the second is blue, the third is red, the fourth is blue.
3) Glue two quadrangles and two circles, changing them sequentially.
4) Carry out similar work with triangles, placing them sequentially in shape and color.
Later, when the children learn to cut out the desired shapes from paper themselves, they are assigned the following tasks:
1) Cut the paper strip into squares that can be used for ornaments, toy house windows, flags, etc.
2) Cut thin straight strips from rectangular paper - flag poles, flower stems, etc.
3) Cut the ends of the rectangle obliquely to make a roof for a house, an airplane wing or parts of other objects.
4) Cut a circle from the square, gradually rounding its edges (snow woman, chickens)
5) Cut out fruits, vegetables, flowers, trees, butterflies. A rectangle of the corresponding color is folded in half and half of the intended object is cut out.
6) Cut out objects by folding the paper strip several times.
Regardless of when (at what age) you started teaching your child to work with scissors, you must immediately explain the rules for handling scissors.
Starting work for the first time, and repeating it every next time until the knowledge turns into a habit.
1. Scissors are NOT a toy. Scissors are a tool. They are sharp and dangerous. If you use them incorrectly, you can get hurt.
So, they don't play with scissors, they work with them.
2. You can use scissors to: cut paper, cardboard, threads, fabric, cut out parts for appliques - circles, squares, etc.
3. You CANNOT use scissors: wave, throw, bring to your face, take without permission, walk, much less run.
4. Pass the scissors only closed: rings forward, grasping the closed blades.
5. You need to work with scissors while sitting at a table.
6. Every time after work, put the scissors back in the closet!
Principles of working with scissors
Hand position
First of all, as with any work related to fine motor skills, the child needs to be seated correctly.
1. The child should sit upright, his legs should rest on the floor and not hang in the air.
2. The child’s elbows should be on the table, knees should be bent at right angles.
3. Hands should be somewhat pressed to the body, not tightly, but at the same time they should not be very high “in the air.” Make sure your child does not raise their elbow when cutting.
If your child is unable to hold his hands correctly, you can try several techniques.
The first is to tell him: “Imagine that your arms are tied to your body at the elbows.” You can hold his hands a little so that he understands and feels this position.
Second, you can let him cut with your elbows on the table.
The third one can be cut while lying on the floor, on your stomach. Raising your elbows in this position is very uncomfortable, and children with coordination difficulties often learn the correct hand position this way. Let your child cut like this for a few days so that he gets used to it, and then sit him down at the table again.
In addition to the position of the elbows, it is important to ensure the correct position of the hands. When a child holds scissors in one hand and a cutting sheet in the other, the hands should be in the so-called functional position - with the palms turned inward towards each other and the thumbs on top. You can say to the child: “Make sure that the thumbs of both hands are up.” You can put colored stickers on your thumbnails and tell your child that when he cuts, he should always see the stickers.
The ability to work with scissors is very good for developing finger motor skills. Having learned to handle children's scissors, over time you can trust ordinary, simple scissors that parents use. Naturally, at first you will have to watch the child practice with ordinary scissors; he will be very proud that the parents consider the child already an adult and trust him to use adult things.
Good afternoon, dear readers!
Today we will talk about how to teach a child to use scissors, how to teach a child to cut with scissors. And the early development of children will help us with this.
Children from birth know what scissors are. After all, they constantly see how adults cut their nails. Naturally, the process of using this device arouses their obvious interest. But, parents ask a number of questions related to this subject. For example, when can you start giving your child scissors, how to teach him how to use them, how to protect the baby from injury?
There is no clear answer. After all, all children are different. Take a close look at the little one. If he shows interest in scissors and can hold them normally, be sure to let him try cutting and teach him how to use them correctly.
Some parents do not give their children scissors at all for safety reasons. But such a ban is not the best way of protection; on the contrary, it stimulates the baby’s cognitive activity more.
How to teach a child to use scissors? We buy safety scissors.
Did you know that there are special models for children's creativity - safe ones. They are usually small in size, adapted to children's hands, light, comfortable, with rounded tips. They are protected from the fact that a child can get hurt during operation. There are even scissors whose blades are covered with plastic.
Show your child how to hold scissors correctly and how to cut. Do the first movements of opening and closing the scissors without paper, practice in the air. After the little one understands the principle of operation, move on to paper.
Be sure to explain to your child the rules for safe handling of scissors:
1.
Scissors are a cutting tool and not a toy at all.
They are sharp and therefore dangerous. If used incorrectly, you may get injured. 2.
You can use scissors to cut cardboard, paper, fabric, threads, cut out various elements for appliques, and you cannot throw, wave, run with them, jump, bring them to your face, or take them without permission.
3.
Scissors should only be passed closed (with blades closed), rings forward.
4.
This tool can only be used while sitting at a table.
5.
Each time after work, the scissors must be put back in place.
Do not allow your child to play or play with scissors. They must be used strictly for their intended purpose.
How to teach a child to use scissors? How to teach a child to cut with scissors?
What should be the first lessons with scissors?
First, the child must learn to cut paper into pieces and make a “fringe.” Remember that the process of cutting and slicing has a good effect on the development of perseverance, patience and other useful qualities.
At what age can a child learn to use scissors?
From the age of three or four, children can already make small cuts on paper, and by the age of 5-6 they can cut well.
How to hold scissors correctly?
1.
The child should hold his hand so that the thumb is at the top.
An adult needs to put one of the scissors rings on his finger. 2.
The baby himself must insert his index finger into the second ring.
3.
For convenience, you can also insert the tip of your middle finger into the second ring.
4.
The little finger and ring finger need to be bent so that they rest against the palm.
5.
To teach your child to hold scissors correctly, raise a piece of paper above his eye level.
If the baby wants to cut it, he will automatically take the scissors correctly. 6.
Remember that you need to work with scissors while sitting at a table.
The child's feet should rest on the floor. Elbows – lie on the table. Knees are bent at right angles. 7.
During the cutting process, your hands should be slightly pressed towards your body.
What should the baby learn, and in what order?
1.
Hold the scissors correctly.
2.
Open and close them.
3.
Show interest in them.
4.
Cut or cut off a piece of paper, cut the “fringe”.
5.
Cut a piece of paper, making two or more consecutive cuts.
6.
Cut the sheet in half.
7.
Cut out a square and any other geometric shape.
8.
Cut out a more complex shape.
How to teach a child to use scissors: games and exercises
Below are exercises that will help develop fine motor skills and teach your child how to use scissors. Later, you can simply give your child unnecessary postcards, booklets or magazines so that he can cut everything out.
Cutting out zigzags
Pages with wide and dotted lines are designed for younger children who are just learning to use scissors. Simply use a marker to draw various zigzags, waves and lines on strips of colored paper. The younger the child, the larger the figures should be. Invite your child to cut strictly along the line with scissors.
Source www.funwithmama.com
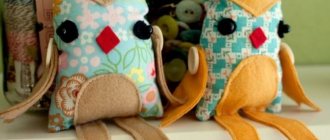
Game with scissors "What's hiding in the grass"
To find out what or who is hiding in the grass, the child needs to cut off all the “blades of grass.” Making such a game couldn’t be easier: cut green colored paper into strips and glue it to any picture.
Cheat sheets for exams and tests
| See also... |
| Methodology for the development of children's visual creativity part 2 |
| Second junior group |
| Middle group |
| Senior group |
| Preparatory group for school |
| Children's creativity in modeling under the influence of works of art. |
| Enriching the color expressiveness of painting clay products. |
| The enrichment of the compositional concept in modeling is the creation of relief and bas-relief images on clay tiles. |
| Methods and techniques for sculpting various objects depending on the developmental characteristics of children. |
| 3 ways to sculpt |
| Ways to design and decorate an image |
| Application. Types of applications in d/s. |
| Equipment and materials for application. |
| Tasks and program material for the application. |
| 2nd junior group |
| Middle group |
| Senior group |
| Preparatory group |
| Techniques for working with scissors in different age groups. Cutting methods. |
| Cutting flat geometric shapes and objects of simple and complex shapes |
| Symmetrical cutting |
| Silhouette cutting |
| Methods of teaching children straw appliqué. |
| Methods of teaching children applications from dried plants. |
| Types of applications |
| Creation of works |
| Construction. Types of design. |
| Content of knowledge and skills in design |
| Designing from paper in the middle and senior groups of kindergarten. |
| Senior group |
| Methods and techniques of teaching. |
| Planning. |
| General principles of planning. Mastering the program. |
| Selection of subject and plot content of classes. |
| Mastering the visual arts program |
| Visual abilities. |
| Stages of development of visual abilities. |
| Features of creative activity of preschool children. |
| The dependence of the development of abilities and creativity on training |
| Children's fine art. |
| Stages of development of children's visual creativity |
| Indicators of the presence of creativity in children’s visual activities |
| All Pages |
Page 19 of 42
Techniques for working with scissors in different age groups. Cutting methods .
Children learn techniques for working with scissors by imitating the ways of an adult. Therefore, the teacher must show the correct ways to use scissors, taking into account the difficulties that children usually experience. For example, the teacher needs to make sure that the child does not bring forward the elbow of the hand with scissors, control the movements of both hands, knowing that large parts are cut out with wide open scissors, and small parts are cut out with small, careful movements.
Let's take a closer look at the basic cutting techniques , based on the principle of a gradual increase in image difficulty for children of different age groups:
a) cutting out geometric figures and objects, the basis of which are these figures and their combinations;
b) symmetrical cutting of objects and pattern elements;
c) cutting out by eye the complex outline of objects with an asymmetrical structure.
Figure 1 shows cutting out different geometric shapes by eye , using folding techniques from various types of blanks, as well as techniques for replicating shapes (techniques for replicating geometric shapes by bending blanks into several parts are used in classes with children only of senior preschool age 6 - 7 years old.) for patterned compositions.