Are you looking for detailed instructions on how to make a hare from plasticine step by step? In this master class you will find photos and descriptions of each step in sculpting a cute animal.
Every kid knows that these animals' fur coat color changes depending on the time of year. We suggest you make a gray bunny. But you can show your imagination and turn him into a pink toy rabbit or make Krosh from the cartoon “Smeshariki”, the owner of blue fur. The main thing is that your baby is happy.
Master class “How to make a hare from plasticine step by step”
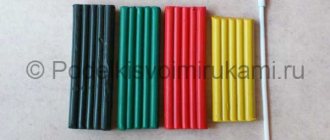
Take yellow, white, green, black and gray plasticine. By the way, the latter is quite often absent from sets. But you can make it yourself: crush part of a black bar and add a light one there, mix. As a result, you will get the desired shade.
Soften the gray plasticine and divide into three parts. From the first, roll out a round head, from the second - a pear-shaped body, and leave the third for now, it will be used to create small details.
You can start sculpting the long ears of a hare. You need to roll sausages from a piece of gray plasticine, flatten them, you get two oval ears. On top they need to be decorated with red inserts of the same shape.
Now you can start decorating the bunny’s face. Form two round eyes from black plasticine and stick them to the white pancake pupils. At the bottom, stick the cheeks and chin in the same shade as the pupils, after drawing a mouth on them. Then you need to attach a red button nose, and long ears on top.
Take the shape of the body and stick a white chest and tummy on top of it.
Make the hare's feet from gray plasticine, like his entire body. Mark the fingers with claws using a plasticine knife.
Gather all the parts together, you can attach a white or gray tail to the back.
To prevent the gray baby from starving, “give” him a carrot made of red plasticine and leaves made of green plasticine into his paws.
We need: modeling compound, stack, skewer, PVA glue, felt-tip pens or stained glass paints. You can also sculpt from simple plasticine.
Step-by-step sculpting scheme:
1. Make the main parts of the hare: head, ears, body, legs, tail. The basis of each part is a ball. 4. Decorate the hare’s body with a pink spot. 3. Roll small balls for the cheeks from the pink mass and flatten them. Use a skewer to make dots - a mustache; use a stick to mark the eyes and mouth. Make eyebrows from thin white flagella. 4. Connect all the parts using PVA glue. 5. Color the eyes and nose with felt-tip pens. Don't forget to make and give the hare a delicious carrot!
The second hare is also white and well-fed. You can make it gray or even red, but our bunny has already changed his gray summer coat to a winter one.
We make 2 balls, one larger and the other smaller. We roll the larger one into a thick sausage - this is the body. The smaller one is the head. The front legs are 2 small sticks. The hind ones are long. Let's add ears and a muzzle and you can admire your creation.
The third bunny is the most difficult, but also the funniest, as if he had just jumped out of a cartoon.
We hope you got the bunny that you wanted to make.
Print Thank you, great lesson +22
There is absolutely nothing complicated about sculpting a hare from plasticine.
All that needs to be reproduced from a soft pliable mass are long ears, a fluffy miniature candle tail and fur clothes of the desired color. Children know that bunnies are cowardly animals, they are afraid of wolves and foxes, bears and owls, but they know how to camouflage themselves, wearing a gray coat in summer and a white coat in winter. Thus, when choosing plasticine for sculpting a hare, choose either the first or second option. Other lessons on forest animals:
Plasticine fox step by step
In order to make such a fox, you will need plasticine in orange, white and black colors.
- First of all, as always, we sculpt the head. To do this, you need to roll an orange ball.
- We make a plasticine fox nose from a ready-made head: you need to pinch the head on one side with your fingers so that you get an elongated figure.
- For the body we take twice as much material as for the head. Roll the orange ball and roll it into an oval. We attach the head to the body.
- Next we make the white belly and neck. To do this, take a little white plasticine and smear it with your fingers on the front of the body and along the bottom of the head.
- Let's move on to the front legs. We make them in the shape of a sausage from orange and black colors. We cut the plasticine fox's fingers using a special knife.
- The back legs are just balls, which we also shape into toes using a stack.
- The tail is made as follows: roll a large thick sausage of orange and white material together. Make the tip of the tail a little thinner by pressing it with your fingers. We attach it from the back.
- All that remains is the plasticine fox face. We make the ears white from a ball rolled in our palms. Next, as in the case of the tail, we press along the tip with our fingers so that one end becomes thinner. To get a triangle shape, you need to make the ears a little flat.
- The nose and eyes are black balls that need to be carefully attached to the face at an even distance from each other.
- We make the mouth and cuts in the ears using a knife. That's all, the plasticine fox is ready!
Step-by-step photo lesson:
In this modeling lesson, gray plasticine, a drop of black and plastic stack were used. You can repeat all the steps with the white mass.
Roll into an oval ball.
Stick on white eyes with black pupils. They can be placed close to each other or at some distance. Also attach a black nose and use the stack to create the effect of furry cheeks.
Place two long ears on the top of your head.
Prepare the required amount of gray mass for sculpting the body of the animal.
Gradually crush the ball with your palm and swing it in different directions, stretching your torso. Make the chest area shaggy.
Add a head by placing it on a match.
To make the front and back legs, divide the remaining gray plasticine into four portions. From large pieces, mold parts shaped like commas; draw the front legs in the form of simple rollers.
Attach the legs to the body.
Attach a shaggy candle tail at the back.
The plasticine bunny is ready. Now you will definitely have to continue the exciting work to treat the animal with crunchy vegetables: carrots or cabbage.
Today we will make a plasticine hare. A 4-5 year old child can easily cope with this task, but younger children will need the help of adults. First, show your child how to sculpt a hare correctly, and let him make the next plasticine craft on his own.
1. You will need a block of white or light gray plasticine. Divide it in half using a plasticine knife.
2. Divide one of these two parts into four more: in total you should get 1 large piece of plasticine and four small ones.
3. A large piece will be the bunny’s body; you can immediately shape it into an oval. With small pieces you need to proceed as follows:
- one of them will serve as paws - divide it into four parts and roll them into small drop-shaped shapes, flattened on one side;
- cut the second into two equal parts - these will be the hare's ears;
- from the third piece form the head of an animal;
- and the fourth part will be useful to you later for sculpting a small tail and muzzle.
4. Glue the head with ears, and the body with legs. Don't forget to insert half a match into the body so that the head holds well.
5. Assemble the bunny figurine, connecting the parts in the right places.
6. Next up is modeling a hare’s face from plasticine. Glue a small ball in place of the nose, and a little lower place two small flattened ovals - cheeks.
Now make the bunny's eyes using two small black balls. You can “revive” them by adding highlights: glue very tiny pieces of white plasticine on top of the black eyes.
And the final touch is the toes on the animal’s paws, which need to be made using a plasticine stack or knife.
7. This is what your bunny should look like (side view).
And to make it more fun to play, you can mold food for him - plasticine cabbage or carrots. This is how easy it is to mold a hare from plasticine!
Plasticine hare:
step-by-step master class on sculpting a hare from plasticine with children in step-by-step photographs.
Plasticine
– an amazing material for creativity. It not only gives children the opportunity to realize their creative potential and helps develop aesthetic taste, but also teaches them to live in harmony with nature. After all, children must express their feelings, emotions and imagination, their attitude towards the world around them.
Every child can easily master this technique and sculpt the desired figures and objects. To do this, you just need to correctly structure the modeling lesson and observe the necessary sequence in the work.
Which plasticine is best to choose for sculpting a hare?
Good plasticine in bright colors, elastic, kneads easily in your hands and does not stick to them, does not leave stains on your hands or work surface.
The master class from this article was prepared by Vera Parfentyeva,
reader of "Native Path". Vera is the leader of a children's art group, a technology teacher, and a participant in our Internet Workshop of educational games “Through play - to success!”
The main secret in sculpting a hare is the basic elements from which you can make the body of any animal or bird.
The craft - a plasticine hare - consists of three elements:
plasticine balls, rollers and cakes.
Hello everybody! As I promised before, in the next modeling lesson we will learn how to sculpt a hare from plasticine. Today it’s time for the next lesson, which means today we will sculpt a bunny. Or more precisely, a fairy-tale bunny from a cartoon. Sit down with us, let's start sculpting. Surely you have already prepared plasticine of different colors. To make a hare, we will need several of the most standard colors - white, green, pink, yellow, orange and red plasticine. All these colors are included in the usual set of plasticine, which can be found in almost every home where there are children.
Our bunny will consist of the following main parts - the body, head, ears and paws.
First we will mold all the parts separately, and then we will connect them together. 1. We sculpt the body of a hare. The body - also known as a sundress - can be molded from green plasticine. The body must be rolled into a cone, truncated on one side. The lower part of the body must be slightly bent upward along all the circumferences to give the hem of the sundress a waviness. 2. We sculpt the head of a hare. Everything is simple with the head. The most common white plasticine ball. 3. We sculpt the hare's paws. All four bunny legs (legs and arms) are almost identical in shape and size, see the bottom picture. 4. Ears. The ears will be two-colored - white and pink.
The shape of a hare's ears is slightly curved, narrow at one end and wide at the other. Now that all the main and large parts of the hare are ready, you need to attach the head to the body, ears to the head, paws (legs and arms) to the body. The hare itself is ready, now a few details. First of all, of course, it is necessary to sculpt the eyes, muzzle and tongue. Eyelashes can be drawn with a black pen or a thin felt-tip pen. Now let's decorate one of the bunny's ears with a yellow-orange bow, put a flower of the same color in his hands and decorate the body (sarafan) with small yellow dots. That's it, the bunny is ready.
Not much time passed and we learned how to sculpt a hare from plasticine. I hope you enjoyed the lesson. You can leave your reviews about the bunny craft in the comments. I don’t know yet what we will sculpt next time, perhaps we will learn how to sculpt a cat or a dog. You can also write your idea for the next lesson in the comments. And in order not to miss the next lesson, you can subscribe to new crafts by email, to do this, enter your e-mail in the form below.
Watch the cartoon Little Fox - Strawberry Rain
Enjoy watching!
This is an almost limitless storehouse of instructive stories, kindness and care for others, where every child can find a lot of interesting characters. And one of these animated masterpieces is the short cartoon “Strawberry Rain”, among the main characters of which there is a cute, cheerful fox.
As part of today's lesson, we will try to sculpt this cute, funny and loving fox. And as always, detailed instructions will help us with this. By the way, using the instructions presented, anyone can independently or together with their child, make a little fox from any other favorite cartoon. It will be enough just to make the necessary adjustments. So, how to mold a fox from plasticine in just 15-30 minutes?