Contents of the collection of technological maps for modeling
| Subject | Goals Objectives | Working with parents |
| "Candy" | Improve the technique of sculpting round shapes using circular movements of the palms. Develop the ability to find shape-changing techniques to convey the shape of candies (flattening, stretching, squeezing). Encourage children to look for different options for decorating candies. Create conditions for the use of different tools and materials. | Offer to bring candy wrappers, beads, juice straws, and lids. |
| "Souvenir candlestick" | To develop children's ability to sculpt candlesticks. By independently choosing the method and techniques of sculpting. Offer to decorate the candlesticks according to your choice - with moldings, cut-out decor based on folk ornaments, beads, natural materials, etc. Encourage initiative and independence when choosing additional materials and means of artistic expression. To cultivate artistic taste, the ability to use different materials to decorate the image. Develop creative activity. | Talk with children about candlesticks: what are they for; what are there. Consider if possible. |
| "Aquarium fish" | Continue mastering the techniques of relief modeling, teach children to create flattened figures, decorate them with moldings and cut-out designs. Improve the ability to design crafts with dots, stripes, etc. Develop creative activity. Cultivate initiative. To develop children’s ability to sculpt a fish figurine, convey the shape of the body, structure, shape of parts, proportions, and tightly fasten parts together. Initiate independence when choosing additional materials. | Consider the appearance of fish, talk about the variety of names. |
| "Friends for a Hedgehog" | Strengthen technical skills and sculpting techniques (pinching, pointing, pressing, joining). Sculpt from parts, divide a piece into parts, maintain the ratio of proportions in size, tightly connecting them. Develop fine motor skills. Develop creative activity and coherent speech when writing a story about your craft | Looking at pictures of hedgehogs Offer to bring vermicelli, pine needles, matches |
| “In the Meadow” “Favorite Tales” | Continue to develop children’s ability to sculpt insects, conveying the characteristic features of structure and color. Strengthen the ability to use familiar sculpting methods in work (rolling between palms, connecting parts by pressing). Create conditions for the creative use of all mastered skills, initiate an independent search for means and techniques for decorating an image. Foster initiative and independence. Develop creative activity. To develop children’s ability to sculpt flowers from plasticine (roses, daisies, cornflowers). Develop the ability to roll a roll from a thin strip, spreading it on the palm of your hand, first tightly, then looser, flatten it on one side to obtain a bud. Continue to introduce children to ways of attaching parts to the base (painting). Arouse interest in sculpting fairy-tale characters. Develop the ability to conceive the content of your work, determine how to implement the plan, and independently choose methods and techniques of modeling. Show the possibility of using different materials to decorate the image. Develop creative activity. Final lesson: exhibition of works “In the world of fairy tales” | Looking at a variety of flowers. Prepare riddles about insects. Reading your favorite fairy tales, looking at illustrations. |
We also recommend introducing activities aimed at increasing the level of pedagogical education of parents of pupils in the field of developing the creative activity of preschoolers, such as: surveys, consultations, seminars, information stands, reminders, organization of exhibitions, etc.
Modeling classes for senior preschool age – 20-25 minutes. Classes are held once every 1-2 weeks.
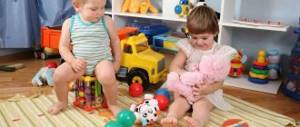
It is best to arrange tables for classes in a semicircle in front of the teacher’s table, if space allows, or in a checkerboard pattern, but so that each child sits facing the teacher. Each table should have a board, wet wipes, a glass with stacks, and a box with additional materials, if necessary. The attendants prepare the equipment and place it on a separate table, and the children themselves set up their own workplace.
In the center of the room, in a visible place, place a light bedside table covered with a plain napkin. The bedside table is 25-30 cm higher than the children's tables. On it they place a nature - a sculpted craft that is clean, beautiful, without defects, if this is suggested by the topic of educational activity.
If you need to clarify details, the teacher can hang illustrations on the board, but no more than 2-3, so as not to distract the children’s attention from the main task.
On the teacher’s table there is everything necessary for the lesson: books with poems, records, films, technical means, a board and material for demonstrating the method of action or for showing as individual help (the teacher uses his material to show how to work).
At the senior preschool age, the plastic method of modeling (sculptural) is introduced - pulling out a part from a whole piece (figurines of an animal, a person on legs), tape and the method of circular (roller) molding, selecting plasticine from the original form - modeling dishes; decorative relief modeling.
Techniques - the ability to smooth the surface of a product, firmly fasten parts, make moldings, recesses, reliefs, be able to use frames, use stacks, work with a variety of plastic materials, be able to convey movement. At the same time, children are taught to treat the surface of the product, smoothing it with a wet cloth for subsequent decoration with relief or painting. At this age, children master sculpting objects from life and from imagination.
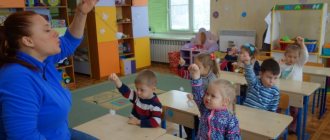
The teacher uses a partial demonstration of modeling techniques (a full demonstration is not used, since the children are familiar with the image of the original forms) of modeling or involves children in the demonstration when the form is familiar to the children. When showing a new method of sculpting or technique, the teacher gives them a sample or demonstrates the new technique himself. This develops the creative activity of preschoolers.
During sculpting from life and from imagination, children develop independence and creative activity in sculpting methods. The leading methods will be heuristic and research teaching methods aimed at developing creativity. Modeling: subject, subject, decorative, according to plan, according to presentation, from nature.
Thus, the development of creative activity and independence in modeling classes depends on the use of a variety of teaching methods and techniques, on the variety of materials used, techniques and modeling methods.
Lesson structure:
Part 1 - getting to know the subject of modeling using a playful form; examination of an object, examination of a sample, demonstration and explanation of sculpting techniques, consolidation of techniques, use of form-building actions;
Part 2 – implementation of the plan. The teacher carries out methods of direct and indirect guidance, this depends on the individual characteristics of the children, age group, type, topic and program content of the lesson;
Part 3 – analysis of children's works. In early preschool age - a general positive assessment, on average - differentiated, in older - the teacher analyzes the children's work, gives a sample of the analysis and teaches children to analyze their work and the work of their comrades. In this part of the lesson, it is very important to have the right attitude towards the child’s creative idea and to maintain children’s interest in the modeling process.
Let's look at the structure of the lesson in more detail:
I. Introductory part - the process of forming a plan.
This is a very important part of the lesson - the manifestation of creative activity in the children’s activities depends on how the teacher structures this particular part of the lesson. The teacher creates an atmosphere of creativity, formulates a topic, and sets a task.
The formulation of the topic should be unexpected, evoking emotions, with a surprise moment, with an artistic expression, giving the child the opportunity to express in modeling something of his own, just invented.
Options for surprise moments:
1.Game technique (there is a knock on the door, a doll appears who asks to fashion a treat, because she has a holiday soon, etc.).
2. The “guess” technique (there is something (for example, salt dough) covered with a handkerchief on the teacher’s table, the teacher invites the children to guess what might be there).
3. Musical technique (play a melody on a musical instrument and invite children to think about who this melody is about, let them listen to a fragment of a piece of music).
4. “Riddle” technique (Walks in the forest in summer, rests in a den in winter).
Options for formulating the educational game task:
1) Let's learn how to sculpt bagels. Let's help doll Masha prepare a treat for the holiday.
2) We will make baked goods for the store game.
3) Let's learn how to sculpt a cockerel. This will be a New Year's gift for mom and dad.
4) Let's learn how to sculpt a bear cub. Let's make bear cubs for kids.
Examination of an object before sculpting is preliminary work.
Explanation, demonstration of sculpting techniques - this stage is associated with an explanation and clarification of how children should act, what technical techniques to use to sculpt an object.
Demonstration of image techniques is needed when it is necessary to use a new technical technique or when a complex object is given to complete:
— A full demonstration of techniques is used when performing a new task, using new techniques.
— Partial demonstration is necessary when the teacher sees that children are performing some technique incorrectly, or wants to draw attention to some method of modeling, remind them how to do this or that part of the work. A partial demonstration of modeling methods can be done by a child, and he must explain how and what he does.
When explaining a new technique to children, they show it at a slow pace and tell how their hands and fingers are positioned. Particular attention is paid to the quality of movements. Each time when performing one or another technique, the teacher explains how to regulate the force of pressure of the hands and fingers, using the words: “a little bit”, “slightly”, “a little”, “stronger”, “stronger”, “very much”. strongly". If the action is complex, it is necessary to divide it into a number of simpler actions, and each one must be called a specific term. When explaining a new technique, the teacher invites the children to make this movement with him, repeating his actions.
II. The main part is the execution of the plan.
Stage 1. Organization of perception of the subject as a whole.
Visual control of the consistent and continuous movement of the palms and fingers, starting from the top point down along the main characteristic lines (movement from top to bottom and as if in a spiral). The position of the object is always fixed (the left hand holds the object, the right hand examines it; the object can stand motionless on the table).
Stage 2. A detailed examination of an object combined with its analysis.
Examination of an object by hand and eye is accompanied by an analysis of the main parts and determination of their properties (shape, size, proportions); the movements of the fingers seem to measure the ratio of depths and determine the spatial relationship of the parts, the connection of the parts with the main part.
Identification of smaller parts of an object and establishment of their shape, size, spatial position in relation to other parts.
Stage 3. Repeated holistic emotional perception of an object.
The general final movement of the hand and gaze from top to bottom allows you to combine the data obtained through sensory means into a holistic image. The examination can also be aimed at analyzing (feeling) the structural surface of an object. To recognize the structure of the material, pressure is applied to the surface of the object.
Independent work follows. It is necessary to constantly encourage children who show independence and initiative. In case of difficulty, you can help the child, but show it on your own piece of plasticine. Children who quickly completed the task should be given additional material and suggested options for adding to the image. If most children have difficulty, a second explanation should be arranged. 5 minutes before the end of the lesson, you need to warn the children about this (attention is cultivated, clarity in fulfilling requirements, and a sense of time is developed).
III. Final part.
Analysis of children's works.
Object modeling: it is analyzed how correctly the children sculpted the object, whether they were independent, and what new things they brought into the image.
Plot modeling: analyzes how the plot is conveyed and whether it is expressive.
Decorative modeling: the accuracy of applying a decorative pattern, the rhythm of individual elements of the pattern are analyzed.
Modeling according to the plan: has the plan been brought to completion, how interesting is it.
It is effective to analyze children's work in a playful way.
As a result of the analysis, children should understand how to sculpt correctly and what mistakes they made. The teacher makes critical comments regarding modeling techniques in a friendly manner, in a recommendatory form.
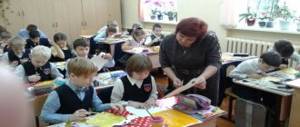
After the lesson, it is advisable to arrange all the fashioned toys beautifully and demonstrate them to parents. The teacher draws their attention to the achievements of all children, and not just his own child. This weekly parenting show encourages children to sculpt their work beautifully.
Each child's best work is displayed in a closet where there is a permanent exhibition of work. These works are treated with paraffin and preserved for a long time; they are constantly replenished and replaced, striving for all children to be participants in this exhibition.
A personal exhibition is one of the forms of encouraging children with extraordinary imagination. You need to collect all the works of one child on a separate shelf, arrange them beautifully, write his first and last name, and show them to his parents.
Organizing exhibitions gives great results: it attracts children to visual arts, increases the aesthetic level of their works, and activates creativity. Each exhibition should have its own name - figurative, artistic.
Conditions for conducting classes are the availability of visual, illustrative and didactic material:
• Methodological development of classes
• Educational and methodological manuals
• Technological maps for the manufacture of products
• Photos
• Product samples
Materials and tools: stacks, modeling boards, frames, food foil, wire, rolling pin, molds, garlic press, toothpicks.
Additional materials: beads, beads, buttons, burlap, fabric, colored cardboard, etc.
Technological map for modeling on the theme “Violet” in the preparatory group
"Hello children! Nastenka is writing to you from the fairy tale “The Scarlet Flower”. I heard that you have a lot of indoor plants growing in your group. I also want to grow beautiful flowers in my distant kingdom across the ocean. I really like your violets, they are so colorful and bloom all year round. Could you give me one violet?”How can we help Nastenka?
Yes, you guessed it right. We'll be making a violet today, but let's look at a real violet first. Has everyone seen such a plant?
Now let's take a better look at the details of the violet in the pictures. Who can describe a violet: what parts is it made of, how many petals does it have, what shape are the leaves, what color of plasticine should you take for the violet flower itself?
In order for the violet to grow in our pot, we need yogurt cups. We will fill it with crumpled paper or newspaper, and cover it with black or brown plasticine on top. And we will have a pot with real soil in which our violet will grow. What do you think needs to be done next? That's right, first you need to sculpt the leaves and place them tightly to each other, and then the flowers.
To make leaves, we first roll up a small ball and flatten it, we have a flat cake and then we cut out the leaf in a stack and make veins in the leaf. Next we make the petals of the flower. Who guessed how to make them? That's right, we roll balls, only smaller than for leaves and flatten each one, the petals are ready. Each flower has 4-5 petals and in the middle we will make a small yellow ball. One violet flower is ready. Let's see how many flowers our violet has? To make our violet lush, we will make three flowers. So our violet is ready.
I ask you to rise - this time.
The head turned - that's two.
Hands up, look forward - that's three.
Let's spread our arms four wide.
Squeeze and unclench your fingers with force – that’s five.
All the guys sit down quietly - that's six!
Are you ready to start making violets? Let me remind you of the sequence. First we make a pot for the violet, then the leaves and then we make the flowers themselves.
So you have made your violets. Let's put them on the same table. Look what a blooming garden we have created. It is suggested that they stay in our group, and then we will send them to Nastenka as a gift. Did you enjoy making the violet? What did you like most? Now let’s put our workplace in order.