First sensory box for children from 6 months
The first sensory box for a child can be made as soon as he learns to sit. It is better to avoid small fillers at this age; put something larger in the box, for example, balls, a bell, a brush, a hedgehog ball, a wooden spoon, a sponge, cubes, a jar of cereal (as a rattle), etc. work well. It is advisable to select objects so that they differ in color, shape and, most importantly, to the touch - soft, hard, prickly, rough, smooth. It is better to wash all things first, because, most likely, the baby will taste them.
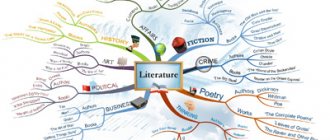
Consultation “Do-it-yourself sensory toys”
Elena Nikolaevna
Consultation “Do-it-yourself sensory toys”
The main content of the play of younger preschoolers is actions with toys and substitute objects. Children especially love to play with household items such as sand, water, various jars and bottles. Such activities contribute to the development of the child’s sensory system : vision, hearing, smell, taste. sensory experience in early childhood , this will help him feel much more comfortable in the future, in adulthood, and will also help him learn successfully.
Now many manufacturers have begun to produce wonderful toys for children . These include educational rugs, soft books, sewn puzzles or laces. you can make an interesting educational . Self-made sensory toys carry a charge of positive energy, warmth and tenderness to the hands, and are unique.
Working with young children, I noticed that there was a need for the development of fine motor skills, so I had the idea to create a series of toys for sensory development using scrap materials. A variety of items were used: hooks, buttons, laces, Velcro and other scrap materials , which can be found in any home. great assistance in making crafts . Together we sewed, glued, nailed, created, invented. toys with great pleasure . My favorite is "The Magic House"
.
In the process of creating a sensory zone, I gave preference not to purchasing ready-made materials, but to playing games made with my own hands . In didactic games, I try to interest children through vivid images of objects and surprise moments. The color scheme of the games consists of the main four colors. Work with children is carried out mainly individually or in a subgroup consisting of 2-3 children. The selection of games is varied: for recognizing, naming and fixing colors, grouping homogeneous and dissimilar objects by color, shape, size, fixing the size of objects, geometric shapes, comparing objects by color, shape, size.
I believe that all games made by hand should be made aesthetically. I include all the didactic games that I use in free activities with children in the daily plan of educational work. Moreover, both in the first half of the day and in the second, in order to consolidate and systematize knowledge. At the same time, I take into account the individual developmental characteristics of each child. Using a variety of didactic games to accumulate children's sensory experience , I noticed that children more easily adapt to the conditions of kindergarten, children more confidently accumulate ideas about color, shape, size, showing a desire to act together with the teacher, with peers and independently. As a result of additional work in the form of didactic games, children showed positive dynamics of sensory development in the field of examination of objects, visual perception, perception of shape, color, size, and orientation in space. Using the sensory zone in free activities with children, I was convinced that when playing, children better assimilate program material; in addition, didactic games contribute to the development of memory and thinking in children. By attracting children's attention to sensory didactic play , I noticed that children develop such qualities as interest and curiosity. Children develop purposefulness, activity, planned action, restraint, organization; achieving results causes a feeling of joy and good mood. This joy is the key to the successful development of children at the early age stage and is of great importance for further education.
Sensory boxes with cereals
According to my observations, from 9-10 months a child begins to have a real passion for small objects. I remember that Taisiya was attracted even by every piece of trash on the carpet; she would forcefully squeeze her still poorly trained fingers to take it. This is the best time to make sensory boxes with small objects for children. Add pebbles, beans, bolts, dice, coins (clean), buttons and other small things to the cereal. The child will really enjoy choosing items from the cereal and putting them in a jar. During the game, pinch grip with fingers is well trained. An older child (from about 1 year 3 months) can also be asked to sort the found objects by color or shape.
You can also practice weapon skills in such a box, so prepare scoops, spoons and containers. Those who have already learned how to handle a scoop can be shown how to pour cereal from one container to another.
Perhaps someone will say that giving small objects to a 10-month-old baby is dangerous; he will definitely put them in his mouth and choke. Indeed, the baby will probably want to try out a new toy, so the game should only take place under the careful supervision of an adult. After each child’s attempt to put a button in his mouth, calmly remove the baby’s hand from his mouth and explain that these toys can only be played with his fingers.
My daughter Taisiya really loved finding toys buried in boxes. I hid the toys in the cereal so that a small piece was visible, and she eagerly began to take them out of hiding. This game is good for developing finger strength.
To diversify the sensory experience, use different cereals in your games: buckwheat, millet, oatmeal, semolina, rice, peas. Rice can also be dyed in bright colors. This can be done using food coloring or brilliant green, turmeric, beetroot, carrot juice, cocoa powder, etc.
How to color rice for a sensory box? First you need to mix the dye with water to get the desired shade. Well-washed rice is placed in this water (the water should completely cover the rice). It is necessary to keep the rice in the water for some time, I leave it for about 30 minutes for a guaranteed result, but in fact the rice colors much faster. After this, drain the water and place the rice on a piece of newspaper to dry thoroughly. It is best to color the rice in the evening and leave it to dry overnight, and in the morning you can start playing.
DIY toy for kindergarten
We are publishing the works of participants in the competition - “Do-it-yourself toy for kindergarten”, which was organized by our website. So many interesting and useful ideas!
Not all works submitted for the competition are published here. The second part will be presented on our website in the near future. There were so many works with toys that they could not all fit into one material.
Toy: “Teddy Bear”. Made with my own hands: teacher Litvinenko Natalia Aleksandrovna. For the work you needed: threads, scissors, felt fabric in 3 colors, accessories (eyes, buttons), cotton wool.
Auto - Nelli Iosifovna Kamilova, kindergarten No. 115 - GBOU Pushkin Lyceum No. 1500 “Faith, Hope, Love”
Materials: flesh-colored tights; pieces of padding polyester; medium thickness wire; thin needle for darning; threads No. 40 thick, flesh-colored; wax crayons; ready-made eyes with eyelashes (optional); wig or yarn for making hair.
Making a toy: 1. Cut off the sock from the tights and fill it with padding polyester. 2 Pull a long thread into the needle and begin to form the outline of the nose. 3. We make several stitches for the bridge of the nose and nostrils. 4.Insert pieces of cheek filler. 5. Let's start making the mouth. To do this, insert a piece of padding polyester and outline the lips with stitches. Using short, tight stitches we create a smile, while outlining the shape of the lips. 6. We stitch the eye sockets. 7. Separate the pieces of ear filler. 8. We decorate the auricle with stitches. 9. Slightly stretch the bridge of the nose and make depressions for the eyebrows. 10.Use crayons to draw eyes and eyelashes or paste in ready-made ones. 11.We make hair from yarn or use a wig. 12 We make a frame of palms from wire. 13 We wrap it in padding polyester and tighten it with nylon. 14.Tighten the tights at the wrists. 15 We decorate the fingers and nails with stitches. 16 We make a flexible base for the body: neck, shoulders, stomach, legs, arms. 17 We cover the frame with filler and nylon. 18 Sew on the head and palms. 19 We make clothes and shoes from pieces of fabric, masking the joints of the parts. The doll is ready.
Author - Satsuk Kristina Vitalievna 26 years helped Satsuk Matvey Mikhailovich 2 years.
Hello, I am a young teacher and mother, my son is 2 years old. He and I sewed an educational book - a toy for kindergarten with our own hands.
It’s better to sew it from felt, I sewed it from flannel rags, inside the pages I put foil, a laminate backing, and a rustling bag for tactile sensations. I also used a zipper, ribbons, buttons, beads, Velcro, thread, needle, scissors. First I cut out the sneaker, made the base, tongue, heel, used a hole punch to make holes in the base and laced the lace, the lacing came out, then I sewed the bug using a zipper and a piece of fabric, the zipper connects the wings, the child playing with it learns to fasten the zipper. Next, I sewed the pages together and inserted the filler.
On the following pages I made a Christmas tree out of fabric, I put cotton wool in it for softness, I sewed a button, a bead, and Velcro to the Christmas tree, I cut out Christmas tree decorations, made holes in them and Velcro came in, the Christmas tree is ready. I also made a pyramid from Velcro and pieces of fabric of different lengths; one side of the Velcro was sewn onto the pages, the other onto parts of the pyramid. The last page with an apple in which holes are made and a caterpillar made of beads is sewn, this is also a kind of lacing. On the cover I simply sewed the name of the child and beads to which geometric shapes made of fabric with holes for fastening are attached, the book is tied with ribbons sewn into the cover
Author - Satsuk Kristina Vitalievna 26 years helped Satsuk Matvey Mikhailovich 2 years.
Good afternoon, I am a young teacher and mother, I wanted to share with you the toys for kindergarten that I made with my own hands. This is a hedgehog - lacing, made of cardboard, colored paper, lace. To work, we needed a hole punch, a pencil, scissors, glue and the materials listed above. I drew a sketch of a hedgehog, cut it out, covered the cardboard with paper, circled the cut out hedgehog on the back side, cut it out of cardboard, then made holes in it using a hole punch, the lacing is ready, for more interest I cut out fruits from cardboard, made holes in them for lace, the toy is ready.
Game feed the squirrel.
To make it you need a box, colored paper, glue, scissors, nuts. We cut a hole in the box so that a nut or pine cone can fit through, cut it out of a magazine, for example (unnecessary), or draw a squirrel and a tree. We paste the box with colored paper, glue a figurine of a squirrel and a tree on top (there are many options), the toy is ready, the point is that the child feeds the squirrel with cones and nuts, I made pictures with mushrooms, took acorns, the children are very interested, and children can also actively glue the figures on box, thereby participating in the manufacture of the toy.
Game with clothespins “Feed the animals”.
Materials: clothespins, cardboard, pictures, glue, scissors. We cut out a circle, images of animals and the food they eat (I took it from a magazine I didn’t need), glue food around the circle onto animal clothespins, make matches and attach clothespins with the desired animal to the image with food. The same can be done with houses.
The author is the teacher of the group "Kapitoshka" Malyutina Oksana Aleksandrovna MBDOU "Kindergarten No. 23 of a combined type" Leningrad region, the city of Gatchina.
DIY toy for kindergarten - “Beauties of the Year”
Materials: colored cardboard, glue stick, colored paper, quilig paper, lace, cotton wool figured hole punch, sequins, scissors, braid, napkins, gouache.
The process of making a toy: we take colored cardboard, the color of the cardboard should correspond to the time of year (winter - white, spring - light green, summer - green, autumn - orange). We make a cone out of cardboard, there should be 4 pieces, glue the edges of the cones, a large cone for the body, a small cone for the head, the smallest cones for the arms.
We cut off the sharp top of the large cone, insert a small cone into this hole with the point down to form the doll's head. On the body we glue two small cones - these are the arms. Glue hair from quilling paper onto the doll's head and draw a face. Then we decorate each doll: winter: sparkles, sequins, cotton wool, lace, spring: painted with gouache, summer: lace, braid, flowers made with a figured hole punch, autumn: roses from napkins, quilling paper.
Author : Victoria Vladimirovna Smirnova.
I develop educational toys - manuals: Caterpillar, Pyramid, Space, Who loves what, Sensory flower
All my toys have a developmental aspect. They develop sensory knowledge (familiarity with color) and fine motor skills, which is very important for children aged 1-3 years.
Author: Derevnina Lidiya Mikhailovna, Murmansk, MBDOU No. 34 (teacher)
To create the characters of the “Theater of Fairy Tales” you needed: disposable cups, PVA glue, multi-colored balls of woolen threads, scraps of different fabrics and hairpins, plastic decorative eyes. Glue was applied to disposable cups, then threads were wound. Two holes were made in each cup, through which an ordinary hairpin was threaded, with the help of which a ball (the head of the toy) was attached. The characters' ears were also made using hairpins, on which thread was wound or cardboard was glued. Clothes were made from scraps (scarves for grandmother and granddaughter and caftan for grandfather).
To make toys with your own hands for kindergarten “Cheerful Dog” and “Fish” you needed: woolen threads and felt, plastic eyes. First, pompoms of the required sizes were made from threads. Then ears (for the dog) and fins (for the fish) were cut out of felt. All details were sewn to the body. The eyes are glued on with glue.
Game for kindergarten “Sun of Flowers”.
The manufacturing process is very simple. I needed a sheet of yellow cardboard from which the base was made, colored paper for the mouth, the eye and for the colored squares, as well as ordinary plastic clothespins in different colors. This game for memorizing colors and developing fine motor skills is perfect for kids.
Performed by Maria Anatolyevna Chistyakova, kindergarten teacher.
We are pleased to present toys for preschool educational institutions for the development of auditory attention, made by Zemskova Kira, 6 years old, a student of the speech therapy group of the MB Preschool Educational Institution No. 2 in Murmansk.
The containers are filled with different grains, and the children can tell by the sound in which “tummy” the grains are hidden.
Game "Listen carefully."
A toy for kindergarten made by a teacher.
To make such a toy you will need: cardboard, cotton wool, matches, scissors, PVA glue, gouache. For the base of the sheep, we cut out a medium-sized circle from cardboard and cover it with plenty of cotton wool on both sides. We cut out the head from paper and paint it with gouache. We also cover the bangs with cotton wool. Next we glue the head to the base - the body.
We make the legs for the sheep in this way: cut out 4 hooves from cardboard and paint them with black paint. Next, take four matches of the same size and glue the hooves to them. The last step is to glue the legs to the body. Our sheep Moli is ready!
Author - Troshina Anna Valerievna - teacher of MA preschool educational institution Kindergarten #26 "Ship" in Khimki.
Set “Mathematical Humpty - Dumpty”
The author is Svetlana Nikolaevna Negrebetskaya, teacher at MBDOU No. 2 in Murmansk.
Making the “Mathematical Humpty Dumpty”. For the mathematical Humpty Dumpty, you need to prepare plastic dragee or marmalade eggs measuring at least 7 cm in height. The upper outer part of the egg is decorated with eyes, sponges, bows, etc. Felt circles on a self-adhesive base are glued inside both parts. The number of circles varies. This toy will allow you to solve problems of composing numbers from two smaller ones on a competitive basis, with your eyes closed, etc. The surface of the egg will allow you to write numbers according to the number of circles inside with special markers, and then erase them. The number of eggs is at least five.
Life-size puppet-Kostroma.
Author: Made by teacher Istomina Galina Yulievna, 36 years old. MDOU "Kindergarten" Kozhva
Description of the manufacturing process: In order to make this beautiful life-size doll, a variety of fabric was needed - from lining to front, filling, stockings, artificial hair, accessories. The doll is sewn well, the face is created in the likeness of a human, the hands are made as realistic as possible - every finger of the doll is embroidered.
Authors : Yulia Valerievna Medvedeva, 26 years old, Elena Sergeevna Makarova, 31 years old.
House "Snow White and the 7 Dwarfs". The candy box is covered with paper and pieces of wallpaper. A roof is formed from Cortona and covered with stones and beads. Beads were also used to decorate the windows.
The house can be used for theatrical games.
Author - Emelyukov Kirill Evgenievich, age: 5 years. Tolyatti
Teachers: Yulia Viktorovna Kuznetsova, Tatyana Vladimirovna Posvezhina.
The name of the toy is “Tank”
Materials: cardboard; bushings; scissors; PVA glue, self-adhesive colored paper (green, red); small cardboard juice box;
Stages of work:
1 Cover the bushings with green paper.
2 We make the wheels from cardboard, cut out circles to fit the diameter of the bushings and glue them.
3 Then we twist the barrel out of paper.
4 Glue the barrel to the juice box and cover the top and sides with self-adhesive paper.
5 We fold the green cardboard like an accordion to make it look more like “caterpillars”.
6 Glue the three bushings together and wrap them in cardboard “caterpillar”.
7 Glue the juice box to the base of the tank.
8 Decorate the tank with stars. Cut from red self-adhesive paper.
Author of the work: Tatyana Nikolaevna Baranova, teacher, age 57 years.
Toy "Parsley".
Author of the work: Tatyana Nikolaevna Baranova, teacher.
Material: I needed fabric of two colors, padding polyester, black velvet, small bells, threads, eyes, two sticks for the vaga (crossbars), fishing line, a parsley pattern and a clothing pattern.
The head is made of papier-mâché, the body is made of white fabric, clothes are made of green and white crepe satin, and shoes are made of velvet. I use this toy both in classes and in theatrical activities.
______________________
Author Fadina Elizaveta Olegovna and Fadin Alexander age: 3 years
Author: Maria Neplyueva 5 years old teacher: Fadina Elizaveta Olegovna
Sensory boxes by color
In order for the baby to remember colors better, many mothers organize “color days”: for example, on one day they look for all the red objects and toys with the baby, put on red clothes, the next day the same with the color yellow, etc. This idea can also be applied to sensory boxes, by selecting objects of one or another color for the baby in advance. While playing with such a box, the child learns colors very quickly, because... the desired color is always in front of your eyes, and its name is mentioned many times during discussions of the game.
A toy that helps in working with preschool children.
Irina Shulepova
A toy that helps in working with preschool children.
“Best Helper Toy ” was held in our preschool educational institution.
.
I would like to talk about the toys that I knitted and presented. My dolls are called pencil babies, the children named them Alice and Alvin.
Child development is unthinkable without toys . A toy to help you explore the world , a source of joy. It must create conditions for development and leave the opportunity for independent creativity.
Some say: “Ah! They're just toys !
But are
toys really nothing ? A toy is an indispensable childhood companion. The toy should encourage the child to play, awaken imagination, and provoke questions and reflection. Toys for a child are an “environment”
that allows them to explore the world around them, develop and realize creative abilities, express feelings;
toys teach them to communicate and get to know themselves. And also toys - educators , teachers, mentors. This is what a serious thing is - toys .
An assistant toy brought into the educational process is not just a cute toy that entertains children, but a character with a certain character that solves didactic problems. the most boring and serious activity into a game Depending on what result you need, you and your “assistant”
perform various
“transformations”
.
The helper toy helps organize children, set a goal, and interesting tasks to complete it. With the help of an assistant toy, it is easier to reveal the child’s emotional sphere.
The toy character performs different functions: “helps”
,
“checks”
the correctness of the task, sometimes he himself asks for help. Using these techniques, you can present your child with new material and create a desire to repeat it again and again. Children begin to teach the dolls - they explain, tell them what they already know, correct the mistakes of the fairy-tale character, confidently complement the story, since the children are at the mercy of the play situation.
My toys are used as :
• surprise moment (a guest came to us, we came to visit)
;
• toy characters come with their own games and tasks;
• offer to guess what we will talk about in class today;
• tells a fairy tale, conducts a conversation;
• a toy character can ask, praise, check;
• you can introduce a toy character to some stage of the lesson to complete several tasks.
Train your imagination. What can you do, for example, with the help of baby pencil dolls who came to visit? What story options did you come up with?
For example:
• the pencil has lost its friends;
• the pencil does not want to draw, it feels sorry for its wonderful rod, created for beautiful drawings;
• the pencil remembered how it used to be a big tree and wants to talk about it;
• the pencil came up with a funny story and wants to tell it by depicting characters in pictures;
• the pencil dreams of turning into a magic wand, but is afraid that it won’t work out, and is waiting for help from the guys.
Now let's try to choose the nature of the game:
You can go on a long journey to colorful countries and travel for a whole week, mastering a color every day. These can be countries of different objects: fruits, flowers, birds, insects, fish, etc.
As you can see, to come up with a game , you need very little knowledge and effort, you just need to be creative in your solution.
Adult help doesn't end with providing the right toys . It is important to give life to the toy , that is, to introduce it into the game , then the child will happily pick it up. When a child manages to do something himself, he gets sparkle and joy in his eyes.
Sensory box with pasta
To diversify your baby's tactile experience, use a larger filler, such as pasta. The essence of the game here is the same - we transfer the pasta with a spoon, take it out with our hands, and look for small toys among the pasta. Children also love to put large pasta on their finger.
In this game, an educational game made from a cereal box will come in handy, in which the baby needs to feed his favorite character pasta.
Sensory box with mill, with sieve
For children who have already mastered the scoop well, you can offer other devices for play, for example, a mill or a sieve.
One piece of advice: for a sensory box with a mill, you need to take smaller grains - millet or semolina, because... larger grains will get stuck in the holes, blocking the mill.
Using a sieve, you can teach your baby to separate beans, buttons or small toys from semolina. In general, play Cinderella. During this experience, the child develops a clear idea of the compatibility of sizes, he understands that large grains or objects will not fit into the small holes of the sieve.
Sensory box with hydrogel (aquasoil)
Taisiya had a real delight in playing with the hydrogel; she even liked to just plunge her hands into it and finger it. The sensations here are completely new and unusual - the aqua soil is slippery, cool, wet and at the same time not liquid. And getting toys for your baby out of it is not as easy as it seems, they will slip out at any moment!
You can find aqua soil at any flower shop. It needs to be filled with water several hours before the game. And remember that during this game it is necessary to carefully monitor the baby’s play and prevent any attempts to taste the hydrogel.
Soft toys - helpers in activities with children
- March 24, 2011
Competition “Golden Handicraft”
Our preschool educational institution is attended by children with general speech underdevelopment and mental retardation. The task of teachers is to provide them with differentiated assistance, to maximize the activation of all analyzers that contribute to the assimilation of educational material. We pay significant attention to the emotional sphere, since a child, learning the world, should receive joy from this knowledge and experience interest in the surrounding reality. Therefore, in cognitive cycle classes, we use surprise methods and game situations as often as possible. They help to bring a drop of surprise and joy of discovery into the lesson, sharpen perception and contribute to the development of imagination.
Who usually comes to visit the children during classes? Dunno, Pinocchio, Bunny, Masha doll. To be honest, I'm a little tired of it. I wanted the guest toy to be bright, original, and unusual. Let her have her own fairy tale story! Let her be associated in the death of children with some specific area of life!
I came across the book by T. Gorodkova and M. Nagibina “Soft Toys - Cartoons and Animals.” She gave me the idea of creating special dolls, which now help me in teaching children.
Here is Brownie. He is the owner of the group. Comes to children when it is necessary to help them master the topics “Toys”, “Clothing”, “House and its parts”, “Household appliances”. The little brownie asks the children funny questions, “travels” with them around the house, and learns safety rules together with the kids.
Zvukaryk is a specialist in literate speech. Teaches children to speak beautifully and correctly, introduces sounds and letters.
Florik and the caterpillar Glasha are the main experts in natural history. They tell children about animals and plants, about the secrets of forests, meadows and swamps.
Snow appears in kindergarten with the onset of winter. He is in charge of winter natural phenomena, fun, and the properties of snow and ice.
The children fell in love with these toys, which means the goal has been achieved. The kids are surprised, delighted, and enthusiastically complete the tasks given by their furry friends.
Author: Svetlana Leonidovna Donskaya, teacher of the highest category at the Municipal Preschool Educational Institution No. 76 “Solnyshko” in the city of Yoshkar-Ola, Mari-El Republic. Work experience 26 years.
I have been making soft toys since childhood, and now many of my works delight children in the near and far abroad. I also like to knit, crochet, and needle. Now I’m into a new craft, wool felting. In the summer I work at the Zvezdochka Children's Children's Centre, leading a soft toy group.
Photo by the author
Svetlanaleonidovna
Water sensory box
It’s good to play with water in a basin or in a large container; it is advisable to lay an oilcloth on the floor in advance. A very exciting activity is to catch toys from the water with a spoon, ladle or sieve. At the same time, it is equally interesting to get both floating and sinking objects, at the same time the child receives the first understanding of “sinking or not drowning.”
You can also take various glasses and molds, pour water using them, scoop water into a glass with a large spoon, and pour water through a mill.
You can also make boats from sand molds for small toys. Taisiya simply loves this game. The game teaches the baby to calculate his actions by adjusting the pressure so that the boat does not sink when he places a toy on it.