The role of using non-traditional drawing techniques in the artistic development of preschool children
As mentioned above, the use of non-traditional drawing in kindergarten is beneficial for children. Due to the fact that completely atypical objects can be used in drawing, preschool children are given the opportunity to think outside the box. It turns out that they are having fun and usefully spending their time. They experiment with different painting techniques and try different ways of expressing themselves. Classes develop observation skills, creativity, and artistic taste. The educational process turns into a fun game. Therefore, modern methods of creative activities are increasingly being used in kindergartens. Diagnostics of the use of non-traditional drawing methods in kindergartens shows good results.
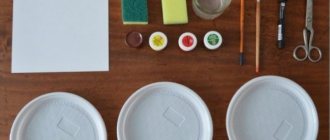
Unconventional spray painting technique
Non-standard methods of drawing are always fun, emotional and creative. The result of such creativity is beautiful and unusual, even if the child has no artistic skills.
2.1. Techniques for working with watercolors
Watercolor paints are made from the most affordable art materials; with them you can use your imagination and create amazing and vibrant works.
Blotography is a great way to have fun and usefully spend time, experiment with paints, and create unusual images. It perfectly develops creativity, fantasy, imagination, fosters aesthetic perception of works of fine art, and also fosters empathy.
The blotography technique is to learn how to make blots (black and multi-colored). Then you can look at them and see images, objects or individual details. “What does your or my blot look like?”, “Who or what does it remind you of?” - these questions are very useful, because... develop thinking and imagination. After this, without forcing, but by showing, I recommend moving on to the next stage - tracing or finishing the blots. The result can be a whole plot.
Drawing on wet paper. Until recently, it was believed that painting could only be done on dry paper, because the paint was sufficiently diluted with water. But there are a number of objects, subjects, images that are better to draw on damp paper. We need ambiguity and vagueness, for example, I suggest the following topics: “City in the Fog,” “I Had a Dream,” “It’s Raining,” “City at Night,” “Flowers Behind the Curtain,” etc.
You need to learn how to make the paper a little damp. If the paper is too wet, the drawing may not work. Therefore, I recommend soaking a ball of cotton wool in clean water, squeezing it out and running it either over the entire sheet of paper, or (if required) only over a separate part. And the paper is ready to produce unclear images.
Finger painting . Means of expression: spot, dot, short line, color. Materials you will need for work: bowls with gouache, thick paper of any color, small sheets, napkins. Method of obtaining an image: dip your fingers into gouache and apply dots and specks onto the paper. Each finger is painted with a different color. After work, wipe your fingers with a napkin, then the gouache is easily washed off.
Palm drawing .
Means of expression: spot, color, fantastic silhouette. Materials: wide saucers with gouache, brush, thick paper of any color, large format sheets, napkins. Method of obtaining an image: dip your palm (the entire brush) into gouache or paint it with a brush and make an imprint on paper. I recommend drawing with both your right and left hands, painted in different colors. After work, wipe your hands with a napkin, then the gouache is easily washed off. Monotype method. This method of obtaining a drawing is fraught with a lot of tempting things. In short, this is an image on cellophane, which is then transferred to paper. Paint on smooth cellophane using a brush, or a match with cotton wool, or a finger. The paint should be thick and bright. And immediately, before the paint has dried, they turn the cellophane over with the image down onto white thick paper and, as it were, blot the drawing, and then lift it up. This results in two drawings. Sometimes the image remains on cellophane, sometimes on paper.
Happening. The method of obtaining a symmetrical image is to fold the sheet in half, draw on one side, fold it and get the full image.
Topics for drawing in kindergarten
The topics of drawing in preschool classes can be very diverse. Typically, educators rely on seasonality. Therefore, for example, in autumn it would be relevant to paint a yellow-red landscape or use fallen leaves in the process itself.
For younger children, it is better to choose well-known objects: animals, flowers, trees. These topics are always relevant, and they can be done with almost any drawing technique.
Note! If you don’t have enough ideas for drawing, you can always use thematic literature with examples of work. Or you can get advice on unconventional drawing methods from more experienced teachers.
Types of non-traditional drawing in kindergarten
What is especially valuable about non-traditional methods is that most of them can be done by young children, in contrast to the usual drawing with a brush or felt-tip pens and pencils. For middle-aged children (4-5 years old), more complex techniques are available, which are performed with the help of adults. Children aged 6-7 years can use all non-traditional methods independently.
The following describes various methods for practicing non-standard drawing, as well as recommended ages for children.
Fingergraphy
The simplest and most common method of non-traditional technique is drawing with fingertips. Special finger paints are well suited for this; you can also use gouache or watercolor, after wetting it with water.
All that is required of the child is to dip his finger in the paint and leave a print on the paper. It’s fun to decorate the templates this way (you can print them out or draw them by hand):
- Add leaves to the bare tree;
- On the stem and core - petals;
- For the ladybug, make spots on the back;
- For the New Year tree - toys;
- White spots on the fly agaric cap;
- Butterflies have spots on their wings.
Note! Any picture can be fully colored using fingerprinting or the missing elements can be added.
Drawing with palms
This method can be considered the next step after finger painting. The entire palm will be involved here. The same paints can be used as for fingerprinting. Here are some options for drawing with your palms:
- Chick. You should apply yellow paint to your palm and leave an imprint on the paper - you get a body. Then apply paint to the fist and thus make a head for the chicken. All that remains is to add the beak, legs and eyes.
- Fish. To do this, you can apply different colors to your palm, then leave an imprint on the paper and add eyes and fins to the image.
- Tree. To do this, use brown or black palm print paint. Then decorate the resulting tree with leaves using fingerprinting.
- Peacock. This beautiful bird will come from two or more handprints. Then you should draw the head, paws, eyes and decorate the tail.
- Flower. It is worth using bright paint to leave an imprint. Then add a stem with leaves to it.
Cockerel made from a palm print
Note! The open palm most closely resembles a bird. Therefore, using this technique you can make any bird of your child’s choice.
Drawing with cotton swabs (poking method)
This method is reminiscent of fingerprinting, but it uses an alternative tool for making a print - a cotton swab. The mark it makes is small and more round, so this method is good for drawing spots on animals. Another option is to completely paint the image with pokes, thus obtaining a mosaic effect. Using cotton swabs you can draw the following:
- Grains from a mouse or chicken;
- Rowan berries;
- Snowfall;
- Rain;
- Starry sky.
Lessons of traditional and non-traditional drawing in kindergarten
You can also use a few pokes to create an object of the required shape, for example, tree leaves or flowers.
Note! You can draw with several sticks at once; for convenience, they can be secured with a string.
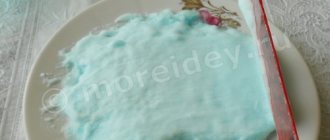
Drawing with bulk substances
For this method, you can use salt, sand or any cereal. Drawing occurs in stages. First, you should put some design on the paper. Then drop PVA glue into certain places and sprinkle them with salt or cereal. After drying, shake off excess. The result will be an unusual three-dimensional drawing. You can experiment with this method of drawing on the following topics:
- Winter forest;
- Fireworks;
- Snowstorm;
- Pattern on butterfly wings;
- Flowers.
Snow-covered birch tree made with salt
Note! It is more interesting and colorful to use colored grains or sand. To do this, you can use food coloring or buy ready-made colored sand.
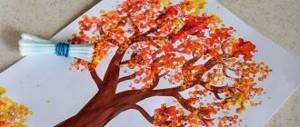
Drawing with crumpled paper
For this method it is more convenient to use gouache. You will need a small piece of paper that needs to be crumpled. Then dip this lump in paint (if necessary, add water to the gouache) and begin to apply it to the paper. The drawing turns out airy and light. Here are some ideas of what you can draw this way:
- Lilac branches;
- Dandelions;
- Clouds;
- Snowy spruce trees;
- Blooming meadow.
Lilac branches
Note! In this way you can color the image in an unconventional way. For example, make a shaggy cat or a fluffy owl.
Drawing with threads in kindergarten
Thread drawing can be a little challenging for preschoolers, so it is recommended to do it with older groups. This is a rather complicated technique and little ones cannot cope with it. To create such a pattern, you need to prepare threads (it is advisable to choose thicker ones, for example, wool). Next, you need to cut a thread about 30 cm long and dip it thoroughly in paint. Then you should place the thread on the paper, for example in a loop, and pull it down. For convenience, you can use two sheets of paper to properly press the thread on both sides. Another option is to fold the sheet in half and thread the thread inside. You can create a variety of patterns, for example:
- Abstraction;
- Flowers;
- Snail (the thread for this should be folded into a spiral);
- Butterfly.
Note! Nitography is the most complex drawing technique for children. But the result is very unusual, and the creation process is interesting and will appeal not only to children, but also to adults.
Monotype
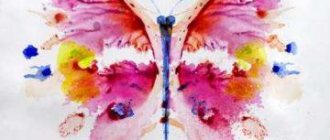
This is a technique of creating an image using a print. A suitable method for kindergarten is when a sheet of paper is folded in half and an image is painted on one side. The design is then pressed onto the other half of the sheet, thus creating a symmetrical image. What can you depict using this technique by drawing only half of the image?
- Butterfly;
- Reflection in the water of the landscape;
- Ship with reflection;
- Vase with flowers;
- Sun;
- Tree.
Landscape with reflection using monotype technique
Note! Monotype is interesting because its result can be unpredictable. The resulting drawing always comes out unique.
Drawing with foam rubber in kindergarten
The execution process and the result are ultimately similar to drawing with crumpled paper. For this technique you will need a piece of foam rubber or a dishwashing sponge. Foam rubber does not need to be soaked in water; it should be immediately dipped in paint. Ideas for images using this technique:
- Snowman;
- Christmas trees;
- Tree crown;
- Winter in the forest.
Landscape painted with foam rubber
Using this technique, you can paint animals, then they will look fluffy.
Blotography
The essence of this method is to initially drop paint onto a piece of paper, forming a blot. Then you should supplement it with various details, obtaining some kind of drawing. This method perfectly develops children's imagination.
To get blots or splashes of paint on paper, you can use a cocktail straw. Using the same tube, you can inflate the blot, obtaining the desired image, for example, the following:
- Tree branches;
- The man's hairstyle;
- Any character.
Note! You can supplement the image with the same paints or felt-tip pens, or even plasticine.
Drawing with wax crayons
Wax crayon can be replaced with a paraffin candle. The essence of this technique is that with the help of a chalk you can draw any design, which will then not be painted over with watercolors and will appear on the surface. Examples of possible images:
- Fireworks in the night sky;
- Sea bottom;
- Cloudy sky;
- Stained glass.
How to develop fine motor skills in a child
Note! If you use white chalk, you can make a secret drawing or note, since the image on the paper will appear only after using paint.
"Secret" image
Spray
Creating an image using this technique involves splashing paint onto paper. To do this, you can use a toothbrush or a hard brush. In this case, the splashes are small and distributed chaotically. Therefore, it is better to use stencils to obtain a drawing of the desired shape. This could be a stencil:
- Christmas trees;
- Cat;
- Colors;
- Tree.
Note! In addition, with the help of spraying you can fill in the background of the future drawing. It could be grass, starry sky, snowfall.
Drawing on wet
In this method, paint is applied to a damp surface. As a result, you can get a blurred background for your future drawing. At the preparatory stage, it is better to mark the future drawing with a pencil on a sheet of paper. This should be done before you need to wet it with water. Do not wet it too much; excess water should be removed with a sponge. Watercolor on wet paper will spread evenly from the brush. This way you can let the different colors mix on their own, so the color transition will look even. What can you draw on the raw side, except for a plain background:
- Setting sun in the sky;
- Clouds and storm clouds;
- Flowers;
- Trees;
- Sea bottom.
Note! After the background has dried, you can add any details to the drawing: birds, fish or an outline.
Batik
This is a technique of painting on fabric. For this activity you will need a piece of white cotton material. For kindergarten, the simplest painting option is suitable - knotted. To do this, you need to tie several knots on the fabric, then dip them in paint. After drying, the knots should be untied - interesting patterns will remain on the fabric.
Drawing with traffic jams in kindergarten
Balsa wood stoppers are great for making circular impressions on paper. It is better to take several corks so that you can use each one for a different color of paint and do not mix them. Using this technique you can draw:
- Berries;
- Caterpillar;
- Chickens;
- Leaves;
- Flowers.
Note! If you cut the cork, you can give the prints a different shape.
Stamping
This technique is quite simple to implement and is suitable even for younger kindergarten groups. The idea is to dip a stamp in paint and leave an imprint on the paper. Moreover, you can choose anything as a stamp, for example, the following:
- Leaves;
- Vegetables;
- Fruits;
- Twigs.
Note! It is very convenient to cut stamps of various shapes from potatoes. You can also make stamps from foam sponge.
Ebru
The Ebru technique involves painting with liquid paints on water. Paint and water have different densities, so you can make some kind of pattern on the surface of the water. Then a sheet of paper or cloth is applied to the surface, and the design is transferred to the new surface. Water can be made more dense with a special solution, which is sold in an art store. Thanks to this, the paint does not dissolve in water, but remains on the surface in the form of a film. You can drip the paint onto the water and then use a stick to make patterns.
This technique is suitable for older groups of kindergarten or lower grades of school. Exercises with ebru can be turned into a fabulous game. Children of all ages really like this technique. Without any special skills, already in the first lesson you can feel like an ebru master.
Drawing on water using the ebru technique
Scheme and example of lesson notes
In the senior group, standard long-term planning provides for one drawing lesson per week. The total duration of continuous activity should not exceed 20–25 minutes; methodological manuals recommend performing physical exercises (finger, breathing, motor exercises) for 5 minutes for relaxation and prevention of mental and physical fatigue in children.
Lesson outline:
1. Organizational part - includes an educational story, a developing conversation or a game situation of a motivating nature, which is accompanied by a demonstration of visual material, reading poetry and riddles, listening to a fragment of a musical or literary work. The introductory part of the lesson stimulates the creative activity of children and sets them up for conscious work (approximately 3– 5 minutes).
An example of the organizational part of a lesson on the topic “Russian folk toy” (author Tatyana Izyurova)
| Various nesting dolls are placed on the table. - Children, do you know what these toys are called? That's right, these are nesting dolls. — These wooden toys also originate from ancient times and were made by Russian folk craftsmen. — We, too, have already become acquainted with some clay toys that have their own name. - Name what kind of clay toys you know (Dymkovo, Filimonov). — Each nesting doll also has its own name. Some nesting dolls are Semyonovsky and they are made near the city of Semenov, other nesting dolls are made in Sergiev Posad and are called Sergievsky nesting dolls. Another type of nesting dolls is made in Polkh-Maidan and is called Polkh-Maidan dolls. - Guys, look what amazing toys these are. The dolls have aprons, kerchiefs, and beautiful patterns on them. - Now let’s compare two folk toys - the Dymkovo toy and the matryoshka doll. Are the patterns on them the same? (No) - How are they different? (Children find differences: on the Dymkovo toy there are rings, circles, dots, circles, lines, dashes; on the nesting doll there are flowers, leaves, curls, berries.) - But still, all nesting dolls are different. They are painted with large, bright colors with a distinct black outline. — Artists painted with pink, red, yellow, purple, blue and green paints. — Matryoshka dolls are covered with transparent varnish. These colorful patterns make them very elegant. - And now I suggest you become master artists for a while and decorate these nesting dolls (silhouettes) with your patterns. |
2. Practical part - the teacher explains and shows how to technically perform the task (3-5 minutes). The peculiarity of classes using non-traditional techniques is that older preschoolers are given more freedom in the drawing process than in classes based on studying classical methods of creating an image; each child will get their own unique result. Thus, the demonstration of a sample prepared by the teacher should not be used for copying, but only for the formation of a correct understanding of the task or its clarification.
An example of the practical part of the lesson using the technique of drawing on a wet sheet “Magic Land - Underwater Kingdom” (author Timoshina R. N.)
| – What is this drawing “on a wet sheet”? Let's remember with you. The main tool today will be a sponge - a small one made of foam rubber. We will wet our sheet with it. A sheet of paper is wetted with a quick movement (teacher demonstration). The work must be done quickly, with a light movement, the hand moves freely. And then paint is applied “on a wet sheet”. The brush does not touch the sheet, the paint lays down beautifully, forming magical shimmers. Do you guys remember? So, if you and I wanted to feel the magic, then let our drawing today be magical, amazing, fabulous. - Look how I will draw the sea. I wet the sheet with a sponge from left to right with quick movements. Using a wide brush, I draw a line on top of the sheet, and the paint flows down. You will also draw a strip and lift the leaf vertically so that the paint also drips off. Let the paint dry a little, and we will paint the inhabitants of the underwater kingdom with a thin brush. We draw algae, sandy bottom and all the inhabitants of the magical sea country. If you want, you can depict the fairy-tale palace of the “golden” fish in your drawing. |
3. Independent work of children (15–20 minutes).
4. Final part - the results are summed up, the works are examined, children share their impressions and learn to express their opinions about the works of their comrades, as well as about the artistic experience gained (3 minutes).
Summary of the lesson “Primitive Drawings” as part of the short-term project “Chalk Pencils” (Author Tatyana Semenyako)
Problem: Who came up with the idea of drawing with charcoal? What can you draw with a charcoal pencil? Game motivation: Traveling in a time machine Purpose: Experiment: making a charcoal drawing and determining its visual and expressive capabilities. Tasks:
Materials: Sheets of paper white and tinted in pastel colors, A4 format, charcoal. The teacher has photos of cave paintings of primitive people, a laptop for showing photos. 1. Organizational part. Teacher: In the last lesson, we learned what coal is and why it is needed. But tell me, what else can you draw with a charcoal pencil? (Children's assumptions) To answer this question, we will go on a journey on... the Time Machine! Do you agree? Then let's go. Let's sit back, close our eyes, say the magic words that you know. (Children offer options) The teacher opens the laptop, talks and shows the photo.
Educational story. It was a long time ago. On our green planet, where various animals and birds already lived, man appeared. Where did he come from? Whether it originated from monkeys or flew from outer space, we don’t know. But he still appeared. And this is how he was, our distant ancestor. (Showing a picture of a primitive man.) The man had neither sharp teeth nor claws, but what can I say - he had neither telephones nor televisions. There wasn't even a house or dishes. And clothes! Look what the ancient man was wearing? (Children: in the skin.) Why did the person dress like that? (Children reflect) Yes, then there were no factories or factories, and people had to do everything with their own hands. And who can guess why he needs the skin? What are your clothes for? (Children: protection from the cold.) We guessed how primitive man saved himself from the cold. Maybe you can guess what else a person needed to survive? (Guiding questions from the teacher. Children's answers.) Of course, he needed water, food and shelter. He could drink from a river or stream. What did he eat? (Children: berries, grass, meat). Game situation. Well done! Now you and I will turn into primitive people and go to a forest clearing to pick berries. On command, we start picking berries; whoever collects the most will become the most dexterous berry picker. Bring your “prey” and put it in a bowl. Developmental conversation. Where could primitive man live? (Children: in the cave) But the man ate. I lay down in the cave on a soft skin and slept. What to do then? You can’t listen to music, you can’t watch TV, you can’t read a book. What to do? (Children’s reflections) - The man began... to draw! On what? On the wall of the cave. With what? There are no pencils or paints. But the ember from a burnt fire leaves a nice black mark! (Showing photos of rock paintings). What and who is not here! What did you see? Children list: trees, people, animals. Well, the time machine is running out of fuel, it's time to go back! Guys, let us tell you about our journey the way a primitive man would have done it - let’s draw what we saw. Do you agree? 2. Practical part. Then get to work! (Children approach the tables). We will make the paper “old” - we will crumple it. Like this (shows) let’s unfold it and smooth it out. Now the paper looked like the walls of a cave. And here comes coal - just like in ancient times. Draw for them everything you saw, if desired.
3. Independent work of children. Children draw. The teacher guides the children’s activities using advice, directions, and praise.
4. Final part. Result: Exhibition of children's works. Teacher: What new did you learn while traveling in the time machine? Guys, is it possible, looking at your drawings, to guess where we traveled? Did you enjoy the trip? We will arrange the drawings as the album “Travel in a Time Machine.”
|
How to make notes for a lesson on drawing in non-traditional techniques
The purpose of such a lesson should be to familiarize children with one or another non-standard drawing technique. It is necessary to draw their attention to the features of this technique: how the paint behaves, what happens in the drawing.
Practicing unconventional drawing requires careful organization. The main task is to attract children, especially younger ones. To do this, you should tell a fairy tale or poem appropriate to the activity. Then you need to figure out how this can flow into drawing, for example, you will need to help a chicken hatch from an egg. Children, in turn, will have to draw it with their palm.
Note! At the end of the lesson, you can collect the work and organize a presentation dedicated to one topic. Such exhibitions of works should be organized after each non-traditional drawing class.
Unconventional drawing methods contribute to the creative development of the child. If the kindergarten program does not include visual arts of this nature, then parents should conduct them themselves.