Making a malachite box with your own hands in a step-by-step master class
Materials for crafts from plasticine:
- ball fine-grained plasticine that will harden;
- a small box with a plastic lid;
- beads and beads for decoration;
- a piece of felt;
- scissors;
- pencil with ruler;
- modeling board;
- rolling pin for rolling out plasticine, glue.
To make such a box, you can use coarse-grained and fine-grained ball plasticine. He is easy to work with. It does not remain on hands or clothes. With its help you can make a wooden, cardboard, plastic figurine or craft. Therefore, even a child can work with such plasticine.
Making a box with your own hands:
- The first thing to do is prepare the interior of the box. Using felt, they decorate the inside of the box. You need to cut out circles in advance, which will then be used for the bottom and lid. You need to make a wide strip that will be the same as the height of the box. Felt parts are glued or simply inserted. You can fix them using plasticine.
- Then the box is covered with plasticine and distributed over the surface. While the plasticine is soft, it is applied and applied with rubbing movements to the entire surface of the box.
- For the walls and lid, it is better to apply a thicker layer, then it will be easy to press the beads. But you can apply a light thin layer to the bottom so that the bottom is not visible. Use a rolling pin to level the walls. To make the bottom even, you need to place the craft on the board and press on it.
- Beads and beads are pressed into the still soft plasticine. To decorate the box, different colors of plasticine are used. You can make ornaments with cereals, sequins, buttons, shells, pebbles and kanzashi.
- The lid can be decorated with a three-dimensional felt flower, which is subsequently glued.
- This completes the manufacturing process. It is better to leave it for a day. At this time, the plasticine will dry and the beads will be securely attached.
The box is used to store jewelry. Your mother, sister or grandmother will love this gift.
Crafts are simple and quick
If you don’t have the time or skills, you can make a simple craft.
Sinyushkin well
For crafts, take thick twigs or wooden sticks. They may not be smooth, with bark or its fragments, or with knots.
Fold the sticks in the shape of a well according to the principle of folding a log house. For greater stability, make indentations at the joints of the sticks.
Place the well on a brown or green cardboard stand, place a blue feather next to it or place a doll in a Russian sundress. All! Even a child can handle this kind of work on his own.
Silver hoof
Place the finished figurine of a deer on a stand, and attach multi-colored pebbles nearby. Can be supplemented with cotton wool that imitates snow. If there is a figurine of a cat, place it next to it. If desired, you can decorate the deer's hooves and antlers with rhinestones.
Collection of Ural stones
Cover a box with low sides with colored paper and line the bottom with dark blue corrugated cardboard for crafts. Using a glue gun, secure the mineral samples in even rows. Decorate the box with lizards. Ready!
Do crafts with your children. Read Bazhov's fairy tales, imagine what the heroes of fairy tales might look like and start tinkering. This will broaden the child’s horizons, introduce him to the work of the Ural writer and develop his imagination.
Detailed lesson on creating a malachite box step by step
Required material:
- red or brown velvet cardboard;
- scotch;
- squared paper;
- stationery knife.
Malachite can be imitated using plasticine. To do this, mix black, dark emerald, green and light green colors. And yellow will perfectly complement this range as a decoration for a box.
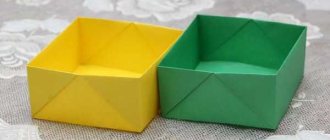
To make the base of the craft, you will need thick paper. You can also use colored cardboard. The pattern is made on checkered paper. Connect the parts using tape.
How to make a base for a box:
- After the pattern drawn in the cells is ready, it is transferred to the back side of the velvet paper. Cut it out with a stationery knife. You can also use scissors if you are working with children. All folds are carefully pressed from the inside out, then the box will bend better.
- Now the parts are bent and connected at the joints on the outside with tape.
How to imitate malachite from plasticine:
- To do this, take several colors of plasticine, which can be found in natural malachite. Roll each shade into a sausage and make long strips. They should be layered and rolled out together. Then strips of plasticine are cut, the thickness of which is no more than 2 mm.
- They need to be connected to each other, first making rings from the strips. This is how the most valuable malachite “peacock eye” is imitated. Then they take part of the strips and make a sausage again. To make the pattern striped, you need to roll in one direction. You should get a plate about 1mm thick.
How to assemble the box:
- The lid and sides are separated from the finished pattern. They are placed on plasticine to be cut out with a stationery knife, and then the box blank is covered with the resulting elements. You can see how to do this correctly in these photos.
- You will need yellow or gold plasticine. A 2mm thick plate is made from it and then cut into strips. This will make a square. The strips are twisted into helical spirals, which will later be on the folds of the box.
- A yellow plate is used to cut out a lock, which then needs to be stuck to the front of the box.
Stone pattern
Even without real malachite and tools for processing it, it is possible to create a similar pattern with the simplest tools at hand.
To create a fabulous box you will need plasticine, a stationery knife, a rolling pin for polymer clay, which can be replaced with any even, smooth cylindrical object, varnish for the final coating of the product and a varnish brush.
This master class is dedicated to making a malachite box from plasticine.
Related article: Handmade pillows | Making a edging for a pillowcase with your own hands
In addition to tools and materials, you need the base of the box - if you wish, you can purchase a blank in the store, use an old unnecessary box or cardboard box. You can also make the base yourself from cardboard and velvet paper.
To reproduce malachite stone, you will need plasticine in several shades: black, dark green, emerald, light green and white. You can get new colors by mixing existing greens with white or yellow; in any case, the selection of shades is always up to the master’s choice.
For final processing of the product you will need varnish - you can choose a varnish for creativity or a glassy varnish for decoupage.
To repeat the pattern of the stone, you need to roll out pieces of plasticine into “sausages”, and then into strips of varying thickness:
The resulting strips are cut into approximately equal squares, and there is no need to follow the order of the set of colors - the pattern of natural malachite is always random, and it is precisely this randomness that needs to be reproduced.
Multi-colored pieces of plasticine are collected into piles of approximately the same height, which then need to be flattened a little so that the layers of plasticine are held together more tightly.
In order to continue working, you need to take a rod for the base - a pencil or a sushi stick will do - and bend the stack around the end of the rod:
In the same way, the remaining assembled layers of plasticine are stuck onto the rod. The rod is only needed to start work; if the resulting column holds tightly, the rod can be removed and continued without it. When all the layers are assembled, the plasticine column needs to be rolled out so that you get an even “sausage”. Already at this stage, the cut will slightly resemble a malachite pattern:
You can study this stage of work step by step from the photo:
Further work will consist of cutting the plasticine sausage and laying out a large plate from the resulting sections. After laying out, to fasten the sections, this plate should also be rolled out. After rolling, the plate should be as thin as possible, but this also depends on the level of skill:
Related article: What and how best to plant flowers in outdoor flowerpots
The main work has been completed, the resulting “malachite” plates can be fixed to the base. For a wooden piece, this stage is not difficult. If you want to make the base yourself, you can use the following box-chest diagram:
After covering the base with a layer of plasticine malachite, if there is a solid base of the box, it can be varnished.
The finished box attracts the eye with its interesting and unique pattern, however, if desired, you can make a real work of art from a simple, laconic box. To prevent the malachite chest from looking empty and boring, you can decorate it with fittings or pieces of plasticine left over after working on the box itself:
To do this, you can use special forms - molds - or do without them.


