Good day, friends! Some mothers and fathers, when preparing their child for school, pay close attention to whether the child can read and count. And they completely forget about other aspects of the process. For example, about the development of fine motor skills. But the success of a child’s education at school directly depends on this. I hope you are not one of those careless parents. And today I want to tell you about how my favorite student Artemka and I are developing our hand for writing.
In general, I would not equate the concepts of “development of fine motor skills” and “preparing the hand for writing.” I would mark it as “approximately correct”. Motor development is a broader concept. Motor skills are not only needed for writing, they also affect thinking and speech.
Any exercise to develop motor skills prepares a child for writing. But some tasks for preparing for writing have nothing to do with motor skills.
Hand preparation plan.
So, let's figure out how to make sure that little hands can withstand the load that will fall on them at school?
- It is necessary to prepare the small muscles of the hand for work. In order to hold the handle and at the same time make many small movements, the muscles must be strong. What makes muscles strong? Training of course!
- You need to make your fingers dexterous and able to handle small objects. You need to teach your brain to give the right signals to your fingers. Try to remember how you felt the first time you used Chinese chopsticks, rather than the usual fork and spoon, to eat. If this has never happened to you before, be sure to try it. And you will understand what a small child experiences. My fingers don't obey. Not because they don’t want to, but because they don’t know what is required of them. But if you give them work constantly, they will quickly learn.
- You need to teach your fingers to hold a pen correctly. And as soon as possible. And also explain to the child how to sit at the desk, how to place the notebook in front of him.
- Doing graphic exercises will definitely benefit your future first-grader. Will allow him to get used to a new type of activity.
- A simple piece of checkered paper is a great way to get ready for school. It is necessary to teach the child to navigate it.
Well, now let’s talk in more detail about what exercises we do with my youngest son Artemka, who will also go to first grade in the new school year.
Developing arm muscles
All the exercise equipment necessary for the development of manual muscles can be found in any home, these are:
- plasticine;
- scissors;
- paper;
- wire;
- dough;
The list goes on, but sometimes even these simple things are not needed.
Our classes are divided into:
- Ordinary, familiar, creative work.
- Finger gymnastics.
Typical creative work is:
- modeling from plasticine;
- paper cutting;
- applications;
- working with dough;
- wire modeling;
Artem knows how to sculpt from plasticine and loves it. So there is no need to force him. I buy the most ordinary plasticine. To stretch it, to warm it, you have to try. And that's all we need.
Scissors are also a great trainer. Albeit dangerous. The main thing is to show the child how to use them correctly. It took a long time for Theme to cut it out. But we tried, we trained, and now he has already learned. It also happens that we do not cut the paper, but tear it with our fingers. Such torn paper makes beautiful unusual appliqués.
When our grandmother prepares homemade dumplings, and she is a real expert at this, she begs Artyom to help. He is happy to help her. And there is always a piece of dough left for Artyom’s personal use, which he then plays with, sculpts, rolls out, kneads.
It's interesting to work with wire. You can do a lot with it too. Various rings and figures. Artem first makes the frame, and then covers it with plasticine on top. It turns out great.
Super fingers system
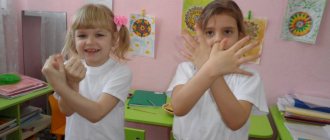
In fact, this is such a strange plot-role-playing game. The main participants are my hands and Artem’s hands. We put our hands on the table and they come to life. They talk to each other in our voices. Sometimes when someone blurts out something, you laugh for half an hour and can’t calm down. In general, although a strange, but very fun game.
My hands are trainers, and the Temins came to the fitness club to exercise. The coach shows what needs to be done, the others repeat. Everything is like in life.
Our training plan:
- "Warm-up." She's the first. Rub your palms together to warm up before training. Three until they become warm.
- "Training our fingers." Starting position – palms on the table, fingers extended forward. And one - swing up the little finger of one hand, and two - swing the ring finger of the same hand, and three - swing the middle finger. And so we reach the little finger of the second hand, and then back. Next, we begin to wave two little fingers, two ring fingers, etc.
- "Barbell". Let's start with strength exercises. Palms on the table, fingers extended. We hold a pencil between the second phalanges of the index and middle fingers. And we try to hold the pencil with our fingers and lift it up.
- "Race walking" The index and middle fingers are like legs. Again, a pencil is sandwiched between them. Holding the pencil, we begin to walk along the table with our fingers. It is impossible to run in this position. The steps are very small.
- "Rollers". Where do the rollers in the fitness club come from? We will discuss this issue later. In the meantime, let's go for a ride. Plastic bottle caps work well as rollers. We “put” the rollers on the index and middle fingers and started rolling on the table. Be careful, this is a very fast sport. Sometimes the hands collide with each other, fall, lose their rollers, cannot get up for a long time, kick their legs and shout something unintelligible. And such moments cannot but cause laughter.
- "Exercises with the ball." Instead of a ball, we use Kinder containers. Pour salt into them to make them heavier. And just roll it from one hand to the other.
- And finally, some fun. We arrange spider races. A little preparation, from counting sticks we lay out paths along which our spider hands will run. We put the handles on the start. The palms are raised from the table, resting on all five fingers, so that it looks like spiders. Attention! March! And the spiders ran, moving their legs, hurrying. Sometimes they are forgotten, creep onto the walls and even onto our heads.
- The training is over! You can go home! Stop! What about “cleaning”? The chopsticks are scattered all over the table! We collect the sticks with one hand, one thing at a time.
Finger dexterity
In order to learn how to handle small objects, you need.... small items.
Beading, knitting, embroidery - all this has a great effect on the development of motor skills. Once I bought Artem a kit for making a frog from beads. But my son said that it’s not a man’s business to weave beads and advised me to give the set to Alexandra. Sasha is his older sister. So I did. Sashulya was happy! Artem too!
Well, for Temka we bought a Lego set with small parts. He loves to play with it and can sit for hours and build something. And he does it so well! Takes pride!
We also have an iron construction set like we used to have. Tema also makes crafts from it. Either he tightens some screws, then he unscrews some nuts, then he attaches wheels. Basically you get different cars.
Well, to develop finger dexterity, you can offer your child:
- string beads on a thread;
- tie shoelaces and bows on ribbons;
- wind threads onto a ball;
- sort through the grains or lay out pictures from them.
What's the point? Find something small, come up with a game and offer it to the child.
Holding the pen correctly
What is written with a pen cannot be cut out with an axe!
And what is written with a simple pencil can be easily erased with an eraser.
This is why we don’t bring pens to preparatory courses at school. The pencil case contains only simple and colored pencils and an eraser. As the teacher explained, this is necessary so that the children do not worry too much about mistakes and can correct them. They say that it will be the same in first grade.
Pay attention to how your child holds the pencil when drawing.
Correct hand position. The pencil is held with the middle and thumb fingers, and the index finger covers the pencil from above. The little finger is pressed to the paper. The palm is turned towards the table. Hold the pencil at a distance of 2 cm from the lead. And the free end of the pencil looks at the shoulder.
If you see that a child is holding a pencil incorrectly, then this must be corrected. We cannot turn a blind eye to this. Otherwise, he will write very slowly at school.
You will find five different ways to teach your child to hold a pen correctly in this article.
In order for your child to understand exactly how to hold a pen correctly, it is recommended to stand behind him, place the pencil correctly in his hand, take his hand in yours and write together.
It is also worth taking care of your posture. Make sure the child is sitting correctly. The back is flat, the body is slightly forward, but does not lie with the chest on the table. The legs do not hang, are not lifted up on the chair, but stand on the floor. Hips parallel to the floor. The left hand holds the notebook. Left-handers have the right one.
The notebook is placed in front of the child at an angle, at an angle. We place the lamp on the left for right-handers, and on the right for left-handers.
Preparing your hand for writing: learning to hold a pen and pencil correctly
How to hold a pencil correctly and incorrectly when writing and doing graphic work: you need to know this!
Signs of improper use of a pencil or pen by a preschooler:
First. The child holds the pencil and pen incorrectly - he holds it with a “pinch” (gathers his fingers into a handful) or even in a fist. Second. Incorrect finger position when holding a pen or pencil. It manifests itself in the fact that the pencil lies not on the middle finger, but on the index finger. Third. The child holds a pencil or pen too close to the lead or too far from it.
To correct these mistakes, do the finger play exercise “Building a house for letters” with your child, which will help you learn how to hold a pen in your hand correctly:
Take a pencil or pen correctly (hold the pencil between your thumb and middle finger, while stepping back from the bottom edge - the pencil lead - up a few centimeters), place your index finger on top of the pencil. The index finger can move freely up and down, and the pencil will not fall, since it is firmly held by the thumb and middle fingers. Show your child how to do this - “tap” the pencil with your index finger. And say the poem rhythmically with your child, raising and lowering your index finger to the rhythm of the verses (knock with your index finger: “knock-knock”):
Knock, knock, hammer, We will build a house for the letters. Knock, knock, hammer, Settle, letters, in it.
This exercise allows your child to understand how to hold a pen and pencil correctly.
Another typical child mistake. The fourth mistake is incorrect position of the hand when writing or performing graphic tasks. How to hold a pencil or pen correctly - the top edge of the pencil or pen should be directed toward the writer’s shoulder. How to hold a pencil or pen incorrectly - the brush is turned out, the upper end of the pencil or pen “looks” to the side or away from you. The hand and elbow hang over the table. Show your child where the pen should “look” – towards his writing hand’s shoulder.
Graphic exercises
Graphic exercises include:
- hatching;
- coloring;
- stroke;
To complete graphic tasks, you can purchase special literature for preparing for school, copybooks, and coloring books. There you will find a lot of tasks to develop your graphic skills.
It is better to color pictures not with felt-tip pens, but with colored pencils. They are more useful in terms of developing fine motor skills. Because when drawing with pencils, you have to press on them. Make sure that the picture is painted neatly, evenly, without protrusions beyond the lines.
Coloring books, by the way, can also be used for shading exercises. You need to shade the pictures in different directions. Vertically, horizontally, diagonally. Keep an eye on your child while shading. Pay attention to whether he turns the sheet over when he moves from vertical to diagonal shading. This is mistake! You need to learn to control your hand, not a piece of paper.
Tasks where you are asked to circle something are excellent for developing precision in hand movements. For example, a drawing that is depicted with a dotted line.
A lot of graphic exercises can be found in children's magazines. Do you buy magazines? We are now “hooked” on “Extracurricular Magazine”. This is a very young publication. In March of this year, only issue 4 went on sale. In addition to hand exercises, there are many interesting tasks to develop memory, attention, and thinking.
Graphic dictations
Graphic dictations are very useful for preschoolers. They not only develop attention and teach how to navigate on a sheet of paper, but also prepare the hand for writing. And children, as a rule, really like such tasks. For them, these are not lessons, but an exciting game with a prize in the form of a funny figure at the end, if everything is done correctly. Please note that most graphic dictations begin and end at the same point, i.e. The figures are obtained with a closed contour.
It rarely takes more than 10 to 15 minutes to complete even the most difficult graphic dictations. Even the busiest parents will probably be able to fit them into their busy work schedules. And the benefits will be enormous.
How to conduct graphic dictations:
- We use only a simple pencil or pen. Working with felt-tip pens has its own nuances and does not teach the correct pressure.
- We read clearly, without repeating, so that the child gets used to listening carefully and remembering the task.
- We gradually increase the pace.
- At first, you can write the letters “L” (left) and “P” (right) in the corners of the sheet. When the child becomes confident in navigating the sheet, discard this hint.
Graphic dictation “First-grader”
Attention! Before performing the dictation, ask the child to step back 4 cells to the left and above, and put a dot in this place. This is the beginning and end of the drawing that will be obtained as a result of performing a graphic dictation. We start work from this point, and we must return to the same point. If this does not happen, it means there was a mistake somewhere.
3 grades to the right, 1 cl. left up diagonally, 1 cell. to the right up diagonally, 2 cells. down, 1 class. to the right up diagonally, 2 cells. down, 1 class. left up diagonally, 3 cells. down, 1 class. left, 1st cell. down, 2 cells to the right, 1 cl. to the right down diagonally, 2 cells. down, 2 cells to the right up diagonally, 2 cells. left up diagonally, 1 cell. up, 1 cl. to the right down diagonally, 1 cell. to the right up diagonally, 1 cell. to the right down diagonally, 1 cl. to the right down diagonally, 1 cl. to the right up diagonally, 1 cell. down, 2 cells left down diagonally, 3 cells. down, 2 cells left, 2 cells up, 2 cells left down diagonally, 1 cell. left, 2 cells up, 1 cl. left up diagonally, 2 cells. down, 1 class. left down diagonally, 1 cell. down, 1 class. to the right down diagonally, 1 cell. down, 1 class. to the right down diagonally, 2 cells. down, 1 class. left, 3 cells down, 1 class. to the right, 1 cl. down, 2 cells left, 4 cells up, 1 cl. left, 4 cells down, 2 cells left, 1st cell. up, 1 cl. to the right, 3 cells. up, 1 cl. left, 2 cells up, 1 cl. to the right up diagonally, 1 cell. up, 1 cl. to the right up diagonally, 1 cell. up, 1 cl. left up diagonally, 2 cells. up, 1 cl. left down diagonally, 3 cells. down, 1 class. left down diagonally, 1 cell. left, 1st cell. up, 1 cl. to the right, 4 cells. up, 1 cl. to the right up diagonally, 2 cells. to the right, 1 cl. up, 1 cl. left, 3 cells up, 1 cl. left down diagonally, 2 cells. up, 1 cl. to the right down diagonally, 2 cells. up, 1 cl. to the right down diagonally, 1 cell. left down diagonally.
The result should be a figurine of a first-grader with two bows and a bouquet of flowers.
Did it work? Well done!
Something incomprehensible came out, but the circuit is not completely closed? Dont be upset! This is just an excuse to practice one more time. You can come up with graphic dictations yourself or use those that are easy to find on the Internet or in stores.
Orientation on a sheet of paper
To develop orientation, we use a large checkered sheet.
First you need to explain to your child what a cell is. What do you mean when you say this word. Show where the cell is top, bottom, right and left. Try counting the cells.
The same goes for a sheet of paper. Where is his center? Where are the top left, top right, bottom left and bottom right corners? Offer your child tasks like this: draw some shapes in the center and three corners, and leave one corner empty. Let the child draw something himself in this corner. Ask him what part of the sheet is his drawing on?
Three more cool exercises:
- Drawing by cells.
- Copying patterns.
- Mirror drawing.
Consultation for parents “Preparing a preschooler’s hand for writing”
Consultation for parents
“Preparing a preschooler’s hand for writing”
Among the various tasks aimed at preparing a child’s hand for writing, the most effective are considered to be: exercises to strengthen the hand muscles
Exercises to strengthen arm muscles
- Exercises with small materials.
While working with your child, you can string beads, fasten and unfasten buttons, snaps, hooks, tie and untie ribbons; move small toys with the three fingers used to hold the pen while writing; work with a pipette and a glass (select and pour water), weave from threads (for example, bookmarks) and so on.
- Various types of productive activities
: modeling, drawing, applique, cutting out paper figures along the contour, embroidery. In addition to a good workout for your hand, drawing gives you a sense of “creation” and is the key to an emotional understanding of art.
- Shading
This rather pleasant activity is a burden for children at first, but later they do it with pleasure.
Conditions of the task: you need to paint only with colored pencils, do not go beyond the contour of the drawing, paint solidly, without stripes, you can change the pressure of one pencil and paint over the drawing in three tones - very light, thicker and very thick.
- Hatching - uh
This work is quite difficult, but very useful for the development of fine motor skills, but this activity does not arouse interest in children.
To ensure that the child’s interest does not fade, you can include playful moments, for example: “Night has come. We need to quickly paint over the sky and close the windows in the house.
- Drawing various graphic images.
When performing such exercises, it is necessary to draw children's attention to the cage: children learn that the cage is divided into four parts, that it has a middle, corners, top, bottom, right and left sides. When sketching, children must accurately copy the details of the picture.
- Performing finger exercises.
According to scientists, finger exercises activate the speech zones in the cerebral cortex.
Exciting tasks, accompanied by the rhythm of sentences, prepare the child’s hand for writing, develop his memory, attention, visual-spatial perception, imagination, observation, which in turn contributes to the development of speech. We offer you several options for finger gymnastics.
"Cat
" With the relaxed fingers of one hand, stroke the palm of the other hand.
The cat's fur coat is soft, pet it a little.
"Fan"
. Relax your arms from the elbow, open your fingers and “fan” your face with them, like a fan.
We bought a new fan, It works like the wind.
"Clicks."
Press the tip of each finger alternately against the thumb and click.
One click, two clicks. Every finger was able to jump.
When we write, we follow the following rules
:
- The table at which the child will do his homework is selected according to the child’s height;
- When writing, the light falls from the left;
- We sit straight; tilt your head slightly forward, keep your back straight;
- Feet together;
- The distance between the chest and the table is 1.5-2 cm; the child should not lean his chest on the table;
- distance from eyes to notebook or album 25 cm;
- the notebook or album should lie on the table tilted to the left, the notebook located at an angle of 30 degrees. If the notebook is positioned differently, the child will have to turn his torso and tilt his head strongly;
- The lower left corner of the sheet on which the child writes should correspond to the middle of the chest;
- Both elbows are on the table.
You can memorize a small poem and repeat it every time before you start writing (helps you remember the rules of landing and protects you from curvature of the spine):
Sit up straight, legs together, take a notebook at an angle. The left hand is in place, the right hand is in place, you can start writing.
What is important to know if you are raising a left-handed child:
- the light should fall from the right;
- the notebook or album should lie on the table tilted to the right.
An important task for parents is to teach their child to finish what they have started, whether it be labor or drawing, it doesn’t matter. This requires certain conditions: nothing should distract him. Much depends on how the children prepared their workspace. For example, if a child sat down to draw, but did not prepare everything necessary in advance, then he will be constantly distracted: he needs to sharpen pencils, select the appropriate piece of paper, etc. As a result, the child loses interest in the plan, wastes time, or even leaves the task unfinished.
Many parents make a big mistake by forbidding their child to pick up scissors. Yes, you can get hurt with scissors, but if you talk to your child about how to handle scissors correctly, what you can do and what you can’t do, then the scissors will not pose a danger. Make sure that the child does not cut randomly, but along the intended line. To do this, you can draw geometric shapes and ask your child to carefully cut them out, after which you can make an applique from them.
When preparing a child for school, it is necessary to take into account his individual abilities and evaluate the talents of his child. Correct assessment of these qualities and help in case of any problems will help the child successfully adapt to school and gain knowledge, joy and pleasure.
Consultation for parents
“Preparing a preschooler’s hand for writing”
Teacher of MBDOU No. 16
Ponomarenko N.V.
Novorossiysk
Drawing by cells
For children 6 - 7 years old it’s perfect. Place a dot on the sheet. This is the beginning of the drawing. The child places a pencil on the point. And you tell him where he needs to go. For example, 2 cells down, one to the left, three up, etc. You speak, the child listens and draws.
Want to try? Let me dictate, and you draw:
- one square up
- one cell to the right;
- one up;
- one to the right;
- six squares up;
- five to the left;
- one up;
- one to the right;
- one up;
- one to the right;
- one up;
- one to the right;
- one up;
- two to the right;
- one up;
- one to the right;
- one down;
- two to the right;
- one down;
- one to the right;
- one down;
- one to the right;
- one down;
- one to the right;
- one down;
- five to the left;
- seven down;
- one to the left;
- one down;
- two to the left.
Finished the exercise! Please tell us in the comments what kind of picture you got?
Patterns are also drawn in cells. You can add creative elements to them, all sorts of circles, waves, dots, crosses. The parents’ task is to start the pattern, the child’s task is to continue it according to the pattern. Well, or you can find samples of patterns in the copybooks.
How to prepare a child's hand for writing at home
Consultation for preschool parents
Consultation for parents: “Preparing your hand for writing.”
Author : Sharypova L.V., teacher-speech therapist of ChDOU Kindergarten No. 206 of JSC Russian Railways, Taishet. Goal: To help parents prepare their child’s hand for writing.
Your little one is going to school soon, but you still can’t write? There are original and effective ways to develop the fingers of a future first-grader for beautiful writing. You can prepare your hand for writing without waiting for registration at school. Using the following exercises: Exercises with a stationery eraser
5-6 year old children enjoy doing exercises with an ordinary rubber band. Take such an elastic band and put it on your baby’s thumb and index finger. Let him stretch it to the sides with his fingers. You can play with an elastic band in another way. Take push pins and ask your child to stick them into a board or foam along the contour, for example, of a car (draw the contour in advance). Now we stretch the elastic band over the protruding parts of the buttons. You will get a silhouette of a car! In the same way, you can learn the names and images of different geometric shapes.
Exercises at the table
Place your palm on a table or other surface. Raise your fingers one at a time without lifting your palm from the table. First with one hand, and then with both at the same time. It is useful to pronounce syllables with different “difficult” sounds: “SA-SA-SA-SA-SA. RY-RY-RY-RY-RY.”
Fist-palm-rib exercises
The child’s hand alternately changes position: first it clenches into a fist, then it rests its palm on the table, and then it stands on its edge.
Exercises with millet in a glass
Sit your child down at the table and give him a glass of millet. Let the child cook the porridge, that is, stir the millet in the glass with his index finger. The brush should not move, only the finger. Then middle and nameless.
Exercises with buckwheat or lentils
Ask to separate the cereal into two piles. This long and painstaking work is very useful for developing concentration, perseverance, and logical thinking. If your baby is tired, pour different types of cereals into a large bowl and bury a lot of small toys in them. Thus, muscle spasm of the arms, fatigue and tension are relieved. Show your child different original shading patterns. Hatch the pictures with cells, zigzags, dots and other methods.
Exercises to develop arm muscle endurance, pressure strength training.
“Planes behind the clouds” Draw several planes with clouds around them. Shade one cloud intensively, make the other a little lighter. The plane is almost invisible behind a dark cloud, but clearly visible behind a light cloud. Ask him to draw dark and light clouds for the rest of the planes. You can also depict a person in the pouring rain or a house at night. “Hit the target”, “Labyrinths” The child’s task is to draw a line as accurately as possible without lifting his hand: -throw the ball into the basket; - guide the ship along a short route so that it does not run aground; -score a goal into the goal; -hit the center of the target with an arrow; -try to drive quickly along the serpentine road; “Hatching” In three geometric shapes, the child must perform shading: in a square - with strong pressure, in a triangle - with medium pressure, in a circle - with weak pressure. You can use different shading methods. “Exercises to develop coordination” - trace the figure along the contour indicated by the dots; - complete the unfinished contours of geometric shapes; - complete the drawing: half of the nesting doll, butterfly, beetle and airplane; -continue the pattern along the cells according to the sample. “Graphic dictation” The child draws lines along the cells in a given direction.
For example: “one cell to the right, two up, one to the right, two down. Exercises to clarify position in space.
“Color the flags” In a row of drawn flags, the one on the far right should be painted red, and the second one on the left should be painted blue. “Turn on the light in the windows” Draw a house with windows. Offer to paint (turn on the light) in the upper right window, lower left, etc. “Draw a picture” Draw a tree in the center of the sheet. To the right of it is a flower, to the left is a bush, in the upper right corner is the sun. “Name what is drawn” Draw objects by “overlaying” one image on another. Ask them to name what the baby saw.
We recommend watching:
Raising interest in school in children of the preparatory group Teaching literacy to children 5-6 years old Advice for parents of future first-graders Summary of a comprehensive lesson on preparing children 6-7 years old for school
Similar articles:
Learning the alphabet with preschoolers in kindergarten
Children's perception of information
Fatigue and overwork in preschool children
Educational coloring books for children from 3 to 5 years old
Excursion for preschoolers to school