–Categories
- Creativity (183)
- Felting (29)
- Decoupage (22)
- Painting (22)
- Spot painting (19)
- Teddy bears (18)
- Toys (16)
- Stained glass painting (14)
- Modeling (11)
- Beads (9)
- Jewelry (5)
- Scrapbooking (5)
- Mosaic (4)
- Foil (2)
- Dolls (2)
- Mehendi (1)
- Papier-mâché (1)
- Master Class (88)
- Recipes (70)
- Baking (44)
- Main courses (33)
- Sweets (21)
- Salads (13)
- Soups (6)
- Drinks (4)
- Ekadashi (1)
- Vedas (32)
- Ayurveda (7)
- Krishna (6)
- Magic of life (32)
- Psychology (27)
- Children's (26)
- Wisdom (24)
- Videos (22)
- Health (18)
- Face, body (5)
- Drawing templates (17)
- Interior (13)
- Home Decor (6)
- Meditations (13)
- Music (12)
- Countries, cities (12)
- Painting, illustrations (12)
- Useful things (11)
- Mantras, prayers (9)
- Exercises (8)
- Yoga (6)
- Everything for the diary (4)
- Fragrances (2)
- Vegetarianism (0)
-Music
–Photo album
–Search by diary
–Subscription by e-mail
-Friends
– Regular readers
–Communities
-Statistics
Saturday, July 09, 2020 15:52 + to quote book
Planar modeling (BAS-RELIEF)!
Modeling is one of the most useful activities for children.
The educational and educational significance of modeling is enormous, especially in terms of the mental and aesthetic development of the child.
Modeling broadens one's horizons, contributes to the formation of a creative attitude towards the surrounding life and moral ideas.
Modeling classes cultivate a child’s artistic taste, the ability to observe, highlight the main, characteristic things, teach not only to look, but also to see.
By plastically reproducing this or that object from life, from memory or from a drawing, children become familiar with its shape, develop their hands and fingers, and this in turn contributes to the development of speech.
Kids learn to look at an object more carefully, which develops their powers of observation. This work gives scope to children's imagination.
Modeling fosters perseverance, develops the child’s work skills and abilities, finger muscles and manual dexterity.
Carved and molded works have long been used by people to decorate their lives.
From plasticine you can make small paintings with a variety of reliefs. To do this, you need to prepare a base - a small cardboard plate covered with a thin layer of plasticine. Parts of the desired shape and color are attached to it, pressing and smearing them onto the base.
There are relief forms with protruding and recessed images.
1.High relief. It has a strongly protruding, semi-voluminous image. (Stucco ceiling decorations in ancient houses). 2. Bas-relief. An image with details protruding slightly above the surface of the base. (Coins, badges, medals are miniature bas-reliefs.)
3. Counter-relief. An image embedded in the surface of the base. The design is scratched, selected or pressed with a stack or stick. (The design is applied to the top layer of the material, exposing the top layer, which differs in color. This technique is called sgraffito).
Using bas-relief modeling in working with children.
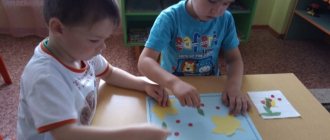
Modeling, along with drawing, applique and design, is a productive activity and is of great help in the development of fine motor skills in children.
Research by scientists has shown that speech areas are formed under the influence of impulses coming from the fingers. The level of development of a child’s fine motor skills presupposes the corresponding level of development of his speech.
Preview:
BAS-RELIEF MOLDING IN WORKING WITH PRESCHOOL CHILDREN
Bas-relief modeling can be successfully used in working with preschool children. The advantages of bas-relief modeling are that it allows:
– create more opportunities for children to practice mastering such modeling techniques as rolling out plasticine with straight, circular movements, rolling out plasticine with their fingertips;
– increase the use of various arm muscles during one session. (For example, in the work “Christmas tree decorated with beads,” children practice rolling plasticine between their palms with straight movements and fingertips, and also train finger strength by performing a technique called “smearing from a column”);
– to train children in the coordination of hand and eye movements (For example, in the work “Fairytale Fish”, the scales should be approximately the same in size and they should be applied in a certain order, which contributes to the development of hand-eye coordination in children);
– develop compositional skills. (Children learn to fill the work space, which can later help when creating a composition in a drawing);
– diversify the topics of modeling work and link them more closely with the topics of other classes (for example, with classes on speech development);
– use children’s works to decorate the interior of group rooms and save the works as souvenirs or give them as a gift, which is almost impossible with works of ordinary modeling;
– have a comprehensive impact on the child’s development and develop general manual skill, fine motor skills, synchronize the work of both hands, and develop finger strength.
In the senior group, 7 classes on bas-relief modeling are held per year, in the preparatory group - 4 classes during the school year.
The decrease in the number of classes in bas-relief modeling is explained by the fact that by the senior preschool age children have improved modeling techniques, the ability to perform more complex work using conventional modeling techniques increases, and in the senior and preparatory groups for school the work of various circles has been additionally organized: “Isothread”, “ Origami".
In the process of conducting classes with children, the following techniques are used:
1. Introduction and examination of the background. For classes in bas-relief modeling, a background is introduced (it is entirely made of plasticine), on which individual fragments of the future image are given, for example, an image of Santa Claus in a sheepskin coat without decoration, etc. There can be one or two backgrounds, depending on the work being performed.
2. Creating game motivation for the lesson. They come up with playful moments before the next lesson: help Santa Claus come handsome to the children for the holiday, and for this, decorate his sheepskin coat; make a picture for the sad monkey in the zoo that will remind him of his homeland Africa; make a picture with roses, etc. as a gift for mothers.
Features of creating bas-reliefs
If hundreds of years ago only an artist with a natural gift and who knew the secret of creating a plastic gypsum solution could make a bas-relief with his own hands. After all, this is nothing more than a version of gypsum stucco. But in our time, anyone with the slightest bit of creativity can do something similar, and modern technologies make it easy to cope with technical difficulties.
- First of all, these are factory-ready textured plasters that simply need to be mixed—or, at most, need to be mixed with water. They are plasticized by adding polymer additives to the gypsum binder, including those that slow down the hardening of the mass.
- This gives time to complete the drawing, because it is known that plaster sets very quickly. The price of such compositions is rather high, so those who make money from creating bas-reliefs make up their own recipe - for example, they take dry acrylic plaster, mix it in half with architectural plaster and modify it with PVA glue.
- Each master makes the consistency with which it is most convenient for him to work. Execution techniques may also differ, because the main thing here is not the process of execution, but the end result.
- If we talk about types of relief, then bas-relief occupies the golden mean in terms of degree of convexity. A pattern that is higher in volume is called high relief, and a concave pattern, when fragments of the upper layer of plaster that still retains the plasticity of the plaster layer is cut off to create an image, is called sgraffito.
Note: However, it is the bas-relief that looks best indoors - the main thing is that the lighting is not too dim. For this reason, the image is often placed in a plasterboard niche in which lighting is organized - or devices are installed to illuminate the wall on the ceiling.
There are different types of bas-relief in the interior. The most suitable for amateur beginners is when part of the picture is cast in a mold and then attached to the base. It is very convenient to use when there are identical fragments in a composition.
Below are a few photos as an example:
As you can see, the bas-relief can be made not only directly on the wall, but also as a removable panel. And if during the production of the latter it is possible to correct something or even redo it, then when shaping a non-removable image it is almost impossible to do this.
Therefore, we advise you to first acquire the necessary skills using a sheet of drywall as a base, and then proceed to more responsible work.
Tool used
This kind of work doesn’t require a lot of tools, but there are still special ones that you can’t do without.
- It is very convenient to use a rubber ball cut in half as a container for mixing small portions of the solution. You can easily remove the remnants of the already set mixture from it, and this is done quickly, which saves time. And in this case it is the primary factor, since the faster the entire bas-relief is formed, the more durable it will be.
- The advantage of this solution is not only the softness and tightness of the container, but also its spherical shape without corners. They interfere with high-quality mixing of the mixture, which must be homogeneous. If you don’t have a ball at hand, take a round plastic bowl.
Portions of the solution should be small
- The main tool is a palette knife - an artistic spatula or knife, with which one or another texture is created. And since several types of reliefs can be combined in an image, different spatulas are required.
Artistic spatulas
- They are usually sold in sets of at least 6 pieces. This is enough for a beginner, but professional sets can have up to 50 palette knives. They are expensive, so craftsmen often use improvised materials - for example, ordinary spoons of suitable shape and size (including disposable ones).
- As a handy tool, many masters of sculpture use syringes - both confectionery and medical syringes of various sizes (a needle, of course, is not needed). They are very convenient for forming small things like twigs, petals, stars, roses, berries. The work, one might say, is similar to what confectioners do when decorating cakes.
Working with a pastry syringe
You will also need several inexpensive, but different-sized flat and round brushes, which are used to plaster individual fragments of the design. All tools must not only be kept clean, but also washed regularly during use. Remains of dried mixture on them is a direct path to ruined work.
The principle of three-dimensional image formation
We have already said that the bas-relief can be permanent or composite - when it is made on plasterboard, and then mounted with glue on the wall. In any case, the base must be well prepared: freed from old finishing, leveled with an error of no more than 2 mm per 1 m2 and primed.
- If the bas-relief is made directly on the wall, you will also have to apply a thin layer (background) of any decorative plaster. Select it with the required fraction of filler - depending on what kind of image you plan to create. Perhaps a grainy texture will look best.
- If necessary, the background layer is structured with a fur roller, foam sponge, or brush. Most often, the bas-relief is left in white, but if necessary, the background layer is tinted before the relief begins.
- Once its formation is completed, the design can be painted over with acrylic paints, after which it is covered with waterproofing latex primer for protection. It will protect the plaster from absorbing moisture and dirt, as well as strengthen its surface, add shine and richness to the colors.
The bas-relief is formed layer by layer, from parts 1-2 mm thick. The solution usually has a thin consistency, is applied with a brush and smoothed with a spatula.
If the image is in color, each layer is tinted, and the concentration of pigment in it becomes weaker as the relief is formed.
Practical example - one of the options
It is always better to look once than to read many times, so below are instructions in pictures that will clearly show how to create a bas-relief for the interior:
| Steps, photo | A comment |
|
After the background layer has been applied, you need to apply on it the outlines of the design that you would like to embody in plaster. |
| Start applying the mixture inside the contour, leveling it with a spatula. At first, the figure should be solid, and you will be cutting small parts within a day, when the plaster has dried. |
| Using a palette knife, you immediately adjust the edges of the picture and smooth its surface. Leave the plaster to set. |
| The next day you can continue working, for which the surface of your future bas-relief needs to be moistened with water from a spray bottle. |
| For further work, which will be performed with a spatula knife, it is necessary to make pencil markings. |
| Regularly wetting the surface, cut out notches on the gypsum leaves. |
| Finally, the drawing is sanded, and if you do not plan to paint it, immediately cover it with a latex primer. |
As an option, you can make a bas-relief using the free plaster method, which looks especially good on flower arrangements. For this, artificial flowers are used, which, as in the photo, are dipped into a very liquid gypsum solution several times in turn until a layer of about 1.5 mm is formed on them.
Plastering an artificial flower
After each plaster bath, the flower is always placed on one side so that a flat area is formed where it will subsequently adjoin the base. Upon completion of the gypsum, it is immediately placed in the position that it will occupy in the bas-relief, having first made a bed of gypsum glue.
For people without any experience, this is the most accessible way to make a bas-relief with your own hands - you can watch a video on the relevant topic in this article.
As a result, you can get these gorgeous “still lifes”:


