DINING DUTY IN A MIDDLE GROUP
Memo on organizing canteen duty in all age groups
JUNIOR GROUP
Duties are of great importance in raising children:
Ø those on duty always perform work that has social significance and is necessary for the team. Forms a desire to work for the sake of others, to show a caring attitude towards one’s comrades, to develop the ability to help an adult, to notice where help is needed.
Ø duty in the canteen develops in children moral and volitional qualities and skills, the ability to accept a goal and achieve results.
From the age of 2, children are involved in the preparation of the feeding process, carry out simple tasks: place chairs correctly at the table, place plates with bread in the middle of the tables, place spoons on the right side of the plates standing on the table.
Canteen duty starts from the 2nd junior group.
Tasks: help the assistant teacher set the table at which he and his friends are sitting. Distribute spoons, put out bread bins, vases with napkins.
Before introducing duty, the teacher organizes special classes in which he shows and explains in detail all the actions, involving children in their implementation.
While on duty, the teacher explains the need to work hard and encourages any attempt by the child to show independence.
Reminds you of the priority in completing the assigned task.
“Today Ira will take care of his comrades and will be on duty at his desk. Dima will set this table. Let them work for everyone today, and let other children do it tomorrow.”
· The teacher teaches children to carry out the assigned task without being distracted, without fussing, without rushing, without finishing one task, not to move on to another.
The teacher says in a friendly tone: “Kolya, don’t rush. Why are you in such a hurry? You will have time to do everything. Lay out the spoons carefully for all the children.”
Supervising the work of those on duty, the teacher reinforces the skills of laying out cutlery: “Spoons should be taken by the handle, one at a time, placed on the right side of the plate.” If forks are given, then the fork lies closer to the plate with its sharp ends up, and then the spoon with its convex side down. Now put the bread basket in the very middle of the table so that it’s easy for everyone to reach, and then put the napkins. First you need to finish one thing, and then start another.”
· “Let's see how you arranged the spoons. Did you miss anyone?
· The teacher supports indecisive children, encourages:
“I know, Nadyusha, you will set the table well now. Start handing out spoons: to Katya, and Sasha, and your friend Anya.”
· You should not constantly set the same children as an example and assign them to duty. Slightly higher demands can be placed on them.
· As children master skills, the teacher’s role in supervising those on duty changes. Initially, he reminds the kids of work techniques, the sequence of operations, and helps them cope with the task.
· Later, the adult limits himself to advice, general reminders, control, and approval.
· It is important that the duties of duty officers are performed by all pupils, and not just active and skillful ones.
DINING DUTY IN A MIDDLE GROUP
Tasks:
-Form a responsible attitude for the assigned work.
-Cultivate concern for each other, a desire to help help. teacher, work carefully and diligently.
-Know how to properly set the table.
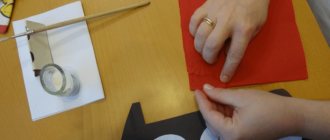
· The child on duty in the dining room must independently arrange forks, knives and spoons; put bread bins, vases with napkins; serve the second course; collect the dishes.
· The duty officer's corner should have everything necessary for work: aprons, caps, scoops, trays. Vases for napkins and bread bins are in such a place that it is convenient for children to pick them up and put them away after use.
· In the middle group, knives first appear in table settings, and the skill of handling them has not yet been developed.
· The volume of work in the middle group increases: children place saucers and cups from the serving table on children's tables, fill vases with napkins, lay out cutlery (spoons, forks, knives).
· In the middle group, each attendant serves one table.
Thus, duties are repeated frequently, and therefore children learn the necessary skills faster and better. The teacher needs to take into account the individual characteristics of children and the level of development of their work skills.
To work without haste, those on duty must be the first to finish the game and return to the room after a walk.
When the majority of the children are just starting to collect toys, the teacher reminds those on duty of their responsibilities and sends them to the group.
There they are met by the teacher's assistant (at this time she had already wiped the tables and placed a pile of dishes on each table).
The teacher and assistant teacher teach the attendants how to properly lay out the equipment.
The attendants place the plates, each opposite the high chair, spoons are placed to the right of them, and a glass with napkins is placed in the middle of the table. The cups are placed so that the handle is on the right side.
· If a knife is served for lunch, then it is placed to the right of the plate with the blade facing the plate, next to a spoon, then a salad fork.
The fork for the second one is on the left side of the plate.
A small spoon - in a saucer or next to a plate parallel to the edge of the table, the handle of the spoon should be on the right.
· The teacher must be patient and encourage those on duty:
“Seryozha was truly on duty today, he took care of everyone, he remembered everything himself, he didn’t forget anything.”
· The attendants remove bread bins and glasses with napkins from the table. They sweep the crumbs off the table, fold the tablecloths, turning to another person on duty for help.
· Do not overload the attendants with duties that each child must perform himself, for example, pushing in a chair, stacking plates, putting away a used napkin.
· At the end of the school year, children usually cope with cafeteria duty on their own, and the teacher is limited to control and individual reminders.
· It is important that the children on duty not only perform their duties, but also eat themselves without haste or interruption. Therefore, when the tables are set, soup is poured for those on duty before other children. Thus, those on duty are usually the first to finish lunch, after which they can begin their duties.
(The tablecloth on duty is folded in half on the table, and then in half again, and only then folded lengthwise).
Organization of work of kindergarten attendants in different age groups
Contents of work of duty officers
In younger groups there is no duty as such; children carry out separate work assignments from the teacher and junior teacher.
Children 2-3 years old
In 1st junior group
Before meals, children arrange chairs at tables (to make it more convenient to walk around the table), bring bread bins and napkin holders to tables, and arrange them with the help of a junior teacher or teacher.
Children 3-4 years old
In the 2nd junior group, from the 2nd half of the year, canteen duty is introduced.
Before entering duty, the teacher organizes special classes in which he shows and explains in detail all the actions, involving children in their implementation.
Children are taught to carry out the assigned task without being distracted, without fussing, without rushing, without finishing one task, not to move on to another. The teacher supervises the work of those on duty, reinforcing the skills of arranging equipment (Appendix 1).
Children on duty must have special clothing (an apron or robe and a headdress - a headscarf, cap, etc.). The child on duty is given only one condition: to help the junior teacher set the table at which he and his comrades are sitting.
1. The child lays out individual napkins (if available).
2. Arranges bread bins, napkin holders, mugs for the third dish (empty).
3. Lays out spoons and forks.
The teacher focuses on teaching consistency in work and the ability not to be distracted from the task. He also strives to create a calm environment.
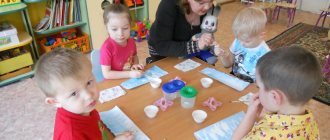
Children 4-5 years old
The duty is organized from the beginning of the school year.
The children develop a responsible attitude to business.
In this age group, each attendant serves one table. In the first months, it is necessary to teach those on duty the correct work techniques (Appendix 1)
. In the middle group, the responsibilities of the duty officer increase:
1.Children lay out individual napkins (if available).
2. Arranges bread bins, napkin holders, mugs for the third dish (empty).
3. Arrange the plates for the first course.
4. Lay out forks and spoons.
The second dish is distributed by the junior teacher and teacher (children do not get up from the table while eating).
After eating, children put away napkins, bread bins, and napkin holders. Plates with leftover food after the first and second courses are removed by the junior teacher, the teacher.
Children 5-6 and 6-7 years old
The duty of older preschoolers (senior and preparatory groups) is gradually becoming more complicated both in the content of work and in the form of unification of children, in accordance with the requirement of independence in work. Usually, every day the teacher appoints two children on duty. These children are on duty throughout the day. An important task of organizing the work of duty officers is to develop in children responsibility for the assigned work. The content of the work of the dining room attendants in senior groups includes full table setting, assistance in cleaning the table after meals:
NEWS BOOKS FOR PARENTS BOOKS FOR CHILDREN PROJECT MAP ABOUT THE SITESenior group
In the older group, children’s work in caring for plants is organized in the form of duty. It is introduced at the beginning of the year, and children are taught this new form of work organization in class.
Sample summary of the lesson “Duty in a corner of nature”
(conversation showing working methods).
Program content.
Clarify and consolidate children’s knowledge about plant care techniques and the sequence of work. Clarify knowledge about equipment for work and where it is stored. Explain the structure of the duty board. To develop responsibility for the assigned task and the ability to complete it.
Progress of the lesson.
The children are sitting in their places. The teacher, turning to them, says: “Children, today we will talk about how we care for plants, what we do (children list).” Then he asks questions: “How do you know when a plant needs to be watered? (The earth is dry to the touch, light.) What kind of water do we water? (Warm water that has been sitting in watering cans since yesterday.) How should you water correctly? (Invites one of the children to show how to water.) Did Vova water the plant correctly? That's right, he holds the spout of the watering can right above the pot, watering it carefully and accurately. What do we do first, water or wipe the pot, saucer and windowsill? Why do you need to water first? (Then you can spray it on the saucer and window sill and you will have to wipe it again. The child shows how to wipe the pot.) When all the plants are watered, what else needs to be done? (Pour water into the watering cans and leave them for tomorrow so that the water warms up.) What else is needed to care for plants, besides watering cans? (Cloths, bowls, oilcloths.) What should you do with them after the work is finished? (Wipe oilcloths, rinse and dry rags.) Where is everything needed to care for plants stored? (In the table under the aquarium, everything is in its place.)
Since the very form of organizing work turns out to be difficult for children at first (they forget that they are on duty, are distracted, do not finish the job, etc.), the teacher does not initially show them new techniques for caring for plants. They are introduced gradually as the children get used to being on duty. Much attention is paid to organizing duty, especially at first. To develop the habit of being on duty in children, the teacher uses different techniques: reminds some children that they forgot to water the plants or put away their equipment, gives others examples of comrades who are doing their duties well, asks others if they have done everything, and invites you to go back and see if this is so, etc. But you cannot direct children only to perform plant care techniques; You should definitely draw their attention to the changes occurring in the plants and encourage those children who have seen more.
In order to give children more time to observe plants while on duty, it is advisable to organize duty in the older group for 2-3 days, but only in the first half of the day, so that the children do not get tired. In the afternoon it is better to use individual orders. Being on duty does not preclude the use of assignments. If there are many plants in a group, not all of them can be served by the person on duty; Some are looked after by children who have received individual assignments—work assignments. These assignments can be sporadic or longer, lasting several days.
From time to time, also in the afternoon, the teacher gathers those on duty, talks with them about how they perform their duties, what they do and how, what new things they noticed in the life of plants.
When the children get used to being on duty, the teacher introduces them to new types of plant care: spraying, pruning dry leaves, then loosening the soil; teaches new care techniques. It is better to do this at the end of a lesson on familiarization with indoor plants, and the meaning of each technique should be explained and the children should be provided with the necessary equipment to complete the work. The teacher teaches children how to loosen the soil on plants that have a sufficiently deep root system (so that they do not damage it).
In the older group, complications are introduced into the types of care already known to children: the teacher draws attention to the fact that in autumn and winter plants hardly grow, many do not bloom, so they need to be watered less often. With the onset of spring, children see that the plants begin to grow, young leaves and buds appear on them. The teacher leads the children to the conclusion that at this time the plants are watered more often. At the end of March - beginning of April, when plant life awakens, they begin to fertilize.
Sample summary of the lesson “Care for indoor plants and their first feeding”
Program content.
Clarify children's knowledge about plant care techniques and their sequence. Reinforce the loosening technique that children have not mastered enough. Introduce children to a new type of care - fertilizing (feeding) the soil, tell them some rules for applying fertilizers (water with a fertilizer solution once a week after watering, the amount of solution depends on the size of the plant). Continue to instill in children an interest in plants, a desire to observe and care for them. Introduce the words fertilizer (feeding) into the children's dictionary.
Preparing for the lesson.
The teacher, together with the attendants, places plants on the tables (for each child; two or three children will take care of large ones), distributes equipment for care: oilcloths, sticks for loosening, rags. A bowl of water, a spray bottle, scissors, and a watering can are placed on each table. A basin and a large watering can are placed not far from the tables. On the teacher’s table there is a bag of fertilizers and cups of solution, full and filled to half.
Progress of the lesson.
The teacher invites the children to roll up their sleeves and sit in their seats. He says: “Children, today we will take care of indoor plants. But first, let's remember what needs to be done for this. (Children list techniques and procedures for care.) What have you learned recently? (Loosen the ground.) Why do you need to loosen the ground? (So that water flows well and so that it is easier for roots to grow in loose soil.) How do you loosen the soil? Why such sticks? (So as not to injure the roots.) How to loosen correctly? Kolya, go show me. (The child completes the task, the teacher holds the pot with the plant at an angle so that all children can see.) Is Kolya doing it right? That's right, closer to the stem it loosens shallowly, and further from the stem it loosens a little deeper. How should you wash plants? (Wipe large leaves with rags, place plants with small leaves in a basin, cover the soil with oilcloth so as not to wash it away, and water from a large watering can.) Why do we care for plants? (So that they are beautiful, grow well and bloom.)"
Next, the teacher asks to look at the plants they are caring for. Do they notice any changes in their appearance? (Geranium has new leaves, balsam has buds.)
“Now spring is beginning,” says the teacher, “our plants are starting to grow. In order for them to grow and bloom better, they need to be fertilized and fed. There is a special powder fertilizer for this (shows a package with pink powder). But you can’t sprinkle the powder on the ground; it must first be diluted in water. Feed the plant with this solution once a week after watering it, so that the solution is better absorbed into the soil. There are cups of fertilizer solution on my table. Some cups contain half of the solution, and some are filled to the brim. After you wipe the leaves of your plants, loosen the soil, spray them, and wash the plants with small leaves in a basin with a watering can, take the cups of fertilizer from me. But everyone should think about how much solution he will take the glass with: full or with half liquid (if the plant is large - full, for a smaller plant a smaller amount of solution will be required). When you apply fertilizer, put the cups back in place, clean up your work areas, and take the plants back to where they were (except for the larger ones). Whoever works together, agree which of you will do what.” The children start working.
The teacher monitors the children’s activities, helps them with advice, and notes those who successfully cope with the task.
At the end of the lesson, the teacher sums it up and asks the children: “What have you learned today? (Feed the plants.) Why feed (fertilize) them? (So that they grow and bloom better.) What kind of soil should the fertilizer fall on? How much fertilizer should you pour into a pot of plants? (On wet ground, fertilize after watering, pour half a glass or a whole glass depending on the size of the plant.)"
Then he says: “Today you fed the plants, and then the workers on duty will do this work once a week. The day before, I will dilute fertilizers in a bucket, and then the attendants will pour them into pots with plants. Now you should all observe the plants to see the changes in them after feeding. At home, tell your mothers what you learned today, take care of plants at home the same way as in kindergarten.”
The teacher emphasizes the collective importance of the children’s work: everyone worked hard, the plants have become beautiful, they decorate the group, and they will develop even better.
After the lesson, the teacher organizes observation of the growth and development of plants. Talking with the people on duty, he finds out what they saw new in their plants, whether they informed all the children about the changes, and notes the work of the most attentive and observant people on duty.
In natural history work with older children, didactic games with plants and their images (pictures) are widely used. Games can be carried out individually, with subgroups of children and included in classes to familiarize themselves with plants. Such classes are held 4-5 times a year. For classes, plants are selected that have pronounced signs of difference and similarity (for example, two types of geraniums, begonias), plants with different stems (for example, ivy and fuchsia), different leaf surfaces (for example, coleus and balsam), etc., no more in total five to six plants. It is advisable that at each lesson a new, unfamiliar plant to the children (one that blooms better) is offered; this revives children's interest in work.
Sample summary of the lesson “Getting to know indoor plants”
Program content.
Clarify and systematize children's knowledge about plants. Teach children to more fully describe plants, noting significant features of appearance. Introduce more precise definitions of the appearance of individual parts of plants into the children's dictionary: curly trunk, rough leaves, leaf edge with teeth, etc. Introduce children to a new plant - abutilon (indoor maple), note the characteristic features of its appearance. Strengthen children's interest in caring for and observing plants.
Preparing for the lesson.
On the teacher’s table there are plants: fragrant and zonal geranium, indoor grapes, primrose, fern. Abutilone was removed at the beginning of the lesson.
Progress of the lesson.
The children are sitting in their places. The teacher says: “Children, today we will look at some of our indoor plants and talk about them. What are the names of the plants that stand on the table? (Children call.) Let’s first look at indoor grapes.”
To make it easier for children to describe the first plant, the teacher asks questions: “What size are the grapes? What does it look like, a tree or a bush? (For a bush, it has several long trunks.) What kind of stem does the grape have, straight or not? (Its stem is not straight, it curls around the bar.) Correct. That's what it's called - curly. How do the grapes cling to the bar? Yes, he has a mustache. What are they, what are they like? Right. On springs, with them the grapes cling to the support. What kind of leaves do grapes have? Tell me, Raya. (Large, dark green, dense, oval-shaped, the edge of the leaf has teeth.) Stroke the leaf: what is it like? (Smooth.) Are the grapes blooming? (No, it didn’t bloom here.)”
The teacher calls one child and asks him to tell him everything about the grapes that the other children noticed and said.
After this, primrose and fern are examined. The teacher invites the children to talk about these plants in the same way as they talked about indoor grapes; If someone is at a loss, help him with a question or invite another child to continue the story.
Then the teacher says: “Now let’s compare two plants. Are primrose and fern similar? (No, they are not alike.) Look at them carefully and tell me how they are not alike. What kind of leaves do they have? (The leaves of the primrose are round, not smooth, rough, dense, the edge of the leaf is even, but the leaves of the fern are long, smooth, thin, cut out at the edges; the young leaf of the fern is curled at the end.) Look at them again carefully and say what they are similar. How big are both plants? (Small.) What color are their leaves? (Light green.) That's right, that's how they are similar, but what else? Do they have a visible stem? (No, both the primrose and the fern have no visible stem.) This means that both plants are not only different from each other, but also somewhat similar to each other.”
Then the teacher offers to look at two different geranium plants, asks to compare them and note how they are similar and how they differ. Children talk.
In a corner of nature, children work with interest: preparing the ground for sowing seeds, planting cuttings, caring for planted plants
“Now I’ll show you a new plant,” says the teacher and brings in abutilone. “It’s called indoor maple.” Look at it carefully and tell me why it is called that. That's right, its leaves look like the leaves of a maple tree. Tell us about it the same way you talked about other plants. (Children talk.) Indoor maple grows well in a bright place. Where do you think he should stand in our group? That's right, the sun often falls on this window, after class we will put it here. It needs to be watered more often. And now we will play with you. I will ask questions about plants, and you will answer. Which plant has the largest leaves? What about the little ones? Which of our plants blooms in winter? Which ones started to bloom in the spring? How do plants' leaves unfold? Which plant has a leaf “dressed in a shirt”? (In ficus.) Which plant has a young leaf that is first rolled into a light green tube, and then it unfolds and darkens? (In a friendly family.) Which plant has the tip of a young leaf curled up like a snail? (At a fern.) Which plant has a scent not only for its flowers, but also for its leaves? (Geraniums.) Which plants have bright red flowers? What about the whites? And the pink ones? Which plants have large single flowers, and which have many small ones? Now come up with your own questions about the plants of this corner of nature.”
In a corner of nature, children work with interest: preparing the ground for sowing seeds, planting cuttings, caring for planted plants
Children learn to ask similar questions, the teacher helps them, paying attention to the characteristic features of the plant’s appearance, its size, etc., praises those who came up with interesting questions, emphasizes that all the children’s questions indicate that they love plants and carefully observe their growth and development.
In a corner of nature, children work with interest: preparing the ground for sowing seeds, planting cuttings, caring for planted plants
At the end of the lesson he summarizes: “You studied well today, you spoke correctly about plants, you saw a lot of interesting things in them. Continue to observe our plants; If any of you see anything new from them, tell everyone.”
In a corner of nature, children work with interest: preparing the ground for sowing seeds, planting cuttings, caring for planted plants
At the beginning of the year, it is advisable to offer children simpler plants to examine and describe, then you can give them more complex ones. At the end of some classes on getting to know plants, educational games such as “Guess by Description” are also used. The teacher makes a wish for a plant, and the children guess. “The plant is large, the stem is not visible, the leaves are narrow, dense, dark green, smooth, the leaf edges are even, the flowers look like orange bells, they are all collected on one arrow,” says the teacher. “What kind of plant is this?” (Clivia.) Now you guess, and I’ll guess.”
When describing plants, the teacher helps children note the characteristic features of each of them with questions.
During the lessons, children watch the buds blooming on cut branches, examine and compare plants
In these classes, children learn to carefully examine and describe their plants. If during the lesson the children cannot answer one or another question about a plant, the teacher does not need to rush to answer it himself; After the lesson, children should be asked to think about what plant this is said about, and after a while ask if they guessed what plant the question was about.
In addition to similar activities, you can conduct one that is entirely devoted to a didactic game, for example, “Flower Shop,” where children practice their ability to describe plants and guess them from the description.
During the lessons, children watch the buds blooming on cut branches, examine and compare plants
While examining plants (in and outside of class), the teacher should draw the children’s attention to the appearance of the plant, emphasizing its attractiveness and how it decorates the group. For example, ask which plant is the most beautiful; invite children to talk about it, note why it is attractive; find the most beautiful plant, examine it in order to draw it in the next lesson, analyze the drawings and note how the children managed to reflect the characteristic features of nature in their drawings.