On the topic: methodological developments, presentations and notes
Program content: Lead children to deliberately convey an image; Teach children to hold a pencil correctly, draw with circular movements of the hand. Consolidate knowledge of colors (red, blue, ...
Objectives: - Learn to draw using an unconventional method - decorating a plate; - Develop the ability to draw with a cotton swab on a round shape; - Develop fine motor skills; sense of symmetry, perception, visual...
Summary of an open drawing lesson in the second junior group on the topic: “Rowan branch for bullfinches”….
What You'll Be Creating
As winter approaches, ice becomes a major component of the outside world. Join me and I'll show you how to draw a cool icicle.
Playing a photo
Step 1
Now we can start decorating the details and creating the icy effect. If you are right-handed, we will work from left to right to avoid smearing the graphite and coal, but if you are left-handed, I recommend doing the opposite.
We use two methods of applying graphite to paper using pencils, soft charcoal stick, graphite powder and charcoal powder.
- Circular hatching
- Cross hatch
Circular hatching involves rotating a pencil, charcoal stick or cotton swab
with moderate pressure in a circular direction, moving them across the page as shown below. Like line hatching, this technique can be used to create tone depending on the pressure applied to the pencil and the frequency of repetition of the movements. I use circular shading for darker shades, and this is especially useful for dark areas because... creates a good coating on paper.
Cross hatching is done by a series of diagonal lines going in one direction and then repeating in the opposite direction. Tone levels can be achieved in this method by drawing dash lines closer together or by repeating the movements over and over again. You can also shade the shaded area with a Q-tip or pigment paper if you wish.
For the first section we are going to add a background to our image using charcoal powder
and
a cotton swab.
To begin, take a swab and carefully dip it into a bottle of charcoal powder until a moderate amount of powder remains on it, and then transfer it to paper, starting to hatch in a circular pattern. Remember that at this stage you only need to cover a certain background area.
Step 2
Once the first layer is on the paper, scoop up more powder and work the same layer in a circular motion.
Step 3
For darker tones, use a super soft charcoal stick.
and try it on a separate sheet of paper.
Next, take a clean cotton swab,
rub it on the charcoal that you left on a separate piece of paper, and then transfer it to the canvas. Repeat the action until you achieve the desired tone.
You should now have a partially completed background; we're going to continue working with it after finishing the big icicle in the next section.
Step 4
If necessary, take a charcoal pencil
and cross-hatch the areas of tone where needed, then take
a Q-tip
and blend that area.
Drawing ice
Step 1
Now that we've completed the wooden beam, we move on to a completely different texture - slippery ice! At the beginning the process is very similar to the previous one, with a wooden beam. First, apply a layer of graphite powder with a cotton swab.
Step 2
Then take a 6B pencil
and using circular hatching, carefully work in the tone areas in this first clump of ice.
To capture darker tones, you may need a 7B pencil
, but be careful with the pressure on the paper, because. It may be difficult to erase these areas later.
Step 3
Now that we have the tone on the paper, take small and medium sized blending clumps
and rub these tones together, smoothing out the overall look.
Step 4
For very minor black areas, which aren't a lot on the sample, I would recommend using a soft charcoal pencil.
and carefully draw these black areas.
Before starting, make sure the pencil is sharp
.
Step 5
Now we need to add some bright highlights. To create them we need a mechanical eraser
, but as you can see from our sample, these highlights are very clear, so we will need to lightly touch the paper with the eraser, because.
The eraser itself rotates at that speed. If you want to do this, you can use the tombow round eraser
to further refine the highlights.
Lesson Objectives
Children's development will take place in the cognitive, artistic, aesthetic and speech spheres. In this lesson, children will develop knowledge and skills by solving the following problems.
Kids learn to draw icicles
Developmental and educational
During this lesson, educators will be able to do the following:
- teach finger painting;
- Help kids expand their knowledge about the world around them. They will be able to learn about what icicles look like and what they are, and will learn to better understand the changing seasons and the characteristics of spring;
- during classes, expand the vocabulary of children;
- teach children to delve into short works of poetry.
Math lapbooks for kindergarten
Summary of educational activities for fine art activities in the middle group “Icicle”
Summary of educational activities for fine art activities in the middle group on the topic: “Icicle.”
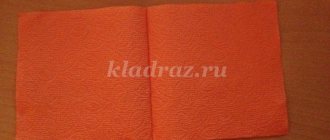
Integration of educational areas: “Artistic creativity”, “Socialization”, “Communication”, “Music”. Goal: development of creative productive activity; Objectives: - develop the ability to recognize and name the season - spring; - highlight the signs of spring; - learn to write a story based on a picture; - develop the ability to see the beauty of the surrounding world; — to develop the skills of a culture of listening to music; - learn to draw an icicle; - develop the ability to paint over drawings with a pencil, drawing lines and strokes in one direction; - consolidate the ability to rhythmically apply strokes throughout the entire form, without going beyond the contour; — consolidate the ability to maintain the correct posture when drawing, not to hunch over, to sit freely, without straining; - develop children's imagination; - activate children's vocabulary; — teach to pay attention to the results of the work of other children, evaluate the work; — cultivate responsiveness, a desire to respond to a letter; maintain interest in creative activities. Equipment: Envelope with a letter, voice recorder or mobile phone (for recording children's stories), a picture of little negros, schematic cards of spring, summer, autumn, winter; a drawn sun with large rays, a sheet of paper with a drawn house, pencils, a projector for viewing the presentation, music - Nasaulenko’s song “We welcome spring”, a song by the group “Wizards of the Courtyard” - “Spring Lambada”, music by Sri Chinmoy “Magic music-icicle tale” , candies, lollipops for treats. Progress of the lesson: Children enter the music room and stand in a circle. Educator: Guys, today we have an unusual event. Firstly, because I am leading it. I miss you very much and would like to chat with you a little, do you mind? Secondly, our meeting today will take place in the music room. And since we are in the MUSIC hall, I suggest you listen to the song (Nasaulenko’s song “We welcome spring”). Please tell me what this song was about (children's answers). Absolutely right, this song is about spring, about how the snow is melting, the first flowers are appearing, the sun is shining. And I have a sun for you, only it’s not quite ordinary, it will help us understand whether you know this time of year and can distinguish it from others. Let's check! We approach the carpet, the sun lies on it, on the rays of which there are plot pictures - one each of autumn, winter, summer, six - about spring. Educator : Guys, look how beautiful the sun is, bright and warm. Look carefully at its rays, there are pictures about different seasons. Let's choose those pictures that relate to the time of year - spring. Children look together and point to the correct pictures. We consider each picture separately (what is depicted; how we realized that it was spring, etc.). Educator: Let's remember the words that can be said about this time of year. What is spring like? Remember the most beautiful words (tender, warm, exciting, reverent, beautiful,). “Suddenly” we find a letter under one of the rays. Educator: - Oh, look, a letter. Who is it from, I wonder? Shall we read it? (Children's answers) “Hello, guys! Children from Africa are writing to you. (showing a picture of little negros) We, too, like you, go to kindergarten. We know that winter has passed in Russia and spring has come. In Africa it is summer all year round. And we don’t know what spring is. This makes us very sad. Our teachers say that icicles grow on your roofs in the spring. How do they look? What are they made of? And how can they grow? Please tell us about it, if possible, send some icicles.” Educator: Shall we tell the children of Africa about icicles? I will record your stories on my phone and after our lesson is over, I will send this recording via the Internet to Africa. Look, I brought you icicles (showing icicles on a plate). What are they? (cold, long and short, transparent, beautiful). Where and why do icicles appear?
As we found out, icicles can be different: small
and very large And yet where do they come from and why sometimes they fall
Where do you think the water to build ice comes from? (children's answers). This, as you might guess, is snow lying on the roofs of houses. Not everyone knows that it is slightly heated from below, from the attic side, as a result of which thin streams of water flow down to the edge of the plumb line. Here they are exposed to frosty air and freeze, turning into elongated pieces of ice. However, there may be another reason for the melting of snow; it is known that it can melt in the sun during cold weather, although you won’t notice it by eye. Since the icicles are constantly fed, they slowly grow, sometimes reaching enormous sizes. As soon as the temperature rises above zero degrees, everything around begins to melt. The most severe thawing occurs in the place where the icicle “clings” to the roof - the fact is that the heat from the roof heated by the bright sun is added to the effect of warm air. After some time, the icicles break off under their own weight and fly down.
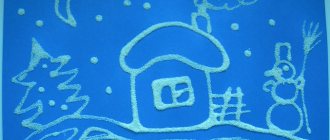
It is very dangerous to be in such places. Educator: Guys, I have a magic icicle (I show the children the icicle), whoever I touch will turn into a funny piece of ice (I touch each child in turn). Children take turns going out onto the carpet. Physical education minute. Movements to the song of the group “Wizards of the Courtyard” - “Spring Lambada” Educator: Oh, what wonderful drops, what beautiful icicles! How are our icicles? Are you waiting to be sent to Africa? Oh, what's wrong with them? (They melted because the room is warm) Educator: What will we send to the children in Africa? (children's answers) Educator: You can draw icicles as a gift for our African friends. Please come to the tables. Choose a piece of paper and start drawing. There is a house drawn on your sheets. The bright yellow sun baked the snow on the roof and icicles began to appear. Show us what beautiful icicles have grown on your house. We sit down straight, keep our back straight, and don’t slouch. Watch how I draw an icicle. I'll take a blue pencil and draw. I can draw each icicle separately, or many icicles together. To do this, without lifting the pencil from the sheet, I will draw a line down, then up, not reaching the edge of the roof, again draw a line down, this time longer, and up again, so I can depict large and small icicles. Then I will start coloring my icicles. To do this, using a pencil, carefully, trying not to go beyond the contour, I will begin to hatch the icicle - I will do this by drawing lines and strokes in one direction. The children get to work. Music plays (Sri Chinmoy “Magic music-fairy tale of an icicle”) After drawing is completed, the drawings are laid out on the table. Analysis of drawings Educator: What beautiful icicles you made! Everyone is so different. Now we will put them in this package and send it to African children. I take the package, and there is also a letter and a bag of candy. “Guys, we don’t have beautiful ice spring icicles, so we send you our candies, they also look like icicles, only they, unlike your icicles, can be eaten.”
Children go to the group.
We recommend watching:
Abstract of the NOOD in the field of "Cognition" in the middle group "Let's help friends" Synopsis of the NOOD in the area of "Cognition" in the middle group Synopsis of the NOOD "Cognition" Mathematics in the middle group
Summary of educational activities on artistic creativity in the middle group according to the program “From birth to school”
Similar articles:
Summary of GCD in the middle group in artistic creativity
Lesson summary on artistic and productive activities in the middle group
Summary of entertainment in the junior and middle groups
Summary of GCD for preschool educational institutions on the topic: “Our legs”
Summary of GCD in kindergarten on the topic: “Our skin”
Triangular rays
One of the most common options for drawing the sun among children is a luminary with neat sharp rays. The rays are isosceles triangles with long sides and a short base. It is possible to draw such a sun using any materials; the only required accessories will be a simple pencil and a ruler.
The work process is as follows:
- On a sheet of paper located in a convenient position, draw a circle with a pencil, which will be the base of the sun.
- Mark four points on the outline of the base circle at equal distances from each other.
- Using a ruler, draw rays originating from the marked points. Add segments forming triangles to the resulting lines on both sides. You should get a figure similar to a compass. Such actions make it possible to make the sun symmetrical and neat to the maximum.
- Draw more similar rays between the triangles, filling the entire space around the base.
- Design and color the drawing as you wish.
Drawing the sun is interesting because you can depict the rays in different ways, use a variety of materials, add unique elements, and make an original design. And the most interesting thing is that using any option, you get a bright and beautiful drawing.
Adding the fixative and finishing touches
Step 1
You should now have an almost completed picture! At this stage, I recommend that you carefully check your work against the sample to make sure you haven't missed any details.
Step 2
In the sample, you'll notice a few floating dust particles around the icicles, so we'll carefully add them in with the tombow round erasers.
tapping with
very light
movements. If the effect is not achieved after the first time, you may need to press harder.
Finally, to seal the work, spray the drawing with art fixative. This substance prevents accidental smearing of the design when it is stored or on the display.