Non-traditional drawing techniques in classes in the middle group
Children 4–5 years old often experience uncertainty, sometimes even fear, before drawing classes. The skill of using a pencil and brush is still developing; form-building movements are rarely accurate. In basic drawing classes, middle group students learn to draw vertical and horizontal lines with a pencil, a continuous line with a brush, draw simple shapes and practice the skill of painting within a contour. Children's attention is unstable, they get tired quickly, monotonous activities reduce interest in the work being done. Drawing in unconventional ways surprises children and activates their attention to creating images on paper using unusual objects and tools. Watching the teacher draw with a fork or toothbrush, the children experience delight and a desire to draw as well.
During drawing classes using non-traditional techniques, developmental and educational tasks should be performed that correspond to the age characteristics of children in the middle group:
- Development of fine motor skills of the hands. Performing actions with various instruments develops the child’s hand; on the tips of the fingers and the surface of the palms, nerve endings are excited, which send an impulse to the cerebral cortex - the thinking and speech centers are activated.
- Development of spatial thinking and visual perception of objects. The child learns to find individual details and shapes in the image of an object, which he can convey in the process of drawing on paper. By making blots, drawing with wax, and making prints, the children consolidate the ability to determine the center of the sheet and develop a sense of composition and rhythm.
- Training in working with a variety of materials. During the classes, children will learn that images can be created not only with the usual paints and pencils on a white sheet of paper. Everyday objects, natural and waste materials are used in creative work; cardboard and colored paper are used as the basis.
- Activation of imagination and the formation of interest in independently thinking through a plan. If drawing classes in non-traditional ways are carried out as part of the functioning of an additional education circle, it is recommended to arrange a rack with signed boxes in the room where the students study. As children master the skills of various techniques, they gain access to a variety of materials. Students in the middle group can be given a choice of tools with which they want to draw a picture on the topic of the lesson. You can allow children to take turns choosing an object that has not previously been studied as part of non-traditional drawing: at the beginning of the lesson, the student chooses an object, the teacher tells how to create an image with it.
- Creating a good mood, developing self-confidence, relieving tension and fears. Drawing in non-traditional ways with children of the middle group contains game elements at its core: actions are accompanied by sentences (“Rain-rain, drip-drip-drip!” - dots are made with a cotton swab. “One is an apple, two is an apple, then there will be compote !” - prints are made with an apple slice, etc.), creating drawings is a solution to a problem situation (dandelions do not bloom on a poster with a picture of a lawn, and children draw flowers on it with a poke), etc.
- Formation of interest in collective activities. Children 4–5 years old do not yet know how to work harmoniously in pairs or groups. In the middle group, children learn to think through an individual plan. But the students are happy to complete simple tasks together. The teacher announces the task, the children will perform the same actions on a common sheet of paper (whatman paper or half-whatman paper). For example, in the “Autumn Forest” lesson, the task is given to draw the crowns of trees with a piece of foam rubber. The guys sit down at a common table, on which lies a Whatman paper depicting bare trunks and branches of trees. Everyone chooses a tree, takes a piece of foam rubber and paints the leaves with yellow, orange, brown and red paints. At the end of such classes, the teacher must draw the children’s attention to the fact that such a complete and beautiful picture was obtained due to the fact that everyone worked well.
- Development of aesthetic taste. The technique of non-traditional drawing teaches children to create texture of an object, imitation of animal fur or bird plumage using non-classical techniques. Children develop the ability to see beauty in the unusual. Shapeless prints of a foam sponge or a poke with a hard brush look organic in the finished work. In the process of drawing, children develop the ability to combine colors in pattern elements and begin to select solutions for creating an image on a colored background.
In drawing classes using non-traditional techniques, it is necessary to observe the principle of continuity of knowledge. By creating images with unusual objects or non-classical techniques, the children in their works consolidate and improve the skills acquired in regular classes: they outline the outline of an object with a brush or pencil for further drawing in an unconventional way; decorate the picture with appliqué elements (paper or plasticine); complete the elements of the subject as usual; learn to paint the background.
Finger painting (fingergraphy)
Until school age (7 years), the leading processes through which a child studies objects and phenomena of the surrounding world remain visual and tactile sensations. In the younger groups, finger painting was both a game and a transitional stage to the classical drawing technique; the children mostly filled in printed pictures with multi-colored dots. In the middle group, students form and develop the skill of drawing various elements with their fingers: dots, spots, strokes, lines. It’s fun to intentionally get dirty with paint, smearing paint with your fingers is a special feeling, creating an image with strokes rather than just painting is satisfying with the result. During classes, special finger paints can be used: they are hypoallergenic and safe if they get into the mouth, and have a light consistency. Traditionally, in the middle group they paint with gouache, but it is possible to paint with fingers using watercolor paints: they are not as thick as gouache, but you need to dip your finger in a glass of water before picking up paint, or first drop clean water with a brush into the cells with watercolors.
With students in the middle group, you can try finger painting using diagrams. On the board there are step-by-step instructions on how to draw an image of a person or animal using prints and adding pencil squiggles. The teacher voices each stage, demonstrates its implementation, and the children repeat. Maps of step-by-step drawing of pictures with fingers are presented in numerous manuals for parents and preschool teachers (for example, in the book “Imprint, dot, stroke. Drawing with fingers” by Ilona Molnar).
Finger painting in the middle group
Fingertip drawing technique:
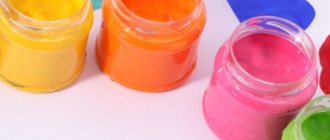
- The child dips his finger into a jar or bowl with gouache paint.
- Each finger is painted with a different color.
- The child draws with his fingertips on a sheet of paper, re-painting the desired color if necessary.
- At the end of the work, wash your fingers with soap, the gouache is easily washed off.
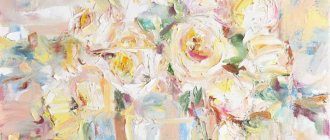
"Bouquet"
Putting green paint on your finger
Drawing lines on paper
Flower stems
Paint of a different color is applied
Flowers are drawn with dots
New color
Second flower
Drawing a flower with brush strokes
Mixing paints (yellow+red) The process of painting flowers
A butterfly is drawn with lines
The butterfly shape uses straight and curved lines
The final stage of work
The drawing is ready
Drawing with palms
Painting with palms, like with fingertips, involves imprinting and smearing paint. Drawing options in this technique for middle school students: “Make a palm print and complete the drawing to make a bird, octopus, fish, etc.” (children can draw additional elements with a brush or finger), “Complete the picture with handprints to make it…” (handprints become leaves on tree branches, flowers in a vase, hedgehog needles).
Collective drawing with palms in the middle group
Palm painting technique:
- The child puts his hand in a saucer of paint. In the middle group, children should learn to apply paint to their palm using a brush held with the other hand; this skill is practiced in classes on the topics “Bullfinch”, “Titmouse”, “Butterfly”, when the palm print should be multi-colored.
- The palm and fingers are pressed tightly onto a sheet of paper to make an impression. You can make circular, vertical or horizontal movements with your palm according to your design.
- At the end of work, wash your hands with soap.
"Titmouse"
Applying yellow paint to the palm (titmouse breast)
Applying paint of a different color (in this work the child mixed blue and black paints)
The palm is placed tightly on a sheet of paper
Imprint
A child paints a bird's head with a brush
Draws a paw
Draws a second paw
Finishing the beak
Draws a titmouse's eye
The drawing is ready
Combination of fingerprinting techniques with palm painting
For pupils of the middle group, tasks are offered on drawing an object composition or a complex image using palms and fingers. First, handprints are made to indicate large details or the basis of the design, then additional elements are drawn with the fingers. A combination of finger painting and palm painting techniques is used in tasks on the topics “Fairytale Tree”, “Swans”, “Funny Octopuses”, “Fishes”. In these tasks, children develop the ability to find the center of the composition, combine various finger painting techniques, colors and shades of paint to accurately convey the image.
"Fairytale Tree"
Applying paint to the palm
Pressing your palm onto a piece of paper
Palm print - tree trunk and branches
Paint gets on your finger
Drawing strokes with your finger
Finger painting process
Combination of shades of green Colors of other colors are collected
Tree leaves are drawn with dots
The fairy tree is ready
Poking drawing
The poking method is great for simulating fluffy and prickly objects or objects. During the lesson you will need sheets of paper of any color or shaped blanks in the form of animals, brushes with stiff bristles, gouache, a glass of water, and napkins. Poke drawing classes are held on the topics “Cat”, “Christmas tree”, “Hedgehog”, “Dandelions”, “Bunny in winter”.
Poking technique:
- A dry brush is placed in a jar of gouache and paint is drawn up.
- Holding the brush vertically, hit the paper with it - you get a poke.
- Before picking up paint of a different color, the brush should be rinsed in a glass and blotted well with a napkin. The poke is made only with a semi-dry brush.
- The outline of the depicted item or object is filled with pokes; the details necessary according to the plan can be drawn with an ordinary brush.
"Fluffy kitten"
The guys pick up gouache with a hard brush and poke it on paper
Poking process
The kids draw the kitten’s face, paws, and bowl with a simple brush.
Work examples
Monotype
Monotype is a drawing technique by imprinting part of an image. This method of drawing is considered simple, but suitable for classes in every group; older preschoolers draw landscape monotypes using various colors and shades in one work. Drawing with monotype improves the ability to find the middle of an object and develops a sense of symmetry.
Monotype technique:
- A sheet of paper is folded in the middle.
- Spots are drawn on one part of the paper using paints of different colors.
- The sheet is folded and ironed with the palm of your hand.
- The sheet opens and the resulting image can be decorated using a brush and paints.
"Butterfly"
Spots are applied to one part of the sheet with the marked middle
The process of painting spots with different colors
A sheet of paper is folded along the fold line and unfolded
The abdomen and antennae are painted on with a brush
Using the monotype technique, you can create not only a symmetrical image, but also a drawing with two identical objects. In this case, the entire object is drawn on one half of the paper and imprinted on the other half of the sheet in a mirror image.
An example of drawing a composition using the monotype technique
Drawing with a toothbrush
The technique of drawing with a toothbrush is simple: the guys put paint on the bristles and draw lines on a sheet of paper in accordance with the design. It is recommended to combine these drawing classes in the middle group with other non-traditional drawing techniques (finger, cotton swabs) or appliqué elements.
"Herringbone"
A triangle of colored paper is glued onto the sheet - the trunk
Picking up paint with a toothbrush
Drawing pine needles with straight lines
We decorate the finished work with sequins
Spray
Children become familiar with the spraying technique in younger groups: they pick up paint with a toothbrush or comb, direct it onto a sheet of paper and, by running a pencil over the bristles/teeth, they get colored splashes. In the middle group, the ability to create drawings using multi-layer spraying is developed.
Multi-layer spray technique:
- Stencils are used to create an image. In classes to introduce this technique, stencils are attached to a sheet of paper with paper clips.
- Paint is drawn onto the brush and splashed on top of a sheet of paper.
- The next stencil according to the plan is applied, splashes of a different shade are made.
- The stencils are removed to create a complex image that imitates the volume of an object or a composition with foreground and background.
"Winter forest"
Stencils: snowdrifts, tree trunks and crowns, snowflakes
Splash tools and watered down paints
First layer
Second layer
Third layer View of the design after removing the stencils
Drawing with a sponge or piece of foam rubber
The technique of painting with a sponge or foam rubber is based on the formation of the skill of printing with paint. Foam rubber prints create the texture of an object; they are used to draw animal fur, fluffy bunches of flowers, clouds, tree crowns, etc. For classes, you can purchase sponges for drawing in this technique, or together with your children you can make a simple and easy-to-print tool: a piece The foam is grabbed with a clothespin, which will act as a handle.
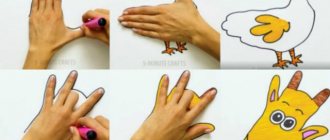
"Chick"
A piece of foam rubber is cut from the sponge
We grab the foam rubber with a clothespin (the guys perform this action independently)
We put paint on the foam rubber and print in a vertical motion
Draw a chicken
Add details with a brush
Printing with natural materials
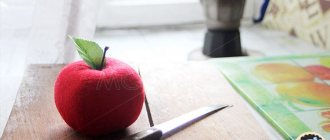
Drawing with prints is a simple way of drawing: paint is drawn or applied with a brush onto the printed surface of an object, and with a vertical movement we place the print on a sheet of paper. For students in the middle group, tasks on creating a composition from prints using classical drawing techniques are suitable. For example, for the task “Cooking compote,” the children use a brush to draw the outlines of a pan, within which they will place multi-colored prints of half an apple. Natural printing material options: leaves, flat flowers (daisies, daisies), shells, cut cucumbers, apples, lemons.
"Vegetable salad"
For printing you will need onions and cucumbers
Paint a salad bowl with a brush
We collect paint with an onion and apply it to the sheet.
Onion prints
Printing with cucumber
Salad ready
Drawing with cotton swabs
In the younger groups, the guys tried to draw with cotton swabs: they picked up paint and decorated paper blanks or an image on a sheet of paper with dots (a Christmas tree, a sundress, a teapot). For students in the middle group, the task becomes more complicated: they develop the ability to create an image with a cotton swab on a blank sheet of paper. The children draw with dots, spots, strokes, various lines and simple geometric shapes (rings, circles). Drawing with dots using cotton swabs will be of particular importance when introducing the pointillism technique in older groups.
"Rowan Branch"
To work you need several cotton swabs, watercolor or gouache. The branch is drawn with lines
Berries are drawn in spots
Bunches of rowan berries are drawn
The leaves are drawn with strokes. The cores of the berries are drawn with dots. The rowan branch is ready.
Drawing with cotton pads
Cotton pads in non-traditional drawing classes can be used as a tool for working with gouache, or can be used as an unusual material for the basis of a drawing. Draw with cotton pads, applying them to a sheet of paper with the entire surface, folded in half or into a quarter.
"Flower"
The cotton pad is folded to obtain the desired shape of the part, paint is collected
Prints with a cotton pad according to design
Elements are drawn with a brush
"Balloons"
Creating a picture background - the sky
Cotton pads - balls are glued
Drawing on cotton pads
Patterns on cotton pads
The threads of the balls are finished with a brush
Drawing with a fork
Another option for printing with an unusual object is drawing with a fork (metal or plastic). The gouache is poured into a flat plate, the flat surface of a fork is used to scoop up paint and make prints on the paper.
"Tulips"
Putting paint on a fork
We lean the fork against a sheet of paper. Prints
Draw stems and leaves with a brush Tulips are ready
Drawing with crumpled paper
You can make paint prints using a crumpled piece of paper. Drawing tasks using this technique are made more difficult for middle school students by combining elements of classical drawing or appliqué.
"Leaves Are Falling"
The guys make an applique from strips of paper - trunk and branches
Use a crumpled piece of paper to make gouache prints - leaves
Work examples
Blotography
Blotography is a method of creating an image using spots and blots. To practice this technique you will need watercolors, a glass of water, a brush and a plastic tube. Blots can be supplemented with a design in the classical way; you can initially create a design on paper that will be decorated with blots as intended.
Blot painting technique:
- Apply watercolor paint with a brush well soaked in water.
- A spot is made on a sheet of paper or a drop is placed.
- Blowing air out of the tube, draw a blot with paint.
"Cherry Blossom"
Place a drop on a sheet of paper Blow through the tubes onto the paint Blow up the blot - the trunk Place drops of paint on the tree trunk and blow up the branches Place drops of green paint Blow up the grass Put drops of white paint Complement with pink paint Blow up the drops - cherry blossoms
Nitcography
Drawing with wool thread in the middle group consists of putting paint on the thread, applying it to a sheet of paper and creating a pattern by imprinting with the movement of the thread. The wool thread creates a fancy pattern that is suitable for depicting a cloud or a cloud, a dog or a sheep.
"Tuchka"
The thread with the collected paint is placed on a sheet of paper. The thread is covered with another sheet on top, the child moves the thread in different directions, creating a pattern. Use a brush to draw drops. The cloud is ready.
Drawing with semolina
In fact, children draw with glue (usually PVA). A layer of glue is applied to the marked outline of the image with a brush, semolina is poured in and a sheet of paper is firmly placed on top. Then the excess semolina is shaken off from the drawing and the next detail is created in the same way. In the middle group, children develop the ability to carefully trace a stencil and apply glue within the outline. Since semolina is white, colored paper or cardboard is used as a basis for drawing in this technique.
"Gift for Mom"
We trace the stencil
Apply a layer of glue to the outline of the flower with a brush.
Pour semolina and place a sheet of paper on top
Shake off excess grains
Using this method, we complete the next element - a stem with leaves. The gift for mom is ready
Drawing with a candle
Children develop skills in drawing lines, spots, and simple geometric shapes with an unusual tool - a candle. For this lesson you will need a thick sheet of white paper as a base, a simple candle (a piece of a candle), watercolor paints and a brush.
Candle painting technique:
- On a sheet of paper with a candle, the children draw details according to plan.
- Use a brush to paint the sheet with watercolor paint.
- Wax images appear through watercolors.
"Winter landscape"
Using a candle, draw a Christmas tree at the bottom of the sheet, and snowflakes at the top.
We paint the leaf with watercolors of blue, cyan and black. The winter landscape is ready
Drawing with wax crayons
In drawing classes using this technique, children develop two classic skills at once - drawing with a pencil (wax crayons, as a rule, have the shape of pencils) and filling the background with one or more watercolor colors using a brush. The results are unusual and vibrant works.
"Summer Meadow"
On a sheet of white paper we draw flowers, butterflies, the sun
Fill the leaf with blue and green watercolors
Finished work
Scratch (waxography)
With students in the middle group, you can try grattage - drawing by scratching lines on paper filled with ink or paint. Children at home with their parents can prepare the basis for painting using this technique for the lesson; you can do this part of the work in kindergarten (but keep in mind that drying the paint will take a certain period of time). To create the base you need wax crayons, black gouache and a wide brush, and for scratching - a pointed stick (you can use a wooden skewer for frying meat).
Waxography technique:
- Color the surface of the sheet with wax crayons.
- Paint the sheet with black gouache.
- Let the paint dry completely.
- Scratch the paint to create a pattern with lines.
"House"
Paint the sheet with wax crayons of different colors
Apply black gouache over the wax
Let the paint dry
Scratching the drawing
Finished work
Drawing through wet gauze
In non-traditional drawing classes, children will learn that they can make a drawing using unusual tools, or they can paint with a familiar brush and paints, but using additional unexpected materials. Thus, using wet gauze to work allows you to create an original work.
Technique for drawing through gauze:
- Using cotton swabs, draw water from a glass and wet the entire surface of the sheet well.
- Apply a layer of gauze to the wet sheet and straighten it. The gauze should stick and be motionless on the paper.
- On top of the gauze we paint with watercolors using a brush, as usual. Leave the drawing until completely dry.
- We remove the gauze from the dried work - a pattern remains on the paper in the form of an imprint of the texture of the gauze fabric.
Drawing using the technique of unconventional drawing through wet gauze
Techniques and methods of non-traditional drawing for middle preschool age
For the lesson to be successful, the teacher must be able to use non-traditional techniques. In general, this will not be difficult due to the simplicity of these techniques.
Poking technique
The child draws with a poke (folded pieces of fabric). At the beginning of the lesson, you need to make a poke. Next, the shape of the object is drawn on paper (you can use a stencil). The poke is wetted in paint, after which you can fill the empty space.
Palm painting
The palm is painted with one or two colors, after which an imprint is placed on paper. The details are drawn with a brush.
Giraffe from palm
Finger painting (fingergraphy)
Fingers are painted and fingerprints are made. You can make either individual shapes (finish them with a brush) or fill the area of the sheet with patterns.
Finger paintings
Toothbrush painting technique
The brush is wetted with paint, after which it is necessary to spray it on the paper.
Tree made from toothbrush splashes
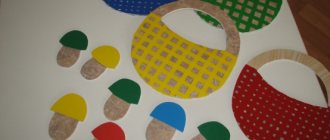
Stamping technique using natural materials
You can use leaves, potatoes, carrots or apples for this. A pattern is cut out from halves of vegetables and fruits, after which paint is applied and a stamp is made. There is no need to trim the leaves, just move on to decorating right away.
Leaf imprint
Nitcography
The threads are well soaked in a jar of paint, maybe several. The thread is laid out on paper. It is necessary to ensure that the tips protrude from both sides of the sheet by at least 5 cm. After this, the thread is covered with a second sheet of paper, which must be held firmly. The ends of the thread are straightened under the second sheet.
Nitcography
Drawing with glue and semolina
Take cardboard, preferably dark or bright. A pattern is applied to it with glue. After which, without waiting for it to dry, you need to sprinkle the glue with semolina.
Drawing through gauze
Gauze is dipped in paint diluted with water, after which you can poke the paper around the stencil or inside the outline with it.
Important ! It is advisable to apply it to your hands with finger paints, which will not cause allergies.
How to teach your child to use a pencil or pen correctly
Drawing up notes for a lesson on drawing in non-traditional techniques
The lesson notes should indicate the goals and objectives set by the teacher. You should describe the preliminary work on the topic of the lesson: observing animals and birds, natural phenomena during a walk, reading poems and fairy tales, looking at illustrations in books. The use of motivating material in the classroom is noted (studying pictures and posters, involving small forms of oral folk art, conducting a conversation, creating a surprise moment or game situation), conducting outdoor and didactic games, physical education lessons and finger gymnastics.
In accordance with hygienic standards, a drawing lesson in the middle group lasts no more than 20 minutes and consists of the following stages:
- Organizational moment 1 minute.
- Motivating start of the lesson 4-6 minutes.
- Practical part: direct demonstration of actions by the teacher and drawing by children for 10 minutes.
- Demonstration and discussion of drawings for 2–3 minutes.
- Summing up 1 minute.
Summary of a lesson on non-traditional drawing in the middle group “Russian folk toy matryoshka.” Author: Olesya Regina
| Goals | Learning to draw with a poke and using the monotype technique. Development of fantasy and imagination. Activating interest in drawing in unconventional ways. |
| Material | Silhouettes of nesting dolls, paints, brushes, cotton swabs, cups of water, napkins, wooden matryoshka, pictures, educational game “Assemble a nesting doll,” projector. |
| Preliminary work | A conversation about the history of Russian folk toys, looking at illustrations and nesting dolls, playing with nesting dolls. |
| Progress of the lesson | Organizational moment and greeting. The teacher asks the children a riddle about a nesting doll. The children are shown pictures of nesting dolls and wooden toys. The teacher reminds the children the story of the nesting doll. Reading a poem about a nesting doll. Conducting a conversation: are all nesting dolls the same, what are the differences between these toys. Physical education Carrying out finger exercises. Practical part: the teacher shows the method of drawing with monotype, children draw an apron and scarf using this technique; demonstration of drawing with a poke using a cotton swab, the children decorate the clothes of the nesting dolls with dots and spots. Demonstration and discussion of works. The teacher sums up the lesson and thanks the children for their interest and effort. |
Long-term planning for non-traditional drawing in the middle group
Before developing a work program for non-traditional drawing, it is recommended that you familiarize yourself with methodological manuals for working with preschoolers in this area:
- Borodkina N.V. Visual activities in kindergarten. Lesson notes for children aged 3 to 7 years. — Academy of Development, 2012.
- Doronova T. N. Nature, art and visual activities of children. — Enlightenment, 2007.
- Nikitina A.V. Non-traditional drawing techniques in kindergarten. — Karo, 2010.
- Lykova I. A. Visual activities in kindergarten. Middle group. — Publishing House Tsvetnoy Mir, 2016
A non-traditional drawing program should contain:
- Goals and objectives of the educational course.
- Methods and techniques of the teacher’s work (visual, verbal, games) used in the classroom.
- Calendar-thematic planning: topics of classes and program content of each.
- Forms of analysis of children's artistic activity: analysis of works, exhibition of drawings in the kindergarten hall, conducting demonstration classes for pupils of younger groups.
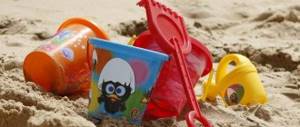
Sand, beads and grains
Non-traditional drawing techniques in kindergarten may involve the use of any materials. Using various grains, sand and beads, you can create original paintings.
Moreover, there are two directions:
- sand animation;
- fixing bulk materials on the surface of the sheet with glue.
Animation
Sand or semolina is usually used for this technique. The material is poured onto a surface of contrasting color. You need to draw directly with your hands on the surface.
This technique is very useful for children. Working with bulk materials helps you get rid of negative emotions, calm down, overcome internal personal barriers and learn to improvise. Children develop coordination, fine motor skills, imagination, fantasy and memory. The technique is suitable for children of any age.
Sand animation lesson for children:
Paintings with glue and bulk materials
This technique is as follows: the outline of the design is drawn on paper and coated with glue. Then sand or grain is poured onto the surface. The finished picture gains volume. Combining different grains allows for different textures.
Video on the topic of non-traditional creativity in kindergarten
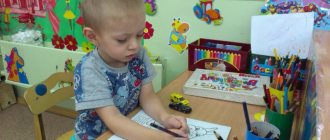
Fragment of a lesson on drawing with a fingertip in the middle group “Winter Forest”
https://youtube.com/watch?v=jqJTAtmyXU0
Summary of an open lesson on drawing in the middle group using an unconventional method - poking
https://youtube.com/watch?v=sl1CB0XUBDA
Non-traditional drawing technique - drawing through wet gauze (lesson)
Unconventional painting techniques - spray painting
Lesson in the middle group on non-traditional drawing techniques - finger painting on glass
Sponge painting class in the middle group
https://youtube.com/watch?v=NUQMVlBS7fw