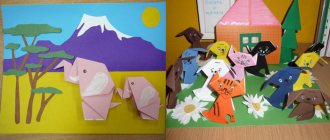
Modeling. My favorite toys!
Topic:
Modeling
.
My favorite toys!
Educational area
: “Artistic creativity.”
Integration of educational areas
: “Reading fiction”, “Communication”, “Labor”, “Physical education”, “Communication”. Types of children's activities: productive, cognitive-research, communicative, motor.
Form of organization:
subgroup.
Target:
teach the technique of creating an image of a “toy” on a plane in half volume using plasticine.
Tasks:
- consolidate the ability to create the integrity of an object from individual parts, using existing skills: pressing parts to the base, smearing, smoothing the boundaries of the connection of individual parts; — expand children’s knowledge about toys, teach how to write a descriptive story, select an action to an object, develop fine and gross motor skills, memory, and sensory areas; - cultivate a caring attitude towards toys.
Preliminary work
: reading a fairy tale by G.Kh. Andersen's "The Steadfast Tin Soldier", educational game "Guess the Toy", riddles about toys, drawing toys.
Material and equipment:
— cardboard with images of toys, size A-4; - a set of plasticine; - modeling board, stack; — paper and wet hand wipes; — projector, presentation on the topic; - toys.
Progress of direct educational activities
1. Organizational moment.
- Guys, today we will draw with plasticine, but guess what?
(Toys.) - Yes, I asked each of you to bring your favorite toy and introduce us to it. Children take turns coming out, showing their toy, reading a poem: 1 child:
Here is a funny fat bear, He is my friend, not a little naughty boy.
He has a bow on his neck. Well, Mishutka! What a dandy! - What is your bear? (Soft, brown, fat, funny). Why do you love him? 2nd child:
He has big ears, He is brown, Everyone in the world loves him, Every mongrel knows Gena’s Friend, Cheburashka.
— Describe your Cheburashka. Why is this your favorite toy? 3rd child:
Well, this is Tumbler, the Multi-colored cutie.
Swing it right, left, and put it on the shelf. - Tell me about your toy. Who gave it to you and when? Child 4:
The cubes are always in front of me.
Build a tower out of them. And then a huge house for an old gnome to live in. - What, do you like to build with cubes? Child 5:
Here is my favorite ball, It is always with me now.
Jumps and spins Jumps and spins! - What is your ball? (Round, rubber, multi-colored). — What ball games do you like to play? 6th child:
I will assemble a pyramid from multi-colored circles, and then I will remove the top and scatter it on the carpet. — How many rings does your pyramid have, and what color?
2. Main part.
Conversation.
- From birth, each of you has toys, but guess what the very first one is:
If you touch it, it will immediately rattle and surprise the baby.
What is this bright toy? - For the baby... (rattle) - Like today, a child’s first toy in ancient times was also a rattle. In Ancient Greece and Rome, rattles were given to newborns. Mothers sang lullabies while tapping these rattles. It was believed that with their noise they drive away evil spirits from the child. (1 slide). — Ancient Russian toys appeared in the 9th century. They were made of wood and clay, called nursery rhymes. These were wooden horses, cows, deer, swans, birds and other objects. They were used both for games and as talismans. For example, the Russian traditional grain doll, which was given as a gift for holidays associated with the harvest. (2 slide). — The very first animal figurines were carved from bone, and later made from wood, clay or metal. Toys were sewn from fabrics or woven from fiber, and made from any suitable available materials. There were known toys with movable body parts, which have been made since ancient times. They were driven by a simple rope or wire mechanism. — Previously, toys were treated with great respect. They were never left haphazardly, but were stored in special baskets or chests. Moreover, they not only played with toys, they participated in many rituals: honoring dead ancestors, worshiping ancient gods, and also acted as amulets. — Nowadays, toys are made in special factories. These are bright, modern toys that can talk, sing, jump, take off, and drive independently. They are made from a variety of materials, which ones? (Wood, plastic, iron, rubber, fabric, leather, paper, clay, dough). - Guys, imagine if there were no toys. (Children's answers.) - Toys decorate our lives, make it interesting and fun. Toys teach us, develop us, help us. How should we treat toys? (Be careful, always put in place). — We will also open our own small factory and make our own toys, but from what material? (Plasticine).
Practical part.
Stage 1.
- I will distribute the finished outlines of your toys, and you prepare the colors of plasticine that you will need.
You can take the same color as your toy, or you can use a different color of plasticine or combine several colors at once. Children think through and express their wishes to the teacher. The teacher encourages children's choice and reminds them of the modeling algorithm. We pinch off a small piece of plasticine, roll it into thin sausages, place it along the contour of the object and spread it in a thin layer. — To get a drawing on a toy, we start working with it. For example, on a ball we first sculpt yellow stripes, and then paint over the remaining 4 parts. The teacher helps each child decide where to start working. Helps during sculpting. Fizkul Tumbler, look, bend it anywhere. (Bending over to exhale, straightening up - inhale.) She will stand up straight again, She is so stubborn. (Tilt to the sides 3 times, back and forth 3 times.) The spinning top began to spin,
don’t spin too fast, (Circular rotations of the body 3 times in one direction, 3 in the other.) That’s enough, everyone stop. Our cheerful ringing ball, Again
it rushed at a gallop.
(Jump 8 times.) The doll Katya suddenly started walking, she stretches her hands towards us. He says it’s time to play, I’m tired of waiting for you here. (Raise your right leg and left hand, then vice versa.) To play with the ball, you need to inflate the ball. (Palms of your hands on your stomach. When you inhale, inflate your stomach, when you exhale, pull your stomach in. 6 times.)
Stage 2.
— Guys, don’t forget about the additional details: eyes, nose, mouth, bow on the bear. To make the toy look “lifelike”, place thin sausages along the contour of the color of your toy.
3. Reflection.
- So our toys are ready.
What kind did you get? (Bright, cheerful, beautiful). — How should you treat toys? - A toy is your friend and comrade, take care and love them. — Let's send our toys to the store (to the exhibition). But first, let’s play the didactic game “What can toys do?”
For example, a car: drives, hums, is lucky, rumbles; ball: flies, jumps, jumps, falls, rolls.
Progress of the lesson:
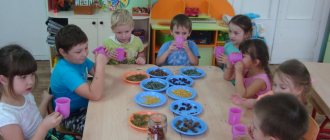
The teacher invites the children to go to the group’s play area, where the toys
, and has a conversation with the children:
toys there are in kindergarten!
.
Please show me which toys do you like to play with
?
Children choose a toy
, and based on the teacher’s leading questions, they talk about them.
The teacher invites the children to relax a little and play with animal toys.
.
“Guess by the description”
is played .
After the game, the teacher invites the children to a creative workshop, where children can choose the toy
and mold it from plasticine.
Before starting work, the teacher demonstrates to the children how to use familiar modeling
You can sculpt various parts of the animal's body.
Children start making toys
. The teacher provides assistance if necessary.
The figures of sculpted animals are placed on a common stand.
Publications on the topic:
Interpersonal relationships of children in kindergarten. This question worries every educator and, of course, parent. This is especially important in a group where.
Abstract of the educational activity "Artistic creativity" (application) "My favorite toy." Preparatory group. Integration of areas: design,.
Abstract of educational activities for the OO "Speech Development" senior group. Storytelling on the topic “My favorite toy” Purpose: To teach children to write stories based on.
Lesson summary for the first junior group “My favorite toy in the kindergarten group” Lesson summary for the first junior group: “My favorite toy in the kindergarten group” (cognition - the formation of a holistic picture of the world.
Summary of a lesson on speech development “Composing the story “My Favorite Toy” Organized educational activities on speech development. Topic: Writing a story on the topic “My favorite toy” Purpose: To teach.
Lesson summary “A story from personal experience “My favorite toy” Program content: - learn to select facts from personal experience according to the topic; - tell a coherent story; - full and expressive, clear.
Summary of a lesson on modeling from salt dough “Favorite toy” Favorite toy Summary of educational activities on artistic and aesthetic development GOAL:. Creating conditions for attraction.
Modeling classes in the senior group are designed not only to shape the aesthetic tastes of children and develop fine motor skills, but also to introduce children to examples of folk and applied art. An example of one such activity is the creation of Dymkovo toys with characteristic paintings. Let's consider the important nuances of the work using the example of the topic “Dymkovo toy: deer and goat,” as well as the technology for making crafts.
Preparing for a lesson in sculpting donkeys and other toys in the senior group
In the senior preschool group, children are already quite independent in order to help prepare everything necessary for creative activities, however, the substantive aspects of this work must be thought out and clearly planned by the teacher.
Modeling method
Children in the older group practice the combined method of modeling, when parts can be made separately and then combined into a single composition (constructive method), as well as when the entire craft is made from one piece of plasticine (sculptural method). However, to make a donkey, it is preferable to use the sculptural method, since it makes it possible to give the desired shape to each part that turns into another. For Dymkovo toys this is of key importance, because initially whistles were made using this method. And for them it is important to bend and bend the elements correctly so that the sound comes out.
Techniques
As for modeling techniques, in the junior and middle groups the kids have already become familiar with all the basic techniques for creating molded structures, so it’s time to practice their skills
- rolling out “balls”;
- rolling “sausages”;
- pressing indentations on the mold;
- flattening “pancakes”;
- pinching pieces with two fingers;
- pulling an element from a piece of base;
- accessions;
- smearing parts onto the base;
- pinching without flattening;
- stretching elements, but maintaining the original shape;
- smoothing the transitions of elements into each other.
What can children do?
This is interesting. Dymkovo painting takes its name from the place where this craft originated - the settlement of Dymkovo, near the city of Kirov, more than 4 centuries ago. The painting of the Dymkovo toy has its own “handwriting”, which is characterized not only by the strict form of the ornament, but also by the predominance of a certain spectrum of colors. Straight and wavy lines, diamonds, large circles, dots - all these elements are located on the lower background, in such a way that they contrast very much with each other. And the very form of these elements subtextually speaks of some kind of amulets. Each toy is hand-painted, so the soul of the artist is always present in it, and it is impossible to find two absolutely identical Dymkovo toys.
Children aged 5–6 years old can make crafts based on the Dymkovo toy independently, with minimal help from an adult (as a rule, this is required at the stage when individual parts need to be smeared onto the base). If a toy (in particular, a deer) is created in a sculptural way, then in this case help may be required at the stage of distributing the material to parts of the figure’s body. In some kindergartens there is the opportunity to practice clay modeling, which involves a slightly different system of work, and, therefore, greater involvement of an adult in the creative process of children. The same situation is typical for those cases when the modeling of Dymkovo toys is made from polymer clay. All these materials have different plasticity and different methods of drying finished products, which also implies different methods of modeling. As for plasticine, it is a universal material for children’s creativity, allowing children to show independence and a certain professionalism in working with it.
Do I need to color it?
If the craft is made of clay, then it must be painted, since the material can crack without coating, and plasticine is well preserved even without a layer of paint.
The main distinguishing feature of Dymkovo toys is their unique painting, done in bright colors. Products must contain red, yellow, blue, orange and green colors.
Combinations of lines, dots, and stripes also imply the presence of white fields. Thus, the background for coloring should be white. When working with plasticine, this is very easy to achieve: you need to paint the finished craft with white gouache, let it dry, and only then apply a bright pattern with paints (gouache). Painting or decorating a craft with plasticine is a question that the teacher decides based on the level of preparedness of the children, the time allotted for completing the work and specific tasks that are solved in a separate lesson.
How to implement an individual approach?
While preoccupied with the technical intricacies of making the Dymkovo toy, we must not forget about the educational orientation of the activity. This is especially true when it comes to implementing an individual approach to work. Typically, the process of determining the level of difficulty determines how much the child is able to cope with the task without outside help. And in this matter, everything depends on the child’s level of development, his temperament, and abilities. In general, creative tasks can be differentiated as follows:
- if the little one can’t color, then you need to help him;
- those children who quickly cope with rolling workpieces can help those who are less agile;
- The little ones can be invited to make their own painting using Dymkovo colors or, conversely, working with classic patterns, apply shades to their taste, etc.
Goals and objectives of the lesson
The program content of a modeling lesson on the theme of the Dymkovo toy involves
- systematization and consolidation of knowledge about folk applied art of the Vyatka region;
- development of creative abilities;
- instilling pride and respect for the peoples inhabiting the country.
The tasks can be identified
- teaching children to create crafts based on the Dymkovo ones;
- train constructive and combined methods of modeling;
- work on children’s active vocabulary (in particular, expanding the set of adjectives used in speech);
- continued development of the ability to carefully work with plastic material;
- cultivate the desire to solve the assigned creative task independently (regarding the choice of decorative elements);
- encourage creativity and initiative.
Options for crafts based on Dymkovo motifs
This is interesting. Oleshek is a baby deer, fawn.
In the older group, in addition to the deer, children can create
- goat;
- young lady.
Children usually sculpt the Dymkovo duck and horse in the middle group. True, the elements of painting were either not used or were used in a simplified form. In the older group, these same crafts can become more complicated due to more intricate painting.