Synopsis of a technology lesson in grade 5 “Species of wood, parts of wood. Types of lumber"
Bolotnikov Sergey
Synopsis of a technology lesson in grade 5 “Species of wood, parts of wood. Types of lumber"
Lesson summary 5th grade
Types of wood, parts of wood. Types of lumber.
Goal: to familiarize students with the importance of wood as a structural material in the national economy of the country, its species, structure, main types of defects and uses, to teach how to identify wood species and types of defects by the appearance of samples.
Tools and equipment: sets of samples of lumber, veneer, plywood, samples of wood with defects, instructional and technological cards.
During the classes:
I. Introductory part.
1. Consolidation of the material covered.
Repetition of covered material.
Questions:
1. The wedge should protrude above the table top to a height less than the height. (blanks)
2. What is the name of the discipline we are studying? (Technology)
3. The base of the workbench is (underbench)
4. It can be cutting and measuring. (Tool)
5. The profession of a worker engaged in manual wood processing. (Carpenter)
6. Serves to secure workpieces. (Clamp)
7. Wooden blocks intended for supporting workpieces (Wedges)
2. Communicate the purpose of the lesson
I. Presentation of new material.
Forests occupy an area of over 700 million hectares in our country. Despite such enormous forest wealth, everyone must treat the forest with care, as it significantly affects the climate, flora and fauna. In addition, the forest is of great economic importance. Its main product - wood - is used in construction, furniture, match production, chemical industry, etc. Forest resources in our country are protected by law.
- Let's compare the properties of wood and materials such as metal and stone.
We come to the conclusion that wood is a light, durable material that can be easily processed with cutting tools and has a beautiful appearance.
At the same time, wood also has negative qualities: easy flammability, warping when dried, rotting.
— What tree species do you know and what types are they divided into?
Deciduous and coniferous.
Trees with foliage are called deciduous, and those with needles are called coniferous. Deciduous trees include birch, aspen, oak, alder, linden, etc.; Conifers - pine, spruce, cedar, fir, etc.
- What does a tree consist of?
From a trunk, root, twigs, leaves or needles. Wood as a natural structural material is obtained from tree trunks by sawing them into pieces. Rice. 3
The tree trunk has a thicker part at the base and a thinner part at the top. The surface of the trunk (Fig. 3) is covered with bark (7). The bark is the “clothing” for a tree; it consists of an outer cork layer and an inner bast layer. The cork layer of bark is dead. The bast layer (6) is a conductor of the juices that nourish the tree. The wood of the trunk consists of many layers, which are visible in the section as growth rings (4).
- What can you learn from them?
You can determine the age of the tree. The loose and soft center of the tree is the pith (1). Heart-shaped rays extend from the core to the bark in the form of light shiny lines (2). They serve to conduct water, air and nutrients inside the tree. Cambium (5) is a thin layer of living cells located between the bark and wood. Only as a result of the activity of the cambium does the formation of new cells occur. “Cambium” comes from the Latin “exchange” (nutrients).
To study the structure of wood, three main sections of the trunk are distinguished (Fig. 4). Section (1, passing perpendicular to the core of the trunk, is called end. It is perpendicular to the growth rings and fibers. Section (2, passing through the core of the trunk, is called radial. It is parallel to the growth layers and fibers. Tangential section (3) runs parallel to the core of the trunk and is removed from her at some distance.
Wood species are determined by their following characteristic features: texture, smell, hardness, color. (Show how to identify wood types using the poster.)
The disadvantages of wood are also defects: knots (Fig. 5p, wormholes (Fig. 5.6). They limit the use of wood in industrial production, but can be valuable in the manufacture of decorative products.
Rice. 5
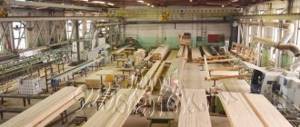
Let's move on to considering lumber and wood materials.
When longitudinally sawing tree trunks on sawmill frames, various lumber is obtained (Fig. 6): beams (a, b, bars (c, boards (d, e), plates (e, quarters (g) and slabs (h)
Rice. 6
Lumber has the following elements: layer, edge, end, edge.
(Indicate on the poster. Plywood is widely used as a construction material.)
- How do you get it?
By gluing three or more thin sheets of wood - veneer - onto each other. Veneer means “sliver” in German. The veneer is cut (peeled) with a sharp knife of a special peeling machine while rotating a log about 2.0 m long (Fig. 7). In this case, the log, like a roll, is rolled out into a veneer strip. The veneer strip is cut into square sheets, which are dried in dryers, coated with glue and laid on top of each other so that the direction of the fibers in them is perpendicular to each other. The sheets are glued together under a press. This is how you get plywood.
Plywood is stronger than wood, almost does not dry out or crack, and bends and processes well.
—Where is it used?
In construction, furniture manufacturing, mechanical engineering, aircraft manufacturing.
— You’ve probably heard the word chipboard, but what does it mean?
Particle boards. They are obtained by pressing and gluing crushed wood in the form of shavings, sawdust, and wood dust. The slabs are made with a thickness of about 10-26 mm. They are durable, almost do not warp, and can be processed well with cutting tools.
-What are they made from?
Furniture, doors, partitions, walls, floors. However, over time they release substances harmful to health, so they are not recommended for use in residential areas.
— What is fiberboard?
Fiberboards. They are pressed into sheets of wood pulp that has been steamed and crushed into individual fibers. They have a pleasant gray color, smooth surfaces, and bend, like plywood. They are used for interior decoration: cladding walls, ceilings, floors, in the production of furniture and doors.
— What is the common disadvantage of plywood, chipboard and fiberboard?
They are afraid of dampness.
Sh. Practical part
1. Students cut a block of soft wood (pine, linden) along and across the grain with a regular knife. As a result of this operation, they come to the conclusion that wood is easily split along the grain with little effort, but it is impossible to split across it, even with great effort.
2. Students try to identify wood types from samples, look at samples of lumber, plywood, chipboard and fiberboard.
Check whether the samples can be easily processed with any tool (file, hacksaw, etc.).
IV. Final part .
Summarize the lesson, note the most active students during the discussion of the material.
Clean the workshop.
Lesson “Wood processing technology” (grade 5)
Chapter:
Wood processing technology
Lesson topic:
Information on materials science. Elements of graphic literacy.
Class:
5
Lesson objectives:
1. Educational - to give an initial understanding of wood as a natural structural material, about technical drawings and the rules for reading them.
2.Developing – to develop in schoolchildren the ability to analyze and make independent decisions.
3. Educational – to contribute to the formation of a working culture in students, creativity in students.
4. Career guidance - to prepare students for a conscious choice of the profession of a carpenter, to promote the development of the necessary qualities in schoolchildren: will, accuracy, determination, creative thinking.
Materials and equipment:
workbook, computer, wood samples, sample layouts for sketching.
Didactic support:
textbook Technology 5th grade, presentation.
Lesson type:
lesson in acquiring new knowledge.
During the classes.
1.
Organizing time:
— teacher’s readiness for the lesson;
— students’ readiness for the lesson.
2
. Checking the material passed (oral frontal survey):
1. Name the main parts of a carpentry workbench.
2. TB while in the workshop.
3, Basic carpentry tools and their purpose.
3.
Presentation of new material
Lesson topic:
The concept of wood as a natural structural material. Technical drawing and rules for reading it.
Target:
introduce students to wood, its composition and use, and teach them how to read a technical drawing.
Plan:
Wood as a natural construction material. Use of wood in the national economy. The structure of wood. Wood species. Types of wood defects and their characteristic features. Wood texture and its use. Types of lumber.
The concept of a technical drawing, sketch and drawing of a prismatic shaped part. Main view, left and top view. Applying dimensions. Rules for reading a detail drawing. The concept of an instructional and technological map. Studying the design and technical requirements for manufactured parts and products, becoming familiar with the technology of its manufacture: selection of workpieces, tools.
Wood
- one of the most common materials that people learned to process in ancient times. With the help of an ax, knife and other tools, people made houses, bridges, windmills, fortifications, tools, dishes and much more. And today, wood is widely used in construction, for the manufacture of tools, dishes, furniture, etc. (Slide 2) The peculiar beauty of the surface treatment of a wooden product always attracts the eye.
The profession of a worker engaged in manual processing of wood is called a carpenter.
This name comes from the main activity - making tables. The enterprises employ carpenters, assemblers of parts and wood products, who must master the techniques of wood processing, know its properties and be able to read drawings.
Wood consists of elementary cells, different in size and shape and firmly connected to each other. Cells can be filled with resins, gums, water; they form vessels, medullary rays and the woody mass itself.
Let's look at the cross section of the trunk. (Slide 3)
The outside of the trunk is covered with bark, consisting of an outer cork layer and an inner bast layer at the border of bark and wood. Immediately under the bark there is an outer sapwood layer of wood, often distinguished from the rest of the mass by a lighter color. It almost always has high humidity and consists of young cells.
The central part of the trunk makes up the bulk of the wood. It is darker and is called the core. Near the geometric center of the trunk there is a core with a diameter of no more than 1 cm; it is distinguished by weakened, loose wood. From the core of the kkore, medullary rays extend in the form of light shiny lines, which have different colors and serve to conduct water, air and nutrients inside the tree. The wood of the trunk consists of many layers, which are visible in the section as growth rings. What can you learn from them?) The age of the tree is determined by their number.
Cambium is a thin layer of living cells located between the bark and wood. Only from the cambium does the formation of new cells and the annual increase in thickness of the tree occur.
Tree species are divided into two types (question for students: what types of trees are divided into?) coniferous and deciduous. Conifers have needle-shaped leaves. Almost all conifers are evergreen, with the exception of larch, which sheds its needles in the fall. Deciduous trees have broad leaves and fall off in the fall. But there are exceptions here: in the subtropics and tropics, almost all trees retain foliage all year round.
Coniferous species _
in the CIS countries play a leading role in wood processing. The common trees here are: pine, spruce, larch, cedar.
Pine
. (Slide 5) Pine wood is straight-grained, durable, moderately light, resinous. The color of the kernel is light brown with a reddish tint. In air, pine wood becomes dull and turns gray in different shades. Pine lends itself well to artificial and natural drying, dries out little, and does not deform in finished products. Its advantages also include ease of processing, gluing and cladding. Pine wood tolerates shock loads satisfactorily.
Spruce.
(Slide 6) In terms of production and processing volumes, spruce wood ranks second after pine. But the quality of the wood is lower in terms of such indicators as product strength and the presence of knots. Otherwise, spruce is a complete substitute for pine. The advantages of spruce wood include: absence of odor, the presence of mostly small knots, less tendency of the wood to turn blue, the same color of sapwood and mature wood - close to white.
Larch.(
Slide 7) It grows mainly beyond the Urals and is used less frequently than pine and spruce: Products made from larch are very durable and serve reliably in conditions of variable humidity. Larch wood is distinguished by very low knots - even small knots cannot be found on a significant part of the lumber. Larch wood is straight-grained, it is heavier than pine and has a higher resistance to impact loads. It pricks easily. It is more difficult to process larch wood than pine wood - it is resinous; lumber is dried under soft conditions. Effectively used in structures where high resistance to decay is required. Products made from larch look very impressive, so they are often finished with transparent materials.
Cedar.(
Slide 8) Cedar wood is distinguished by its resistance to rotting. The wood is pinkish-white in the sapwood and brown in the heartwood. It is close in strength to spruce and fir. The annual layers are almost invisible, so the wood cuts smoothly in all directions and is very easy to process. Cedar is widely used for the production of furniture, pencils, and battery veneer is made from it.
Hardwood
. The economic importance of deciduous trees is reduced by two factors: smaller reserves compared to coniferous trees and the tendency of wood to rot in atmospheric conditions. On the other hand, the variety of other properties, including the richness of texture, and the strength characteristics of many hardwoods make them irreplaceable.
Oak.
(Slide 9) The wood is hard, has few knots, is characterized by high strength, rot resistance, and relative straightness. The oak has a beautiful texture in all cuts. Widely used in furniture production (often in the form of sliced veneer). Suitable for painting, finishing with varnishes and mastics. Parts and entire products are often made from oak in the plywood-planing and parquet industries, in the production of riveting, mechanical engineering, and construction. The color of the wood is light brown in different shades. The material is heavy, but, nevertheless, it is well processed, bent and polished.
Birch.
(Slide 10). Birch wood is white with a reddish tint, the annual layers are hardly noticeable. It is characterized by density and high strength, especially under shock loads. Weight and hardness are average. Low resistance to rotting at variable humidity. It is well processed, planed, bent and polished. Has significant resistance to splitting. Birch wood is used to produce peeled veneer and plywood. The high density of wood determines birch as a valuable material in ornamental and turning works, and in the manufacture of furniture. It imitates valuable species well and is easy to paint and polish. Birch is dried under soft conditions, since often as a result of drying, lumber warps in areas with the inclusion of a false core. Before drying, it is recommended to keep birch lumber until it is air-dry. Birch is used widely: it can be seen in building structures, furniture, containers and parquet are made from it.
Aspen.
(Slide 11) The wood is soft, light, and inferior in strength to birch. Also rot resistant. The wood is white with a greenish tint, the annual layers are hardly noticeable. It glues well, dries well, warps little, and is easy to process. Aspen found its main use in the production of matches.
Linden.
(Slide 12) The wood is light and soft, of uniform structure, white with a pinkish or reddish tint. It cuts, bends and dries very well - it cracks a little and hardly warps. Linden is used to make drawing boards, panel furniture, various crafts, models in foundry, and cladding parts.
Beech.
(Slide 13) Beech wood is light yellow with a reddish tint and a characteristic shine of the core rays; it often has a false brownish-red core. It looks very impressive in a radial section. In all sections of wood, annual layers and medullary rays are clearly visible. In terms of strength, beech is close to oak, but is more fragile and less resistant to rotting. Beech is used for the production of veneer, parquet friezes, and in the furniture industry. It is also widely used in finishing works, in the manufacture of musical and drawing instruments, and sports equipment. Beech is well processed and impregnated, finished with transparent materials, revealing its unique texture.
Nut.
(Slide 14) The wood is brown or grayish-brown in color, often with a golden tint. The material is heavy and hard, but it is well processed and polished and has a beautiful texture. Used in the production of veneer for the production of top quality furniture. Used for fine carvings; walnut burl is highly valued for its rich palette of colors.
Wood is a heterogeneous material, having various deviations from the norm and damage. Anything that significantly reduces the quality of wood - irregularity of its structure, damage, various diseases - is called defects. Let's consider just some common wood defects: knots, cracks and defects in the shape of the trunk.
The most common defect is knots
– the bases of the branches that are present in the wood of the trunk.
When cutting wood, knots of different shapes and types are revealed on its surface (Slide 15). Based on the shape of the cut on the surface of the wood, you can see round, oval and oblong knots, and according to the degree of fusion with the wood, they are further divided into fused, partially fused and unfused, or falling out. When cutting wood into boards, knots can have different positions - face, edge, edge, stitched
- in the case of a longitudinal section of a knot, part of it extends simultaneously onto two edges of the same side of the board and
end
- when the knot is at the end of the board. According to the relative position of knots on lumber, they are divided into scattered - single or separated from each other at a considerable distance, group and branched.
Another type of wood defect is cracks.
(Slide 16)
when
wood breaks along the grain. Cracks occur in growing and felled trees. The first ones include metic, peeling and frost cracks, the second ones include shrinkage cracks.
Methic cracks have the greatest extent, which pass through the core of the tree trunk, and when the harvested wood dries, their size increases. In round pieces of wood, such cracks usually occur at the ends; in lumber or parts - at the ends and side surfaces.
When wood delaminates along the annual layer, peeling cracks form, usually at the border of a sharp transition from interlayer wood to large-layer wood, and are found in trees of all species. During drying of wood, the peeling crack increases.
When drying wood under the influence of internal stresses, shrinkage cracks appear.
This type of cracks differs from others (metic and frost-breaking) in their shorter length and depth.
In boards, cracks can extend to the face, edge or end. Accordingly, they are called face, edge and end. Cracks, especially through ones, violate the integrity of the wood material and reduce its mechanical strength.
Processing of wood of all species is very often complicated by the presence of defects in the shape of the trunk: camber, ovality, growths, curvature and burrowing.
(Slide 17)
Convergence
is expressed in a decrease in the diameter of the log or the width of the unedged board, exceeding the normal run-off, which is equal to 1 cm per 1 m of the length of the assortment.
As a rule, it is greater in deciduous trees, especially in trees that have grown in open spaces, and along the length of the trunk - in the apical part. This type of trunk shape defect increases the amount of waste when sawing and peeling round timber and causes the appearance of radial inclination of fibers in the veneer. The ovality
of the trunk is an ellipsoidal cross-sectional shape of the end, whose larger diameter is 1.5 or more times larger than the smaller one.
Wood processing is complicated by growths in the form of local thickening of the trunk of various shapes and sizes. Growths
are formed as a result of tissue growth under the influence of various irritants - fungi, low or high temperatures, etc., as well as fires, mechanical damage and other reasons.
Smooth growths often appear on the trunks of pine and birch. The annual layers in places of growths are usually wider than in the trunk. Lumpy growths, or burls, are formed mainly on the trunks of birch, walnut, as well as maple, black alder, ash, beech, poplar, etc. The wood in the burl area has an irregular structure with a curled-wavy direction of the fibers and with dark-colored inclusions in the form of small spots, dashes and dots. When cut, burls have a beautiful texture, so they are used as a material for artistic crafts and the manufacture of sliced veneer.
Such a defect of the trunk as its curvature,
also makes it difficult to use round timber and increases the amount of waste during sawing. The curvature of the trunk is the deviation of the longitudinal axis from a straight line, and it can be with one bend or complex - with two or more bends.
Often there is a type of trunk defect such as lumpy,
which is expressed in a sharp increase in the diameter of the butt part of round timber, i.e. when the diameter of the butt end is 1.2 times greater than the diameter at a distance of a meter from this end. When sawing and peeling wood, the presence of such a defect leads to an increase in the amount of waste and, in addition, causes the appearance of a radial inclination of fibers in the veneer. The hardness of the round timber also makes it difficult to use round timber for its intended purpose and complicates wood processing.
When longitudinally sawing tree trunks on sawmill frames, various lumber is obtained (Slide 18): beams, whetstones, boards, plates, quarters and slabs.
timber
– lumber with a thickness and width of more than 100 mm.
Bruschi
- lumber with a thickness of less than 100 mm and a width of less than double the thickness.
Boards
- lumber up to 100 mm thick and more than twice the width.
Plates
obtained by longitudinally sawing logs in half, and quarters - into four parts.
Gorbyl
or obapol is the sawn side part of a log.
Lumber has the following elements: faces, edges, ribs and ends.
Plasyu
The wide plane of the lumber is called the edge, and
the edge
.
Edge
is the line of intersection of these two planes.
end
- transverse (end) plane of lumber.
Wood products usually consist of individual parts,
which are connected to each other in various ways. Before making any part, a graphic representation of it is made: a technical drawing, sketch or drawing.
Technical drawing
- this is a three-dimensional image of an object, made by hand, indicating the dimensions and material (Slide 19). The sign “Ø12” in Figure 14 means that the hole diameter is 12 mm.
Sketch
is a flat hand-drawn image of a part indicating its dimensions (Slide 19). In the sketch, s40 means that the thickness of the part is 40 mm.
By drawing
called an image of a product drawn using drawing tools indicating its dimensions, name, scale and material (Slide 20).
Based on the images of an object in the drawing, one can judge its size and the size of its individual parts. The basis for this are dimensional numbers, regardless of the scale and with what accuracy the images are made. The rules for applying dimensions on drawings are established by GOST 2.307-68.
Dimensions in the drawing are indicated by dimensional numbers, dimension and extension lines. Dimensional numbers on drawings are usually indicated in millimeters without indicating units of measurement. In cases where it is necessary to use other length units, they are shown after the dimension number.
Dimensional numbers are applied above the dimension line, possibly closer to its middle. The gap between the size number and the size line should be about 1.0 mm. The height of the dimensional numbers is taken to be at least 3.5 mm.
The dimension line is drawn parallel to the segment whose size is applied above it. It is carried out between extension lines drawn perpendicular to the dimensional lines. It is allowed to draw dimension lines directly to the lines of the visible contour, axial and center. In some cases, the dimension line may not be drawn perpendicular to the extension (Slide 21). Dimension lines are limited by arrows. In some cases, they are not carried out completely, but with the arrow broken on one side (Slide 21). The size of the arrow is chosen based on the thickness of the solid thick main line adopted in the drawing. Within one drawing, the size of the arrows should be the same as possible. It is not recommended to use contour, axial, center and extension lines as dimension lines.
If the length of the dimension line is too small to accommodate the arrows, then the dimension line is extended beyond the extension lines, and the dimensions are applied as shown on slide 21.
Extension lines are drawn from the boundaries of measurements; they are auxiliary and serve to place dimension lines between them. If possible, extension lines should be placed outside the image contour, perpendicular to a straight line segment, the size of which must be specified. Extension lines should extend beyond the ends of the arrows of the dimension lines by 1...5 mm.
The minimum distance from the dimension line to a line parallel to it should be 10 mm, and between parallel dimension lines - 7 mm.
Angular dimensions in drawings are indicated in degrees, minutes and seconds, indicating units of measurement. The size of the angle is applied above the dimension line, which is drawn in the form of an arc with the center at its apex. In this case, extension lines are drawn radially.
If the dimension line is located in an area that is shaded in the drawing, dimension numbers are applied on the shelves of leader lines (Slide 22).
If there is not enough space above the dimension line to write the size number or this space is occupied by other elements of the image and it is impossible to write the size number in it, the size number is applied according to one of the options given on slide 22.
Often the part is so large that its life-size image does not fit on a sheet of paper. It is also difficult to depict a very small detail in life size. To do this, use a reduced or enlarged image of the part. The ratio of the linear dimensions of the image of a part to its actual dimensions is called scale.
Strictly defined scales are established: for reduction - 1:2; 12-; 1:4, etc., and for enlargement - 2:1; 2—
: 1; 4:1, etc. For example, if “M 1: 2” is written on the drawing, then this means that the image is two times smaller than the actual one, and if “M 4: 1”, then it is four times larger. In a drawing, sketch or technical drawing shown on any scale, the actual dimensions of the part are indicated.
The image of the visible part of the surface of an object facing the observer is called the view
. The names of the views depend on which side the object is viewed from when projected.
The starting point in the drawing is the front view
, which is also called
the main view
(Slide 23, 1). If you look at an object on the left, at a right angle to the profile plane of projections you get
a view on the left
(Slide 23, 3).
When looking at an object from above, a top view
(Slide 23, 2)
.
Each view occupies a strictly defined place in the drawing in relation to the main view. Left view
located to the right of the main view and on the same level with it,
the top view
is under the main view. You cannot violate this rule by placing views in random places without special designation.
In order to get acquainted with the structure of any object, you need to read its drawing. Engineers, designers, workers, designers, architects, reading drawings, mentally imagine the finished product, structure.
To read a drawing (sketch) means to imagine, based on the images in the drawing, the three-dimensional shape of the object or building depicted on it. In the process of reading a drawing, it is necessary to understand not only the shape as a whole, but also the shape of each part of the whole. It is important to identify the orientation of the object (building) in space and the location of each part relative to each other.
The drawing should be read in a certain sequence:
1) get acquainted with the contents of the main inscription of the drawing;
2) identify images (types, sections, sections, etc.) that represent the product;
3) carefully examine the images in the drawing to create a primary idea of the shape of the part and its orientation in space. Identify projection-related images of each structural element and mentally imagine their shape. Correlate mental images with initial ideas about the shape of the object in order to make sure that the shape is represented correctly. Clarify the relative position of each structural element relative to each other for a complete correct representation (understanding) of the object’s shape;
4) imagine the size of the item according to the overall dimensions of the product indicated on the drawing.
In order to manufacture any product, it is necessary to perform a number of actions, that is, go through a number of stages.
First of all, you need to think in advance about what materials the product will consist of, what tools and devices are needed for this, what equipment and workplace can be used to manufacture the product.
There is no need to rush to start making the product right away. Otherwise you can turn it into a marriage
- unnecessary products. It’s not for nothing that there is a saying: “Measure twice and cut once.”
First, the product is depicted in the form of a technical drawing, sketch or drawing. Select a high-quality piece of wood of the required species. Workpiece
They call the material of a certain size from which
the part is made.
Mark the workpiece, checking the dimensions several times. Then it is planed, sawed, cleaned and finished, turning it into a finished part.
Products may consist of one or more parts. Each part is made from one piece of material.
The connected parts in a product are called an assembly unit.
A product may consist of one or more assembly units.
If the product consists of several parts, then after manufacturing they must be adjusted to each other and connected to each other. The connection of parts into a product is called assembly.
The manufactured product must be checked for strength and tested. If any shortcomings are discovered, the reasons for their occurrence must be found and eliminated.
The sequence of actions for processing workpieces and assembling parts in
the product is described in
technological maps.
(Slide 24)
Processing of workpieces is carried out using working tools manually or on machines.
Each part is manufactured according to its own technological process,
which is part of the entire production process of transforming a workpiece into a part or product.
The technological process of manufacturing parts consists of a number of technological operations.
Operation
refers to a completed part of a technological process performed at one workplace or on one machine. For example, the operations will be: cutting out a workpiece on a carpenter's workbench, drilling holes in it on a drilling machine, painting the workpiece in a special room.
Operations consist of transitions
and
installing
parts. The transition is performed at one workplace or machine with one tool.
The flow chart indicates the sequence of operations, a graphical representation of the changing workpiece, and the tools and devices used.
Slide 24 shows a technological map for the production of a kitchen cutting board.
In order to choose the right tool for making a product, we will get acquainted with the basic working tools and methods of their work (I show students the tool and the methods of its work, for example, a plane - planing, a hacksaw - sawing, a hammer - hammering a nail, etc.).
4.
Consolidation of new knowledge and skills (in the form of a frontal oral questioning).
1)Where is wood used in the national economy?
2) Name 2 types of tree species: how do they differ?
3) Name the main types of wood defects. What do they influence?
4) What is a technological map (explain in your own words)?
5) What types of product images on drawings do you know?
5.
Independent work: making sketches of parts based on appearance.
6.
Final instructions:
- summing up the lesson;
— homework: Prepare for independent work on the material covered.
8