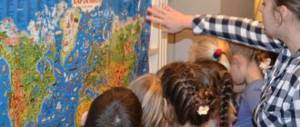
Crafts on the topic “Ecology” are one of the methods of environmental education for preschoolers and primary schoolchildren. From early childhood, children need to be explained how important it is to take care of the environment: that you cannot throw garbage on the street, but only in trash cans; that many waste materials can be reused in the household and in creativity.
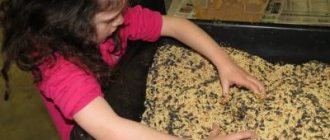
It is not surprising that in 2020, environmental education classes were held in many preschool institutions, in which crafts were made from waste material, because 2020 was declared the year of ecology in Russia. Don’t forget that you can use a wide variety of materials for creativity; children will be happy to create crafts from cereals and paper, as well as from plastic.
Crafts on the theme “Ecology”
On the eve of May 12, when Russia will celebrate the Day of Environmental Education, environmental events are being held throughout the country, the main goal of which is to educate everyone, young and old, about the enormous importance of events aimed at preserving the ecosystem of our planet. With the development of technology and chemical production, the planet is faced with a huge danger - some corners of the planet that previously could boast of their green forests are now literally buried in mountains of garbage. You can look at the small streets of your city - there are plastic bags and plastic bottles lying everywhere, materials that take a very long time to break down in natural conditions.
Unfortunately, in our country there are very few factories and enterprises that would process secondary raw materials, so it is important to raise a young generation that will understand how important such production is. After all, a plastic bottle does not have to be immediately thrown into the trash bin; it can be used in the household: make an organizer for pens and pencils, a container for storing bulk products, etc. Many options for use can be found in a summer cottage: making a fence for a flower bed, greenhouse, and even a small outbuilding. By the way, the use of plastic bottles as building materials is popular not only in poor third world countries, but also in high-tech Japan.
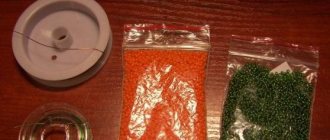
Children can contribute to the preservation of the ecosystem - at home with their parents or in kindergarten, they can make crafts on the theme “Ecology” with their own hands , using plastic containers, various packaging and other waste materials. Children in such classes will be able to learn how to breathe new life into those materials that we usually throw into the trash without regret. To make the best DIY crafts in elementary school, it is not at all necessary to buy a new package of colored paper, because wood is used for paper production, which means that trees die somewhere for every sheet of paper; you can take a variety of other materials that have already served their purpose and are ready for recycling.
DIY crafts on the theme “Ecology”
By creating children's crafts on the topic "Ecology" , children not only contribute to the preservation of the ecosystem, which they certainly need to be clearly told about, but they can also have fun. You can work on the craft independently or in a team with other students in the group. Most likely, in the creative process, children will need the help of adults, especially if they have to work with thick cardboard or plastic. You should start with the easiest thing, for example, a simple application is suitable for middle school students. As the main decorative material, we can offer preschoolers candy wrappers - shiny and bright, they will become a real decoration of our applique.
In the process, children will get acquainted with the fascinating world of creativity, learn how to make colorful appliqués using not only paper, but also a variety of waste materials. Of course, such an activity contributes to the development of children's imagination and creative imagination. In addition, before starting work, the kids will have a great excuse to eat some delicious chocolates and use their wrappers as decorative material. You can organize a small container at home where children can put candy wrappers throughout the year, and then they can be used in creativity.
- Paper
- Wrappers
- Glue stick
- Pencil
- Stationery scissors
We will need some candy wrappers with a black back side, others with a bright pink side. On a piece of paper you should outline the outlines of the future tree with a pencil; this can be done by a parent or teacher. Parents can also mark the outline of all the pieces on the candy wrappers to make it easier for their child to cut them out. Pupils of the senior group or junior students can independently draw the outline and cut out all the necessary details.
A craft on the theme “Ecology” for kindergarten in the form of an appliqué depicting a flowering tree begins with the trunk; for this you need to use the reverse, dark side of our candy wrapper. First you need to cut out the trunk and glue it onto paper, then you need to cut out small “gnarled” branches to give the tree a finished look. For the flowers, we will need a candy wrapper with a pink pattern, from which we need to cut out flowers; these can be flowers like those in the presented master class, or of a different shape. The cut out flowers must be glued to the branches, after which the work can be considered completed.
Additionally, the applique can be decorated with butterflies, the leaves of which will also be cut from candy wrappers, as well as dragonflies. If you want to make a craft with your child on the theme “Autumn”, then you should choose orange, yellow and red candy wrappers, and the leaves for the autumn tree should be cut into small, oblong shapes. And don’t forget about crafts made from natural materials on the theme “Ecology” , because the best material for creativity is fallen autumn leaves, which excite the imagination with their unusual shapes and rich colors.
Crafts on the theme “Ecology” for kindergarten
When it comes to crafts made from waste materials on the topic “Ecology” , you always want the master class to deal only with those materials that we always have on hand and that we usually throw away. In addition, it is imperative to choose materials that will be easy for the child to work with, even with the help of parents. For example, every family regularly consumes juices and milk. What do we usually do with tetrapacks? That's right, we throw them in the trash, but this is an excellent material for creative ventures. Firstly, tatrapack is, first of all, a product made of thick cardboard with an additional coating, and cardboard can be cut, bent, and painted, which means that all these manipulations can be done with tetrapack. The very idea of creating a house from tetra-pack is more suitable not for classes in kindergarten, but for a home hobby. The child will be happy to work with his mother to create such a house, which can then be used in home games or in a children's puppet theater. Houses made from tetra packs are crafts on the theme “Ecology”, the photos of which will bring you real delight. They turn out so bright and colorful, truly fabulous. Not only will you not want to throw them away, but after such a craft for kindergarten, the child will collect other tetrapacks - small and large - to build an entire fairy-tale city. It is convenient to place such “buildings” in a child’s room on a windowsill or along a wall; they do not take up much space, and are very convenient and safe for play. Children will not be able to get hurt on the cardboard, and they will not be able to break the houses themselves. The perfect homemade toy! If you can make a multi-story doll house from a large cardboard box, where there will be several rooms with homemade furniture for Barbie, then such small houses are more suitable for playing with Lego men or other miniature toys.
- Tetrapack
- Paints
- Paper
- Glue
- Scissors
The set of necessary materials may be minimal, but if you wish, you can use various additional decorative elements. For example, the surface of a tetra pack can be painted with several layers of paint or covered with colored paper or wallpaper. Windows and doors can be drawn or pasted with an applique of rectangles of colored paper. Using rope and toothpicks you can make a rope ladder. In a word, your imagination is not limited by anything, and you can use a variety of materials. Using the same principle, you can make not only multi-story residential buildings, but also a hospital, shops, a school, and “signs” can be printed on a printer. And if mothers want to make a convenient organizer for jewelry out of tetra packs, then you can rest assured that the children will immediately come to the rescue and will take every possible part in the process. And girls will want the same box for their jewelry.
Crafts for the garden on the theme “Ecology”
Often, sections made from waste material are used to decorate and functionally design a garden plot. Plastic bottles are a material that craftswomen have found many uses for. Firstly, they are often used in the household as a convenient container for water and bulk products. Secondly, many gardeners not only use plastic bottles to make fences for beds and flower beds, but also use them as containers for growing seedlings, and even make unusual flower pots for fresh flowers that decorate their garden plots. Many mothers choose plastic bottles for children’s creativity, and in the process of working, preschoolers can be told how dangerous plastic is for our ecosystem. An unusual craft for the garden on the theme “Ecology” will allow you not only to join in an exciting creative activity, but also to learn a lot of new things about the environment.
We will create a bright caterpillar on wheels, and for this craft we will take the most ordinary plastic bottles. You can play with such a caterpillar at home and outdoors, and if any part breaks, then there is no reason to be upset, because you didn’t spend a penny on this toy.
- Plastic liter bottles - 10 pcs.
- Plastic bottles, volume 2.5 l. - 2 pcs.
- Multi-colored acrylic paints
- Bottle caps – 12 pcs.
- Double sided bolts
- Nuts to match bolts
- Glue "Moment"
- Wire
- Jute rope
This craft involves joint action by adults and children, and all family members can be involved - there is a task for everyone. Adults will cut the plastic and make holes, and children will do all the work of coloring and decorating the finished caterpillar.
Crafts on the theme “Ecology”: photos
You will definitely be attracted by a craft on the topic “Ecology” for a schoolchild , which can become part of a thematic exhibition. Environmental events and campaigns will definitely be held in schools in order to educate schoolchildren about the need to preserve the environment. Of course, the “Caterpillar” craft will be more to the liking of preschoolers. First, you need to cut off the bottoms from the bottles with scissors; as a result, you should get ten bottoms from a liter container and two bottoms from large bottles. A hole should be made in the middle of each plastic blank using a drill or awl, which must be heated over a flame. You can thread a rope through this hole to connect all the track pieces. Now it’s time for the child to work on the “Caterpillar” toy: the bottoms need to be painted in pairs in bright colors, in total we will need six colors of acrylic paint.
The plugs will be used as wheels, so you should make a hole in the center of each and screw the prepared bolts into this hole. We will have 10 wheels in total. All that remains is to assemble all the painted parts of the bottle and attach the wheels, and decorate the head with eyes and a mouth, and attach wire horns. You can also use other ideas on how to create crafts on the theme “Year of Ecology” , which will help highlight the environmental problems of the planet. For example, you can create a thematic wall newspaper for a school.
An endless universe of crafts
So how can you make a solar system model for kids at minimal cost? There are several ways.
The most primitive model of the solar system can be made from plasticine or salt dough, painted in the desired colors. It is suitable for the smallest babies.
This model will give the child an idea that all planets revolve around the sun and their number.
- let's blind the orange sun;
- brown-orange Mercury;
- in the same color we sculpt Venus;
- the Earth will be blue and green;
- black-red Mars;
- Jupiter will be brown;
- Saturn is blinded with rings;
- Uranium will be made of blue + gray mass;
- We make Neptune out of blue;
- gray Pluto.
We string all the “planets” onto wooden skewers and attach them to the “Sun”. For greater clarity, skewers can be made of different lengths. Ready.
Related article: Do-it-yourself clothes for Baby Bon with knitting needles with photos and videos
A plasticine model can be made on a plane:
As a gift for a little schoolchild, you can make a model of the solar system from papier-mâché.
Papier-mâché (translated from French as “chewed paper”) is a plastic mass made from paper with the addition of binders and adhesives (starch, gypsum, glue).
A paper layout is the simplest and most affordable to make. A detailed master class with photos will help you make it.
Materials for work:
- newspaper;
- gray toilet paper;
- office glue;
- plywood sheet;
- colored gouache paints;
- quick-drying blue paint;
- some silver beads.
Make a ball of newspaper soaked in water.
We wrap it with toilet paper and roll this lump into a bun. Lubricate the paper bun with glue, spreading it evenly over the surface.
Leave the balls to dry at room temperature or on a radiator.
While the parts are drying, let’s prepare the basis of the layout: we cut out a circle of the required size from plywood, taking into account the size of the prepared planets. We paint it with blue paint.
We make scatterings of stars from silver-colored beads, evenly distributing them on a circle, according to the picture of the starry sky.
We paint the dried koloboks, imitating the color of the planets.
We will make the rings of Saturn from silver paper.
It is imperative to accurately position the planets in relation to the Sun.
We screw screws into the bottom of the plywood, according to the location of the planets.
We screw our “planets” on top of them.
Our model of the solar system is ready.
During the manufacturing process, you can tell your child about the structure of the solar system, about the planets and everything that will be interesting to him. And such a gift will take on special meaning for him.
A wonderful idea to create a model of the solar system as an element of the interior of a children's room.
First, we decorate part of the ceiling as a starry sky.
We make planets from papier-mâché as described above.
We paint them with acrylic paints. It is more effective to use glossy ones.
Related article: DIY elastic skirt
We pay a little more attention to the sun. We color and make rays from a strip of faux fur.
We attach a fishing line to the “planets” and secure them with paper clips or a stapler to the ceiling, observing the order of their location from the “Sun”.