Home › 1-3 › Development › Learning to draw animals using your palms: 14 funny images
Sometimes it is so difficult to draw an animal, and even more difficult to teach a child to draw himself, so that it really looks like it. We have selected lessons for you that will help you draw beautiful animals using your palms. Try it yourself!
You will draw adult animals, and the baby, due to the size of his palm, will draw their children. It should be a whole zoo. Take note if your child often asks to draw an animal, and you don’t know how to start.
The most popular games for autumn walks with children. We play non-stop!
Squeeze your fingers together and move your thumb perpendicularly away from the entire palm. Let's circle. All that remains is to finish drawing the paws, beak and wing.
Giraffe
We press in the middle finger, move the rest to the sides and circle. All that remains is to decorate and you will get a giraffe with horns and ears.
Ostrich
From the usual combination of fingers when we show “Cool!” you just need to bend your fingers outward a little. We outline, draw thin long legs and teach the ostrich.
Peacock
We take turns tracing the right and left hands, spreading our fingers freely. We circle the thumb only halfway. A peacock with a loose tail learned.
Children are the flowers of life: 8 flower names for little princesses
Bend four fingers halfway. We move the big one a little to the side. We get a full-fledged body for the turtle.
Snake
Again, remember the fingers with the “Class” combination, and move the little finger away from this combination. We outline and color - we get a snake.
Elephant
We bend four fingers, move the slightly bent little finger, and also move the thumb to the side. We turn it over and decorate the future elephant.
Pregnancy makes me stupid and weak
We keep four fingers bent tightly together, move the thumb slightly to the side - we get a snail with a house, which only needs to be finished drawing the horns.
Fox
We repeat the combination of fingers as on the Giraffe, add fur and get the face of a fox.
Horse
Straighten four fingers and tuck the thumb under them. We get the head of a horse whose mane needs to be completed.
Mouse
We hold our fingers in a “Pistol” shape and trace it on paper. We finish drawing the ear and mustache - and we get a mouse face, almost like Jerry in profile.
Crocodile
We repeat the combination from the Mouse, that is, we again outline the palm assembled in the “Pistol” and finish drawing the sharp teeth. We get the Crocodile.
Mollusk
We trace the fingers in the same way as for the Snail. We decorate the animal’s house differently and turn it into a shell from which a Mollusk can be seen.
Frog
We press our thumb and circle the hand twice: first, four fingers together, turn it over and squeeze the two middle fingers a little. We circle and get the whole body of the Frog.
All video lessons
⇓⇓⇓
Source: https://www.moirebenok.ua/toddler/razvitie-toddler/uchimsya-risovat-zhivotnyh-pri-pomoshhi-ladonej-14-zabavnyh-obrazov/
Developing fine motor skills in a child
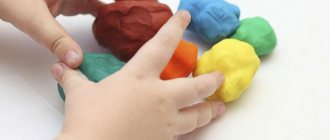
Psychologists believe that creative experiments with finger paints can begin at 10–11 months. Even then, the baby can trace the relationship between the paint and the mark on the paper. But it’s better to focus on your child’s individuality. If he can already move freely, crawling or on his feet, and is fully engaged in research activities, it’s time to introduce him to creativity and introduce him to finger paints.
It is advisable to start finger painting in the first half of the day, when the child is more active. The baby will remind you about the end of the lesson, because it is simply impossible for a one-year-old baby to hold attention for a long time. The first lessons, as a rule, do not last long - literally a couple of minutes. In the future, an enthusiastic child can draw for up to 15–20 minutes without stopping.
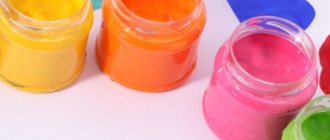
What do you need for finger painting? First of all, special finger paints, they can be bought in almost any store that has a department of goods for children's creativity. They have the desired consistency and do not require additional dilution with water. When choosing, pay attention to the jars themselves: they must close tightly so that the paint does not thicken too quickly. For your first experiments in fine art, it is better to choose bright, but not “acid” colors. As for paper, A3 size watercolor sheets are preferred. They are big, the baby will have room to “swing”. And if you take a roll of old wallpaper on which you can draw on the reverse side, then there will be no limit to a child’s happiness. And also make a blank - a green leaf on which the ladybug sits. You will need it.
Step 1.
Taking into account the child’s age, we prepare a workplace: cover the table or floor with oilcloth (newspapers), put a sheet of paper and paint, open a couple of jars. It is better to start getting acquainted with finger paints with one or two colors. At first, the baby is surprised by the very fact that the paint leaves a mark on the paper, and does not try to change colors.
Step 2.
Take your time to dip your baby’s finger in the paint. He may get scared and flatly refuse to “get his hands dirty.” Better show him an example by leaving a long colored line on the paper with your finger or a print of your palm. Then invite your baby to “play around” with you. Celebrate the activity with rhymes or songs.
Step 3.
Now let the baby dip his finger in the paint and run it across the paper. Give your child time to get comfortable and understand that the line on the sheet is the work of his fingers. And then move on to simple game exercises.
Step 4.
Now we take our blank - a green leaf with a ladybug. Invite your child to finish painting her paws and dots on her back using a finger and black paint. Children love it when there is a playful moment in the lesson. This really captivates them. And if they like it, the next “lesson” will be a great success!
Vigilance first!
Before purchasing, check whether the finger paint you choose meets safety standards. Russian manufacturers must indicate the number of the sanitary-epidemiological report. On the packaging of imported paint, pay attention to the presence of the “CE” or “AP” marks. This marking means that the product meets the requirements of European or American standards and is safe for the health of its consumers.
Learn to draw with your palms
How to paint with fingers has already shown some ideas here.
With the help of this article, you can teach your child to create interesting drawings by tracing their palms and fingers. See for yourself how exciting and fun this process is, and also very useful. Conscious finger movements stimulate speech development in children.
When tracing the palm and fingers, the child uses both hands, which perfectly develops coordination. For left-handed children, such drawing contributes to the full development of the right hand.
Any visual activity contributes to the aesthetic perception of the world and enhances speech activity, develops imagination, spatial and figurative thinking. When a child creates an image, his understanding of the world around him improves.
He remembers the characteristic features and details of objects, masters visual skills, and finds the first design solutions. A child’s imagination is varied, and drawing is not mathematics. But the baby may not succeed on the first try.
It can be difficult to draw a perky cockerel so that it looks exactly like a cockerel, with a bright colored tail and a red comb. Here you simply cannot do without the help of mom, dad, grandparents. In our article you will find simple and understandable patterns for drawing with palms.
A distinctive feature of children's perception from two to five years old is the desire for independence. Therefore, it will be better if you draw on a separate sheet of paper, showing your child how to perform this or that element, and he will repeat after you, drawing his own picture. Be sure to praise your child - this supports his confidence and desire to create something new.
Place your palm on a sheet of paper, spread your fingers and trace. Turn the paper so your fingers are facing down and round the outline where your wrist begins. Now take a closer look: here it is, a dinosaur! The big toe is the head, the other four are the legs. Draw teeth on the back, and eyes and a sweet smile on the head.
If one of the adults agrees to put their hand on it, then the little dinosaur will have a mom or dad.
Our little dinosaur lives in the desert where prickly cacti grow. Trace one outline of your palm over the other. All that remains is to draw the spines and flowers - the cactus is ready. You can simply trace your fingers, moving from top to bottom, and you’ll get a different cactus.
Let's draw bully cockerels! Trace your palms: first the left and then the right. The main thing is that the contours of the palms of the thumbs point at each other. Close the outline at the wrist. The thumbs are the heads of the cockerels, the rest are the tails that the cockerels spread before the fight. Draw legs with spurs, beaks, combs and eyes.
Where did our cockerels meet? In field? By the fence? To draw a bush, trace your palm. If you trace a few outstretched fingers, you can draw a fence or grass. Add a crossbar for the fence, and add flowers on the grass. The cockerels have stopped fighting! We decided that being friends is more interesting!
There are so many butterflies in summer! To depict a butterfly, first draw the wings. Place your palm so that your spread fingers look to the side. Trace the outline. And the second palm is nearby, but looks in the opposite direction. Draw the body, head, antennae and color. But our butterfly is bored of flying alone. Let's draw her a friend - a dragonfly. For the wings, you need to circle four fingers, folded in pairs. First to the left side, then to the right. Draw the body, head, big eyes and antennae.
Who else can you see in the summer? Moth and snail! Shall we draw? Place your palm on the sheet, closed fingers pointing upward. Trace the outline. Place the second palm on the first contour so that the thumbs overlap each other. To draw a snail, clench your fist, put your thumb to the side and trace - you get a snail's house and head. Draw horns and a tail for the snail and color it.
Now we will draw an elephant and a dog, Moska... An elephant requires a large palm. Ask dad to help. Clench your palm into a fist, move your thumb to the side (this will be the trunk) and circle. Turn over the sheet. Draw the ear and four columns down for the legs, don’t forget to draw the tail at the back.
Moska is an angry dog. She barks at the elephant. Place your palm on the sheet, bend your thumb up and your little finger down. Trace the outline. The thumb will become Moska’s ear, and the rest of the palm will become the muzzle. Complete the eye, nose and spots. br/>
The contours of palms, fingers and fists can turn into anyone and anything. You just have to look carefully at what happened on paper. Fold your fist so that the folds of your index finger and little finger look above it. Trace the outline. Where the toes protruded upward, the cat's ears turned out. Now draw the eyes, nose and mustache. What kind of kitten do you have? Gray, red, striped?
And where there is a cat, there is a mouse.
And then a bunny came galloping towards us! The one who ran away from the hunter. Make a fist. Leave your index and middle fingers uncurled. Trace the outline. Well: the index and middle fingers became ears, everything else became the Bunny’s body.
Place your thumb twice so that it looks down - these are the bunny's front paws. Now let’s draw his eyes and tail. And he hid in the bushes. To draw a bush, fold your fist in the same way as for a mouse. Trace and color.
source
Other non-traditional drawing techniques:
(Visited 5,685 times, 2 visits today)
Source: https://luchikivnuchiki.ru/uchimsya-risovat-ladoshkami/
The importance of classes using non-traditional drawing techniques
Non-traditional drawing is distinguished by artistic showiness and unpredictability of the result, unusual working techniques that do not require special manual skills and abilities, but are more like a game that helps to reveal the creative potential of every child. In addition, they give a sense of novelty and are an impetus for the development of initiative, independence, stimulate ingenuity and interest in visual activities.
Three-year-old children still have difficulty holding a brush; not all children have shown interest in visual arts. You can captivate children with artistic creativity and turn drawing into an entertaining game, simultaneously developing aesthetic taste and imagination, if you use not only classical techniques in your work, but also try to experiment with unusual materials, for example, leaves, vegetable stamps, salt, semolina, sand etc.
The importance of using alternative drawing techniques:
- They promote full mental development, increase self-esteem, help overcome fears and psychological pressures.
- Develop abstract thinking and imagination.
- They form a holistic perception of an object, improve their sense of color and shape.
- They create conditions for the development of children's creative potential and free expression of their individuality.
- Introduce children to the properties of various materials.
- They instill a taste for unconventional thinking and experimental research activities.
- Develop tactile sensations, fine motor skills and coordination of movements.
- They allow you to experience a feeling of joy and inspiration, awaken the desire to create, and create an atmosphere of emotional uplift.
drawings from child's palms. large selection of works
I already wrote about drawings from palms in the spring. Take a look at our past work for inspiration. I hope you like them. And you will draw something of your own.
And today I’m posting the second part of our collection of paws of all stripes. Don't judge strictly, we tried our best.
Let's start with the palms, which we turned into birds.
Blue bird
ostrich
unknown breed of bird
You can make an imprint of the mother's palm and the child's palm. You will get a bird with a chick. Like our swans.
swans
You can paint your palm with different colors. This will give the bird bright, unusual plumage.
When we drew birds, our baby was impatient. He wanted to immediately press his palm to the sheet. That's why we limited ourselves to one color.
Finger painting in kindergarten
Finger painting for children can begin as soon as the baby begins to sit. It will be interesting for him to observe how different marks are left on the paper.
Unconventional drawing
In the nursery group there are children who are two years old and up to three years old. They don't yet know how to hold brushes in their hands. Kids like to type with their fingers - it is more difficult for them to work with a brush, but with their palms it is a very easy and simple hobby. Finger painting for children 3-4 years old is done in kindergarten so that children gain experience for further work with other creative tools.
The technique of working with fingers in a preschool educational institution provides that preschool children will work with their palm and fist. Finger painting promotes the early development of children's creative abilities. They learn to convey their feelings and impressions. It is useful and interesting for kids to explore the capabilities of their hands. With the help of their palm, they can receive a large number of different prints and add their own imagination to them.
Additional Information ! At this age, the goal is not to create a specific image - children are interested in the process itself. They enjoy working with dyes to produce vibrant colors.
Children over four years old can work with pencils and felt-tip pens, but they are interested in the fun process of finger painting. With the help of felt-tip pens and colored pencils, they can complete the drawing of various characters. Finger and palm typing can be done in the middle and senior groups of kindergarten, and elementary school students also enjoy this process.
Palm typing
Hand drawings
Greetings, dear readers! If you are interested in simple and quick crafts for kids, in this material you will find hand drawings that are easy to make in kindergarten, at school or at home with the whole family. Even if your baby doesn’t know how to draw yet, with your help he will be able to create the first works of art in his life. We offer some original ideas!
Sun
The simplest and easiest drawing to perform is, of course, the sun. It will require a small preparation. Take a piece of paper and draw a circle in the center. Color it yellow. When the material dries, mark the eyes, mouth and nose. The sun is ready. Now it's time to draw the rays.
Ask your child to dip their hand in the finger paints and place it on the circle with the wrist facing inward. Take several images in different directions without overlapping them. You will get a picture like this.
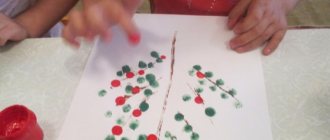
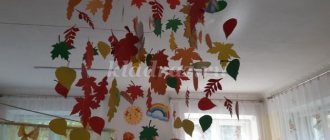
Autumn
This craft is suitable for children of any age, but it also requires the help of adults. As a blank, draw a tree trunk or make an applique. To make the picture bright, you can make it on colored paper, for example blue.
But your baby will draw multi-colored leaves with the help of his hands. Prepare finger paints: green, red, orange, yellow, burgundy. Dip your palms in different colors one at a time and make impressions around the tree trunk. As a result, you will get a cheerful autumn tree.
Cockerel
A charming children's drawing of a cockerel arises from a blank and images of children's palms. On a landscape sheet, draw or create an applique using yellow paint or paper of the head and body of a cockerel. At the front, draw a red beak and chin.
Dip your baby's hand in red and place your hand on the cockerel's head twice, placing the impressions on top of each other. This will be a tuft. For the tail you will need numerous multi-colored images in several rows.
To decorate the pictures, add flowers, grass, butterflies - in general, everything your soul desires. Then you will have such a cute drawing.
Giraffe and cacti
The whole family can take part in making this craft. The exotic nature of the southern savannah is easy to convey with the help of images of palms.
Let your child draw the outlines of the cacti. Dip his palm into green paint and apply it to the paper. Repeat the action as many times as you want to see bushes in your “creative project”. Decorate the plants with thorns and flowers.
Now it's time to draw a giraffe. Mom's or dad's hand is suitable for this: then the image will look more convincing. Dip your palm in brown and place it on the paper, fingers facing down. On the opposite side of the thumb, draw the neck and head of the animal. When the paint dries, decorate the figure with dark spots, a nose and eyes.
To complement the picture, introduce other elements: sun, grass, flowers. You will have a real savannah!
Swans
For this craft you will need a sheet of blue or light blue paper and white paint. To make the birds different sizes, you can use adult and child handprints.
Dip your palms in white and prepare 2 prints: one for the left hand, the other for the right. On the thumb of each print, draw eyes and a beak. For this purpose, you can use an application. Draw or glue paws on the bottom.
Crab
Using 2 handprints you can draw another funny animal - a crab. Dip your hands in red, turn your fingers in opposite directions from each other, join your wrists and attach them to a piece of whatman paper.
To make the image more convincing, take it on a blue background or create an imitation of a beach landscape. To do this, color the bottom part of the sheet yellow and the top part blue.
Draw or stick on eyes on the thumbprint. Your crab is ready!
Butterfly
A beautiful bright butterfly is obtained if you use contrasting tones to create a design. Lubricate your palms with yellow paint and connect them with your wrists. You should have 2 mirror prints a short distance apart. You will get butterfly wings.
All that remains is to decorate the picture. In the middle, use dark paint to depict the body of an insect. Decorate the wings with red and green spots. This is how your butterfly will turn out.
Peacock
To depict this exotic bird, you will first need to draw the body of a peacock, for which the color blue will come in handy. Here, children cannot do without the help of adults, although children from 4–5 years old can easily cope on their own.
Around the peacock’s body, use handprints to mark the tail. The prints may be blurry, but then the picture will be even better. Decorate the tail with colorful spots.
Funny turtles
Continuing the theme of depicting the inhabitants of the deep sea, we can suggest drawing turtles. Create green handprints on a blue background. Point your fingers down: these will be the legs of the animals.
Round your thumb: this will be the head. When the paint dries, paint the eyes and mouth. The picture can be decorated with an image of the bottom and algae.
Fish
A very simple fish design can be made using multi-colored palm prints. Point your fingers so that they look like the tail of a fish. On the side of the wrist, draw the mouth and eyes.
To decorate the picture, you can draw algae and elements of the seabed around it. But sometimes a few bubbles are enough to make the picture seem alive.
special instructions
During the creative process, keep some guidelines in mind. They will help make work exciting and useful for the child:
- If your baby is getting acquainted with colors for the first time, you should not immediately resort to compositions. Place your baby’s palm on a blank sheet of paper, and then give him the opportunity to show independence and try out a new type of self-expression. Only after this should you start composing your compositions.
- It is a mistake to believe that drawings from prints will be uninteresting to children after 7 years of age. Such crafts are very popular even among schoolchildren.
- Adjust the saturation of the image by applying paint to your hands.
- Combine applique and pattern to make the composition more vibrant.
Class notes
| Author's full name | Title of the abstract |
| Kokunova S.N. | "Funny Zebra" (second junior group) Educational objectives: teach preschoolers to draw in an unconventional way - with their palms, combine different drawing techniques in a drawing, consolidate knowledge on the topic “Animals”. Developmental tasks: develop color perception, fine motor skills, attention. Educational tasks: cultivate perseverance, accuracy. Integration of educational areas: “Artistic creativity”, “Cognition”, “Communication”, “Socialization”, “Health”. Demo material: toy zebra. Handout: green sheets of colored paper, white and black gouache, brushes, sippy cups, brush holders, napkins. Progress of the lesson: The lesson begins with a riddle:
A toy zebra appears and came to visit the children from distant Africa. The children look at it together with the teacher - it has a beautiful coloring, just like a horse has a mane and tail. A physical education session is held:
Then the teacher tells the kids an amazing story: once upon a time a zebra was born in the African desert. And she became very lonely, there was no one to play with. And so the zebra came a long way to find friends. The teacher invites the children to help the zebra - to draw her many friends who look like her. The teacher invites the children to sit at the tables and explains to them the techniques of drawing using an unusual technique - using their palms. The pens need to be dipped in white paint and left an imprint on green paper. The missing details are painted in with a brush - black stripes, eyes, mane. Independent work of preschoolers. The zebra thanks the kids and leaves happy - now she has someone to play with. |
| Shishova L.V. | "Titmouse" (middle group) The teacher asks the children to show their palms, stroke them, pat them, rub them on their cheeks. It turns out that palms can do a lot of things, including drawing birds. The teacher finds out from the kids that the birds flew to warmer climes because they had nothing to eat. However, some birds remained to spend the winter - riddles are offered on this topic:
The teacher tells the children that today they will draw a titmouse. Finger gymnastics is performed:
The teacher shows the preschoolers his palm and asks if it reminds them of a bird. Use your finger to indicate an imaginary beak, neck, body, fluffy tail. But this bird is not bright at all, so you need to color it (applies paint to the palm of your hand, children repeat the actions after the teacher). The bird needs to be planted in the middle of the sheet - to do this, open your fingers wide and press your palm against the paper. Using a brush, the bird's legs and eyes are painted on. At the end of the lesson, all the birds are hung on the board - a fairy-tale clearing. |
| Alekseenko G. | «Elephant» (senior group) The teacher asks the children to stand in a circle, a short warm-up is carried out:
Children join hands. The teacher tells them that they have turned into one big and kind animal. The game is played:
The guys are given a riddle about an elephant:
Examination of the image of an elephant, discussing its body parts, the shape and size of the head, ears, trunk, tusks, torso, legs, tail. Particularly notable are the huge ears that partially cover the head, the long flexible trunk and small eyes. The teacher informs the children that the ears protect the animal from overheating, as well as from annoying insects. And the movable trunk easily lifts various objects, plucks leaves from trees and draws water from a reservoir. The elephant's sharp tusks serve as protection from predators and also dig up the ground in search of water during droughts. The tusks and trunk are the elephant's survival tools. In addition, the teacher reports other interesting facts from the life of these animals. For example, that all elephants are gray. They are very polite - they know how to greet and hug each other. Elephants live for about 60 years. Preschoolers are invited to depict an elephant in non-standard ways - using their palm. The teacher demonstrates the depiction process: the palm is painted with gray paint, but only up to the first phalanx, since the elephant’s legs are thick and short. In addition, when making a print, the thumb must be moved to the side - this will be the trunk. Finger gymnastics is performed:
Independent activity of preschoolers. Analysis of drawings: the teacher invites several children to tell about their elephant (what its character is, what it likes to do). |
| Patrikeeva I.N. | "Golden Time" (preparatory group) An audio recording of birds singing accompanied by the sound of autumn leaves sounds. Pictures depicting an autumn landscape hang on the board. The teacher asks a riddle about autumn:
The teacher suggests looking at reproductions of famous Russian landscape painters on an autumn theme - I. Levitan “In the Forest in Autumn”, “Oak Grove. Autumn”, “Golden Autumn”, I. Shishkina “Golden Autumn”, “Forest Backwater. Autumn", Kuindzhi "Autumn". Discussion of what was seen: how nature is depicted, what color the sky, trees, clouds, grass, the mood that the artists wanted to express. Then photographs are offered for viewing: children highlight the signs of a golden autumn. Preschoolers are offered the didactic game “Guess the tree from its leaves.” Reading the poem “Autumn Grandmother” by L. Fadeeva:
The teacher informs the children that today they will turn into landscape artists and depict autumn in all its beauty, and then organize an exhibition of their paintings. Children are invited to draw a landscape using their palms. The teacher shows the sequence of doing the work: you need to smear your palms with red, yellow and orange paint and use a print to depict the crown of a tree at the top of a vertical sheet of paper. The rest of the work is done with a brush - the brown trunk and multi-colored leaves are painted on. The image of a tree is complemented by grass, flowers, sun, clouds. A physical education session on an autumn theme is being held:
Independent activity of children. Design of the “Golden Exhibition” stand. |
Learn to draw eyes, hands and feet
Any skill needs to be developed and brought to perfection; even if you have talent from birth, you need to constantly develop and hone it.
We have already told you that absolutely everyone can learn to draw, and we hope that you have already started following our advice.
Today we want to touch on another “sore” topic for novice artists, namely, drawing such complex parts of the body as hands, feet and, of course, eyes.
As a rule, these body parts are always the most difficult to draw and that is why it is worth giving them a little more of your time and attention when you are learning to draw.
How to draw hands
A few basic rules:
1. It is necessary to practice drawing the palm in different positions. The same principle works here as everywhere else - Practice, practice and practice again.
2. Children's palms are thicker than their fingers.
3. A woman's palm is thinner and more graceful.
4. To make the palm more masculine, add angularity to it.
5. On the palms of older people, we place more emphasis on the knuckles and draw more wrinkled skin.
First, we need to understand a little about the anatomy of the palm. Take a close look at your hands. Your main goal is not to remember what part of the hand is called, study the proportions and shapes. Please note that the phalanges of the fingers are not on the same line, and the fingers cannot be perfectly straight and are always tilted in one direction.
The index, middle, ring and little fingers are quite closely connected and cannot be far from each other, while the thumb has a fairly wide range of motion.
Try tracing your hand and filling in the outline with details. This will help you understand a little better what the palm should look like in the drawing.
How to draw cool flat images in Adobe Illustarator
Before you start drawing a hand, you should first outline its overall size and the points at which the ends of the fingers will be located. Only after this the sketch is divided into several parts.
When drawing hands, there are generally accepted proportions. For example, the length of the palm is equal to the length of the index finger multiplied by 2. The index finger is equal to the ring finger, sometimes the ring finger can be slightly longer than the index finger. The little finger reaches the upper phalanx of the ring finger.
The nail should occupy half of the phalanx. Women's nails are drawn more rounded, and men's nails are drawn more square.
- If you find it difficult to draw fingers, imagine that the phalanges are cylinders connected to each other.
- Don't forget to add shadows to make your hand more realistic.
When starting to draw, try simpler options first, such as an open or unfolded palm. Gradually make the task more difficult, for example, by drawing a hand clenched into a fist.
How to draw feet
As in the first case, before you start drawing, you need to carefully study the anatomy of the foot. The structure of the hands and feet are somewhat similar to each other, however, the proportions will differ.
The length of the foot is usually equal to the length of the head of the person you are drawing. The foot consists of two parts - the heel and metatarsus (the part that is connected to the toes). The top of the foot rises to the top.
The bone that is on the outside is always lower than the one on the inside. The bottom of the foot has a curve; it is not drawn flat. The thumb is always drawn parallel to the ground, and all the rest will be lowered towards the ground.
- Another note is that if you draw the foot from above, the toes will be longer than when drawing the foot from below.
The bottom of the nail is halfway up the top joint, and the width of the nail is longer than its height. The thumb is the width of the second two fingers.
How to draw eyes
If your goal, of course, is to be able to draw portraits, then you will have to devote a lot of time to your eyes. The look is what needs to be conveyed first when drawing the eyes.
Stunning illustrations in honor of the great David Bowie
The first step is to draw the shape of the eye. In the future, when drawing portraits, you will have to devote quite a lot of time to this step, since an incorrectly shown form will ruin your entire drawing.
After this, outline the cornea. Immediately apply highlights to the pupil. Don't miss any little thing you see. The iris of the eye should not be completely round. From below and from above it is cut off by the eyelid. The iris that falls under the upper eyelid will always be slightly darker. The rest of the shadows and highlights will depend on your desire or who you are drawing.
Darken the white of your eye. Along the edges the shadows should be slightly darker.
Eyelashes are drawn as the final step. They are thicker at the base than at the end. Please note that the eyelashes are reflected slightly in the eyes.
Finally, we remind you once again that the main thing is practice. Start simple and gradually improve your skill by gradually complicating your tasks.
- Draw and get inspired with us.
- Yulia Ivanova
- Main photo taken from Depositphotos website
- How to become an artist. Books, advice, promotion
- Facial anatomy: angles, emotions, races
- 7 watercolor painting techniques for beginners
Source: https://say-hi.me/illustration/uchimsya-risovat-glaza-kisti-ruk-i-stopy.html
The benefits of finger art for kids
Scientists prove that the centers responsible for movement and speech development are located nearby. The activities of one center interact with another. Drawing accelerates children's development and teaches logical thinking. Using different colored dyes, they learn their names and learn that they can be mixed to create a completely new color.
The benefits of finger art in kindergarten are enormous:
- By working with their hands and fingers, children develop fine motor skills well.
- When children learn to draw with their fingers, it will be easier to teach them how to use pencils and felt-tip pens.
- Training your fingers and hands is a preparatory stage for the transition to working with brushes.
- By mixing finger dyes, the baby learns to obtain different shades.
- Drawing with hands and fingers for children provides a kind of reflex massage to strengthen the body.
- Teaches you to use figurative and abstract thinking and cognitive activity to create images.
- Develops perseverance, diligence, and patience.
Note ! The creative process not only develops fine motor skills in children, but also helps them develop speech.
Card file of conversations in the second junior group