“I sculpt dolls, clowns, dogs from plasticine...”
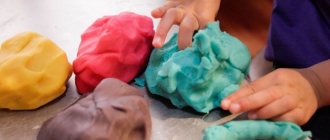
Modeling from plasticine is the only type of crafts about which they even wrote a song. We have sculpted or sculpted everyone: from the youngest preschooler to a mature adult, who, in the role of a grandmother or grandfather, together with his grandchildren, takes up sculpting again. There is no child who would not try himself as a sculptor, trying to sculpt figures of men or animals, flowers or cars from plasticine.
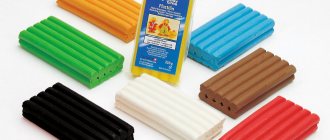
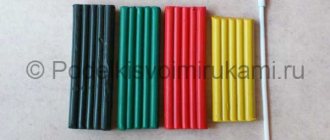
To prevent the craft from turning out badly, like the author of this song, you need to prepare for modeling. You need to choose a brand of plasticine that is easy to knead, does not stick to your hands, can be washed off clothes, and is bright at the same time. For a first grader, it is recommended to buy a set of 12 colors, including white.
Plasticine modeling is divided into the following categories:
- Subject (figures of animals, people, cars, etc.)
- Plot (consists of a composition: all its components are interconnected in meaning)
- Decorative (vase, mask, panel, etc.)
A first-grader is already ready for any of them if his work is competently directed and organized by an adult.
Plasticine dolphins
This craft can be classified as plot modeling if the child makes several dolphins and places them on cardboard, creating a composition.
Modeling from plasticine, among other skills, helps a child understand the proportions of individual parts. When creating a dolphin, maintaining proportions is especially important.
Let's start with sculpting small parts. This:
- two lateral fins;
- one abdominal;
- one dorsal fin;
- two parts of the tail;
- two eyes;
- torso.
Pay attention to the child that the double parts are the same size. The plasticine for them can be plucked off or cut with a plasticine knife.
Every detail starts with a ball. If the parts are paired, then it is better to do the work in parallel: roll one ball, immediately make the same second one, and so on. The first grader already knows how to pull out parts, press them, making them flat, and pull out one end. He acquired these skills in kindergarten.
To make the dolphin have an open mouth, we more clearly mark the slot between these parts using a knife.
Let's flatten the white balls a little and stick them in place. The black balls retain their shape.
You need to take care of this when it comes time to stick them on top of the white plates.
To make the craft neat, remind your child to smooth the surface of the parts.
The dolphin is ready.
Now we need to fashion a lifebuoy. It consists of 6 parts: three white “sausages” and three red ones. So that they come out the same size, first we cut off pieces of plasticine, three times larger than each piece. We roll it into a circle, then roll it into a briquette and divide it into three parts. Let's repeat the same thing with a different color. We connect the resulting briquettes, alternating colors.
Having made this dolphin a friend, you can place them on blue cardboard. Thin flagella made of plasticine of different colors can become a frame for the composition.
Master classes on crafts made from plasticine on the theme of autumn
If you want to start making plasticine crafts on the theme of autumn, but not a single original idea comes to mind, you can use existing ones. Step-by-step master classes are presented below.
Application made of plasticine on the theme of autumn on cardboard
An autumn-themed applique on plasticine cardboard is considered one of the most excellent ideas for preschool children. Such a plasticine picture can be made by the whole group in kindergarten or at home with parents for a competition.
Even children 3-4 years old can make an autumn leaf on cardboard on their own. Naturally, with the submission of parents, who will need to prepare a template in the form of a maple leaf.
Attention! Young children need to cut out the template with the help of their parents.
To complete the craft you will need:
- White paper;
- colored cardboard;
- plasticine of different colors;
- stationery (pencil, scissors, glue).
Step by step execution:
- First you need to prepare a template for the future sheet.
Printable wedge sheet template - Then they take plasticine of different colors, tear it into pieces and place them on the cut out template in a chaotic order.
It is advisable to select the color for the autumn season (yellow, orange, red, brown) - The laid out pieces begin to be smeared over the surface, mixing the colors with each other.
The leaf color is unique and very interesting. - The finished maple leaf is glued onto a colored base using glue.
A painting made of plasticine on the theme of autumn is completely ready. It is better to make the base from darker cardboard, this will give the craft contrast
Older children can be offered a more complex version of autumn applique made from plasticine. For example, make not just a single leaf, but a whole branch, and even strewn with berries.
To complete this you will need:
- white cardboard;
- plasticine;
- stack;
- simple pencil.
Creation method:
- First, draw a rowan branch with a bunch of berries on white paper.
Plasticine is also prepared. For applique, you can use a ready-made drawing - The application begins from the branches, for this they take a brown mass and roll out flagella of a suitable size.
Their number should correspond to the number of branches in the figure - The resulting flagella are glued to the cardboard along the contour of the design.
Lightly smear. Unevenness can be easily removed using a stack - Next comes the turn of autumn leaves.
Yellow and orange flagella are also rolled up for them, only their ends should be narrowed. The resulting elements are applied to the cardboard one after another along the contour of the leaves, filling them. The flagella can be lightly lubricated when applied to the cardboard so that the leaves are even. - The last to be done are autumn berries.
Roll small balls from the red mass and fill them with the drawn fruits. Autumn plasticine rowan looks very realistic and bright
Modeling from plasticine on the theme of autumn
In addition to plasticine applications on cardboard related to autumn, you can also make beautiful thematic figures. For example, kindergarten students can be asked to make crafts in the form of vegetables or fruits.
To make a pumpkin, you should prepare:
- plasticine orange, brown and green;
- stack;
- toothpick (pen rod or wooden skewer).
Sculpting process:
- First, a ball is rolled out of orange plasticine.
- Then it is pressed lightly.
- Using a toothpick (rod or skewer), make pressed lines around the entire circumference.
- Start sculpting additional elements. A short sausage is rolled out of a brown mass, and a long flagellum and a slightly flattened teardrop-shaped element are rolled out of a green mass.
- Connect all the resulting parts together.
Step-by-step creation of a craft in the form of a small pumpkin
In addition to vegetables, mushrooms are a symbol of autumn for many children. And molding them from plasticine will not be difficult at all.
For modeling you will need: green, white, red plasticine.
Execution steps:
- First, plasticine blanks are prepared.
Roll out white mushroom stems, one should be made longer, the other shorter and thicker. They also roll out a long thin rope of the same color. Hats are made with red plasticine, first by rolling two balls. Now fly agarics will be made, if you need to make another mushroom, the color of plasticine should be taken according to - A lawn is made from the green mass where mushrooms will grow.
The shape of the lawn can be arbitrary - Attach the blanks in the form of legs to the lawn.
Elements can be positioned at a slight angle - A ring is made from the flagellum, then the balls are flattened.
Connect the parts. Place the ring on the long stem and attach the resulting caps. The edges of the caps should be made thinner - The final touch is to make small spots of white on the surface of the caps.
And the autumn craft can be considered completely ready. In addition, you can make improvised grass under the stem of an autumn mushroom
Raven made of plasticine
This proud bird is so good that it does not require a partner. Let's refer it to object modeling.
Let's start with rolling the balls. We cut off about a fifth of the gray briquette. We cut off a larger piece from the black briquette. We roll balls.
The gray ball must be flattened to form a disk. Using a knife or a stack, cut triangles at the ends. The result is such a carved circle. We put a black ball on it.
Make indentations in the black ball at eye level using any round object.
Let's move on to the wings. They will be black, first roll two balls into a cone, then flatten it. We make cuts at the ends.
Making a beautiful beak for a raven is not easy. It is a cone, but there is a hump on one side, and it is slightly flattened on both sides. Two holes can even be made using a fountain pen.
We make the eyes from white and black plasticine. Flatten the white balls a little, carefully stick the black balls on top of the white ones so that they retain their volume.
Now the raven needs paws. These are two gray balls. We follow the pattern of the neck plumage: flatten it to the thickness of a disk and cut it from the edge into triangles, but not along the entire circle, but only half of the disk. All that remains is to put the body on its paws. A cowlick of thin flagella on the raven's head and cuts where the eyebrows should be will make the bird look cute. The cute guy is ready. If you want to preserve the craft, you can coat the craft with clear varnish. Then the plasticine will not dry out.
How to make a dog from plasticine
This dog is no less a “cute” than the previous creation. It’s quite easy to sculpt this cuteness.
Everyone understands how many blanks are needed:
- head;
- torso;
- two front paws;
- two hind legs;
- two ears;
- eyes;
- nose.
But to these details we need to add three more - these will be red spots on the muzzle and on the sides.
First we sculpt the body. We roll the ball, stretch it out and give it the desired shape. The workpiece is wider at the bottom, narrower at the top. The back is slightly curved, and the abdomen is almost straight. The head is also in the form of a block, thicker on one side, silently built up on the other side.
We connect the head and torso. Immediately attach spots: one around the eye, two on the sides. Smooth out the workpiece.
Let's immediately create the eyes: white circles at the bottom, black balls at the top.
The dog's front paws resemble two small pokers. They are molded in front of the body. The dog will be in a sitting position. The hind legs are flattened balls. They are attached under the body.
This is where you can allow a violation of proportions, so when sculpting the dog’s ears. This will not spoil him at all, it will only make him naive.
All that remains is to attach a black nose and two white circles on both sides of the nose. The dog is ready.
To keep him from being sad, make a bone for him. So the composition came out.
Elephant made of plasticine
Any child can complete this simple craft during the lesson. For it you will need a block of gray plasticine, a little white and literally two crumbs of black.
Let's start with the torso. The size of the remaining parts also depends on how big it is. There are not many of them. This:
- Four legs;
- Two ears;
- Two tusks;
- two eyes;
- tail.
To make the body, you first need to roll the ball, roll it into a cylinder, then stretch it a little so that on one side the part is slightly thicker than on the other.
Also, roll two oblong cylinders from gray plasticine; you can call them “sausages”, since they are much thinner than the body. The length of the workpieces should be the same, but different in thickness: one cylinder is thicker than the other. Place them side by side and cut them in half at an angle of 45 degrees. These will be the elephant's legs. The thinner ones are the front ones, the thicker ones are the rear ones. They can already be stuck in place.
Making an elephant's head is quite simple: roll it into a ball and extend the trunk on one side.
An elephant's ears are triangular. You need to flatten them so that they are the size of a body with legs. Stretch one end and stick it in the head.
Stick the head to the body. All that remains is to mold the tusks; they should be white. And the eyes are black: you need to roll very small balls and stick them on your head.
The elephant is ready. If you have time left, you can continue: sculpt palm trees. Place an elephant and a tree on yellow cardboard, next to a puddle - a cake made of blue plasticine. This is already a composition. Each child will come up with something to add to it themselves.
Autumn tree
Another interesting autumn tree. It can be completed by 1st grade and 2nd grade students. A visual presentation will help the children understand the master class better.
Related article: DIY leather embossing with photos and videos
You will need:
- Cardboard (blue or dark blue);
- Plasticine;
- Napkin;
- Modeling board.
Roll out flagella of different colors from plasticine.
Twist them like a snail.
From the resulting spirals, form the crown of a tree.
Make a trunk from brown flagella.
Cut off the excess bottom of the trunk.
Form waves from the remaining flagella and arrange them to imitate fallen leaves.
Make a frame from lilac and red sticks.
The craft is ready!
Donkey
The figurine of this animal is a little more complex than an elephant. The donkey is decorated with a bushy tail and a curly mane, so additional work will be needed.
Let's start with the head. It is very important to sculpt it in the correct shape. Once this detail turns out, then the donkey itself will work out. Roll out the brown ball into a cylinder, stretch one end out a little. Press the attachment point to the body slightly with your finger.
Now we need to “conjure” with this blank. Any hard object with a rounded end will help with this. You need to make dents for the eyes and nostrils. Immediately sculpt the eyes and put them in their places: stick a black ball onto the white flattened ball.
With the legs, you don’t need to be tricky: sculpt four identical cylinders and place the body on them - a thick cylinder, rounded at the ends.
The tail of this cute animal requires attention. It must be woven from thin flagella, which differ from each other in shades of brown.
The donkey's mane also requires a creative approach. It also consists of flagella. They need to be twisted at the ends, and lines should be cut at the base with a plasticine knife.
Such a donkey stands firmly on its legs and is ready to amaze with its beauty.
Features of modeling from plasticine in 1st grade and necessary materials
At the age of 6-7 years, when the child is sent to first grade, his educational, working and creative life begins. To make the process of sculpting plasticine crafts interesting and exciting, and not cause denial (“I can’t do it,” “I can’t do it”), it is important to take into account some features. When working, the child needs:
- A good example. It is still quite difficult for a child at this age to imagine the final result of his activities. Therefore, he needs a sample of what should happen when working with plasticine. You should not give assignments on a free topic.
The baby needs to see what he must do, and also understand how to do it. - Step-by-step instruction. It is important to show what parts the figurine consists of, as well as how to assemble them into a single whole.
- Individual approach. Some children have been able to sculpt since kindergarten. Others have a harder time completing the task. The teacher must help a student who is having difficulties.
- Praise and recognition. All people, both adults and children, need praise. And it doesn’t matter whether the craft is done correctly or if there are shortcomings, the child should be praised for his efforts.
To make plasticine figures you will need the following materials:
- actually the plasticine itself;
- plastic board;
- a set of stacks for modeling (spatulas, spoons, cutters);
- rolling pin;
- molds for making different shapes;
- scissors;
- protective equipment so as not to stain clothes (apron, sleeves).
Remember!
It is also important to pay attention to the quality of the plasticine so that it does not contain hazardous substances. There are different types of plasticine, each type has its own advantages and disadvantages:
- Paraffin. This is the most affordable and frequently used material. The downside is that it is hard and stains your hands and clothes.
- Wax. It is quite expensive, but has a number of advantages - it is soft, does not stick to your hands, and is easy to wash off.
- Quick drying. This look is ideal for crafts. It is very flexible, so you can make anything from it. Due to the fact that the material hardens quickly, it is not suitable for reusable use.
- Smart. This is a modern plasticine that is flexible and soft. Some of its types even have the property of being magnetic. The downside is the high cost.
See also:
Crafts from cotton pads and sticks for children - step-by-step instructions ✂
Fox made of plasticine
The more accurately the elements of this animal are executed, the more beautiful the craft will be. Its production must be approached patiently, without rushing.
Plasticine is needed in three colors:
Red, white and black.
We begin to sculpt the fox from her head. Separate a piece from the red block and roll it into a ball. Further work proceeds according to the principle: where necessary, we will stretch, where necessary, we will suppress. The chanterelle's cheeks should be pulled out as carefully as possible. And press the places where the eyes will be with an object with a rounded end. This could be the back of a crochet hook or an ordinary fountain pen. The nose is a cone with a sharp end curved upward. We sculpt it from white plasticine. And the tip of the nose is a black ball. Two similar balls, but slightly flattened, will serve as eyes. Let's make the pupils in the form of white balls.
You need to work on your ears. We make two red triangles. And they will have a black border. To do this, roll up two black flagella, flatten them and stick them on the top of the ears. That's not all. Having “placed” the ears on the fox’s head, you need to carefully press the dent with an object with a round end. According to their size, we sculpt two white triangles and insert them into the ear. The head is ready.
The body of a chanterelle is an ordinary column with rounded ends. You can immediately put your head on it. And now it’s convenient to modify the cheeks: draw stripes with a sharp object.
The fox will have a white belly. To do this, roll a white ball, make it oval and flatten it. We stick such a cake, as smooth as possible, with smooth edges and symmetrical, on the front of the body.
The little fox's paws are also quite complex in shape. You can simplify the task: make the front ones in the form of straight sticks, and the back ones in the form of an obtuse triangle. But it is advisable to make a black base of the paw: without this, the craft will greatly lose in appearance. If a child has good technique, he will be able to sculpt paws like in the photograph. The toes must be cut through with a stack.
Fashioning a tail is also an art. True, technically this is much easier to do. Let's make two balls: white and red. We’ll pull out the red one on one side, and on the other we’ll make a dent the diameter of a white ball. We insert the white ball halfway into the hole, fasten the parts and pull out the other end too. All that remains is to attach the tail, and find a worthy place for the freshly sculpted fox so that everyone can admire it.
How to make autumn crafts from plasticine
Plasticine modeling for children on the theme of autumn is a great idea for creating crafts for kindergarten or school. It can be made in the form of vegetables, which are abundant at this time of year. Animals storing mushrooms and pine cones for the winter can also be no less interesting. An original idea could be an applique that depicts a forest with shimmering autumn colors. In any case, for the craft you will need to stock up on plastic mass, preferably orange, yellow, red, brown and black, as well as a stack, a toothpick and cardboard.
Plasticine machine
The craft is very suitable for boys, given their restlessness. It won't take much time for a piece of plasticine to turn into a toy car.
Let's start with the body. You can work especially hard on this detail, achieving the desired shape and smoothness of the surface. Then we take the stack and symmetrically cut out the recesses in place of the black wheels.
We roll out a thin cylinder from black plasticine, cut it into four parts - we get wheels. We mold them to the body in the prepared recesses.
White plasticine will be needed to mark the car windows. We sculpt the side windows in the shape of trapezoids, the windshield and rear windows in the shape of an oval.
All that remains is to complete the rear view windows. Balls of the same size must be flattened on one side and the parts should be stuck in their proper places.
Now it's time to work with the stack. Cut recesses along the line of the hood, trunk, doors.
The car is done.
Bear
If the head of this bear is successfully sculpted, then we can consider that the craft was a success. There are few difficulties here, but you need to know a couple of secrets.
First we make a brown ball. We attach the tongue and muzzle to it. Let's make an evenly shaped disk from brown plasticine, and attach an orange disk of slightly smaller diameter to it. Using a stack, cut the workpiece in half. These are bear ears, they can already be attached to the head. We attach a round black nose to the muzzle. The eyes will be black: two small balls. This is everything we wanted from a face.
The body is simple: a column with rounded ends. We will glue the belly in front: an orange oval.
The front paws are also a column of appropriate thickness, slightly curved. Let's make the hind legs with the feet. We denote the feet themselves with orange ovals. We attach the paws so that the bear sits.
Easter eggs made of plasticine
They will definitely surprise you with their ease of manufacture and bright, elegant appearance.
Required:
- Kinder surprise egg;
- Plasticine of different bright colors;
- Several beads.
We begin to roll the flagella: as thin and as long as possible. We put several beads in the egg; if you don’t have any, you can put a little cereal, it will also rattle.
We close the egg and begin to wrap it with flagella, alternating colors.
In a stack we make slots of the same length and at an equal distance from each other.
You can decorate the eggs with flowers.
Let's make a fairy tale. Master class “Kolobok on a stump”
Vera Karpovich
Let's make a fairy tale. Master class “Kolobok on a stump”
KOLOBOK.
Take a standard block of yellow plasticine. Since lately they have been saving on everything and the bars are getting smaller and smaller, it is better to take two bars. Mostly my bars are not whole, but what’s left over from the last school year, so I form the block by eye.
So, we take the block and divide it into two parts.
Roll one part into a ball.
Pinch off some white plasticine and roll into two balls. Using a stack, cut out a hole for the eyes in the yellow ball and insert two identical balls of white plasticine into it, onto which attach two tiny black balls.
Kolobok has regained his sight!
Now cut out Kolobok’s .
Make lips from red plasticine, which must be rolled out with a roller. To keep the roller even, use two boards.
Glue the lips on top along the edge of the mouth. Although, you don’t have to do this, but you can’t do it without a nose! Roll the nose out of orange the size of a bun's . Glue red or pink petals to the corners of the mouth, these will be the cheeks, and above the eyes attach eyebrows from orange plasticine.
If you want your kolobok to have arms and legs , then take yellow plasticine and roll out four small cakes from it. Use a stack to make notches on the flatbreads. This is how our Kolobok will have fingers .
Our Kolobok is ready ! Let's move on to the stump .
BIRCH STUMP.
To sculpt a stump we need white plasticine. For a small stump, one bar will be enough, but if you want a larger stump, you will have to take two. But usually white plasticine is in short supply, so you can make a stump from a mixture of leftover plasticine, and then stick it with white plasticine rolled into a cake.
Please note that your roller should be one and a half higher than the final stump.
Now make a beautiful cut on the hemp . To do this, take two pieces of brown and orange or black and white. Roll them into thin rolls of equal length and press them with your fingers from the sides so that you get two thin, narrow strips.
Press these strips tightly against each other and carefully roll the resulting workpiece into a roller.
In order for the workpiece to harden, it must be cooled, put it in the refrigerator for a few minutes or simply in cold water. When the workpiece is hard enough, use a sharp knife to cut a piece from it the same way we cut sausage. Glue an even piece with a spiral pattern onto the top of the stump.
Now let's make hemp . Roll small sausages of different sizes from white plasticine. Make cuts in a stack so that you get branches of the roots.
I hope everything is very clear and simple!
Good luck in your endeavors!
Flowers for March 8
First graders will perform this craft with special diligence. A gift for mom on Women's Day will be very beautiful.
Required:
- Computer disk;
- Plasticine in red and green colors;
- Stack.
Let's make a rose. Roll out a piece of red plasticine into a rope, flatten it into a strip and roll it up like a snail. Let's make three flat cakes, also red. Let's stick them around the "snail". The bud is ready.
Let's make a leaf out of green plasticine. Roll up the rope and flatten it so that the middle is the widest. Let's draw the veins in a stack.
We will attach the rose to the disk. Next to it we will place two more red disks. We will push round holes into them.
It remains to sculpt a couple more petals, and the composition is ready.
Step-by-step description of crafts
So, everything is ready for work, you can start creating. Let's take a step-by-step look at some simple examples of interesting crafts for kids.
Plasticine hedgehog with seeds
This funny hedgehog is easy to make and looks very creative and cool. To work you will need brown plasticine for the body, beads for the eyes and ordinary black sunflower seeds.
- Roll a ball out of brown plasticine.
- On one side we pull the ball out a little so that it looks like a drop.
- The eyes and nose can also be made from plasticine, or they can be replaced with beads.
- Place sunflower seeds on the back of the hedgehog, sharp ends up.
- When the entire back is covered with “needles,” place the finished craft on a piece of cardboard. You can decorate the back of the hedgehog with a miniature plasticine mushroom or apple.
Candy on a stick
Multi-colored plasticine lollipops will undoubtedly appeal to kids. To work you will need multi-colored plasticine and matches or skewers for canapés.
- Make as many small balls as you like from different colors.
- Roll the balls into thin sausages.
- Then you can improvise with the appearance of our candies. Take two sausages of different colors and twist them into spirals. The sausages can first be twisted into a pigtail. String the finished lollipops onto sticks and you can take a colorful photo.
Bouquet of flowers
The variety of bouquets created from plasticine is limited only by the sculptor’s imagination. Let's conduct a small master class on making a simple version of this craft.
- Prepare red, pink and green plasticine.
- Roll the green into thin sausages and cut into seven approximately equal parts.
- Roll the pink plasticine into a sausage, then turn the sausage into a strip, flattening it.
- Divide the strip into seven parts and roll each part into a spiral, these will be buds.
- Plant rose buds on green stems.
- Collect a bouquet and decorate with a red plasticine bow.
Plasticine Christmas tree
On New Year's Eve, you can make a beautiful Christmas tree with your kids. To do this you will need green plasticine, a bamboo stick and scissors.
- Build a cone from green plasticine, choose the size to your taste.
- Place the cone on a bamboo stick, the trunk of the Christmas tree.
- Using the tips of the scissors, make small cuts along the entire cone in a checkerboard pattern, bending the tips of the resulting “needles” slightly upward.
Funny turtle
Step-by-step instructions will help you easily make a funny and cute turtle together with your child.
- For the base you will need brown and green plasticine. You can use beads for the eyes, or you can sculpt eyes from white and black plasticine.
- Roll six balls from green plasticine. One larger one for the head, and five smaller ones for the paws and tail.
- Make a large ball out of brown plasticine, then form a shell.
- Glue small flattened circles of brown plasticine onto the shell, imitating the texture of the shell.
- Draw a head on an elongated neck, paws and a tail. Attach them to the shell.
- Use a toothpick to make nostrils and draw a smile. Add eyes to the turtle and the craft is ready.
By doing sculpture with their child, parents help their child develop creatively, and there is also a chance of discovering the true talent of their child.