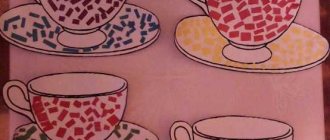
DIY colored paper applique for 1st grade children. Birdie
Application made of colored paper “Bird” for children 7-8 years old. Master class with photos and templates
Master class: Application from colored paper “Bird”
Author: Elena Nikolaevna Nechaeva, primary school teacher, KSU “Secondary school No. 21, Saryozek village” Osakarovsky district, Karaganda region Kazakhstan “Applique” translated from Latin means “application”.
Indeed, in order to make an applique, you need to attach the cut out parts from paper or fabric to a base of plain or colored paper or fabric. The handicraft master class is designed for children aged 7-8 years and for those who like to work with colored paper. The material can be used in labor lessons or in circle work. This application is relevant in the spring, as we are waiting for the arrival of migratory birds .
Goal: developing the ability to perform interesting works from colored paper. Objectives: to teach how to correctly select the color scheme of paper for applique; observe safety precautions when using scissors at work; develop imagination, fantasy, creativity; cultivate perseverance and accuracy while performing work. Materials and tools necessary for making an applique: cardboard, colored paper, scissors, glue, pencil, black felt-tip pen or marker, templates, sample work.
Making the “Bird” applique Guys, what time of year is it now? What changes occur in nature in spring? That's right, it's a wonderful time of year. Spring! Everything is waking up after winter hibernation. Buds appear on the trees, the first grass appears, the first flowers bloom, birds fly in. Today we will make the “Bird” applique. Birds can be very different, of different colors, with different hats. Choose the right paper colors. Guys, we will need to work with scissors, let's remember how to handle scissors while making an applique. Safety precautions when working with scissors: Use scissors with rounded ends. Store the scissors in a specific place, with the sharp ends facing away from you. Pass the scissors rings first with blades closed. You can't cut on the go. When working with scissors, it is necessary to monitor the movement and position of the blades during operation. Do not use blunt scissors or loose hinges. Do not hold scissors with the blade facing up. You have templates on your tables, using them we will cut out all the details of the bird.
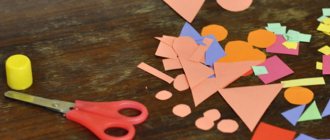
Choose colored paper. Trace the templates and cut out the pieces.
Take a part of the bird’s body, spread it with glue and glue it to the cardboard below the middle.
Take the cut out two wings and coat them in turn with glue and glue them on top on the left and right sides.
Apply glue to the head and glue it at the top, extending onto the body.
Glue on the cap.
Glue circles (polka dots) and a bell onto the cap.
Glue the beak down onto the head.
Spread glue on a twig and glue it to the bottom of the bird, just below the body.
Next, we plant the bird on a branch, gluing its legs. Glue two green leaves onto the branch.
Let's draw two sleeping eyes with a felt-tip pen.
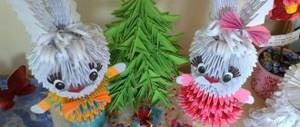
The bird sleeps on a branch. You can make the bird's eyes open.
We recommend watching:
DIY colored paper applique for 1st grade children. Cat Applique made of velvet paper “Baby Elephant” for children 7-9 years old. Templates. Master class with photo Bird using 3D applique technique for children from 7 years old. Master class with photos DIY application for children 6-8 years old step by step with photos and templates. The Scarlet Flower
Similar articles:
DIY fabric applique. Master Class
Simple examples
Paper applications require very few materials:
- A thick sheet of paper or cardboard for the background;
- Colored paper;
- Glue stick or PVA with a brush;
- Napkin;
It is best to start with the simplest applications.
A good example is the mushroom pattern.
Then you can move on to more complex compositions with more details.
Flower patterns and vases:
If the child is a little older, you can create compositions using corrugated paper. Templates for paper applications for children will help.
Related article: DIY glass pendants
There are several types of applications:
- Overlay – obtained by gluing various shapes onto a base.
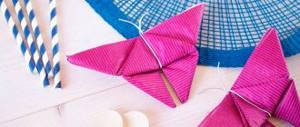
- Symmetrical - obtained by folding a sheet of paper in half and cutting out a figure.
An example of such an application is a butterfly.
- Precipitous. Small pieces come off sheets of paper. A solid pattern is formed from them.
- Ribbon - allows you to decorate a whole garland. The paper is folded in several layers, a part is cut out of it, it is unfolded, resulting in a garland.
- Modular - several figures are assembled into a single whole.
- Volumetric.
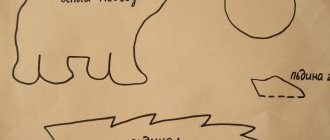
Template for volumetric applique:
It turns out to be a balloon.
An interesting work would be a paper hedgehog. To help - a hedgehog template.
Technology. 1 class. Toolkit
The manual is published in combination with a textbook and workbook. The textbook complies with the Federal State Educational Standard for Primary General Education, is recommended by the Ministry of Education and Science of the Russian Federation and is included in the Federal List. Thematic planning, lesson-based methodological recommendations, lesson notes of various types will help the teacher competently and interestingly structure the teaching of technology in the 1st grade.
The book contains the author's work program on technology for grades 1–4.
Content
Goals and main objectives of the course Contents of the educational complex for grade 1 Approximate thematic planning for the year Methodological recommendations
First quarter
- Lesson 1. Introduction to the textbook
- Lesson 2. Introduction to materials. Paper and cardboard. Broken applique
- Lesson 3. Dividing a square into parts
- Lesson 4. Folding paper toys according to the pattern
- Lesson 5. Folding a model from a rectangle
- Lesson 6. Natural materials and their properties
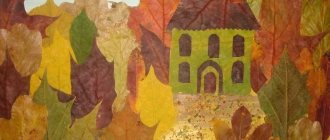
- Lesson 7. Decorative paper processing using fallen leaves
- Lesson 8. Volumetric modeling from natural materials
- Lesson 9. Application from dried leaves
Second quarter
- Lesson 1. Symmetrical cutting. Making templates and stencils
- Lesson 2. Paper applique
- Lesson 3. Introduction to plastic materials. Plasticine background
- Lesson 4. Modeling three-dimensional products in a constructive way
- Lesson 5. Modeling from a whole piece
- Lesson 6. Construction from parts of the Mosaic construction set
- Lesson 7. Designs from strips of paper
Third quarter
- Lesson 1. Construction from parts of the “Figure and Form” construction set
- Lesson 2. Introduction to textile materials
- Lesson 3. Combined works from obtained materials
- Lesson 4. The art of tying knots - macrame. Tying knots “Capucin”, “Earring”
- Lesson 5. Weaving parts. Chain "Screw"
- Lesson 6. Modeling from wicker parts. Tree crown formation
- Lesson 7. Making an ornament on a plasticine background
- Lesson 8. Creating a thread by twisting
- Lesson 9. Mosaic from pieces of paper
- Lesson 10. Fabric and knitwear. Obtaining the material “wavy thread”
Fourth quarter
- Lesson 1. Thread applique
- Lesson 2. Applique from fabric scraps
- Lesson 3. Introduction to the material. Wire. Making a wire product
- Lesson 4. Introduction to the material. Foil. Manufacturing of foil products
- Lesson 5. Combined works from plasticine and seeds
- Lesson 6. Combined works from foil, plasticine and seeds
- Lesson 7. The world of professions. check yourself
Examples of lesson notes Work program on technology. 1–4 grades