Marina 03/28/2019 Handmade Leave a comment 314 Views
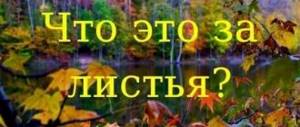
Golden autumn is the most beautiful time of the year. Despite the fact that nature is preparing for natural sleep, we can see rich and bright colors everywhere. At this time, crafts made from the natural gifts of autumn will come in handy for primary school children and their parents. You can create real works of art, the main thing is to approach the creative process responsibly and carefully. It is especially interesting to do arts and crafts with children. We have prepared for you a selection of interesting applications made from leaves (1st grade at school can easily master this technique). All actions are described in great detail and accompanied by photos.
Children have limitless imaginations and take any process very seriously. Therefore, before you start making autumn crafts, it would be good to take a walk in the forest together with the whole family and get a lot of pleasant emotions. Let the child independently collect leaves for his composition. Thanks to this, he will form an idea of what kind of work of art he will create.
So that your child has an idea of what the applique is, you should first tell him about it, showing him what pictures can be made from leaves.
We recommend using only collected leaves for making crafts, as leaves that are too dry will crumble too much and the composition will turn out to be of poor quality. There are two most common methods for drying leaves:
- Place each sheet separately between the pages of an old book;
- Iron each sheet thoroughly.
Read this: Application in the preparatory group: a selection of ideas for children
Choose the method you like best. In the world of applied art, there are various technologies for making appliqué. Let's look at some of them.
Presentation for the lesson
Attention! Slide previews are for informational purposes only and may not represent all the features of the presentation. If you are interested in this work, please download the full version.
Lesson objectives:
- educational aspect:
teach children to work with natural materials, dried leaves, to use scissors and glue correctly; - developmental aspect:
develop imagination, thinking; - educational aspect:
education of accuracy when working with natural materials.
Equipment : Samples of finished applications; presentation for the lesson demonstrating the order of the work; colored cardboard, scissors, PVA glue, rags.
During the classes
I. Organizational moment
II. Introductory conversation. (title slide of the presentation).
Teacher : I would like to start today’s lesson with the poetic lines of S.A. Yesenina:
The golden foliage began to spin.
In the pinkish water on the pond, like butterflies, a light flock of butterflies flies breathlessly towards a star.
— Tell me, what does the poet compare the leaves falling from autumn trees to?
Children : - With a light flock of butterflies.
U.: - How does the flight of a fallen leaf resemble the flight of a butterfly?
D.: — Leaves also flutter in the air, a light breeze can carry them to the side.
— Butterflies sometimes freeze in the air, and then continue their flight again.
III. Lesson topic message.
U.: The leaves are already on your desks, they have interrupted their flight. But will we have butterflies?
Let's guess the riddle (slide number 2).
There are two petals on the flower, And there is not even a stem, And besides, it flies, Tell me, what is it called?
D: This is a butterfly.
U.: Today in the lesson we will make a “Butterfly” leaf applique.
IV. Sample analysis.
U.: Look at the butterfly (slide No. 3). How does she look? How many wings does she have?
D.: - The butterfly has two pairs of wings. As a pair, the wings are very similar.
U.: What kind of body does a butterfly have?
D.: - The body is narrow and long.
U.: What is located on the head of a butterfly?
D.: - The antennae are thin. The eyes are small.
U.: - Now let’s look at the leaves that you have (slide No. 4).
- We will need 2 beautiful identical leaves for the upper wings, 2 smaller leaves for the lower wings, a narrow leaf for the body, seeds for the eyes, stalks for the antennae (slide No. 5).
- Let's now think about what materials and tools we will need, and prepare a workplace (slide No. 6).
D.: - We will need cardboard for the base of the applique.
— Brush and PVA glue, scissors.
U.: I’ll tell you that we also need a folder where we can dry the applications. It’s even better to put them under a press or press them down with something heavy on top. Then the leaves, having absorbed the glue, will not warp and dry smooth and beautiful.
- Now let’s prepare and fix everything at the workplace. Remind me, what are the basic rules for working with scissors?
D.: - Take scissors in your hands only when they are required to complete the work.
— You can pass or hand scissors to a neighbor only with the rings facing forward.
U.: Remember the basic rules for using glue.
D.: — A small amount of glue should be applied with a brush.
— The glue layer must be even.
U.: To work with dry leaves, it is better to use PVA glue.
V. Explanation of the sequence of work.
U.: Let’s look at the sequence of work (slide No. 7).
Let's choose two of the most beautiful identical leaves for the upper wings, and smaller leaves for the lower wings (slide number 8). A long narrow leaf is suitable for the body (slide No. 9). We will select stems for the antennae, and seeds for the eyes (slides No. 10-11).
All prepared parts must be laid out without gluing on cardboard (slide No. 12), and then each part must be glued in place (slide No. 13). You need to spread glue on the parts on a rough piece of paper or a piece of newspaper. They are on your desks. When gluing each part, you need to press it with a cloth (slide No. 14) so that the cloth absorbs excess glue and better presses the part to the cardboard.
— The finished application should be placed in a folder and then under a press (slide No. 15).
— After the work is completed, you must wash the brush and tidy up the work area (slide No. 16).
- Let's see what kind of butterflies you can get (slide number 17).
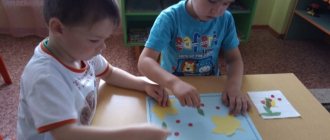
VI. Practical work.
Children complete the task. As the lesson progresses, the teacher provides individual assistance to students.
VII. Lesson summary.
An exhibition of the resulting works is made on the board.
U.: — Who would you like to give your applique to?
D.: - Mom, grandmother, friend.
U .: When the applique dries, it can be inserted into a frame and hung on the wall.
Did you enjoy today's work? And in the next lesson we will be able to make a new animal out of leaves. Let's guess the riddle (slide number 18):
The tail is a fluffy arch, do you know this animal? Sharp-toothed, dark-eyed, loves to climb trees.
D.: This is a squirrel.
T: At home, prepare leaves for the next lesson, from which we can make a squirrel.
Students clean up their workspaces.
"Goldfish"
To make this craft we will need:
- Colored cardboard (preferably blue);
- PVA glue;
- Scissors;
- Glue brush;
- Black marker;
- Multi-colored dried leaves.
In the photo below you can see how the fish turned out:
Step 1. First, you should assemble this composition on colored cardboard.
Note! Do not use glue at this time. Now only the fitting stage is taking place.
Step 2. Once you have decided on the location of the objects on the sheet, it’s time to proceed directly to gluing. It is more convenient to apply PVA glue with a hard brush.
Step 3. When all the elements of our picture have dried well, you should draw the eyes and mouth of the fish.
These are the cute inhabitants of the deep sea we got!
Related article: Second life of old things: remaking trousers, T-shirts and jeans
Leaf application (grade 1): lesson notes and presentation with photos
Golden autumn is the most beautiful time of the year. Despite the fact that nature is preparing for natural sleep, we can see rich and bright colors everywhere. At this time, crafts made from the natural gifts of autumn will come in handy for primary school children and their parents. You can create real works of art, the main thing is to approach the creative process responsibly and carefully. It is especially interesting to do arts and crafts with children. We have prepared for you a selection of interesting applications made from leaves (1st grade at school can easily master this technique). All actions are described in great detail and accompanied by photos.
Mosaic technology
The very name of this technique speaks for itself: the leaves will be fragments of a single whole mosaic composition. When making such an applique, you should use scissors to give the required shape to the leaves.
The Mosaic technology is somewhat complex due to the need to create symmetry of the image relative to the center . You will have to spend a lot of time looking for identical leaves for both sides of the picture. But the result is worth it. You can get a beautiful butterfly with amazing openwork wings.
Powder and drawing
To create an amazing application with powder, you need to grind the dried leaves into fine crumbs. You can use tea instead of leaf crumbs. Just two leaves to create a ballet skirt and a handful of crumbs from dry leaves - you get a wonderful dancer.
Undoubtedly, patterned applique is the most favorite applique technology among kids.
To create such a cute creature, we will need one dried birch leaf, a white sheet of paper, a dark felt-tip pen and a child's imagination.
We glue a piece of paper onto the base and fill in the rest with a felt-tip pen, using our imagination.
In this way, you can create a variety of fabulous animals. If the baby is still small, you can help him and find a blank on the Internet. For example, you print out the body of a hedgehog, and use dried leaves to create needles for it. Using the same technique, you can make an “Aquarium” craft. To create a beautiful background, you can use watercolor paints, and make fish from colorful leaves.
Crafts and drawings from autumn leaves
Marina Shevelkova
Crafts and drawings from autumn leaves
Crafts from autumn leaves
Autumn is an excellent time for a child to become more familiar with natural materials. This wonderful time of year provides us with numerous opportunities to implement various creative ideas related to making flowers, paintings, and bouquets of autumn leaves.
There are many ways to create beautiful crafts and interesting applications using autumn leaves.
1. Application from dry leaves
The simplest and easiest form of creative activity to perform is appliqué. It can be created even together with the youngest children. In this case, we use templates on which dry leaves are glued.
Also, the missing details of the images can be completed with colored pencils or felt-tip pens.
At the same time, as the child grows up, you can complicate the tasks and use more complex figures.
By creating crafts from autumn leaves with your child, you not only form an emotional and trusting relationship with the child, but also develop his creative abilities.
2. Cut out figures from fallen leaves
Here, autumn leaves are used a little differently - it's just a material for cutting out simple figures and letters. This must be done BEFORE the sheet dries, otherwise it will crumble. First we cut it out, then we dry it. So you can cut it
simple silhouettes (animals, houses, clouds).
3. Paintings of flowers and leaves
With older children (from 5 years old), you can create more complex crafts using dry leaves. For example, making whole paintings.
Glue dry leaves of the desired color onto the picture.
Additionally, you can use branches, sticks, and small dry leaves.
This kind of work is not difficult to do, but it is quite labor-intensive and requires perseverance. Therefore, you should choose whether this way of working is right for your child.
4. Leaf frames
You can also create a frame of autumn leaves with your child. A child over 4 years old can create such a craft.
To create a frame, take the leaves and dip them in hot water to soften them. After dipping, you need to spread glue on each leaf and glue it to the frame itself.
After complete drying, it is necessary to coat the leaves with matte varnish.
For the autumn exhibition, you can make frames for photographs and for the design of essays and poems on the theme of autumn.
5. Roses from autumn leaves.
You can also try to preserve the color and aroma of autumn by creating incredibly beautiful delicate and light crafts from leaves - roses.
For autumn roses we will need ordinary fallen maple leaves.
To create one rose, you only need 4-5 leaves, which are rolled up one by one. The entire flower is fixed at the base by tightly winding ordinary threads of yellow or orange color to match the autumn leaves, and the stems of the leaves, collected together during the formation of the rose, serve as the stem of the flower and allow you to assemble a whole bouquet or create a composition from such roses.
6. Herbarium
You can make a herbarium with your child from dried leaves and flowers. By participating in the process of creating a herbarium, the child gets acquainted with the world around him and develops his powers of observation. In addition, the design of a herbarium contributes to the development of accuracy, composure, and the ability to work with literature.
7. Crafts from flowers. Leaf Crafts
The technique for making this original craft from flowers and plant leaves is very simple.
You will need an old toothbrush and watercolor paints. A composition of leaves, blades of grass and flowers is laid out on a sheet of paper, after which paint is sprayed over them using a toothbrush.
8. Leaf prints on paper
You can paint the leaves with paint and make prints on paper.
9. Create a picture from broken leaves.
A child is a creative and creative creature. To develop his abilities and for general development, regularly create masterpieces with him. Crafts with your children will help you develop a multi-faceted personality.
If you start creating masterpieces with your child, your child will not only express his emotions in creativity, but after a while you will get to know his world, desires and fantasies, and this is the most important thing in the relationship between parents and child.
We wish you creative success!
painted leaves
A very interesting technology for processing dried leaves involves creating a pattern directly on natural material. In this way you can make a family of beautiful fish, hedgehogs or kittens. The essence of this method is simple: various patterns are applied to the sheet using paint (it is better to use gouache for these purposes). It could be ornaments or some kind of stripes. In general, everything your heart desires.
After drying, you can add cute faces to the leaves and you will get fairy-tale creatures. Together with your child, you can compose an entertaining fairy tale about them.
Using this technology, you can create characters from your child's favorite cartoons.
Works on cardboard
Applique is a very common type of children's creativity, which is actively used in kindergartens and primary grades of secondary schools, as well as in creative circles. Kids really enjoy creating unusual works with their own hands, especially since they can use their imagination to the fullest.
We present to your attention a small selection of photographs on the topic “Applique as a type of children's creativity”, on the basis of which you can create an entertaining picture yourself together with your child for yourself or as a craft for school. If you are a teacher, you can easily add such ideas to your lesson notes.
Owls made from autumn leaves (birch, aspen, maple):
Cute hedgehogs made from leaves:
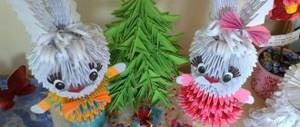
You can create entire fabulous presentations with your favorite characters!
Hedgehog made of leaves. Step-by-step photo master class and video
Now let’s figure out how to make a “Hedgehog” craft from leaves on the theme of autumn for school in 1st grade. Hedgehogs made from foliage can be very different; below are photos of applications with this small and cute forest hero. The main thing is to understand the principle and create according to your own discretion and imagination.
What we will need:
The base is thick white paper or cardboard.
- watercolor or gouache.
- colored paper.
- plasticine.
- scissors.
- PVA glue.
- dried autumn leaves (how to dry them correctly is described in the article above).
Let's get creative:
- We tint the base (paper or cardboard) with any color using watercolor or gouache, diluting it with water. Leave until completely dry.
- We draw with thick paint or cut it out of colored paper and glue the hedgehog’s face onto the base.
- Now let's move on to the spines of leaves. We glue them in order, starting from the back, and the front ones should cover the tips of the previous row.
- Now we sculpt from plasticine or draw eyes, a nose, and paws with paint.
- If desired, you can decorate the resulting picture with leaves, depicting trees or mushrooms (1 oval leaf vertically - the leg and on top half a larger leaf - the cap).
- At the bottom you can glue moss and dried flowers, whatever your imagination suggests.
Below is a video to better imagine how you can make a hedgehog from natural material on paper.
Summary of a lesson on work on the topic “Butterfly from autumn leaves” with presentation (grade 1)
By installing the recommended software, you agree to the license agreement for Yandex.Browser and Yandex desktop software.
Document selected for viewing Notes 1kl_Butterfly from autumn leaves.docx
Lesson summary on labor training. 1 class.
Theme: Application of autumn leaves “Butterfly”
Goal: to create conditions for the development of students’ creative abilities during the production of the “Butterfly” appliqué.
Objectives: learn to use natural material (dried autumn leaves) in making applique, master the technique of making a butterfly;
develop practical skills in working with scissors, glue, natural materials, patience, perseverance, accuracy, fantasy and imagination, critical thinking;
cultivate conscientiousness and independence in work.
Equipment: natural material - dried autumn leaves, scissors, glue, electronic presentation.
1. Org. moment. Psychological mood.
The cheerful bell rang
Is everyone ready? All is ready?
We are not resting now,
We are starting to work.
2. Checking readiness for the lesson. Repetition of safety rules when working with scissors and glue. (Presentation)
During the classes:
1. Organizational moment.
2. Statement of the educational task.
— At the beginning of autumn, you and I visited, together with our regional Chuchkoshi , a school garden and collected a large amount of various foliage , which we then dried together according to all the rules in order to, together with Chuchkoshi , today draw up a beautiful autumn card, which we will present to our friends on Elderly Person’s Day. grandmothers. Let's remember what trees and shrubs we met in the school garden?
- (children’s answers: slides - apple tree, chokeberry, mountain ash, rose hip, aspen, maple, oak, etc.)
Chuchkosha , came to visit us (slide)
who will observe our work today in
class . Let's tell him about what we learned in the last technology lesson
- (Children's answers - composition)
- Right! We know the rules of composition and we have wonderful leaves from our garden . Let's try to formulate the topic of the lesson and set ourselves tasks
3. Mastering new knowledge and methods of action.
— Now pay attention to the slide. Here are images of the compositions. Try to formulate the differences between these and those that we studied in the last lesson ?
- Absolutely right. In the compositions that we see on the slide, the pattern is repeated. This repeating pattern is called an ornament . Look at the screen: slide ornaments (utensils, tools and weapons, textiles, furniture, books, etc., architectural structures, works of decorative and applied art. (demonstration of slides of objects with various patterns)
— Ornaments come in different types . (demonstration of slides of ornaments with explanation :
• Geometric pattern – consists of dots , lines and various geometric shapes: oval, circle, rhombus, triangle.
• Floral ornament – consists of leaves , flowers, fruits, branches.
• Zoomorphic ornament – consists of figures of various real and fantastic animals.)
— The ornament can be located in a strip, in a circle, in a square. (slide)
— The pattern can be located not only in the center, but also along the edge. (slide)
— Elements of the ornament can be dots , lines, geometric shapes, plants, animals. (slide)
— Shall we repeat? (slide show - children name types of ornaments )
We sweep the paths (imitation of movements)
We collect leaves into piles (bend over, imitate movement)
So that while walking, kids
We had a lot of fun! (jumping in place)
Oh, tired ( "wipe the sweat from your brow"
)
And let's go home quickly (steps in place)
4. Consolidation of knowledge and methods of action (practical work)
.
— Now let’s try our hand at decorating a postcard for the Day of the Elderly.
— what tools and materials will we need for the work?
— What leaves are suitable for such a composition?
(Children pick up and place dry leaves on cardboard , forming a future ornament )
— And don’t forget about the rules for working with scissors, glue, and cardboard.
— Let’s look at the slide and talk through the stages of completing the work (a slide with a work plan in pictures, which is discussed together, demonstrating techniques for finding the center, applying glue, etc.)
Monitoring work, providing assistance in completing tasks if necessary. At the end of the lesson , work areas are cleaned.
5. Exhibition and analysis of works.
6. Reflection on educational activities.
- What new did you learn in the lesson ?
— What was difficult?
Attached files:
| prezentacija-k-uroku-ornament_k10sk.pptx | 6889.77 KB | Downloads: 55 |
Lesson summary in 1st grade “Day of Knowledge” 1st grade Day of Knowledge Purpose: to create a festive mood from the meeting with school, to maintain the mood for educational activities Objectives: to introduce.
Summary of a mathematics lesson in the 3rd grade of a school for the deaf. Consolidating computational skills in solving compound problems and equations for finding an unknown divisor. Goals: • To consolidate skills.
Russian language lesson notes in 2nd grade Short-term Russian language lesson plan No. 31 Section: My family and friends. Lexical topic: Rules of friendship. School: No. 4 Date: 25.10. 2020
Synopsis of a technology lesson in the first grade “Mood of spring. What is color?” Lesson topic: Mood of spring. What is color? Place and role of the lesson in the topic being studied: Studying new material Purpose of the lesson: To introduce.
Summary of a mathematics lesson in 1st grade “Subtracting the number 6” Lesson topic. Subtracting the number 6 Lesson type: solving an educational problem Objectives: to develop the ability to subtract the number 6; consolidate knowledge about the composition of numbers.
Lesson summary technology 1st grade “Appliqué from leaves”
Creating various autumn crafts from natural materials is a great way to instill creativity in children, and applications made from autumn leaves are no exception. Such activities will help children develop many useful qualities, which will later have a beneficial effect on their worldview, and will also have a beneficial effect on fine motor skills, attention and accuracy. Little craftsmen really enjoy creating their own personal masterpieces, especially since in the autumn season they can find everything they need for their work just by walking in the yard or park.