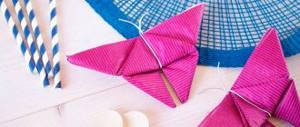
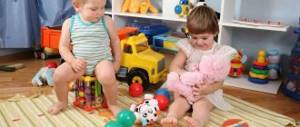
Developing creative skills using applique
To realize different ideas, you can use paper and other materials and it is better to start introducing children to applique with simple ideas. Easy and uncomplicated crafts help solve several problems at once, guaranteeing some variety in the process of home learning and preparation for school:
- development of fine motor skills during the basic process of processing selected materials for making figurines of fruits or vegetables;
- strengthening memory and stimulating the memorization process with the ability to consolidate knowledge of shapes and sizes, colors and new names;
- strengthening skills in working with a variety of materials, textures and tools necessary for making beautiful crafts.
Any child will enjoy spending time with their parents, learning new techniques that help the child express himself. Starting with simple products and uncomplicated designs, he can gradually be taught to create three-dimensional and harmonious compositions assembled into one installation.
Master class in the middle group using the “Berry” applique technique
Publications on the topic:
Children's master class “Greeting card using the technique of volumetric application “Flower” Good day, dear colleagues! A master class today will be shown by a student of my (secondary) group, Anya Chemerisova. For creating.
Children's master class on paper applique using the origami technique “Bird” for a collective painting in the preparatory group Today we will continue with the children of the preparatory group to complement the applique painting created together with Anna Nshanovna (my mother).
Master class on making an applique from corrugated paper using the cutting technique “Lilac Sprig” Master class Applique from corrugated paper using the cutting technique “Lilac Sprig” We continue to make crafts with the children. Today we met.
Master class on making a New Year's card using the appliqué technique in the middle group Good afternoon, Colleagues! Now it's time to prepare for the New Year holiday. Today I would like to present to your attention a master class.
Master class “Modeling using plasticineography technique with elements of the Victory Salute applique!” in the senior speech therapy group" Hello, dear colleagues and friends! The next anniversary of the great victory of our people in the most terrible and bloody one is approaching.
Master class on making an Easter gift “Chicken” using the 3D applique technique. Master class. Easter gift “Chicken” using 3D appliqué technique Purpose: to introduce children to the Easter holiday. Tasks: - teach how to perform.
Master class on the application “Autumn Tree” in the middle group Dear colleagues. I would like to share with you my experience of an appliqué master class with middle school children on the topic: “Autumn Tree.” Subject.
Master class on making flowers using the 3D applique technique Purpose: to teach children to make 3D crafts from colored paper. Develop creativity and accuracy. I hasten to offer you my version of the craft.
Master class on appliqué in mixed media “Blossoming apple tree branch” This master class is intended for educators, additional education teachers, and creative parents. Designed for children's ages.
Master class on applique using the non-traditional technique of broken applique “Insects” MBDOU “Kindergarten of a combined type No. 108” Developed by: teacher Biryukova Svetlana Igorevna Currently, much attention is being paid.
Techniques for making appliques with children
No matter what group or class a child goes to, he will always be interested in creating a beautiful masterpiece with his own hands. For applications of fruits and berries or vegetables, you can use different techniques, the choice of which determines the use of a certain set of materials and tools:
- simple paper applique on a cardboard base. Such crafts are made from ordinary colored paper and the blanks must completely imitate the shape and even the size of the fruit being made. It is best to start with simple and recognizable shapes, such as apples and pears, grapes and plums, apricots and cherries, which grow in gardens and are often encountered by children;
- voluminous applications of fruits and vegetables. By creating three-dimensional forms, the child develops his perspective vision of objects, learns to remember and recognize the objects of the outside world around him. You can make voluminous garden vegetables with your child, such as beets and carrots, and exotic fruits (pineapple and banana), a basket with strawberries or bunches of grapes;
- artistic composition from individual applications. A more difficult task set for the child will be the creation of a harmonious and unified composition, which is easy to do with the help of parents. If you and your children cut out berries, vegetables and fruits in advance and prepare baskets glued to cardboard, then the child himself will be able to divide the figures into flowerpots.
Thanks to the gradual complication of the design of the craft, it will be possible to simplify the learning process and develop the child’s creative abilities. Thanks to this simple approach, the child will not make an ordinary picture, but will create a composition depicting a plate or a beautiful vase of fruit.
Volumetric cherries made of paper: applique
How to make a three-dimensional applique from paper? What is the technique for performing volumetric applique. Using the technique described in the previous section, you can make any fruit, vegetable, berry, and even an animal or insect. For voluminous cherries we will need:
- red colored paper (double-sided);
- base for application in A5 format (half A4);
- scissors;
- pencil;
- double-sided green paper;
- glue.
How to make voluminous cherries from paper: master class.
1. Cut out 4 circles with a diameter of 5-6 cm from red paper. For this it is better to use some kind of template.
2. Bend all the circles in half. We cut out a thin strip from green paper - this will be the stem of our cherries.
3. Cut out leaves from a green rectangle measuring 12x6 cm, then bend them as shown in the figure:
4. First glue the stems onto the base sheet. Then one of the leaves, the second we leave “in free flight”. Then glue one red cherry on top, and a second one on top along the fold line. Mark the veins on the leaves using a pencil.
That’s it – the Volumetric paper cherries applique is ready!
Simple fruit appliques with kids
For the youngest children, it is better to choose simple methods of making appliqués and it will be better if it depicts fruits and vegetables familiar to the child. Parents are advised to choose the simplest templates for their kids, while helping them with cutting out the figures:
- templates from colored paper. Parents can cut out the templates themselves, repeating the shapes and colors familiar to the child, and the child will complete the tails and leaves on the finished applique with pencils;
- blanks from cotton pads. This material already has a round shape and can be used to make round fruits or vegetables with the possibility of painting;
- multi-colored plasticine. At the request of parents, voluminous applications can be easily created not only from paper, but also using classic or airy plasticine, which is easy to process.
Such crafts will become a real decoration for a child’s room and the price of the necessary materials remains minimal. If you use textured and colored materials, it will be easier for the child to remember shapes, names and enhance their tactile sensations, which contributes to the development of memory.
Application-summary: “Beads from berries” lesson plan on applique, modeling on the topic
Section: Application
Educational field: Artistic and aesthetic development.
theme: “Beads from berries.”
Software tasks:
Summarize children's ideas about vegetables, fruits and berries, about their characteristic features.
Strengthen children's knowledge about geometric shapes (circle, oval)
Strengthen the ability to hold scissors correctly, cut with them, use a stencil, the technique of cutting out a circle from a square, an oval from a rectangle.
Strengthen the ability to compose images of geometric shapes on a sheet of paper and carefully paste them; make you want to help the hero.
Teaching methods: verbal (didactic game: “Loto. Fruits, vegetables and berries”), visual (examining fruits and berries), practical (application “Beads from berries”).
Preliminary work: examining illustrations and models of fruits, vegetables and berries, conversations about where fruits, vegetables and berries grow, about their use, viewing presentations on the topics “Fruits”, “Vegetables”, “Berries”, reading fiction.
Demonstration material: didactic game: “Loto. Fruits, vegetables and berries", pictures of fruits, vegetables and berries, a sample of the finished work.
Handout: half a landscape sheet; blanks made of colored paper (red squares and green rectangles, two pieces each); templates (circle, oval); scissors; glue; napkin; oilcloth.
Progress of the lesson:
Stage 1. Organizational.
On the carpet.
- Children, look, the doll Masha came to visit us today and she is very sad. She has a game with herself, but she can’t cope on her own, let’s help her (game “Loto. Fruits, vegetables and berries”).
- Well done guys. What berries do you like?
- Children's answers.
— And Masha really loves currants and gooseberries, and she really wants you to make beads for her from these berries. Will you do it?
- Children's answers.
-Who knows what beads are? What are they made of? What part of the body are the beads placed on?
- Children's answers.
-Beads are an ornament that is worn around the neck. It consists of beads that are strung on a thread in a certain order.
Let's go to the tables.
Stage 2. Organizational and search.
- Guys, let's look at the berries from which we will make beads. Currants - what color, what shape? Gooseberries - what color, what shape?
These are the beads I made for Masha (showing the finished work).
Now look what you have on the table.
— Leaves on which you will make beads. Circle and oval templates, colored paper, pencils, scissors and glue. What shape is colored paper? What colour? What color are the squares? What berries will we make from them? What template do we need? What color are the rectangles? What berries will we make from them? What template do we need? Using the templates you trace the berries. Then you cut it out, lay it out on a string to see what you can come up with, and then glue it on. To glue, place the finished part on an oilcloth with the white side facing up, spread it with glue and glue it to the thread.
Stage 3. Phys. A minute: “Vegetables. Fruits. Berries" (If you see a picture with a vegetable, you squat; if you see a picture with a fruit, you jump; if it’s a berry, then clap your hands.)
Stage 4. Completing of the work.
Now let's get to work. But first, let's all review the rules of working with scissors. (Children repeat)
1. Taking and cutting with scissors is only possible with permission and in the presence of adults.
2. Do not swing the scissors to avoid injuring someone.
3. Hold the scissors straight away from you, do not open them wide
4. You can pass scissors to each other only with the beaks-knives closed, with the windows-rings facing forward (the teacher shows)
5. Having finished the work, you need to put your scissors in a glass with the window-rings facing up. The work is just finished
Scissors need care.
Don't forget to close them
And put it in place.
Work. If anyone needs help, raise their hand and I will come over. Whoever finishes, you can come up and give Masha your beads.
Stage 5. Final part.
- Our beads are ready. Now we will make an exhibition and admire them.
Application technique
Senior group.
The main task of teaching appliqué to children of the sixth year of life is to master a variety of cutting techniques
The sample is used in the older group in cases where preschoolers depict an object for the first time.
They become familiar with the technique of creating a form by tearing off the edges of paper, which makes it possible to convey the features of the texture - the fluffiness of snow, fur.
Senior group.
Children cut and paste their own shapes
The main task is to master a variety of cutting techniques
learn to cut out some shapes from paper folded in half
become familiar with the technique of creating a shape by tearing off the edges of paper
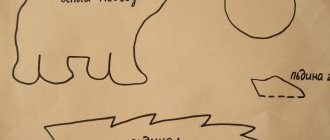
Fruit bowls for older children
When preparing for school, parents will need a simple outline where they can list the topics of the assignments and the material covered. All preparatory tasks completed in theory can easily be completed with a practical lesson in which children will make applications of different sizes and shapes:
- voluminous fruits made of colored paper, consisting of several elements;
- appliques made from pieces of paper or multi-colored napkins glued to the base;
- using fabric or felt to make textured and beautiful crafts.
Any berry or fruit that a child gets acquainted with will definitely be remembered by him if he learns a rhyme about it and reinforces the lesson by creating an application. Even if such fruits do not grow in the region and cannot be bought in a store, accessible photos and pictures will provide preparation for an educational activity that will be interesting to children.
Quilling fruits
Quilling is the art of paper rolling. This method of needlework is more labor-intensive, but it is worth noting that this is an excellent option for developing children’s fine motor skills.
Those who are hearing about this technique for the first time are recommended to study a master class on making fruits in the quilling style.
Required tools for making orange:
- corrugated paper sheet up to 1 cm wide;
- cardboard;
- glue.
Completing of the work:
- Roll orange paper strips into a circle 1.5 cm wide.
- Press the resulting circle on one side to obtain a teardrop shape. It is necessary to create and connect 8 such drops together, which will become “slices” and wrap each with two yellow turns.
- Glue the resulting elements around the core. In the space between the parts, glue twisted circles of the required size.
- Wrap the resulting piece with a pair of yellow and orange turns.
- Glue to the base.
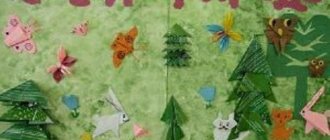
Original applications of fruits and vegetables
If an older child has already mastered simple and accessible applique techniques, you can gradually set more complex tasks for him. Any lesson must begin with theory, while parents can suggest and show how to make a craft, and then, together with their children, make crafts with a complex design:
- applique made of crumpled paper balls or multi-colored napkins (single-layer);
- contour applique from natural materials, seeds and leaves, sand and pebbles;
- the use of woolen threads for applique, laid on a thin layer of glue.
It is best if materials of appropriate colors, most often found in nature, are used for crafts. This way, the child will form strong associative connections and this will improve the process of memorizing figures and will be useful for learning to count and compare the characteristics of objects.
Organizing children's leisure time and consolidating new knowledge acquired in kindergarten or school is within the power of every parent. No matter what grade a child goes to, he will always be interested in doing creativity if his parents pay enough attention to him and spend free time with him. Simple and easy applications will be the key to the development of creative and creative skills, which will definitely be useful to children and will help their self-expression.
Origami from crumpled balls
Handmade items made from crumpled balls can be considered an equally effective and interesting means for developing fine motor skills and creating beautiful decorative fruits. It looks unusual, takes little time, and does not require much expense.
You can form balls from napkins, newspapers, colored or even toilet paper, the main thing is to color it in advance, or choose napkins of suitable colors. We crumple the material into balls of various sizes and glue it to the base on which the image of the fruit is already outlined.