The benefits of geometric applique for the development of preschool children
From early preschool age to 1st grade, exercises on connecting simple shapes into a single image are very useful for children.
They help the little ones learn and remember what geometric shapes there are, and consolidate the names of colors. Classes with this type of application also develop:
- fine motor skills;
- accuracy;
- eye gauge;
- perseverance and attentiveness;
- skills in working with scissors and glue;
- imagination, the ability to think outside the box (the triangle looks like the face of a fox or a piece of cheese);
- the ability to design, taking into account the order in which the figures will be placed on the finished craft - the parts that should be further away are glued first, and those that are closer to the viewer can be layered on top of the previous ones (for example, if the bear stands half-turned, first it is attached to the background one of his paws, then his body, and only then his second paw).
In addition, the process of selecting the necessary details and composing them embeds in the minds of little creators the understanding that much in the world around them consists of geometric shapes, and the complex is made up of the simple.
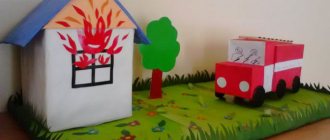
Geometric applique "Transport"
How to make a geometric applique? It's actually quite simple. When choosing a task, it is recommended to familiarize yourself with your child’s preferences. For example, girls prefer flowers, birds, and animals. Boys most often choose cars, robots, etc.
As for the color combination, it is best for children with an impulsive character to choose light or pastel shades. They form maximum concentration and perseverance. In addition, such measures have a positive effect on the emotional state.
We present to your attention an application in the form of transport. It consists of simple geometric shapes. This activity will appeal to children aged 3 to 4.5 years. It creates hard work, perseverance and accuracy.
Before starting the work process, you need to prepare the following tools and materials:
- a simple pencil;
- ruler;
- PVA glue;
- scissors;
- colored paper;
- car image;
- brush.
The process of creating an application takes place in several simple steps:
- We begin to cut out the shapes that make up our “geometric” vehicle: a rectangle for the main part of the car body, circles for the wheels, a square for the roof. Before you start cutting out objects, you need to decide on their color scheme.
- Next, on a white sheet of paper, draw a road along which the transport will move. After that, glue a rectangle in the center. We glue a roof over it. Lubricate each element with a small amount of adhesive. When the roof and body are dry, you can move on to the wheels.
The application is almost ready. Here you can give free rein to your children's imagination. Let the child draw the doors and windows of his car himself.
Organization of the process
Geometric applique does not require serious artistic skills from adults to organize the process of children's creativity. The main thing is to provide the kids with all the necessary materials and tools, to organize a safe and convenient space for work.
- For the little ones.
In order for children aged 2–4 years to successfully make an applique, they need to prepare a drawing with clear contours and cut out the appropriate number of parts. At the same time, they may need a personal example from a senior, showing on the same blank what, where and how to stick.
- For children 4–5 years old.
At this age, children can already arrange geometric shapes on a sheet of paper without ready-made contours, looking at a sample. You can have them cut out parts with straight lines, such as triangles, themselves from lined sheets of colored paper. In this case, you should make sure that the scissors are safe - with rounded ends.
- For older preschoolers.
At 6–7 years old, children are able to trace simple patterns and cut out appliqué details themselves. At this age, it is useful to provide them with an independent choice of the color scheme of the craft: for example, when depicting flowers, geometric patterns, butterflies. This helps them learn how to combine colors and develops their creativity.
To ensure that the work lasts, use high-quality, not too thin colored paper and make sure that the glue stick has not dried out.
Tools and materials
Crafts from geometric shapes are created using a set of simple materials and tools, which are supplemented with new elements as the child grows up.
Paper
The main material for creating flat crafts is paper. It is used for backgrounds and for cutting out geometric elements. For the base, you can choose colored cardboard or thick paper. Small parts are cut from medium-weight double-sided paper. Bright applications are made from colored sheets for the office.
Glue
The adhesive composition is selected according to the age of the child. For 2-year-old children, a paste made from potato starch or wheat flour is suitable for work. This glue does not cause allergies and will not cause harm if swallowed, so it can be spread onto small parts with your fingers.
To make 1 liter of paste, 5 tablespoons of dry substance are diluted with a small amount of water to form a homogeneous paste. Then it is diluted with the remaining liquid. The solution is boiled over low heat until the mass thickens and filtered through a sieve.
Glue for applications is selected according to the age of the child
It is convenient for children 3-4 years old to work with stationery glue in the form of a pencil. When choosing it, special attention should be paid to the quality of the product. It should be applied in an even layer, not leave lumps on the paper and not have a strong odor.
PVA and brushes for applying it are used by children from the senior group of kindergarten. Working with liquid glue requires sufficient development of fine motor skills, attention and accuracy. Brushes for applying adhesive to paper are selected with medium hardness. Their size depends on the size of the working part.
Scissors
The main requirement for scissors used by children is safety. For a child, buy scissors with round ends. Before starting children's creativity, an adult must check the quality of the mechanism's functioning, since scissors with undeveloped levers can be dangerous for a child.
The blade length of children's scissors is approximately 10-12 cm. When cutting out large parts, you can use longer models.
Important! Before teaching children how to use scissors, it is necessary to introduce them to safety precautions, which include the following:
- Do not swing or play with them while working.
- They should be passed rings forward, holding them by the folded blades.
- After use, the tools are put away.
- Store scissors in boxes or high stands with the rings facing up.
For 1st grade students
Children already more or less own scissors when they enter 1st grade. In this case, templates will become indispensable assistants. With their help, children will be able to cut out the necessary parts from paper, and it will be easier for them to create and learn to make appliqués. Here are templates for several simple geometric applications:
Application “House in the Village”:
It seems to be nothing complicated, no complicated details. It's simple. A house, sunshine, a tree, but there is something extraordinary in this picture. In addition, the child will make this picture even more unique, because it will be the embodiment of his imagination and thinking.
Application “Cat and kitten”:
To make an applique of this cat with a kitten, a child will need to cut out a wide variety of shapes and put them together to create a complete image to their liking.
Application “Funny Caterpillar”:
The funny caterpillar will amuse your kids. It is interesting not only to look at, but also to do. After all, these circles and other details can be arranged in different ways. And each child will get their own unique cheerful caterpillar.
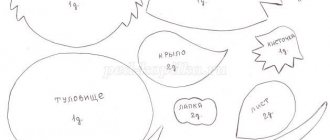
To make the above house, cat and caterpillar appliqués, you can simply print out the diagrams, then children can cut out the figures and glue them onto paper. But this is too simple. So you can make your own templates. And then the children will cut out parts from them from different colors and glue them.
For children 3-5 years old
There are also applications intended for preschool children. They are quite simple. Children will learn a lot in the process. And most importantly, they will become familiar with geometric shapes and where they can be used.
Having printed templates, you need to make the application in the following sequence:
- Cut out templates from paper;
- Glue the parts to their corresponding places.
Next, you can color the drawing.
These applications are quite simple to make, so they are suitable for young children, so to speak, beginners in applications. You can choose from a wide range of designs and print the one that suits your child best.
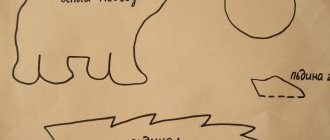
The smaller part of the image will serve as templates, with the help of which you will need to cut out details of different colors and paste them onto the larger part, which will serve as the background for the applique.
The application is performed in the following order:
- Cut out the templates that are on the side of the page. Templates are obtained;
- Next, you need to use the prepared templates to cut out the parts from papers of the desired colors and stick them to their corresponding places.
For students in grades 3-4
Children 9-10 years old can independently create applications on a given topic, for example:
- In the “Sea” craft you can depict a ship and sea animals.
- The application on the theme “Winter” is created using a mixed technique of flat design and mosaic.
- “Summer in the countryside” can depict a house with a fence, trees with fruit, animals.
Crafts in which objects are made up of geometric shapes contribute to the development of a child’s creative abilities. At the same time, acquaintance with shapes and colors occurs, as well as mastery of brush and scissor skills.
Article design: Natalie Podolskaya
For 4th grade children
While making appliqués from geometric shapes for children who are in 4th grade, children will learn to clearly mark out parts according to a template and assemble individual geometric shapes into a complete image.
First, the children should be shown what the work will look like upon completion. Children will need: colored paper, cardboard, glue, ruler, pencil, scissors and a brush.
First, children need to prepare a workspace and prepare everything they need to make an applique.
See if you have everything ready for the lesson? We will need: colored paper, cardboard, glue; ruler, pencil, scissors, eraser, brush; glue jar, napkin, oilcloth.
This is the order in which you need to proceed to make the application:
- Prepare the base;
- We translate and cut out the parts according to the template;
- Let's create an application.
Let’s get started with the application of geometric shapes “Cat and Mouse”:
These are the parts needed for mice and cheese. Templates for them are easy to make. Cut too. But it is very interesting to create such beauty from simple geometric shapes.
Next we move on to the cat. These are the parts needed to make a cat. As you can see, among the materials there is a felt-tip pen with which children can realize their imagination and draw a unique face for a cat.
Our wonderful work is ready.
There are many more applique ideas for kids. For example, such a beautiful boat. It can be done according to the diagram below.
An interesting idea is a garland of geometric shapes. You can make it in the form of a postcard and congratulate someone on the holiday with it.
A very cool idea for 4th grade children would be an application of geometric shapes on a free theme, that is, using heuristic methods. This is done very simply.
A variety of shapes and sizes are printed on white paper. Then they are cut out. Then they take dark-colored cardboard and glue all these figures onto it so that they get a specific design. This perfectly develops hand motor skills, since there are a lot of figures to cut out, and imagination, because children need to come up with images themselves. The figures are the same, but the applications are completely different. This is the trick. Below are examples of work:
Application for older children
To complete this work you will need:
- cardboard;
- double-sided colored paper;
- ruler;
- a simple pencil;
- scissors;
- glue.
Step-by-step instruction:
- We cut out blanks from sheets of colored paper: two squares for the head - yellow and orange, and four rectangles for the ears, paws and body.
- Choose a background - a sheet of white cardboard. Take colored and white paper and divide it into strips.
- Blanks for the tail of the future squirrel are cut out of them. The ends are glued together. To make it easier for children to make the applique, draw the outline yourself.
- Take both squares and make a head. Cut out the body from the rectangle. Choose a place for the future tail and glue all the details onto the cardboard.
- Build paws and ears from the remaining rectangles. To complete the applique, let each child design it themselves - make a face using pencils or colored paper.
- Next, the children design the animal at their own discretion.
How to make an applique from triangles
Materials for making the application:
- sheets of colored paper (two colors, for example red and yellow),
- thick sheets of white paper,
- glue (glue stick for kids),
- tassels,
- scissors (for adults).
Application of triangles “Fish”
- For children who cannot cut out on their own, the parent (teacher) cuts out geometric shapes - triangles - using a template from colored paper. The triangles will be of different sizes.
- Each child (in the garden) is given boxes with cut out colored parts, a sheet of white thick paper, and glue.
- Children should be shown a sample so that they know what application they will perform in class. You need to pay attention to the shape (say that these are triangles), the size of the parts (ask them to find small and large ones), ask what color the parts are in their boxes.
- After this, you need to tell us that this application is not easy. To make it work, you need to correctly lay out the triangles on your sheet of paper. To get children to think, you can give them unlined templates. If there is no time for this task, then you need to show the templates according to which the children will assemble the figurine.
- Let the child choose the template himself. You can even have the children assemble all the templates one by one (without glue, just placing the triangles on the paper). This is one of the lessons on logic.
- After the fish template is chosen, the teacher shows how to apply glue to triangles of colored paper and how to properly stick them to a sheet of white paper (strictly in the center so that it looks beautiful). Children often start gluing triangles without first laying out the entire figure - as a result, the tail or fins of the fish stick out beyond the edges of the sheet.
7. The parent (educator) must not only praise the child for the work done, but also point out mistakes (if any). 8. After drying, the work can be put on display or on a shelf in the child’s room.
Applique of triangles “Herringbone”
This application is similar to the one described above, but a little more complicated. The parts are glued in a certain sequence and with overlap.
Materials for making the application:
- sheets of colored paper (two colors - green and brown),
- thick sheets of white paper,
- glue (glue stick for kids),
- tassels,
- scissors (for adults).
- The parent (teacher), as in the “Fish” application, cuts out triangles from colored paper and distributes them to the children.
- Before the lesson, children should be shown the finished work and told how beautiful and interesting it is. Next, you need to draw the children’s attention to the fact that this application is tricky. To make it look beautiful, you need to glue the triangles with overlap.
- Children lay out the triangles on the sheet independently. An adult explains in what order the figures should be glued to make a beautiful Christmas tree.
- Children glue triangles onto a white sheet of paper using a template (an adult corrects the work and helps correct mistakes). Be sure to praise the child at the end of the lesson.
- The finished works are dried under a press and then exhibited at the exhibition.
Applications from geometric shapes
In general, applications can be made from any geometric shapes. We have already examined triangles, but there are many other shapes: circles, squares, rectangles, rhombuses. Let's try together with the children to assemble fun applications using a ready-made pattern.
Boys prefer crafts with a variety of equipment and machines. Try offering little boys applications with a crane, a car, a steam locomotive, a boat or a rocket.
All that is required of the parent is to print out the template on a piece of paper. The child cuts out the details according to the sample and glues them onto the base. The picture can be supplemented with an inscription or the background can be colored with colored pencils or felt-tip pens.
I know children, and I’ll warn you right away - if a child likes such developmental activities, then you won’t get away with just a template. It's better to print several at once.
Girls will also not be left without applications. You can offer them templates for appliqué with animals. The technology for making such applications does not differ from the above-described option for machines. You print out the template, the child cuts out geometric shapes from paper and sticks them on the outline. The end result is a beautiful and entertaining applique with a mouse, fox, squirrel, horse and other animals.
Don’t forget, you don’t just need to hand your child a picture and scissors with glue. Be sure to repeat the names of geometric shapes, and at the same time the colors. Help and tell your child if he has forgotten the name of the figure. Then your classes will be real developing creativity.
Lessons in geometric appliqué using simple shapes (triangles) are accessible and simple. Believe me, the kids will love these activities.
Examples of applications
Cat
Application designed for the middle group of kindergarten. To work on the cat you will need geometric shapes:
- a circle with a diameter of 3.5–4 cm for the head;
- one large right-angled triangle for the body and two small ones for the ears;
- a square with a side of 1.5 cm is a foot;
- an elongated oval for the tail (the wider the figure, the fluffier the tail will be).
The large triangle should be placed on the sheet so that the smaller leg is at the base, and the head with ears should be placed at the upper sharp corner. Place a paw on the side of the right angle of the body, and a tail on the lower end of the hypotenuse.
House
A plot-based application that gives scope for creativity and additional elements. In order to make a house with a courtyard, you will need to prepare:
- 3 rectangles are the lower part of the house, the door and the pipe;
- 3 squares - for windows;
- 1 circle and 8 small triangles for the sun and its rays;
- a narrow long rectangle and a large oval - a tree in the yard;
- 1 small circle for the center of the flower, 9 ovals for the petals and a thin rectangular strip for the stem;
- oval for a puddle in the yard.
If desired, the finished work can be supplemented with details: apples on a tree, smoke from a chimney.
Children watch with delight how different animals, patterns, and magical castles emerge from simple and boring figures. The opportunity to do something similar with their own hands gives them the opportunity to develop and provides a good emotional charge, making them want to create further.
Car
The truck consists of almost the same number of parts as the previous craft. A small complication is that the window will need to be glued to the top of the cabin - this will immediately change its appearance and bring the whole composition to life in the eyes of the child.
Required figures:
- 2 rectangles for the cabin and body;
- 2 squares - hood and window;
- 2 round wheels;
- 1 large semicircle is the sand that the truck carries in the back.
After gluing up all the parts of the truck, kids will likely want to draw a picture of the person driving the car in the window.
Ladybug
The simplest version of a geometric pasted picture. Take a white, red, black, green, yellow sheet, glue stick, scissors.
Applications from geometric shapes “Animals”
How to make a small cockerel or elephant from colored paper? Show your child that even the most ordinary geometric figure, such as a circle or oval, can turn into a funny monkey or a cheerful circus elephant! Animals made from colored paper are also very easy to make and are intended for children 2-3 years old. Application for kids from the figures “Cockerel”
Example picture, background and templates for work:
Application of geometric shapes “Monkey”
Templates for the application “Circus Elephant”
Templates for applique from “Dinosaur” figures
Templates for work “Parrot”
Templates for the “Butterfly” work
All presented applications are best done together with the child. Such a creative process develops not only fantasy, imagination and introduces the baby to the world around him. Such simple actions as cutting out small parts and gluing them exactly to the intended place develops the baby’s fine motor skills.
Aquarium
This craft involves cutting and gluing a large number of shapes.
Materials needed to make the craft:
- Colored paper or cardboard.
- Markers or gouache.
- Scissors.
- Glue.
- Brush for applying glue.
Instructions:
On white paper you need to draw an aquarium using felt-tip pens or paint. We draw algae, pebbles, bubbles and markings for our future fish.
We cut out triangles of two sizes from colored paper. The large elements are the body of the fish, the small ones are the tails. To make the baby’s work easier, you can draw eyes and tails on the triangles.
Next, we invite the child to place the fish in the aquarium.
Applications made from paper figures are a fascinating activity not only for children, but also for their parents. Invent, fantasize and create simple and complex compositions together with your baby. Nothing brings children and parents closer together than joint creativity.
In this article we talked about geometric applications, their age appropriateness, and conducted small master classes. Now you know how to make a geometric applique for a child and with him.
Applications from geometric shapes “Animals”
This developmental technique is aimed at ages 5 to 6 years. At this time, the child already has a good idea of what shapes the body of a particular animal consists of. How to make a geometric applique for a child? Today we will glue the dog.
The paper structure contains: a head in the form of a circle, a body in the shape of an oval, paws made of small rectangles and ovals, and a neck in the form of a cylinder. To decorate the neck area, we will make a small bow from two triangles.
Before starting classes, you need to prepare the following tools:
- scissors;
- ruler;
- brush.
From the materials we will need:
- colored paper or cardboard;
- white sheet of paper in A4 format;
- glue in the form of a pencil.
The master class for do-it-yourself geometric applications takes place in several stages:
Carefully cut out the geometric components of our craft. Next, we fix each element in its place. Experienced teachers recommend numbering each detail. This will allow the child to master counting and visual representation.
Lubricate the reverse side with adhesive. First we glue the head, then the rest of the animal’s body. The final step will be a beautiful bow in a bright color.
- What does a sword mean to a man?
A variety of engraver attachments for every taste and color
- A still life with roses will delight you longer than fresh flowers
The photo of geometric applications shows drawings and sketches. Here you can choose an educational activity for your child based on his age and preferences.
