05.12.2019
It is no coincidence that in preschool and primary school educational institutions a lot of time is spent on modeling from plasticine. Working with this material develops fine motor skills and abstract thinking in children, and has a beneficial effect on the course of psychological processes, so we advise you to familiarize your child with a plasticine applique on the theme “Golden Autumn”. And since the centers responsible for the development of voluntary movements of the fingers are located next to the speech centers in the cerebral cortex, modeling will have a beneficial effect on the development of speech. The recommended age for starting to work with plasticine is 1.5-2 years. Therefore, plasticine applique in kindergarten should occupy a special place among children's creativity.
We sculpt a birch tree
Let's look at a step-by-step master class on how to make an autumn birch tree from plasticine.
We will need:
- Glue "Titan";
- Plasticine;
- Modeling board;
- Cardboard;
- Scissors.
Cover about 2/3 of the cardboard with a thin layer of white plasticine. It will be heaven.
Note. To ensure that the plasticine adheres well, first knead it in your hands until soft.
In some places, add touches of different shades of blue, simulating clouds. Cover the remaining part of the cardboard with brown plasticine. This will be the earth.
This is how the background turned out:
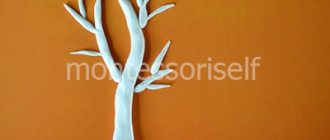
Now cut out a birch tree trunk from cardboard. Using black plasticine, make characteristic black inclusions on it. You can download the template. Glue the finished design onto the background.
Roll small flagella from black plasticine. Use them as branches.
Make small droplets from yellow plasticine - foliage blanks, approximately like in the photo.
You can frame the finished result. It turns out such beauty!
Practical use
All sculpting work is done on a solid base. The selected pattern is transferred to the base. Then, take some material of the desired color. After warming it up in your hands with your fingers, a thin layer is applied along the contour of the future painting. Excess protruding beyond the contour is removed using a stack - a sharpened wooden knife. After completing the work, white paper is glued to the finished painting on the back side, making the bottom of the substrate clean. The remaining plasticine is carefully collected, and the hands are wiped with a cloth and washed well with soap and warm water.
For the little ones
When working together with kids, you don’t need to choose work that is full of complex elements, since creating a craft should not take much time so that the child does not lose interest. Most often, the first craft to introduce a child to creativity is a small tree or flower.
Autumn tree
Another interesting autumn tree. It can be completed by 1st grade and 2nd grade students. A visual presentation will help the children understand the master class better.
You will need:
- Cardboard (blue or dark blue);
- Plasticine;
- Napkin;
- Modeling board.
Roll out flagella of different colors from plasticine.
Twist them like a snail.
From the resulting spirals, form the crown of a tree.
Make a trunk from brown flagella.
How to make autumn leaves from plasticine (drawing autumn leaves with plasticine or plasticineography). Master Class.
Plasticine crafts on the theme Autumn, grades 2 - 4
Do-it-yourself autumn crafts from plasticine in elementary school. Master class from plasticine on the theme “Amazing Autumn.”
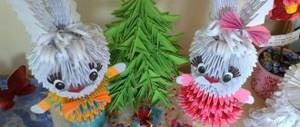
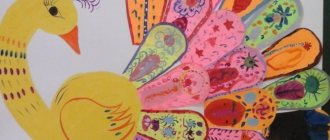
Author: Stepanova Oksana Yuryevna, teacher of additional education, MBOU DOD Arts Center, city. Salavat Purpose: This work can be performed either individually or with a group of children 8-10 years old and older. It is recommended for teachers, interested parents who want not only to teach their child something new, but also to enjoy joint creative activity. Goal: Learn to sculpt “Autumn” from plasticine, conveying the characteristic structural features and coloring. Objectives: - teach how to use various sculpting techniques (rolling, flattening); - develop creative thinking, imagination, fantasy, sense of color; - cultivate perseverance and the desire to complete work; — consolidate the skills of sculpting from several parts; Material: - plasticine;
- stack; — A-4 format cardboard; -scissors, ruler, pencil, PVA glue; - board. Making plasticine crafts on the theme of autumn is always interesting and exciting. Today I suggest you make a craft from plasticine on the theme “Amazing Autumn”. Autumn gives miracles, and what miracles! The forests are decked out in golden hats. Red honey mushrooms are sitting in a crowd on a stump, And the spider is such a trickster! - The network is pulling somewhere. Rain and withered grass In a sleepy thicket at night Incomprehensible words are muttered until the morning Step-by-step description:
Step 1. For the craft, we used materials such as plasticine, modeling board, stacks, cardboard, scissors.
Step 2. Draw a circle on cardboard with approximately a radius of 15 centimeters. We will need part of the circle.
Step 3. Glue half the circle together to form a cone.
Step 4. Cover the cone with any color of plasticine.
Before making a head, the children wrote their wishes on small pieces of paper and hid the piece of paper in a ball, after which they sculpted the head.
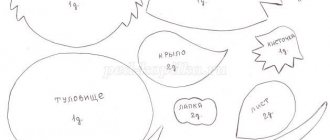
Step 5. Prepare leaves for the Autumn dress. We make a ball, make an oval out of it, flatten it and give it the shape of a leaf. The veins on the leaf can be cut with a stack, or you can print it with a leaf from the tree.
Step 6. Autumn is like a sorceress, she paints the trees in different colors. We will also decorate her dress with colorful leaves. Prepared plasticine parts can be mounted on a cone. It's best to start from the bottom of the cone. We continue to the very top. The cone can be covered with plasticine, and for younger children you can simply attach the leaves to the cone. Step 7. And then we’ll stick on the eyes, nose and mouth, then mold a hairstyle from yellow plasticine and stick it to the head. Then make 2 hands.
And then fantasize, decorate, enliven the image. Create for the joy of your children and yourself!
We recommend watching:
Application from plasticine. Autumn tree
Similar articles:
DIY autumn panel. Gifts of Autumn
Drawing autumn leaves with plasticine
Crafts using the plasticine technique (drawing with plasticine) are usually performed with children of preschool or primary school age, as this activity is very useful for the development of fine motor skills, excellent training for muscles, dexterity and skill of children's hands.
One of the simple crafts that children can do using this technique in a kindergarten class or a technology lesson at school is autumn leaves. In addition to training fine motor skills, the benefit of making autumn leaves is that children can show individuality and creative thinking: they can choose the shape of the leaf, the colors with which it will be painted, and their location. Therefore, the finished craft will turn out differently for everyone.
How to make autumn leaves from plasticine
Materials and tools
For the craft you will need:
- leaf templates
- cardboard
- simple pencil
- scissors
- plasticine
- stack (optional)
You can draw leaf templates yourself, trace a real leaf, or use templates from the article about.
The leaves can be of any shape, but some of the most beautifully colored leaves are maple leaves. They are yellow or orange, and are multi-colored, consisting of various combinations of red, orange, yellow, green and their shades.
For classes with children in kindergartens, the financing of which now leaves much to be desired, it is important that for this craft it is not necessary to use special cardboard for children's creativity; cardboard from the packaging of toys, products (tea boxes, cereals), unnecessary empty folders from for sets of various materials for creativity.
You can also take plasticine from which there are small pieces left that are no longer suitable for larger-scale crafts. Or disassemble old plasticine figures for this.
Stages of work completion
The craft is ready.
We make an application from plasticine on the theme “golden autumn” for the little ones
In kindergarten, plasticine appliqué should not be very complicated, and little time should be spent on it so that children do not lose interest in it.
Often this is a small tree . Required material:
- Sheet of paper or cardboard
- Multi-colored plasticine
- Pencil
First of all, as usual, we make a blank: you need to draw one or several trees with a pencil, now we will make a birch. If drawing is not your thing, you can download a template, for example, this one:
In the process of kneading plasticine, you must tell your child about trees, what a wonderful time of year autumn is and how many things you can do with your own hands, using its gifts. Since we will be making leaves on our tree with our fingers, at the same time we need to explain to the child why the leaves are different colors and sizes. To form a leaf, tear off a small piece from the plasticine, roll it between your palms, giving it the shape of a ball, and press it to the paper. If the plasticine does not stick immediately, be sure to help your child.
We use different colors, simultaneously explaining to the child that in the fall nature pleases us with a variety of colors and colors.
Be sure to praise the child in the process of creativity, and if suddenly the child is already tired and the work is not finished yet, it is better to put it aside or leave it in this form, otherwise you can discourage the child’s interest in any kind of creativity.
We got a nice little tree. Necessary materials:
- Small sheet of cardboard
- Plasticine
- Stack or toothpick
- Board for plasticine
First we will make the trunk and branches of the tree. We roll sausages out of brown plasticine and glue them to cardboard.
Then we roll balls from plasticine of bright autumn colors, then give them an oval shape, flatten them and glue them to cardboard. The result was tree leaves. Now, using a stack or a toothpick, we make veins on the leaves. At the bottom of the applique, if desired, you can make autumn grass. To do this, you will need to smear the rolled plasticine sausages in that place on the cardboard. The result is such autumn beauty.
In 1st grade, children already want to learn a lot of new things, they feel older and, accordingly, believe that they can do more, so creative work should be more difficult, so you can add natural materials to plasticine and start creating.
Let's look at an example of such an application. We will need the following materials:
- Sheet of white cardboard
- Plasticine white, yellow and blue
- Sawdust of different colors, twigs, as well as beans, peas and various seeds: watermelon, sunflower, pumpkin, cone scales
Let's prepare the base. Draw a horizon line on a sheet of white cardboard.
- Then we take plasticine and draw the sky and earth with it, add clouds to the sky. We make the earth yellow because we are drawing autumn. We try to apply plasticine in a thin layer so that the application is not very heavy
- Now we need some sunshine. Let's make it from peas
- We make a wedge of cranes from sunflower seeds
- Now we will make trees using the twigs we have stored for this.
- Watermelon seeds will be useful for leaves
- It was the hedgehog's turn. We will make it from pumpkin and sunflower seeds
- Let's make mushrooms from beans, pumpkin and spruce scales
- Add sawdust to make grass
And we admire the finished work!
2nd grade students can already create a whole picture, which will later serve as a gift for parents or teachers.
For the lesson you will need to prepare the following materials:
- Sheet of cardboard
- Plasticine
- Board for plasticine
- Stack
We take plasticine of autumn colors - red, yellow and orange. We roll out sticks of the same thickness, for example, 3mm. Their lengths must be different!
- Each stick must be twisted into a spiral to form a shell
- From the resulting shells we form the crown of a tree
- We make the trunk of our tree from brown plasticine, also forming sticks
- After the barrel is ready, you will need to trim the bottom with a stack
- At the bottom of the composition we place sticks of red, yellow and orange colors, giving them a waviness. They will depict fallen leaves
For a more complete picture, let's make a frame:
For elementary school students, you can give a presentation about autumn, read poems and excerpts from works. Our poets and writers loved autumn very much, so there is no shortage of works on autumn themes.