The master class offers several interesting ideas for applications on the theme of white, fairy and teddy bears and is suitable for creative activities in kindergarten.
The polar bear is the largest predator on the planet. Despite their massive size, sharp teeth and claws, polar bears are quite funny animals that are interesting to watch. Perhaps this is why the snow-white beast can often be seen in cartoons.
Applications are a great activity for developing fine motor skills and creative skills in preschoolers and primary schoolchildren. In addition, by cutting out and composing animals from different materials, the child gets acquainted with the characteristics of animals, their way of life, and habits.
Polar bear applique made from colored paper
The appliqué technique usually involves working with scissors and adhesive materials. This primarily applies to paper and cardboard. The easiest way is to cut out various shapes from colored paper and make a complete picture out of them. Paper applique can be of different levels of complexity (depending on the number of small and complex parts), so this type of creativity is well suited for children of different ages.
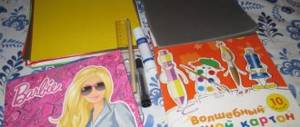
What is needed to create a paper applique :
- large format thick colored cardboard (base);
- stencil of all necessary elements;
- glue stick (PVA paper will most likely come in waves);
- multi-colored paper (single-sided or double-sided);
- pencil;
- felt-tip pens or paint for additional decoration of the finished composition.
3D white bear
The simplest applique with the image of a snow-white animal is made from ordinary white writing paper. Even kids in the younger group can handle the work. The bear cub is assembled from 7 elements - a round body, a head, an oval muzzle and four legs. You can cut out the eyes separately or use blanks (you can also draw them yourself with felt-tip pens). The polar bear lives in the ice near the sea under the northern lights. The characteristic landscape must be reflected on the base using paper or paint. The work is shown step by step in the photo:
You can make such a bear on a New Year’s card and just have fun with your child.
Teddy bear on an ice floe
Progress:
- print and cut out a template depicting Umka, an ice floe, and the sun;
- trace with a pencil the cut-out shapes of ice and sun against the background;
- fold the paper in half (along the dotted line of the template) and carefully cut out the ice floes and unfold;
- cut out the sun, punch out the stars with a hole punch;
- prepare rectangular sheets of white and yellow color of sufficient size to cover the cut out elements on the reverse side of the background;
- glue the rectangles, spreading glue on the “wrong side” of the background;
- Glue the teddy bear on the front side, draw a black nose and eyes for it.
Applications with paper bears
Children 5-6 years old can handle more complex, plot-based applications. The work can be based on a familiar children's story, for example, the fairy tale “Masha and the Bear” or “The Three Bears”. Let the children use their imagination and imagine the home of polar bear cubs - a great applique option!
Video: We teach a child to make a bear from colored paper
Teddy bear at the North Pole
To work you will need:
- White list;
- scissors;
- glue;
- napkins;
- cotton wool
In the younger group, teachers print out stencils with the required design in advance. They are distributed to children who begin exciting handicraft activities. At home, parents can help their child cut out such elements or buy ready-made kits for children's creativity. Let's get to work.
Step-by-step instruction:
- Use a blank or draw a bear yourself. Trace the outline of the animal and carefully cut it out.
- Make other elements of the composition: clouds, sun, ice floe, sea, etc. Place the parts one by one on a base of cardboard or a sheet of paper, fix them with glue, as in the photo below.
- Complete the composition of a polar bear on an ice floe. Use any devices for the background: napkins, paper. Color the background with watercolors, colored pencils, and felt-tip pens.
Experiment, implement bold and interesting ideas for creating a picture. Use the torn technique. Fill the ice floe with colored pieces of paper.
Make an ice cube from cotton wool. Roll it into small rolls and glue it to the base.
Decorate the design with rolled up lumps of napkins: make ice floes and snow mounds out of them. Such a bear will look impressive.
Place the finished templates on blue cardboard. Trace along the outline. Fill the space with napkin balls by gluing them. Make a frame of white snowflakes. The picture is ready.
Use fabric or pieces of faux leather for appliqué. Such crafts are extraordinary and require children in the older group to have skills in using scissors and working with various materials.
Step-by-step application of Bears from paper tubes
An example of a craft is the 2014 Olympic Bear.
To work you will need:
- image of a bear on the base;
- white, red and blue napkins;
- PVA glue;
- glue brush.
Detailed job description:
- Unfold the napkins and cut them along the folds into four pieces;
- roll each part into a tight flagellum;
- Apply glue along the contour of the image and glue blue and white flagella (glue over the body of the polar bear and the scarf, respectively);
- continue filling the bear cub’s body with white flagella and the scarf with blue ones, moving from the edges to the middle;
- do not forget to glue a red flagellum into the muzzle - a smile;
- Glue a curled nose on top, as well as curled eyes and a paw pad;
- decorate the background with snowflakes using decoupage.
Summary of the lesson in the second junior group on the application “Den for a bear cub”
Goal: Formation of socially significant moral qualities in children of primary school age.
Objectives: Repeat material about preparing wild animals for winter, develop children’s speech, repeat a poem about snowflakes, develop children’s responsiveness, develop the ability to work with a construction set, repeat knowledge of the basic colors and details of a construction set, develop the ability to find a part from a description.
Equipment: Toy bear, envelope with a letter, large construction set, scarf, audio recordings of the Zheleznovs “Bus” and “The Bear is Dancing”
Progress of the lesson:
Guys, I came to work very early today, and the watchman gave me this letter. I read it and realized that I couldn’t cope without your help. Would you like me to read it to you?
"Dear Guys. Mishka-Toptyzhka is writing to you. I am still very small and do not understand what is happening around me. It became very cold outside. Squirrel says that winter will come soon. She dried mushrooms, berries, and stocked up on nuts. The bunny changed his gray fur coat to a white one. But I don’t know how to prepare for winter, for some reason I always want to sleep. Help me please!"
Guys, who is this letter from? What does Mishka - Toptyzhka write to us about? Why do you think he wants to sleep all the time now? What do bears do in winter? Where do they sleep? And Mishki-Toptyzhka has no den! I think we should quickly get on our magic bus and go help Mishka build a den. Do you agree?
Children turn around their chairs, the teacher-driver performs movements to the music of the Zheleznovs “Bus”.
Here we are in the forest, get off the bus. Guys, I don’t see Mishka. Look right, look left. You see? How can we find him in the forest? (Children offer options). Let's dance his favorite dance, he will hear and come to us!
Zheleznovs “The Bear is Dancing”
And here comes Mishka.
"Hello guys! Thank you for coming! You will help me now and tell me everything! Why did the squirrel dry the mushrooms and berries? Why did the bunny change his fur coat? How should I prepare for winter? Should I also change my fur coat? (No, bears sleep in winter) Where should I sleep? But I don’t have a den..."
Guys, let's build a den for Mishka! What can we make it from?
Which construction set is more convenient for us to take in order to build faster: large or small?
The teacher gives each child the task of which construction piece to bring. For example: “Zhenya, bring a big red cube.” Children, under the guidance of a teacher, build a “den” together. The teacher asks to arrange the parts in a certain order, sorting by shape, color, and asks what the roof (scarf) can be made from. They put Mishka in the den and cover the top of the den with a scarf. Guys, to make Mishka warmer, we now need to cover the den with snow. We started learning a poem about snowflakes, let's tell it, stand around the den, repeat after me!
A snowball is quietly falling on a clearing, on a meadow,
Snowflakes and white fluffs are spinning,
They flew, rushed and lay down under the tree,
Snowflakes and white fluffs sleep quietly.
Children recite a poem in chorus and perform movements corresponding to the text.
Our snowflakes covered the entire earth with a blanket of snow. Mishka will be warm and cozy in his den; he will not be afraid of any frost. It's time for us to return to kindergarten. Take your seats on the bus quietly so as not to wake Mishka. I'll turn on the music quietly too. Ready? Go!
Here we are again in kindergarten! Where did we go? What were we doing in the forest? What did we litter the den with? And I have a little surprise for you! While you were getting on the bus, I took a photo of Mishka sleeping in our den. And I want to give it to you all as a souvenir. You can tell at home how you helped Mishka prepare for winter and color his photo (black and white drawing).
The teacher gives each child a drawing of a bear cub sleeping in a den, reading a poem by I. Tokmakova:
“Like there is snow on a hill, and snow under a hill,
There is snow on the tree, and snow under the tree.
And a bear sleeps under the snow. Hush hush. Keep quiet!"
Applique of bears from various materials
This MK is dedicated to types of non-traditional appliqué. The white bear will be made from cotton wool, fabric, felt, napkins. Not only children, but also their parents will be interested in the application.
Felt bear
By analogy with paper, you can cut out bears from fabric and glue them to the base. It is important to take thick fabric that will not let glue through and wrinkle when gluing. For beginners, felt . It holds its shape well, is easy to cut and quickly sticks to a surface (fabric or paper).
Mothers can make their own Teddy bear patches for their children. The parts of the teddy bear, pre-cut, are sewn onto the base by hand or by machine. The result will be a nice decorative element for clothing.
Teddy bear made of cotton wool
Using cotton wool and glue, children in the middle group will make not only fur for the bear, but also a den for it. Also, cotton balls will make a “comfortable” ice floe, on which a paper bear will happily sit.
Postcard “Bear in the Den”
In order to hide a bear in a cozy den, you need to prepare:
- paper of brown, golden, white and green colors;
- cotton wool;
- stencils of all applique elements;
- glue;
- scissors (regular and curly);
- pencil;
- felt-tip pen;
- base (colored cardboard).
Step-by-step instruction:
- circle on colored sheets and cut out all the elements of the applique - the face of a bear, a Christmas tree, a den, a month;
- draw a bear’s face with a felt-tip pen, glue “snow” to the Christmas trees (glue small green Christmas trees into large white Christmas trees);
- glue a white den in the corner of the base, and stick a bear’s face on top;
- roll loose balls from pieces of cotton wool and paste them over the bear’s head, focusing on the edges of the den, glue the snowdrifts;
- bend the Christmas trees in half and glue them together on one side, glue the other side to the base;
- stick on stars, a month, make a frame.
Application made from a mosaic of colored paper
White napkins will make an original bear. Creative work is designed for kindergarteners in the preparatory group, as it requires perseverance, patience, and skills in working with small details. The scheme of work is very simple: you need to tear off small pieces from the napkin, roll them into pellets and glue them in dense rows to the contour drawing, gradually filling all the empty spaces.
Family Bunch
Hello to all teachers - or rather Hello Medved! Because we will make a variety of applications with bears and cute bears. Here you will find options for application templates with bears for the youngest children (2-3 years old) - which are suitable for classes in the 2nd junior group. There are also excellent templates with bears that will be suitable for children of the average group of 4-5 years old . older preschoolers 6-7 years old can make Many of the topics about bears are suitable for working with younger students in Technology or Art classes. In short, here you will find interesting options for a variety of pedagogical tasks: learning to cut with scissors, learning to see layers in an applique, learning to play with shape, learning to work with paper of similar shades. Paper BEARS applications will give you new knowledge and many joyful hours of working with children in kindergarten and school.
The simplest application
BEAR'S HEAD.
For the little ones.
Here are templates for simple applications for kids, where you just need to draw a bear’s head. A minimum of parts and a simple, clear assembly of paper elements, with their location symmetrical relative to the central axis of the head. Simple cute applications with bears that children 2-3 years old will love.
You can add the bear's head AND ADD FEET BELOW. And then there may be an additional element below, on which the bear seems to be resting its paws - a gift, a postcard for mom, a fence, or a window.
The bear's head can be made less toy-like and more realistic - with a similar morphology of the face of a real forest bear. It is for such an application that you see the template below.
Based on the same template of the bear's muzzle, you can make a cardboard craft in the FORM of a MASK - with slits for the eyes.
Applique BEAR AND BEES.
SMART ACTIVITIES in kindergarten.
And here is a beautiful applique where a big bear (it doesn’t fit on the background sheet) is looking at a bee. Here the children will have an important task - CORRECTLY PLACE THE PUPILS of the bear's eyes. Before the start of the lesson, when the teacher shows the sequence of work in front of the children, you need to play the game “WHERE IS THE BEAR LOOKING”. That is, they have glued the bear and the bee - but the pupils have not yet been glued... and the teacher first places them to the side, and asks the bear to see the bee (no), then the pupils downwards (does not see either)... and only when the pupils are towards the center and up, the bear sees the bee . Let the children understand this technique and be able to do everything correctly on the applique.
And here is another very interesting bear applique with a task where you need to correctly lay out a MOSAIC FROM HEX POINTS OF COLORED PAPER to make a real honeycomb.
We give the children a stack of hexagons cut out of paper - and the child first glues the bear onto a sheet of paper, and then fills the bottom edge of the sheet with hexagonal honeycombs - laying them close to each other - forming a honeycomb tile.
But here is an APPLICATION FROM DISCS - that is, from round parts. Where the child himself must figure out how to correctly arrange circles of different sizes on a sheet of paper in order to get an image of a bear.
And here is a plot application for group work in kindergarten - where all the elements of the image are laid out from ROUND and OVAL paper parts
Cute bear cubs.
Cute bears - templates for applications.
And here is one of my favorite applications, where you first need to glue the cheeks (pink circles) onto the bear’s face, and then on top of them dark spots of the eyes (overlaying part of the cheek) and then white eyes with black pupils. It turns out to be a very touching face of a cute little bear-baby. A simple and interesting applique for 4-year-old children, which is very nice to show to mom and dad. Be sure to make this cute paper bear cub in your classes with children - both you and your parents will be very pleased.
Teddy bears in the style of animation with ice cream or in a diaper, or in a barrel of honey - little naughty bear cubs. Girls like this applique.
Here is another cute applique with a friendly bear. Kids love this portrait craft featuring a real, fun bear.
Applications for children
TEDDY BEAR.
Bears do not have to be scary and forest-like - they can be ordinary PLUSH TOYS. Here are some templates for appliques with TOY bears. As a rule, toy bears are depicted in a sitting position. Like this…
And as a rule, the lower limbs of such a bear are depicted as CIRCLES or OVALS.
You can make the belly of the bear in the form of CLOTHES WITH STRAPS, as in the template below.
On such hind legs, in the bear appliqué, you can depict the silhouettes of dark toes and heels.
Or the heels and toes of the bear’s paws can be made FROM LIGHT PAPER, as in the template below.
You can combine SEVERAL SHADES of brown and beige in the bear applique to convey the texture of its toy cut. All kids will love making this cute coffee bear. This applique will decorate both a greeting card and gift wrapping.
You can also depict a toy bear made of paper like this... with its legs outstretched, lying down and let its hind legs be round too. As you can see, this also looks good, proportional and appropriate.
POSE for a bear
on a children's applique in the garden.
Bears with character.
Children love not only to depict a bear out of paper parts, but also to add an artistic theme to their craft. Give the bear a living emotion, depict him inside an active action or event. This will already be a bear with a history, with character, with a certain mood. If you are making an applique based on the plot of a fairy tale or a story read the day before, then you need to make a bear with the same character and mood that he had in the plot of the fairy tale.
This could be an applique of an angry bear that growls (as in the photo below).
Or it could be a bear that came and saw a large bush with raspberries. This template below is suitable, only at the bottom of the sheet under the bear’s paws we paste a lot of herbarium and draw raspberries on top of the herbarium with red gouache (we poke it directly with the boy). It turns out to be a beautiful craft - the bear looks at the raspberries, spreading its paws to the sides.
It could be a bear like this (template below) - he sits on a barrel of honey, his paws are spread out, streams of honey flow from the barrel and from his paws (from thick yellow gouache). The result is a gorgeous plot applique with a glutton bear.
It could be a bear that came up to a tree, raised its head and saw a hollow with delicious honey above - and then this silhouette template for applique is suitable for you.
It could be a very fat, fat bear. Who has already eaten all the honey, bees fly around him (you can draw them with a pencil on a white background) and next to him on the ground there is a puddle of honey and an empty barrel.
Puff appliques with a bear.
For the older group of kindergarten.
In the middle and senior groups of kindergarten, we teach children to work using the PAYER APPLICATION technique. When objects are laid out in layers - first the back parts of the object, layer by layer is applied to them - the upper, front layers of the applique.
We see an example of this technique in the photo below.
If desired, you can make a volumetric spacer (from cardboard) between the layers to give the layers volume - so that they hang over each other and there is air between them.
Below I give several ready-made templates FOR LAYER APPLIQUE WITH BEARS.
In the pictures below you can easily distinguish the back layer, the middle layer, the front layer of the body and the topmost layer of the muzzle.
Come up with your own silhouettes with a bear... design the division of your picture into several layers. Create a test sample - test how the entire assembled craft looks as a whole and invite the children to also correctly assemble the layered applique.
Elegant paper cards
WITH BEARS.
You can also make any decorative cards with bears - it will also turn out interesting on the occasion of a holiday or birthday of your mother, father, grandmother, grandfather. Cute applications with bears can be made from colored paper - or from silhouettes drawn in pencil and cut out with scissors. The result is a touching craft in retro style.
These are the wonderful ideas for applique with a bear and toy bears that I found for you today. And now it’s your job to prepare to cut and give the children this opportunity to make a picture with a bear out of paper with their own hands.
Good luck with your creativity in kindergarten. Olga Klishevskaya, especially for the Family Kuchka website.
Cut out the Silhouette of a Brown Bear
I start cutting from the right edge. First, let’s start “traversing” the lower side of the bear’s outline: the jaw, the neck are not very pronounced, the paw is pushed forward.
That's enough for now, let's move on to the dorsal part of the figure.
The muzzle is not very long (but not blunt either). The ears are round and proportionally cut them small. Neck - in the area of the withers we hunch the bear, then the hollow and rounded croup. The hind legs are bent much stronger than the front legs.
Brown bear silhouette
So what to do with this silhouette now? After all, he’s bored... on my table among pencils, scissors and glue... He needs wood! At least a silhouette.
Well, we can do this - we’ll glue the silhouette of a bear to a piece of album paper and draw a taiga for it:
Applique with additional drawing of the bear
Well, we seem to have sorted out the brown bears.
Now let's move on to the development of polar bears.
