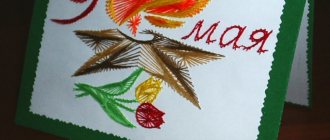
A bright book is a child’s constant companion almost from the moment of his birth. With the help of a variety of pictures, the baby has fun, develops comprehensively, and learns a lot of new and interesting things. However, a restless child gets tired of a single book quite quickly and the mother has to go to the store and buy a new one. This leads to constant spending of money. There is an alternative way that will save you money and have fun with your child, while developing and educating yourself.
Any mother can easily make baby books on various topics on her own or with the involvement of her children. Baby's children's books are simply an unlimited flight of imagination and creativity; they can be made from almost any available material, thereby creating very interesting and useful crafts for the child.
In this article we will look at the description of baby books and the features of their production at home. We will provide detailed master classes on creating children's books at home, as well as a selection of interesting and unusual projects and templates for such books for children.
What are baby books: description and manufacturing features
Baby's books are hand-made educational books for children of all ages. Today, books in stores are quite expensive, so it’s rare that a mother has the opportunity to update her children’s library at least every week. In this case, an original craft in the form of a small baby book will be a real salvation. It is noteworthy that such an educational book can be made very easily using simple materials at hand that can be found in any home.
Such crafts can be made for the development of children, for teaching older children, as crafts for kindergarten and school, and also in the form of your own diaries and stories. Each mother can independently design a baby book, or you can involve children in creativity, allowing them to color and paste appliqué, which is also a kind of educational moment. Creating a baby book craft is a very interesting and exciting process; it allows you to make new books for your children with your own hands on almost all possible and desirable topics.
Let's look at the main features of creating a baby book with your own hands:
- As already noted, a baby book can be made for any age: for the youngest children under 3 years of age, for preschool children from 3 to 6 years old, for schoolchildren, and also for teenagers.
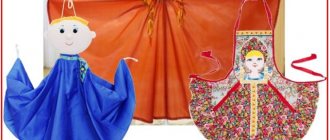
- It is worth noting that all educational books can be divided into several types: baby books made of felt and fabric, educational books made of cardboard and paper, and baby books using photographs.
- Baby books differ from each other in the way they are attached. You can use the simplest option and pierce several leaves of the book with a hole punch, and then tie all the pages with ribbon or rope. There is another way: when creating a baby book from fabric, you can also tie all the soft pages with ribbon, but you don’t need to make holes. You can fasten the pages of paper books using a transformation mechanism, when all the leaves are folded like an accordion. The most durable, practical and convenient way to fasten pages in baby books is to fasten them like real books. To do this, 4-5 pages are sewn together and this is repeated with all the others, then the leaves are fastened to the cover.
- A baby book for preschool and school age should consist of a maximum of 5-6 pages. This volume is quite sufficient to cover a specific topic. In addition, it is quite problematic to fit, for example, more than 5 soft pages into one book.
- As has already become clear, the pages of such small educational books can be made from a wide variety of materials. Plain paper or cardboard, cotton and synthetic fabric, as well as felt are suitable for this.
- The topics of children's books will differ depending on the age of the child. For example, pages with large, soft elements are perfect for very young children who are just beginning to explore the world around them. As for preschoolers, in this case you can make books with paper pages to study professions, animals, seasons, geometric shapes, numbers and other things. Already for children in grades 1 or 2, you can make baby books for learning the alphabet, with poems and riddles.
- It is important to remember that one baby book should be devoted to only one topic, i.e. On each page you can place tasks, exercises, pictures on one specific topic.
- Before you make a baby book with your own hands, it is important to carefully consider its theme and the layout of the pages. To decorate them and reveal the theme, you can use clear and colorful pictures and your own drawings, three-dimensional figures made of fabric and felt with Velcro and buttons, beads and buttons, your own photographs and images from magazines and books.
- Such an interesting craft can be made in a simpler way - just print out the baby book in separate pages from the Internet and fold it into one book.
Making a baby book with your child
Sometimes children even get bored with cute felt bunnies and rattles, but they love to create and come up with new ideas themselves. Choose a theme for a baby book together, draw, collect interesting facts, use pictures and stickers!
You will need:
Paper, glue, paints and pencils, old magazines and printouts, stickers, needle and thread.
How to do:
Instead of making fabric pages or printing out backgrounds, design them yourself! For example, to make a book about animals, first draw their habitats. To do this, fold sheets of A4 paper in half and hand them to your child along with the pictures - let the child choose the animals he wants to live there, while you find something interesting about them.
Older children can fill out the text in the baby book themselves - at the same time this will be a short training in their writing skills. All that remains is to stick all the animals onto your pages and sew the book in the middle with regular thick thread.
Methods for attaching pages in baby books
When creating children’s books, it is important to pay special attention to securing the pages so that such an amazing and interesting craft will last a long time. The type and method of fastening the pages depends on the material from which they are made. Let's look at the main options for attaching a baby's book:
- The simplest option for connecting pages of a developmental book are ordinary holes made with a hole punch. To do this, connect the pages of a book made of paper or cardboard one into one, and then bend them. Next, take a hole punch or regular scissors and make two or more holes in the fold. After that, you just need to take a beautiful ribbon or rope and tie the pages in a beautiful knot.
- You can also tie felt pages using tape, but in this case you can only tie a few pages together, and the holes need to be made carefully.
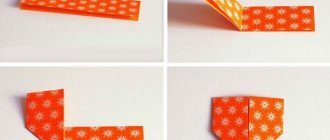
- Another simple way to attach paper pages is to transform sheets of paper or fold them like an accordion. To do this, the leaf is cut in half, after which each half must be folded in half. Next, each bent side is bent again, only back. This way you get a lot of accordions that need to be glued together. You can use a box to store such a baby book.
- For fairly large pages in a baby's book, it is recommended to use special metal rings, like in office folders. In this case, you can also use grommet tools to make the holes in the fabric look neater. With the help of rings, the pages will turn easily and effortlessly, and you can also accommodate a much larger number of soft pages of the book.
- Firmware as in this book. This method is quite complex and troublesome and is most suitable for a baby’s book with paper and cardboard pages. Stack several leaves on top of each other (it’s best to use 5 pieces) and fold them in half. Next, take a hole punch and make 4 holes on the fold itself. After this, take a thread and pull it through all the holes. The top of the spine is coated with transparent glue and the cover is glued to it.
The option for attaching pages to a baby’s book is selected depending on the material from which the craft is made and the number of pages.
Baby book made of fabric
Soft baby books with fabric pages are sold in huge numbers in children's stores. But why overpay for something you can easily and quickly do with your own hands? It is enough to master the basic principle - and you will be able to make such toys until your child gets tired of it!
You will need:
Multi-colored fabric, ribbons, lace, felt, large textured details, threads and needles.
How to do:
Cut out several pieces of multi-colored fabric 20x40 cm (or whatever size pages you want). Decorate them with letters or felt pieces, Velcro figures, zippers, buttons, fur, feathers, tassels, laces, fringes and knitted toys.
To join the pages, place two of them face to face, stitching around the perimeter and leaving only a small hole on one side. Through it, carefully turn the workpiece inside and put a piece of thin padding polyester inside for volume, and then sew up the hole. This will be the cover, first and last pages, respectively.
Simply fold all the inner pages in half, sew them together, turn them inside out and fill them with padding polyester in the same way. The inner pages are simply sewn inside with large stitches or attached to tape. Make ties or fasteners on the cover to make it more interesting for the child and more convenient for you.
DIY baby books for little ones - step-by-step instructions
Children under 3 years old begin to actively get acquainted with the world around them. This age is characterized by familiarization with new objects by feeling and tactile perception. The baby begins to learn all new things with the help of his hands. That is why baby books for children aged six months and older are made from soft materials, fabric and felt. The child on the cover itself feels the material, so it is advisable to use different textures and elements. You should not use beads, buttons, or ribbons that come off easily, which the baby can pull into his mouth. Such small decorative elements must be sewn firmly. It is best to sew large figures from felt and attach them with Velcro, thereby developing thinking and hand motor skills.
How to make a soft baby book for babies - description
Let's look at the detailed instructions for making a beautiful craft - a baby book for little children, consisting of 7 different pages.
Necessary materials:
- Felt of various shades, as well as fabric for creating pages.
- Sintepon.
- Threads to match the selected felt.
- Various decorative elements: beads, buttons, ribbons, braid.
- Sewing machine, scissors, ruler, pencil, template paper.
Making the first page:
- First of all, take a piece of yellow felt and measure a piece of 12 cm by 12 cm on it. Then cut out another one of the same size.
- After this, you need to cut circles of different diameters on one piece of felt, like in real cheese. To do this, you can use regular coins from your wallet.
- At the next stage, using a sewing machine, we sew each circle with a zigzag seam. This can be done by hand with a regular needle.
- Cut circles inside such a seam to create holes.
- After this, you need to start making the page itself, onto which we will later sew felt figures. From fabric or felt of a contrasting color, for example white, cut out a square measuring 23 cm by 23 cm.
- Take a solid square of yellow felt and place a square with holes on top, then secure two pieces of fabric with safety pins to the white page of your baby's future book.
- Using a sewing machine, sew a zigzag stitch.
- Next, we’ll start making a mouse applique. To do this, first of all, cut out templates of the mouse’s body and its ears from white paper.
- After this, we transfer the templates onto gray or pink felt, outline them with chalk, and cut them out with scissors.
- We attach the ears to the body of the mouse, and instead of eyes you can use black beads or buttons. For the ponytail, take a long thin ribbon. We fix it with pins on the page; it is best to place the future mouse on the corner of the cheese.
- Sew with a zigzag stitch.
- To finish working on the first page, we string various beads onto a ribbon from the other end and sew them on, first threading them through the holes in the “cheese”. The page is ready.
Making the second page:
On the next page of the baby's book for children you can make a beautiful tree with apples that can be removed thanks to buttons.
- Cut out templates of a tree trunk and its crown from paper.
- Next, transfer them to pieces of green and brown felt, outline with chalk and cut out with scissors.
- After this, cut out another page of white fabric measuring 23 cm by 23 cm and use a zigzag stitch to stitch the resulting tree.
- Next, we take five ordinary buttons and sew their lower part onto the tree.
- After this, cut out the apple template and transfer it to red felt. It is best to cut apples with curly scissors. At the same time, you need to cut out five red circles of smaller diameter felt.
- Take the second part of the buttons and sew them to the red circles. At the same stage, sew small brown ribbons.
- Next, we apply the circles with ribbons to the future apples and stitch them with a machine, after which we attach them to the tree. Our page is ready.
Making the third page “Abacus in a bag”:
- Immediately cut out a page from a white piece of fabric the same size as the previous ones.
- Since this page will be adjacent to the Apple Tree page, it is better to use the same colors. Take a small strip of red felt and stitch it to the top of the page.
- Next, we take a thick nylon thread and string five beads onto it, in this case these are wooden fish. Sew the thread to the red strip of felt.
- Next we are making the bag. Take pink fabric and cut out a square measuring 28 cm by 28 cm. In the center of the piece, mark a circle with a diameter of 8 cm.
- Gently round the edges of the pink piece of fabric, then wrap them with a tube in two layers so that you can thread the ribbon through them. Secure with pins and stitch.
- Next, place the fabric on the page so that the circle is in the center and sew it with a zigzag stitch. Thread the ribbon, add beads to the corners and tighten the bag. The page is ready.
Making the “Ladybug” page:
- Prepare a book page of the required size.
- Next, take black felt and cut out a circle with a diameter of 10 cm and the face of our ladybug.
- After this, you need to cut out two halves from red felt, and 6 small circles from black felt.
- Cut two halves from the lining fabric and sew a zipper to them.
- Let's start sewing on the ladybug. First, we attach a black circle, a head, wings from white lace, and insect legs from ribbons.
- We put red wings with a zipper on top, and our page is ready.
These are just a few pages with detailed descriptions that can be used to create a baby book for young children. Examples of various topics can be seen in the following photos.
Design options for a children's book
When creating a children's book, you can safely imagine and experiment, since such a book does not provide for any restrictions in design or subject matter.
If nothing comes to mind, then you can check out the list of the most popular options for homemade children's books, which may serve as a good source of inspiration for creating something unusual and original:
- Sketchbook book;
- A book made of stitched sheets of colored cardboard;
- Soft educational book made of fabric;
- A book with photographs;
- Coloring book with riddles;
- Baby's personal diary;
- A book with fairy tales and poems.
When choosing any design option, you should not be afraid to experiment, combining several ideas into one. For example, you can make a soft personal diary or an educational fairy tale book for your child! The more interesting and brighter the book is, the more delight it will cause in the child!
DIY bedspread - a selection of creative ideas, sewing instructions, tips and photo examples
How to make a dollhouse with your own hands - a detailed description of the process, photo examples, tips
Baby books for kindergarten
In kindergarten, children's books can become a real assistant in the upbringing and development of children for both teachers and parents. Such educational little books can be made on various topics, thereby educating your child. At this age, you can already try to make books from paper and cardboard, making interesting and useful crafts. First of all, it is important to decide on a topic and devote the entire book to it.
Baby books: themes for kindergarten
You can make educational books for children for kindergarten on a variety of topics that are studied during the child’s stay there:
- Books about domestic and wild animals.
- Studying professions.
- Seasons and their signs.
- Colors, numbers.
- My house.
- My responsibilities.
- The simplest concepts of what is good and what is bad.
- Children's books about their favorite fairy tales.
Baby's books: animals
Baby paper books about pets will be an excellent assistant in studying our smaller friends, as well as their habits. Such a book can be made with drawings and special pockets where various animals will hide. And they will need to be guessed by some features.
- Take blank sheets of paper and fold them in half. After this, use a hole punch to make several holes in the fold and thread a ribbon or rope through them. If desired, you can make a different mount.
- You can paste any applique about pets on the cover.
- Next, on the first page you can make a window out of colored paper, inside which you can draw a goat with a bell. Glue the hooves onto the window frame, thereby making the design more voluminous. Below the picture you can write a riddle or a poem about a goat.
- On the next page draw a donkey and a couple of grass bushes and a trough with water. In this case, we glue the grass only along the bottom strip so that the carrot can be hidden behind it. Separately, draw a carrot and hide it behind the grass. Write a task for the children: feed the donkey a carrot.
- On the next spread, draw a puddle of water and a pig in it, then glue a colorful bucket so that it covers the pig. Also draw a chicken without a front wing, in place of which you can draw or glue a chicken. The wing is glued separately. Here prepare special inscriptions, as in the picture. The child will enjoy doing such tasks.
- On the next page we glue the image with nature and sew on a ribbon onto which we attach the horse in advance. We write the inscription on top, as shown in the figure. The horse should move easily along the ribbon.
- Draw a booth nearby and glue an opening door behind which the puppy on a leash will hide.
- On the next spread you can draw stories with riddles about a cat and a cow.
Thus, you can come up with a wide variety of stories with riddles about domestic or wild animals to make it more interesting for children to study them.
Baby's books: seasons
Let's look at how to make baby books about different seasons with your own hands. In this case, about autumn.
- First of all, make a cover for such a book. You can use thick cardboard or a hard office folder cover. Decorate the two halves of the cover with scrap paper. On the front side you can glue a themed picture on the theme of autumn. In the future, you can fasten two covers and 4 pages using rings.
- For the pages, you can use thick yellow cardboard or regular cardboard, which can later be covered with paper.
- On the first page you can paste a small piece of paper with a figured edge and write a poem about autumn that will describe its features. On the same page, stick on Velcro the image of a girl under an umbrella and falling leaves. This way the drawing will be voluminous.
- On the next page we again glue a figured piece of paper with a poem about rain, and on the next page we draw beautiful puddles, glue the drawn clouds and glue beads in the form of rain droplets.
- On the following pages you can glue pockets on which you can pre-print or write riddles about the autumn harvest. And inside the pockets you can put figures of vegetables and fruits.
- On the last page, write a poem about leaf fall and stick an applique of an autumn tree with colorful leaves on the bottom. Maple leaves can be cut out by hand, or you can use a special hole punch.
Baby books: templates and projects for kindergarten
Soft books for babies based on fairy tales
Patterns for learning colors
Little book from old magazines
This is a very simple and interesting idea for a baby book that you can bring to life with your child. Let your child choose a topic, cut out pictures and place them on the page. This book is fun not only to read, but also to make, and then share with friends!
You will need:
Old colorful books and magazines, scissors, paper, glue, pencils, thread and needle, tape.
How to do:
Decide on the size of the future baby book, the number of pages and the topic - for example, it could be animals and plants. Divide the cut-out illustrations into groups: wild animals, domestic animals, fish, birds, and so on.
For the cover, take thick sheets of cardboard, make the pages out of paper and sew them with thick strong thread. Inside you can leave inserts of entire magazine pages with educational information. This way, children will be able to learn more about those animals that were previously cut out and pasted on.
Baby's books for school - detailed master classes
For elementary school students, the baby's books will also be an excellent didactic material that will help them learn and get to know the world around them. For this age, educational books are most often made of paper and cardboard with a large number of tasks and exercises. Children from grades 1 to 4 will be able to use the interesting pages of the baby's book to learn the alphabet, sounds, learn to count and recognize geometric shapes. To make these crafts fun for them, you can decorate them with colorful images, hand-drawn or cut out from magazines, as well as inscriptions and poems. Let's look at the detailed instructions for making children's books for different grades of elementary school.
Baby books for 1st grade
At this age, it will be interesting for children to study using little books with riddles that will describe objects of various subjects. Here are detailed instructions for creating a baby's book with your own hands on the topic “Professions” with riddles.
- First of all, you need to draw a template for the main design of the baby’s book on a sheet of white paper using a ruler. In this case, all pages will be in a box.
- We cut out the template, which we will later use to obtain the pages of the baby’s book.
- Next, select the required colors of cardboard and cut out pages from them according to the template. It must be remembered that each subsequent page should be a couple of millimeters smaller than the previous one.
- Carefully bend the resulting pages along the lines; you can use a ruler or compass to make the fold even and the cardboard bends easily.
- The edges of the pages can be rounded with scissors, after which we glue the base of all the pages, pressing tightly with our hands.
- Next, we proceed to making a cover for our book. On a sheet of white paper, draw a template using a ruler and pencil, then cut it out and bend along the lines. Next, use a pencil of glue and glue the corners to form a lid, press it with clamps.
- We cover the lid with beautiful paper, you can use wrapping or scrap paper. You can use a ribbon to keep the box closed.
- Next, we begin filling the baby’s book. To do this, you can use printed images from the Internet, as well as the text of riddles.
- Carefully cut out the images and text, and then color them using colored pencils.
- Next, cut it out and paste it onto the colored pages of the baby’s book. On the front side we paste riddles, to which you need to choose the right answer by choosing a picture from the inside.
- Inside the box you can put cards with pasted images of various professions so that a first grader can select them.
Baby's books: 2nd grade
Primary school begins with learning the alphabet and sounds. For this, a huge amount of didactic materials are used, including books for children that can provide invaluable help. Such baby books can be made in different forms using different pictures and techniques. This includes the study of letters, speech therapy ABCs, and the study of letters of a foreign alphabet.
- First of all, we need to prepare the pages of our future baby book. Thick sheets of white paper in A4 or A3 format are suitable for this, it all depends on the age for which such an alphabet is intended.
- Leaves with images of letters and syllables can be printed ready-made from the Internet.
- Next, take one leaf and bend it in half, doing the same with all the pages.
- After this, we put all the leaves together. You can stitch it using tape or rope, or you can do it more securely and attach the leaves to rings.
- When the base of the baby's book is ready, you can start decorating. You can decorate the cover to your liking: write the word ABC, indicate the student’s last and first name, and paste a beautiful image.
- Next, let's move on to the alphabet itself. We cut out or draw the letters in order, paste on pictures of objects and animals that begin with this letter. Below the picture we write the name of the picture syllable by syllable.
- You can also use other pictures with verses with a given letter or sound printed on them.
Baby's books: 3rd grade
In addition to Russian, elementary school students begin to learn another foreign language, for example, English. In this case, it is important from the very beginning to learn and remember well all the letters of the English alphabet and sounds with which there may be confusion. Let's look at how to make a convenient and practical baby book for learning English, which is convenient to take with you.
- This baby book will be a real salvation in the process of learning English at an elementary level. At the same time, it is very simple to do.
- First of all, you need to print out cards with letters and sounds of the English language, as well as with drawn pictures. You can print either a color version or a regular one, so that you can color the images later.
- Next, the pictures need to be cut into separate cards and folded in order.
- At the next stage, you need to take sheets of white thick paper and fold them like an accordion, while one page of such a book should be slightly larger than the size of the card. The number of pages must be equal to the number of letters in the English alphabet plus covers.
- We glue the cards onto the pages of our baby's book.
- Next, you need to choose a suitable size box with a lid where you can put the book.
- You can make such a box with your own hands.
- Place all pages in one box. While working with the book, you can move the pages into the cover and back.
Baby's books: 4th grade
For children of this age, you can prepare baby books based on your holidays, travels and trips, as well as using various poems. In this way, the child’s memory, imagination and speech will develop. Let's look at how to make a baby book with your own hands with poems for schoolchildren.
- For this option, you need to take white sheets of paper of the required size, fasten them with a spring or using regular tape and a hole punch.
- On one page we paste pre-printed and cut out texts of popular children's poems or stories, and on the next page you can draw a plot from such a work. This will make reading more interesting for the child.
- You can create more voluminous drawings and applications that symbolize the main character of a poem or story.
Baby book made from A4 paper
Little baby books are great for learning the basics of reading. They are cheerful and funny, there is nothing superfluous in them, and the child perceives such leisure time as an exciting game. And such pocket books are always convenient to take with you on trips and travels!
You will need:
A4 paper, a stationery knife, glue, colored pencils, markers, pens and crayons.
How to do:
Fold a sheet of A4 paper in half lengthwise, then again crosswise, and again each half. Unfold it and make a cut in the middle with a utility knife. Coat one side with glue along the entire plane and fold the book, fixing the pages.
You can combine several of these paper blocks into one thicker book and even make a cover. All that remains is to draw pictures and write text. They can be used to study the seasons, animals, surrounding objects, numbers - anything!