Fleece pencil holder
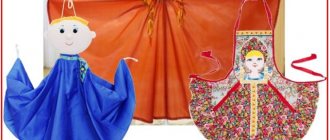
A very interesting model of a pencil holder. You can easily make it yourself if you know how to hold a needle or sew on a machine. Fabric colors can be replaced to suit the decorated room. Step-by-step photos will help you with your work.
What you need for work:
- can;
- fleece fabric in green and white (other colors are possible);
- green felt:
- scissors;
- padding polyester;
- glue gun;
- threads to match the fabric;
- needle;
- centimeter;
- pencil;
- decorative eyes (they can be cut out and glued from black felt or leatherette).
Manufacturing process:
- Measure the height and circumference of the jar. Cut out rectangles from green and white fleece to size. On the sides and bottom we make seam allowances of 0.5 cm.
- In the white case we also allow for a fold at the top of the craft. Then we outline the bottom, add a circle to the joint and cut it out. We sew the covers using a needle and thread using a “back needle” seam or using a machine.
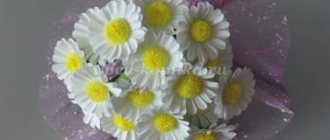
- To decorate the craft we sew 9 faces. We cut them out in different sizes, 2 parts each, 18 pieces in total. Fold it face inward and sew it together, leaving a small hole. We turn the face inside out, stuff it with padding polyester, sew it up and attach the eyes with glue.
- We cover the jar with soft insulation.
- We put a green cover on top. Cover the inside of the bottom of the jar with glue and insert the white part.
- At the top we wrap the fabric outside the can and carefully sew it to the green part with a hidden seam.
- We glue faces around the decorated jar. Cut out leaves from green felt. We attach them with glue.
Also read: Ideas on what you can make from an old sweater with your own hands
The result is a very original pencil holder. Is it suitable for those who need to work in silence? without disturbing others. Pencils and pens fall completely silently onto the soft fleece.
Introduction
Familiarity with a creative project is introduced into the technology of labor training from the 5th grade.
By definition, a creative project is an independent research project that can be completed efficiently thanks to solid knowledge and skills of technology subject programs.
Goals and objectives of the creative project:
1. To develop polytechnic knowledge in the most common and promising technologies;
2. To form an idea of the basics of modern production and services;
3. Develop independence and the ability to solve creative and inventive problems;
4. Ensure the implementation of self-knowledge, familiarity with the world of professions;
5. To cultivate hard work, enterprise, collectivism, humanity, mercy, commitment, honesty, responsibility, and a culture of behavior;
6. Foster a caring attitude towards nature and natural resources;
7. Form an active life position;
8. Form the basic concepts of a market economy and the ability to apply them;
9. Develop a realistic plan to achieve your goal.
Equipment: samples of blanks, rulers, pencils, creative projects, reports, abstracts, posters.
The object of the research work, creative project is the technology of manufacturing wood products, and the subject is the student’s own capabilities in this craft. The novelty and significance of the research can be defined as follows: “Everything new is well-forgotten old. Beauty, revived by human hands, can make the world warmer and kinder.”
The ability to work with wood is an opportunity to experience beauty. This skill is taught in wood processing technology lessons with a view to its further use for practical purposes. It is impossible to imagine Russian housing without wooden products, both in ancient times and in our time.
Even in a modern apartment or office, a wooden composition will flash by, enlivening the interior of the room. Now many folk crafts are being revived, a lot of relevant literature is being published: books, magazines, manuals that will help in the design and manufacture of products.
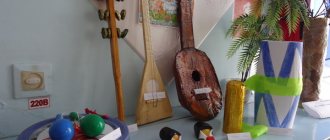
All the tools in the workshop are distributed according to their arrangement, and only pencils and pens are, as a rule, chaotically lying on the teacher’s desk. You can correct this situation and restore order among your office supplies.
The object of development of a creative project is the installation, which can be called a stand for pencils and pens, a pencil holder. Its use will help keep stationery on the table in perfect order, and this product can also act as a pleasant and useful gift for loved ones.
Clay pencil
If you like clay products, you can make such a pencil holder with your own hands. Step-by-step instructions will help you with your work.
What you need for work:
- clay;
- wooden board and rolling pin;
- a piece of burlap;
- rough texture lace;
- sharp knife;
- stacks;
- ballpoint pen refill.
Manufacturing process:
- Cover the board with burlap and roll out the clay on it. The length of the strip should correspond to the circumference of the pencil holder.
- We lay the lace on top and roll it with a rolling pin to imprint the design.
- Using a sharp knife, cut a rectangular strip of the desired size with a printed pattern.
- We apply textured fabric to the longitudinal sections, pressing with our fingers, smoothing out the curved edges.
- We coat the short side of the rectangle from the inside with liquid clay. We twist the strip into a cylinder and glue it together.
- Turn the top edge of the pencil holder outward. Roll out a piece of clay for the bottom of the craft.
- Cut out a circle that is a couple of centimeters larger than the diameter of the pencil holder.
- We press down the cut of the circle with our fingers, making its edge thinner.
- We turn the cylinder over and coat its lower cut with liquid clay.
- Place the part on the circle with the moistened side. We also impregnate its protruding edge with liquid clay and wrap it onto the cylinder. If the wrapped part is uneven, so be it, the wavy surface has its own charm.
- Roll small balls out of clay. Then we splash them with our fingers, and use the rod from the pen to make two holes in the middle. We decorate the pencil holder with these buttons.
- Roll out a small piece on a textured fabric and cut out a pocket. We straighten the cuts and glue it to the cylinder using liquid clay. Using a stack, we finish the seams.
- Roll out another piece of clay on a textured fabric and glue a patch on the back of the pencil holder.
Also read: Ideas on what you can make from an old sweater with your own hands
We burn the finished pencil holder in the oven and paint it with light brown paint.
For reference!
We buy ready-made polymer clay for modeling at a stationery store. It can also be prepared from clay powder purchased at a hardware store. The cooking method can be easily found on the Internet.
How to make a pencil holder using the cardboard technique
Difficulty: low
Working time: 1 day
Pattern or template:
Materials: glue moment, titanium glue, stationery knife, ruler, scrap paper, beer cardboard, wax, acrylic paint, watercolor paper, pencil, sandpaper, cutting mat, clamps
According to the author. Today I want to share with you a cardboard master class. I'll tell you how to make a pencil holder with your own hands.
Lately I've become interested in cardboard art. Moreover, I did not expect that works made of cardboard could be so strong and in no way inferior to wooden ones. Of course, you need to avoid getting them wet, but wiping them is quite possible. In general, today we will study a master class on how to make a pencil holder in the Provence style using the cardboard technique.
For the work, I used beer cardboard 1.5 mm thick, Moment stick glue, Titan glue, two sheets of Tilda paper, clamps, sandpaper, wax (can be replaced with brown acrylic paint, apply with a slightly dry brush), acrylic paint, watercolor paper, brush, stationery knife, pencil, ruler, cutting mat.
Let me make a reservation right away: I made a pencil holder for the first time, and the process of creating it and the order will be the same as I went through. 
Let's start making it. You can download the template and cut a pattern using it.
We make a pattern from thick paper (I took watercolor paper with a density of 200 g/m2), so that it is convenient to work with it, on the side walls of rectangles measuring 10.2 * 6 cm, 9.7 * 5.5 cm.
We cut out rectangles from cardboard for the side walls, make 6 parts for a large rectangle, and 4 parts for a smaller rectangle.
We glue them together in layers, it turns out that the large rectangle consists of 3 layers of cardboard, the smaller one - of two. Secure with clamps.
In the same order we glue the front and back walls of the pencil holder. Large parts consist of three layers of cardboard, smaller ones - two.
After drying, we go over the edges of our blanks with sandpaper.
Now we connect our parts together, we have each wall made of five layers of cardboard. We secure everything with clamps and let it dry.
We cut out connecting jumpers from watercolor paper: 4 pieces measuring 5*10 cm, bend them in half lengthwise.
Glue them to the front and back of the pencil holder on the sides.
Glue the connecting strip to the edge.
We cut out the next two parts measuring 17*5 cm and 5*5 cm and crease them in the middle along the length.
We glue connecting strips along the bottom of our front and back parts.
Glue the side walls and the bottom connecting strip; while gluing, let each part dry.
Glue the top part and leave it to dry.
Glue the connecting strips to the side walls of the bottom.
From my experience with a coffee grinder, I didn’t cut out the bottom in advance, so as not to have to worry about adjusting it later, so I measured the size of the bottom using the finished top part. I got 8.2*20.1 cm - 2 parts, 8.8*20.7 - 3 parts.
We connect the parts of the bottom and clamp them, let them dry.
We glue our parts to the bottom and fix them with clamps, let them dry.
On our connecting strips we cut the corners at 45 degrees to make it stick better. We coat the strips and the bottom cut of the cardboard well with Titan glue.
We leave our pencil case to dry.
Now we need to measure the inside width of the pencil holder to make a partition. I got 5.7*12.8 cm, cut out 3 parts from cardboard.
We glue the parts of the partition together.
We cut out 4 pieces of connecting strips 5*12.5 cm and crease them in the middle.
We glue the connecting strips to our partition.
Mark the middle.
In the upper part you need to cut off the corners of the connecting strips (already modified in the process). Apply glue to the partition and glue it.
This is how it should be.
On the big shot, we cut out a large oval 7*6 cm - 4 pcs., a small oval 6*5 cm - 3 pcs., there were more parts, because As the cardboard passes through the bigshot, it makes it thinner. If you don’t have a big shot, you can cut it out according to the template, No. 1 is a large oval, No. 2 is a smaller oval.
Glue and secure with clamps.
We leave our preparations to dry thoroughly, I did it in the evening, so they dried until the morning.
We go over the edges of the entire pencil holder with sandpaper.
We paint our pencil holder along the edges and bottom with acrylic paint (I selected the color to match the paper with which I will paste it over). We cut out 2 parts of template No. 2 and 2 rectangles measuring 9.7 * 5.5 cm from paper. We sanded along the edges of the parts.
We lightly tint the pencil holder with wax.
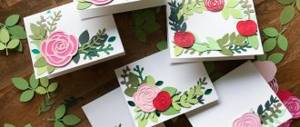
We glue our paper parts. We tint the finished pencil holder in places with wax.
We glue the inside of our pencil holder using a pattern and measuring the internal size of the parts.
I replaced the picture on the oval, I didn’t really like the first one. I experimented with flowers for the photo shoot, it’s a pity that the peonies haven’t bloomed yet. I think they would be perfect.
My daughter immediately took the pencil holder for her makeup brushes
Thank you so much for stopping by my master class! Hope you find it useful! Happy creativity!
Source
Paper pencil
The base of this pencil holder requires only cardboard sleeves and colored crepe paper. And to make it, you need to take the dimensions from the tubes and draw the correct rectangles with your own hands.
What you need for work:
- toilet paper rolls;
- colored corrugated paper;
- scissors;
- glue;
- ruler;
- simple pencil.
Manufacturing process:
- We measure the sleeve around the circumference and also the height of this object.
- We take corrugated paper and draw rectangles on it corresponding to the measurements. Cut out the required number of parts.
- We glue the bushings in different shades.
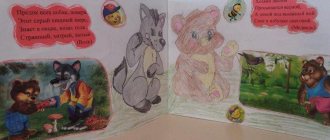
- Draw a cloud on a separate sheet of colored paper. We make sure that all the stands fit and cut it out.
- Using glue, we attach the pencil holders to the “cloud”.
We decorate the stand with cut out flowers or other figures.
Advice!
If colored paper has a thin structure, glue cardboard underneath to seal it.
DIY cardboard pencil. Master class with step-by-step photos
Making a pencil holder.
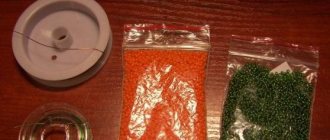
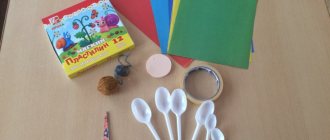
Master class with step-by-step photos. Author: Minaeva Elena Vitalievna, teacher of additional education, MAOU DO “DCC”, Severodvinsk. Description: the master class is intended for additional education teachers, educators, primary school teachers, children of primary school age, and parents. Purpose: for organizing and decorating the workplace, as a gift. Goal: making a pencil holder using the parallel threading technique with beads. Objectives: • teach the basic stages of making and decorating the base of a pencil holder from cardboard and paper; • teach the basic techniques of parallel threading with beads; • promote attentiveness, observation, and hard work; • develop a sense of color, logical thinking, imagination, fine motor skills. At all times, people highly valued the outstanding external qualities of beads. Everyone has seen that beads are a very beautiful, durable and resistant material. Working with beads is extremely popular. Many craftswomen create real miracles from it - magnificent paintings, luxurious jewelry, elegant household items. In this master class we will try to touch the art of beading using the example of making a pencil holder. Let's feel the limitless possibilities of its use in the design of interior items. Introduction to materials and tools. Thick cardboard, white or light beige paper, a sheet of colored cardboard, beads No. 8 of different colors, beading wire, acrylic paint, a bristle brush, a piece of foam rubber, an acrylic outline, a pencil, a ruler, a glue pencil, transparent glue "Contact" or " Moment", scissors, rubber bands.
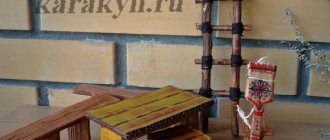
Safety precautions when working with scissors and glue: • keep the ends of the scissors away from you while working; • pass the scissors closed with the rings away from you; • do not leave them open, place them on the table with the sharp end facing away from you; • do not put glue in your mouth; if it gets into your eyes, rinse with plenty of water; • keep order in the workplace. Sequence of making a pencil holder. 1. We will make a pencil case from a piece of thick cardboard. It is necessary to determine the size of the rectangle from which we will make the base of the pencil holder: in this case, the height is 10 cm, the length is 19 cm. The length of the rectangle depends on the diameter of the product (can, bottle, etc.), around which we will lay well-moistened cardboard. Secure the cardboard with rubber bands. Dry. If there is no thick cardboard, then you can use any ready-made cardboard tubes as a base.
The diameter of the bottom of the pencil holder is approximately 4 cm larger than the diameter of the base. We cut it out of the same cardboard.
We glue the joint of the base of the pencil holder and additionally glue it around with a strip of paper.
We cut out rectangles from white paper, slightly larger than the height and length of the rectangle of the base of the pencil holder and the diameter of the bottom. We crumple the paper well and then smooth it out.
We cover the bottom of the pencil holder and its base with crumpled paper. We glue the allowances to the wrong side, first making notches at a distance of 1 cm from each other. The pencil holder is ready! 2. We make pencils from beads using the parallel threading technique. Choose bead colors for pencils (green, red, yellow, orange, blue). We string 3 beads onto the wire: 1 green, 2 white. We close the wire into a ring and, with the opposite end, stretch it through 2 white beads. Tighten the wire in the middle.
We string 3 white beads onto one end of the wire. We pull the second end of the wire through these beads in the opposite direction. We tighten it.
Similarly, we make the next row of 4 white beads.
Subsequent rows are made similarly from colored beads. There are 4 beads in each row.
In the last row, the ends of the wire are connected, twisted tightly, cut (leaving a tail of 5 mm) and bent to the wrong side. Schematic representation of the sequence of making a pencil from beads using the parallel threading technique.
The number of pencils and their length is determined by the size of the pencil holder. In this case: 5 multi-colored pencils, which have 9 colored rows of beads (wire length 30 cm); 5 multi-colored pencils, which have 14 colored rows of beads (wire length 40 cm); 5 multi-colored pencils, which have 19 colored rows of beads (wire length 55 cm)
3. Decorate the pencil holder. Choose acrylic paint of a suitable color. Using a fairly wide bristle brush, pick up some paint and leave any excess on a piece of paper. Using an almost dry brush, we move vertically along the base and bottom of the pencil holder.
We paint all the edges with acrylic paint using foam rubber.
From colored cardboard of a suitable color, cut out a rectangle 9.5 cm by 20 cm.
We paste this rectangle over the inside of the pencil holder. Glue the bottom of the pencil holder to the base.
The pencil holder can be decorated with an acrylic outline.
We choose the sequence of arrangement of pencils on the pencil holder.
We string beaded pencils onto the wire in the chosen order (pull the wire into the sixth row from the bottom). We collect beads between pencils to fill the space between them. The number of beads is determined individually.
Apply “Contact” or “Moment” transparent glue to each pencil. We glue beaded pencils onto a pencil holder. We twist the ends of the wire and cut them off.
The pencil is ready!
We recommend watching:
Master Class. DIY Rocket organizer DIY salt dough pencil holder. Master class with step-by-step photos. Minions DIY box for small items DIY pencil holder made from a plastic cup. Master class with step-by-step photos
Similar articles:
DIY pencil holder
DIY pencil holder made from a plastic cup
Craft made from waste material. Pencil holder
DIY pencil holder made from toilet paper rolls
DIY stationery stand
Pencil holder made from ice cream sticks
You can use ice cream sticks to make an amazing rainbow pencil holder with your own hands. Description of work with detailed step-by-step instructions.
What you need for work:
- multi-colored threads;
- scissors;
- a glass made of thick plastic;
- wooden ice cream sticks;
- brush;
- glue.
Manufacturing process:
- We cut off the top of the cup, leave its bottom and 3-4 cm of the wall, and cover it with wooden sticks. Leave small gaps between them.
- Then, from the inside of the end of the cup, we fix the tip of the thread with glue and intertwine the sticks with it.
- Having reached the end of the row, in the next row we change the position of the lace. If the thread passed along the front side of the wooden plank, draw it from the backside. Next, we intertwine the sticks, also changing the position of the colored lace.
- We decorate the pencil holder to the top, after a certain distance we change the color of the thread. Leave the rounded ends of the sticks at the top.
- We fix the finished and beginning ends of the colored lace with glue.
Also read: Lifehacks - what can be done from an old vacuum cleaner
Children will love the rainbow look of the pencil holder. It has one more advantage - it is not slippery and will not break out of the child’s hands when carried.
Pencil holder from a tin can
This pencil holder requires a tin can and a clothes cord. You just need to secure the rope and carefully wrap it around the metal utensils with your own hands. A step-by-step description and photo will help you do this correctly.
What you need for work:
- can;
- white and red clothesline (one color possible);
- glue gun;
- brush;
- scissors;
- lighter;
- pliers;
- acetone or nail polish remover;
- cardboard or film to protect the table surface;
- white paint (acrylic or enamel are suitable);
- gloves.
Manufacturing process:
- Use pliers to press down all the nicks on the can.
- We treat the jar with acetone, put on gloves and paint it. Let the craft dry.
- We take a white rope, cut it off and set its end on fire. We fix the lace with a gun at the base of the can and wind it tightly in a circle.
- We cover a third of the surface, cut off the end, treat it with a lighter and glue it to the jar.
- Next we decorate with red rope. We finish the covering with white lace.
Also read: What can be made from old tights - the best ideas
Small decorative objects will serve as decoration. You can also glue shells or soft toys.
Advice!
If you don’t have a gun, you can glue the rope with any superglue.
Pencil holders that are pleasing to the eye and carefully store pencils.
Contained in sections:
- Crafts, master classes. Making crafts with children
Showing publications 1-10 of 178. All sections | Pencil holder. DIY pencil holders
New
Photo
The best
Master class “Cup for pencils” “Cup for pencil ”
Purpose: Decoration for the drawing corner
“Merry
Pencil ” .
Purpose: Making a decorated cup for pencils . Many people have encountered the fact that children often scatter pencils and markers everywhere.
To solve this problem, make... Master class “Pencil holder” from felt and a tin can
For the master class we will need a jar, felt of various colors, scissors, a glue gun, and decorative elements. 1. For the pencil holder , I took a can from a can. 2. I cut out a strip of felt, wide enough to seal the top of the jar. 3. Glued it with a glue gun….
Glass jar pencil
To make such a pencil holder, you need a glass jar and napkins. It is very easy to make with your own hands. Photos and step-by-step descriptions will help you in your work.
What you need for work:
- glass jar (if it has an unusual shape, it will add zest);
- masking tape;
- pencil;
- scissors;
- red nail polish or red acrylic paint;
- red and white napkins;
- stapler;
- glue.
Manufacturing process:
- Draw a heart on masking tape, cut it out and stick it in the middle of the wall of the glass dish.
- We open the entire jar with varnish and dry it.
- We take a napkin from the pack, fold it in half as it is, then fold it again to form a square.
- We fasten the workpiece in the middle with a stapler.
- Trim the edges in a circle with a wavy line.
- We lift each leaf up around the fastener and crease it. When you reach the end, you will get a flower.
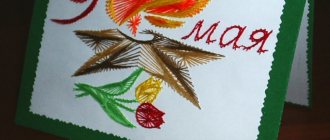
- We fix the white and red flowers around the neck with glue. Remove the adhesive tape from the can.
There are many people with a profession for whom a pencil holder is an indispensable thing on their desk, not to mention schoolchildren. Of course, you can buy it in the store. But nothing can replace a craft made with your own hands. You can put unlimited imagination into it and make a unique thing that will only show off on your table.