Practical part of the lesson, drawing a beautiful bouquet
During the lesson they draw a bouquet of flowers to give to their mother. Such lessons are defined as “direct educational activities” (DEA).
Maria Montessori's system and her contribution to pedagogy
GCD progress, what techniques can be used to apply an image
For depictions, children can use gouache drawing with a brush, as well as using their fingers and palms for this.
Drawing process step by step
The lesson scenario looks like this and is divided into several stages.
Introductory part
At the beginning of the lesson, the teacher reads a riddle poem to the children about how spring comes to replace winter. They answer that this happens in the spring.
The teacher asks about what holiday is happening at this time. Children talk about Mother's Day - March 8th. The teacher recites a poem about this holiday, then asks what can be given to mom on this day.
After discussing with the kids, they come to the conclusion that the best gift would be a beautiful bouquet of flowers. Then the children are shown illustrations with flowers prepared in advance.
There is a discussion about what parts plants have. They talk about leaves, stems, petals, their shape and color.
Physical education minute
Then the teacher offers to get up and rest a little using the so-called physical education minute. Music sounds, and children make certain movements to the poems.
“Chamomile, chamomile (children shake their heads) / Fragrant flower. / Yellow heart (springs) / White petal / With cold and wind (hands up, swaying) / The rains came again / And in the garden, like in summer (lean forward, holding hands to the sides) / Asters bloomed. / We are red carnations (the kids are marching), / Satin petals, / Slender legs (we hold our hands on our belts and stand on our heels), / Green boots.”
Main part
Children are asked to sit down and start drawing.
The teacher, together with the kids, repeats what flowers have (stems, leaves, flower petals). Discuss their color and shape.
Drawing flowers is done in different ways: some paint with a brush. Others use fingers and palms.
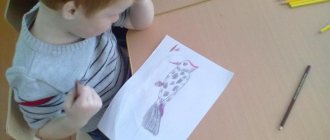
The kids make drawings for mommy on their own. The teacher watches how they act and helps with advice.
Then he looks at the resulting images of flowers, discusses and praises the kids.
Children draw
Practical part of the lesson
At the beginning of the practical part, children need to be given a couple of minutes to imagine their mother's face. You can ask to look carefully at the photo or close your eyes and imagine what your mother looks like.
Note! When a child begins to draw, he should imagine, if not a clear image, then at least its main details.
Age groups in kindergarten by year according to Federal State Educational Standards
What techniques can be used to apply an image?
The course of GCD is the mental or practical educational activity of children, during which they acquire certain knowledge and skills, selected in accordance with their age and level of development. During the work, the following stages are noted:
- sample demonstration;
- independent completion of the imitation task;
- summing up the lesson.
In addition to drawing with colored pencils, felt-tip pens or paints, you can use other image drawing techniques:
- Draw a portrait of your mother with wax crayons. Wax crayons are easy to apply and have bright, rich colors. Well suited for children of primary and secondary age.
- Portray your mother using cotton pads or swabs. In this case, the end of a cotton swab or a cotton pad is dipped in gouache, which is then used to draw on a piece of paper.
- Small stroke technique. Here kids learn to control the work of their hands and apply small strokes to each other. For this technique you will need gouache and a medium-sized brush.
Drawing process step by step
In the middle group, first there is an explanation, and then the teacher begins to draw a new portrait, and the kids repeat his actions.
Note! At the same time, you need to control the drawing process, point out mistakes and help children who are lagging behind.
The first face to be drawn is an oval. In the middle are the eyes. It is explained that the distance between them should be small. A colored circle is drawn inside the eye: “What color are your mother’s eyes? Brown? Then take brown.” And inside the colored eye there is a small black circle - the pupil.
Important! When drawing the eye, it’s worth reminding the guys about the eyelashes (both on the upper and lower eyelids). Please note that the top ones are longer than the bottom ones.
Above the eyes you need to draw arcs - eyebrows. Next, the nose is smoothly drawn, which starts from the eyebrows and is rounded, and the nostrils and wings of the nose are depicted on the side.
When drawing a mouth, be sure to note that the upper and lower lips are different from each other. The upper one consists of two arcs, and the lower one of one. Then the neck, ears and hair are depicted. You can draw a necklace on the neck, and earrings on the ears.
Drawing lesson on the topic “Portrait of Mom” in the middle group of a preschool educational institution
By the age of 4-5, children are already able to pay attention to the work being done and evaluate their creations. Therefore, in the middle group, the study of objects that are well known to the child, having a clear silhouette and pronounced features begins. Cognitive and emotional development also plays an important role in the drawing process. It is important that a preschooler can symbolically convey character and mood in color.
Exhibition of portraits of mother
Note! Children in the middle group pay attention only to those details that are important to them.
So, when drawing a portrait of a mother, they may not draw the ears at all (if this part of the body does not stand out in any way), but they can clearly and beautifully outline the large mouth (for example, if a woman often paints her lips with bright lipstick).
Example of drawing lesson notes
To conduct a lesson in an interesting and harmonious manner, you need to take care of its notes in advance. Preschool institutions approve various documentation. Below is an example of a simple outline.
Lesson, topic, group: drawing “Portrait of Mom” in the middle group.
Purpose of the lesson: draw a portrait of your mother.
Tasks:
- strengthening the concept of “portrait” in children;
- teach how to convey individual facial features in an image;
- learning consistency in drawing a portrait.
Progress:
- motor warm-up (1-2 min);
- organizational moment - introducing children to the topic. Study of the upcoming holiday - Mother's Day (3-5 min);
- sample analysis (3-5 min);
- step-by-step execution of work (10-20 min);
- physical education minute (1-2 min);
- summing up the lesson - questions and results.
What event can the lesson be timed to coincide with?
There are two holidays that children are introduced to in kindergarten. They paint portraits, make crafts, and stage small scenes to please their mothers.
Note! This is Mother's Day, which is celebrated on the last Sunday of November, and March 8th is International Women's Day. They should be the reason for children to become acquainted with such a visual genre as portraiture.
Kid draws in class
Additional goals and objectives
The main goal of the lesson is to teach children of the middle group in the drawing lesson “Portrait of Mom” to convey her individual characteristics (eye and hair color), as well as sequences.
Additional goals:
- development of the child’s skills in conveying his attitude towards a loved one in the image;
- instilling accuracy in the work process;
- consolidating children's knowledge about such a genre as portrait.
The theme of the week is “Book Week” in the senior and preparatory groups
Note! At the drawing lesson, important developmental and educational tasks are also solved.
Educational:
- develop the skill of using drawing materials;
- study of shapes, colors and elementary compositions;
- expansion of the child’s active and passive vocabularies (“portrait”, “color”);
- development of imagination and memory;
- improving the skill of applying and mixing colors.
Educational:
- develop aesthetic taste, teach harmonious mixing of colors;
- teach the child to follow verbal instructions;
- to instill in the child accuracy in the process of completing the task;
- maintain interest in drawing.
Fine arts lesson on the topic “Flowers for Mom” in middle groups of kindergarten
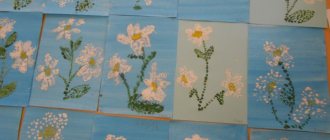
In this lesson, children draw flowers in order to give a picture to their mother. To do this, you can use gouache painting or use the appliqué technique.
Bouquets for mom
Example of drawing lesson notes
On the first page of the summary they indicate who wrote it and for which preschool institution it was made. Indicate for what age such a lesson is intended.
Purpose and objectives of the lesson
You need to formulate the goal that you plan to achieve by conducting classes with kids.
The following are the tasks that will need to be completed. They can be divided into several groups: moral education, development of creative abilities associated with the development of fine motor skills, nurturing independence and self-confidence, and the desire to develop an interest in art.
Preparation
It is necessary to indicate what should be used in these classes. It should be taken into account that each child should receive handouts for work. You will also need demonstration equipment and materials with which the teacher will teach the children.
Usually, shortly before the main lesson, a preparatory lesson is held, during which the children are given additional information, trying to awaken interest in the topic of the lesson and the technique of performing the work. For a drawing lesson you need paints, brushes, sheets of drawing paper, jars of water and wet wipes.
Note! In order to draw a bouquet correctly, you will need a sample drawing.
Preliminary lesson
On it they talk with kids about the holiday of March 8th. Children and the teacher observe the growth of flowers in the garden or flowerbed. Kids are taught about the structure of plants and shown their parts (stem, petals, etc.) and told about various techniques for drawing flowers.
Main part
The outline then describes how the main lesson should proceed. It is convenient to format this description as a table with three columns. On the left, they indicate which part of the lesson this relates to: introductory, main or final. The central column indicates what actions the teacher should take, and the right column describes the expected response of the children. To depict flowers, you can use not only painting with a brush or fingers, but also with cotton swabs.
We need to remember this
Important! In the final part, questions are asked to reinforce the material, the work is discussed and the teacher praises the children.
GCD for drawing on the topic “My Dad” in senior groups of preschool educational institutions
We must remember that it is important that the lesson “Drawing: Flowers for Mom in the Middle Group” is exciting for kids. To do this, they need to be supported and praised. In the lesson, it is necessary to use all opportunities to make it interesting for children.
Exhibition of drawings
What event can the lesson be timed to coincide with?
Children's poems are read to kids about how the snow melts and how spring replaces winter. Then they ask about what month this happens. The children answer that in March. The teacher asks them to say what holiday is in March. The kids say that this is Mother's Day, the eighth of March.
The teacher offers to come up with a gift that can please the mother. After discussion, everyone comes to the conclusion that they can give her a painted bouquet of flowers.
