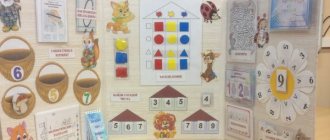
Slide No. 1 Dear colleagues, now we will present to your attention a master class “The Word on the Palm”. Slide No. 2 The purpose of the master class is to increase the professional competence of teachers in the use of finger gymnastics and games for the development of fine motor skills of the hands, the dissemination of variable forms in working with children. Slide No. 3 Objectives are presented on the slide: 1. To acquaint the master class participants with effective methods of using finger gymnastics in a child’s life. 2. To teach master class participants the stages of learning finger games, origami, folding various objects from balls, to give the opportunity to borrow elements of teaching experience to improve their own. 3. Strengthen the skills of master class participants to apply the acquired knowledge in practice.
Introduction
I recently heard a story about research being done in Japan, a pioneering country of innovation. From an early age, children were put in front of a computer to learn to write using a keyboard, and they stopped talking. Understanding the reasons for what was happening, seriously frightened scientists found out that the whole point is that the impact of the keyboard falls on points on the fingers that do not stimulate the development of certain brain areas. But the timely development of speech functions depends on these zones. Thus, the “old-fashioned” methods were urgently brought back. And we are starting our master class “The Word on the Palm,” which is dedicated to the development of fine motor skills in preschool children. Slide No. 4 But first, I would like to know what ideas you have about the development of fine motor skills. Questions for discussion: 1. At what age is it necessary to work with children to develop fine motor skills? 2. Why is it necessary to develop children’s fine motor skills? 3. What methods and techniques do you use in your work to develop children’s fine motor skills? Summing up the survey: Indeed, it has long been known that the development of fine motor skills of the hands accelerates the maturation of the areas of the brain that are responsible for the child’s speech. After all, hand motor skills and the level of speech development are directly dependent on each other. A Chinese proverb says: “Tell me and I’ll forget, show me and I’ll remember, let me try it myself and I’ll understand!” “Indeed, exercises for the development of fingers fully meet these three principles: “I hear. I see. I do." Children hear the teacher's explanation, see the sequence of various actions, and then complete the task themselves. Slide No. 5 Currently, a variety of attributes have appeared for finger gymnastics. A massage ball, Eagleball, which we use when working with children, is very useful in such games; it massages the child’s fingertips with spikes, developing tactile sensations. I offer you an exercise with a massage ball. To complete this task I will need assistants; I will ask three to four assistants to come into the room.
1. Game “Play with me a little” We will take the ball in our hands (we transfer the ball from one hand to the other) We will squeeze it tightly (we squeeze the ball in our palms) We will play with it a little (toss it up) We will roll it in our hands. (roll the ball in your palms) Roll the ball on your palm, (roll the ball in your palms) Stretch your fingers a little. I’ll take the ball and spin it, (twist the ball on my palm) I’ll stretch my fingers.
Game "Two Brothers"
I’ll squeeze the ball tightly and change my palm. Squeeze the ball with your right hand, then with your left. “Hello, my favorite ball! "Every finger will say in the morning. Hold the ball with your index finger and thumb, then your middle finger and thumb, ring finger and thumb, little finger and thumb. He hugs the ball tightly and doesn’t let it go anywhere. Squeeze the ball tightly with your index finger and thumb. Only gives it to his brother: Brother takes the ball from his brother. Pass the ball held by the big one and point. fingers into the corresponding fingers of the left hand.
2. Origami “Rose on a heart” To complete this task, I will need assistants; I will ask three to four assistants to come into the room. Not long ago, the New Year's fireworks died down, and already one of the most romantic holidays of the year is approaching - St. Valentine's Day. This is another reason to give a gift to your loved ones and make them happy! I bring to your attention an option for making a valentine card using modular origami. Origami is a great way to develop children's fine motor skills. The children of my group make such cards and much more with great pleasure! Step-by-step making of a postcard Result: Thank you for your work, the cards turned out very beautiful. You can keep them for yourself or give them to loved ones. I wish you love and family well-being!
3. Modeling from balloons Modeling from balloons into various figures is called twisting (with the audience). Probably, many of you have been to the circus and watched how a clown turns long narrow balls into amazing little animals in a matter of seconds. I suggest you, dear colleagues, to learn this simple art of modeling yourself and make a talisman from balloons “for happiness, goodness and success.” Talismans can be different, it all depends on your imagination. These are the beautiful animals we prepared together with the children in kindergarten. Working with balls develops fine motor skills and tactile perception, the names of colors and shades are reinforced, and can be used to relieve psychological stress. -I will now show you how to make such a “talisman”. (Step-by-step production of toys). Examination of the resulting toys. Bottom line: Let the talismans that you made with your own hands protect you and your family from bad moods and give only positive emotions.
4. Finger games (with the audience) Finger games, accompanied by a poetic text, develop speech, promote the ability to conduct a dialogue, tell, retell. The kids go to kindergarten (index and middle fingers “go”) The teacher is happy for them. (We spread our arms to the sides) The cook cooks soup for them, So that they are full here. (Rotational movements of the right hand, the hand is tilted - “stirring the soup”) And if you say: “Bee! “Doctors will come to treat you. (We show the stethoscope: the index and middle fingers “go” from the ears, and the hands join on the chest)
Part 2. Reflection. Now mentally put on your left hand everything that you came to the master class with today: your baggage of thoughts, knowledge, experience. And on the right hand - what we received at the new master class. Now let's clap our hands and say THANK YOU at the same time! All I can do is thank the audience for their attention, and the participants for their work. Creative success to all!
Author: Tatyana Aleksandrovna Movchan, teacher, MDOBU “Kindergarten No. 4 “Alyonushka”, p. Ekaterinoslavka, Amur region, Oktyabrsky district, Russia
The article is published in the author's edition
(teacher-speech therapist Nikonova E.A.)
Information and communication technologies (ICT) are currently an integral part of modern preschool education. Informatization of the education system places new demands on the teacher and his professional competence. This is especially relevant in the context of the introduction of the Federal State Educational Standard and the implementation of the Information Society Development Strategy. We see what significant changes are now taking place in the preschool education system. And this is largely due to the updating of the scientific, methodological and material base of training and education. One of the important conditions for renewal is the use of new information technologies. Today, educators have access to a fairly extensive selection of ICTs in their practice. When conducting educational activities, parent meetings, and speeches at the Moscow Region, presentations are widely used. But, unfortunately, not all preschool teachers and educators are able to make presentations on their own. Today I invite you, dear colleagues, to go step by step, creating your own presentation in PowerPoint. So, let's begin!
Step 1. Think through everything to the smallest detail!
We must not forget that a presentation is an accompaniment to a report or speech, and in no case a replacement for it. Therefore, you first need to develop a concept for the speech, and then start drawing up the presentation. To do this, try to answer the following questions for yourself:
- What is the purpose of the presentation being used?
- What are the characteristics of listeners?
- What is the duration of the presentation and planned content?
Step 2. And so, let's begin!
Creating presentations in PowerPoint begins with the traditional launch of the program. Next, use the New Slide feature located in the top right corner of the navigation bar to select a slide layout. The selected layout can be applied not only to the entire presentation, but also selected for each slide individually.
The very first window of Microsoft PowerPoint 2010
Helpful advice:
- Do not place several blocks of visual or text information on one slide at once. It distracts, scatters attention, and impairs concentration.
Step 3. Be on topic!
To give your PowerPoint presentation the desired appearance, go to the “Design” tab, go to the “Themes” group and click on the desired document theme. To change the appearance of your slides, on the Slides tab, select the slides you want, right-click the theme you want to apply to those slides, and select Apply to Selected Slides from the context menu.
Choosing a PowerPoint Presentation Theme
Themes for PowerPoint collected in the program are universal for all types of presentations. And using the “Colors”, “Effects” and “Background Styles” buttons you can change the color scheme of the selected theme.
You can also create themes for your Microsoft PowerPoint presentation yourself using your own drawings and photographs.
Helpful advice:
- The text must contrast with the background, otherwise the slide will be difficult to read.
- You should not make your slides too variegated or scattered in color scheme. This harms the formation of unstable visual images.
- Using three or four colors on slides has a beneficial effect on concentration and improves perception.
Step 4. What about the font?
A Microsoft Office PowerPoint presentation allows you to select and change font type, size, and color. Working with presentation text is based on the same principles as working in Microsoft Office Word.
Choosing a font for your presentation
To write text, you need to place the cursor in the “Slide Title” or “Slide Text” field, then on the “Home” tab go to the “Font” group, where you select the font, its size and color.
Helpful advice:
- When developing a presentation, it is important to consider that the material on the slide can be divided into main and additional. The main one must be highlighted so that when demonstrating a slide, it carries the main semantic load: the size of the text or object, color, special effects, the order of appearance on the screen. Additional material is intended to emphasize the main idea of the slide.
- Use the same title font on all presentation slides.
- For good readability of the presentation from any distance in the hall, it is better to type the text in a clear font. These fonts can be Arial, Bookman Old Style, Calibri, Tahoma, Times New Roman, Verdana.
- Don't put too much text material on the slide. Because of this, the listeners' perception is overloaded, disrupting their concentration.
Step 5. Better to see it a hundred times!
To make your PowerPoint presentation clearer and, if necessary, colorful, you can place various diagrams, graphs, photographs, drawings, and collages on some slides. To do this, on the “Insert” tab, you need to go to the “Illustrations” group by clicking on the selected group of illustrations. You can place a photo or drawing in a presentation using the familiar Copy and Paste commands.
Inserting an image into a presentation
Helpful advice:
- Try to avoid using a “picture surrounded by text” slide. It is better to place the illustration on a separate slide, signing the main information under it. In this case, the text is better perceived by ear.
- The inserted photographs or pictures must be of good quality and large enough, otherwise, when stretched, they lose sharpness, which can only spoil the effect of the presentation.
Step 6. And the music sounds!
A Microsoft Office PowerPoint presentation looks better if it uses audio. How to insert music into PowerPoint? On the “Insert” tab, go to the “Media Clips” group and select the “Sound” function. In the list of commands that appears, click “Sound from file.” In the dialog box that appears, specify the folder from which the music will be inserted and the type of sound file. Then set how the sound will play: automatically or on click. In the “Working with Sound” tab that appears, find the “Sound Options” group and set the desired commands.
Inserting audio into a presentation
Helpful advice:
- Do not overdo the sound volume, otherwise speech will be difficult to hear.
- For musical accompaniment of a presentation, it is better to choose calm instrumental or classical music. This will not distract listeners from the content of the presentation, but will only add emotionality.
Step 7. Oh, how interesting!
You can add a lot of variety to your PowerPoint presentation by using animation effects that you can add to any object on your slide. To do this, go to the “Animation” tab, go to the “Animation” group and open the “Animation Settings” task area. Then click on the text or object you want to animate. In the Animation Setup task pane, click the Add Effect button, and then take one or more steps to apply the effects. The effects will appear in the Animation Settings list in the order they were added. In the “Change effect” field you can set the start of the animation, its direction and speed.
Inserting Animation in PowerPoint
Helpful advice:
- You should not oversaturate your presentation with special effects. An excessive abundance of blinking, spinning and jumping objects, extraneous sounds, and animated images distract listeners and prevent them from maintaining attention on the main content of the speech.
- Remember that animation is used to a minimum and only when it has a functional load.
- Using animation, it is good to highlight keywords, numbers, and indicate conclusions. It will be better if the animation is set to highlight colors, and not to various types of movements of letters on the screen.
Step 8. Everything changes!
Transitions between slides make a PowerPoint presentation more impactful. To add identical transitions between presentation slides, on the Transitions tab, click the slide thumbnail, and in the Transition to Next Slide group, select a slide transition effect.
Choosing a transition effect to a new slide in PowerPoint
To set the slide speed, in the Transition to Next Slide group, expand the Transition Speed button, and then select the speed you want. In the “Slide Change” group, specify the order of change: by click or automatically.
Helpful advice:
- Changing slides in a PowerPoint presentation is more convenient with the click of a mouse.
- It’s better to make two copies of the presentation with notes on the slide changes: one copy for yourself, and the second for the technician supervising the presentation.
Step 9. Look what happened!
Work on the slides is complete. To view the resulting presentation, click the "Show Slides" button. If any slide requires adjustments, you can return to the slides by pressing the “Esc” keyboard button. After viewing the revised presentation, you should save it.
Helpful advice:
- Try not to overshadow the speaker with your special effects, bright pictures and photographs, and overly colorful slide designs. Remember that a presentation is not a goal, but a means to achieve it.
Master class Presentation of experience in working with parents. - presentation
Master class Presentation of experience in working with parents
The author's integrated course program “In a world of goodness and order” aims to create conditions for the conscious attitude and behavior of children, nurturing their social and personal adaptation.
Working with parents has an important role to play. “A large role, if not the main one, is played by the moral foundations of the family and the psychological microclimate.” Ostrogorsky
Round table Topic: “Upbringing with kindness” Goals and objectives: To help parents see the relevance, possibility and necessity of fostering kindness and a humane attitude towards others with children of this age. To form in parents a personal meaning in mastering psychological and pedagogical knowledge that helps raise a child, correctly build communication and joint activities with him. Develop parents’ communication skills and pedagogical reflection.
Preliminary work 1. Making posters: HURRAY! COME! WE ARE GLAD TO YOU! WE WERE WAITING FOR YOU! 1.Making posters: HURRAY! COME! WE ARE GLAD TO YOU! WE WERE WAITING FOR YOU! 2. Personal invitation to a meeting. 2. Personal invitation to a meeting. 3.Record on audio cassette (children’s statements about mothers). 3.Record on audio cassette (children’s statements about mothers). 4. Making a five-flowered flower, on the petals of which problems are written that will be discussed with parents. 4. Making a five-flowered flower, on the petals of which problems are written that will be discussed with parents.
Preliminary work 5. Book exhibition. 5. Book exhibition.
Plan for greeting parents. Designation of the relevance of the problem of education. Greetings from parents. Designation of the relevance of the problem of education. Reading by parents one by one of the 10 commandments of parenthood, their comments. Reading by parents one by one of the 10 commandments of parenthood, their comments. Listening to parents' opinions about what good deeds their child can do? How to teach this to children? An example of a teacher. Listening to parents' opinions about what good deeds their child can do? How to teach this to children? An example of a teacher. Recommendations for parents of questions - situations that they can play out with their children. Recommendations for parents of questions - situations that they can play out with their children. Training “Kindness Pie”. Training “Kindness Pie”. Analysis of situations “An incident in the house.” Analysis of situations “An incident in the house.” Poetic game "Dictionary of polite words." Poetic game "Dictionary of polite words." “Get to know your child” (children’s statements about mothers, recorded on audio cassette). “Get to know your child” (children’s statements about mothers, recorded on audio cassette). Recommendation for parents to conduct a mini-experiment at home “Where will your child sit?” (Rene Gilles test). Recommendation for parents to conduct a mini-experiment at home “Where will your child sit?” (Rene Gilles test). Workshop “How to relieve a bad mood?” Solving situations. Workshop “How to relieve a bad mood?” Solving situations. Scientists' opinions. Scientists' opinions. Game with parents “What to give a child on the road?” Game with parents “What to give a child on the road?” An example from a teacher about rejoicing. (Roerich) An example of an educator about rejoicing. (Roerich) Narrating the monologue of Shalva Amonashvili. Narration of Shalva Amonashvili's monologue. Questions, advice, wishes of parents. Questions, advice, wishes of parents.
Imitation game - activity with colleagues Imagine yourself as parents, sit in a circle. Imagine yourself as parents, sit in a circle. Attach badges by writing how you would like to be addressed. Attach badges by writing how you would like to be addressed. Dear Colleagues!
Determination of an effective option 1 subgroup of teachers - expert 3rd subgroup of teachers 2nd subgroup of teachers Suggests a topic Evaluates by 5 points Explains Summarizes Develop their own model Discuss collectively Select Build their own model Present their own option
Reflection Stand in a circle. Complete the sentence: “I think that...”
MAGAZINE Preschooler.RF
State budgetary educational institution school No. 555 with in-depth study of the English language “Belogorye” Primorsky district of St. Petersburg Author: Olga Anatolyevna Tsygvintseva, teacher, GBOU school No. 555 “Belogorye” St. Petersburg The purpose of the classes: to establish harmonious relationships between the child and the parent, and between peers through the reduction of negative behavioral reactions in the child. Objectives: 1. To acquaint parents with the types of child aggression. 2. Help parents see behind the negative crisis manifestations the child’s desire for independence and the development of a child’s personality. 3. Introduce parents to the forms of interaction in the family with the child, leading to the reduction and repayment of child aggression. 4. Conduct a master class for parents on eliminating children's aggressiveness.Equipment: - questionnaires for parents (criteria of aggressiveness in a child Lavrentieva G.P., Titarenko T.M.); — presentation on the topic: “How to deal with childhood aggression.” - computer, overhead projector, screen; — for the Little Mermaid doll, wooden sticks 10 and 15 cm, strips of colored fabric, thread, scissors. — memo for parents: “The Laws of Parental Truth.” Preliminary work: The master class is conducted with parents in a group, in the form of a round table presentation. The teacher conducts an analysis of the questionnaire (criteria for aggressiveness in a child Lavrentyeva G.P., Titarenko T.M.) with parents with problems arising in raising a child, and in order to identify ways to eliminate aggression. Progress of the lesson No. Parts of the lesson Activities of the teacher Slide number 1. Relevance of the topic: “How to avoid children's aggression?” Based on the results of the survey, we can conclude that aggressiveness is a personality trait, which, on the one hand, is determined by the innate characteristics of the child’s temperament, on the other hand, by the style of communication and upbringing in the family. Unfortunately, children, due to their impulsiveness and inability to control themselves, demonstrate to a greater extent the negative sides of aggressiveness. The child unconsciously displays aggression, which is backed by inept attempts to start communicating with peers. Aggression: Physical – the use of physical force against someone. Verbal – rudeness in speech, expression of negative emotions and intentions in an unacceptable, offensive form for the interlocutor. Auto-aggression – directed at oneself (self-accusation, self-humiliation) 2. Exchange of parental experience in eliminating aggression in their child Based on the results of the survey, some parents find their own ways to eliminate aggression. Let's listen to Natalya Evgenievna Metelina, Marina Sergeevna Uvarova. If anyone wants to share their experiences, we'd love to listen. 3. Presentation for parents on the topic: “How to avoid childhood aggression.” • Ignoring. Do not react to the child until he understands that no one is paying attention. • Partial consent. In the case of angry protests or rude refusals, you need to listen carefully to the child, understand his complaints and, if possible, partially satisfy them, for example: “You watch a cartoon for five minutes, and then you definitely go to bed.” • Attracting “allies”. This is an authority figure for the child, such as dad, for example: “Daddy would be very upset if he heard you scream.” • Observance of rituals. In the case of a negative statement, do not give advice to the child, do not pay attention, or fight back in response to rudeness, there are well-known defensive phrases - “amulets” that protect against verbal attacks: “Whoever likes to be teased, I will not hang out with!” “We won’t all play with someone who likes to call names.” • Direct reprimand. An adult needs to show his negative attitude towards the child’s verbal aggression, say: “You are behaving very ugly, I don’t like it when you swear like that! Please stop." • Create conditions for relieving tension through movement. This could be sports, performances, games, hikes. • Go to another room. In this room you can express everything that has accumulated in the child’s soul. • Use a pillow, newspaper, “anger sheet”. If a child is overwhelmed by feelings of resentment and anger, you can offer him to use a special pillow, or tear and crumple the “sheet of anger.” • “Trash can” The method is that the “taboo” from rudeness is removed, but a limitation is placed in space. For example, it is allowed to swear only in a certain place where there is a trash can (it is advisable to have a basket for swear words specifically for these purposes). • "Chill out". Give the child the opportunity to speak out, listen to him, you still have the opportunity to have the “last word”, the child will experience emotional stress. The child will calm down and you can discuss the situation. • Switch attention to another activity. • Draw your state (anger, pain, aggression). • Inflate the balloon. "Balloon". - You're a ball. So you get angry, more and more (inflate the balloon). What will happen? A little more anger, and the balloon will burst (demonstrate how it will burst). And if you carefully release the air, it will not burst and will remain intact. 4. Master class on making a “Little Mermaid” doll Today I want to introduce you to another practical way to get rid of aggression in a child. I suggest you make a doll: “The Little Mermaid” was made in order to save a person from evil, bad thoughts and resentments. The doll is intended to distract the evil spirit to the Little Mermaid doll itself, and not to the person. Bad, negative emotions did not transfer to the person, but settled in the doll, namely in the cross-shaped base from which the doll consists. These crosses should be burned or thrown into water so that all negative emotions go into the ground. Work progress: 1. Take two sticks and tie them in a cross pattern. 2. Tie strips of fabric onto the doll’s hands; the number of strips depends on the person’s accumulated grievances. 3. Take three strips of fabric, tie them together with thread and braid them. 4. Attach the braid to the doll’s head. 5. Burn or throw into water (river, so that the water flows and moves). 5. Summing up. “Whoever cannot take with affection will not take with severity.” (A.P. Chekhov) For you, dear parents, I propose the laws of parental truth, which will remind you how to help a child avoid childhood aggression. Law 1. Cherish the love of your child. Remember, from love to hate there is only one step, do not take rash steps! Law 2. Do not humiliate your child. By humiliating him, you develop in him the skill and skill of humiliation that he can use in relation to other people. It is possible that they will be you. Law 3: Don't threaten your child. An adult's threats give rise to a child's lies, leading to fear and hatred. Law 4. Do not impose prohibitions. The nature of a child is the spirit of rebellion. What is strictly prohibited, you really want to try, don’t forget about it Law 5. Do not take care of your child where you can do without guardianship; Give a little person the opportunity to BECOME BIG on his own. Law 6. Do not follow your child’s lead, know how to observe the measure of your love and the measure of your parental responsibility. Law 7. Develop a sense of humor. Learn to laugh at your weaknesses, allow your child to laugh with you. TEACH YOUR CHILD TO LAUGH AT YOURSELF! It's better than others laughing at him. Law 8. Don’t read endless lectures to your child, he simply doesn’t hear them! Law 9. Always be consistent in your demands, be well oriented in your “yes” and “no”. Law 10. Do not deprive your child of the right to be a child. Give him the opportunity to be mischievous and restless, a rebel and a brawler. The period of childhood is very fleeting, and there is so much to try before you become an adult! Give your child the opportunity to be a child during childhood, otherwise the period of childhood will continue into his adult life. This can have serious consequences for both your child and you, parents! Law 11. Remember that the greatest parental happiness is to see accomplished, smart and grateful children!
| Next > |
Master class on creating presentations in Microsoft PowerPoint. consultation on the topic
Master class on creating presentations in Microsoft PowerPoint.
Relevance: In the modern world, the comprehensive development of preschool children is impossible without the use of new educational technologies and electronic educational resources.
The modern and most effective electronic educational resources for education include educational materials that are reproduced using a computer. To improve the quality of the pedagogical process, electronic educational resources such as electronic multimedia manuals, presentation materials, and computer programs are used.
The use of computer technologies makes educational activities more exciting and truly modern, expands the possibilities of presenting educational information, and can enhance the child’s motivation. The use of multimedia aids and educational programs in the practice of working with preschool children is very effective, since the presentation of information on a computer screen arouses great interest in children. Game components included in multimedia programs activate the cognitive activity of preschool children and improve the assimilation of material.
Target:
increase the competence of teachers in the field of information and communication technologies by means of creating multimedia games.
Tasks:
• expand knowledge in the field of mastering information and communication technologies through the use of the multimedia program Microsoft PowerPoint;
• introduce the capabilities of the Power Point program;
• generate interest in the use of information and communication technologies.
Description of working with slides:
1 slide: In the conditions of modern development of society, the modern information space requires from a preschool teacher computer skills and the ability to create a presentation.
I present to your attention a master class on creating presentations.
Slide 2: Right-click to create a new Microsoft Power Point Presentation.
Slide 3: Create a blank slide. Path (CREATE SLIDE - BLANK SLIDE).
Slide 4: Create a background. In order to create, click on the tab (INSERT – FIGURE).
Slide 5: Select a folder on the computer, our background is in it.
Slide 6: Select a background and insert it.
Slide 7: Our background.
Slide 8: We need to insert a picture on our slide.
Slide 9: Insert a certain picture into Word. To do this, you need to move the cursor over the corner of the picture and, by clicking with the left mouse button, drag it inside the picture. Thus, we reduce the image to the required size if necessary. Cut and paste into presentation.
Slide 10: Repeat with a picture.
Slide 11: Some pictures are copied with a white background. How to remove it?
Slide 12: To do this, select the commands (INSERTION - WORKING WITH DRAWINGS - COLOR). In the field that opens, select (SET TRANSPARENT COLOR). Place the cursor over the white background of the picture and click.
Slide 13: The background becomes transparent.
Slide 14: Adding animation.
Slide 15: Select the object and select the path (ANIMATION – ADD ANIMATION), a window opens, select (MOVEMENT PATH – LINE).
Slide 16: A line with two dots appears on our slide. The green one remains in place, and we drag the red one with the mouse to the item that should have this item. Then in the window we select the inscription (TRIGGER) and perform our action (BY CLICK).
Slide 17: This is what our slide will look like after all the steps are completed. Each action can be viewed in the (VIEW) window.
Slide 18: This slide shows another example of animation. We need our apple to disappear from the corner and appear in the basket. We arrange our items the way we need them. The apple is at the top, and the basket and the second apple are at the bottom.
Slide 19: Select the first apple that will disappear for us, then the path (ANIMATION - ADD ANIMATION - EXIT) exit - this is the disappearance from the slide in the exit, select (FADING).
Slide 20: Select the second apple that should appear (ANIMATION – ADD ANIMATION – INPUT) input is the appearance of an object on the slide. In the input we select (FASHION).
Slide 21: This is what we got.
Slide 22: Now, using this slide as an example, I’ll show you how to make a hyperlink - this is a transition to the desired slide or subsequent ones.
Slide 23: Select the object. (INSERT - ACTION).
Slide 24: In the window that pops up, select (GO TO HYPERLINK).
Slide 25: Next, choose which slide we want to return to and click on the word (SLIDE).
Slide 26: In our presentation, we need to return to slide 5 and we select (5 SLIDE). It is shown in the viewing window. Click OK.
Slide 27: The first window is closed; in the second, click OK.
Slide 28: Checking.
Slide 29: In the next slides I will show you how to make control buttons. Click (INSERT – SHAPES – FIGURE ARROW – RIGHT ARROW). Below there are special control buttons.
Slide 30: Move to slide. The arrow can be painted in any color. Click on the arrow that lights up (DRAWING TOOLS – FIGURE FILL).
Slide 31: Choose red color.
Slide 32: (DRAWING TOOLS – FIGURE OUTLINE) also select red.
Slide 33: (INSERTION – ACTION – GO TO HYPERLINK –
NEXT SLIDE – OK).
Slide 34: Checking.
Slide 35: THANK YOU FOR YOUR ATTENTION!