Summary of the lesson on modeling “Radiant Sun” Senior group
"Radiant Sun"
Tasks:
— to arouse in children the desire to create an image of the sun based on folk crafts and book graphics (based on illustrations for folk nursery rhymes and songs); learn to create the image of the sun using plastic means; - show options for depicting sun rays using decorative elements (dot; circle; straight, broken, wavy, intermittent flagella, as well as a curl; leaf; trefoil, etc.) - continue mastering the technique of relief modeling. Reinforce sculpting techniques. - develop imagination, creativity, fine motor skills, sense of color, rhythm, shape and composition. - cultivate interest in folk art.
Preliminary work
Acquaintance with the image of the sun in works of decorative and applied art and book graphics. Examination of book illustrations in collections of songs, nursery rhymes, and folk tales in order to enrich impressions and ideas about the options for depicting the sun. A conversation about the sun as the source of life on earth and as one of the main images of folk art. Creating portraits of the sun in drawings and applications.
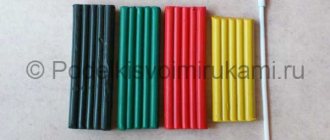
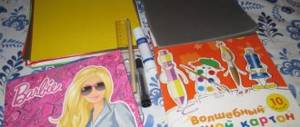
Materials:
cardboard squares measuring 15x15 cm, plasticine, stacks, beautiful buttons and beads for eyes, rags, a toothpick stick.
Progress of the lesson
Educator: Guys, I suggest you listen and guess the riddle:
Not high, not low, Not far, not close, A ball floats in the sky, red-hot like fire. He warms the whole world And does not know fatigue, Smiles in the window, And everyone calls him... ( sun
).
Educator: I offer it to you. Guys, remember the folk nursery rhymes, calls about the sun:
Little sunshine, look out the window! Sunny, dress up, Red, show yourself! Sunshine, sunshine, Red seed! Come out quickly, be kinder to us, sit on a stump, shine all day!
Educator: Guys, what words usually describe the sun in poems and songs, why is it called red (beautiful)? Since ancient times, when even your grandmothers and great-grandmothers were not in the world, people called all the most beautiful and kind things red: “red sun”, “red day” (holiday), “red word”, “red maiden”. They even made up proverbs, for example: “A bird is red with its feathers, but a man is with its mind,” “Spring is red with flowers, and a hut with pies.” Red means beautiful. We looked at the image of the sun in objects of decorative and applied art, in book illustrations. Remember how the sun is depicted in them?
Yes, in different ways (in the form of a circle, several circles, a circle with rays-curls, rays-dots, rays-wavy lines, etc.) (Tables are displayed depicting decorative options (circle, circle with dots, circle with curls, circle with wavy lines)).
Today in class we will create our own suns with you. Let's sculpt a kind sun, bright, big, warm, beautiful, with rays - wavy lines or curls. Our suns will be very beautiful in color - red, orange, pink, yellow, crimson.
Now let’s play a little (physical education).
(Children stand in a circle, squat)
The sun rose in the morning (get up, stretch)
And off we went for a walk.
(they walk in place)
And on our street (turns of the body,
He liked everything.
spreading his arms to the sides)
The sun ran (running in place)
golden path,
And the sun came in (they imitate the window with their hands)
Directly to our window!
Together we set off (walking in place)
With the sun to kindergarten.
The sun caressed (each child puts his
All the guys at once! hands on neighbors' shoulders)
The teacher invites the children to sit at the tables.
A finger warm-up game
“Sunny Bunnies”
is being held Sunbeams (rotation of hands with fingers up)
They play on the table
(in the same position, fingers tap on the table).
I’ll beckon them with my finger
(palms turned towards you, alternate swaying of fingers from thumb to little finger),
Let them run towards me
(“wind” towards themselves).
Well, catch it, catch it quickly, catch it from the right, catch it from the left
(arms to the sides, swings left and right)...
He ran to the ceiling, jump-jump
(pulling up with both hands, lowering the arms).
Show me your palms - right and left! Quickly squeeze your skillful fingers into your fist! Unclench... Examine... And quickly tell me: Why do we, children, need these dexterous palms (children perform movements according to the text)
?
(Children's answers)
Educator: Look at your hands! For boys they are strong and strong, for girls they are gentle and affectionate, and for all of you they are skillful and hardworking. Today you and I will sculpt a portrait of the sun, and our hands will have to work hard. We will sculpt our suns on a base plate. Let's imagine the miracle sun in all its glory. We take a piece of plasticine, roll it into a ball, slightly flatten it into a flat cake and press it against the background in the very center of the plate - this is a solar circle (disk). Using a toothpick stick, mark the locations of the rays around the sun. Now let's start sculpting them. To do this, take a piece of plasticine of a different color, divide it into several parts and turn them into rays (the teacher clarifies the children’s ideas about what shape decorative rays can be and once again draws attention to the decorative table).
Let's stick beautiful rays around the sun. They can be the same or different in size and shape, single-color or multi-color. Children work independently. As the lesson progresses, the teacher provides children with individual assistance in choosing a composition and arrangement of rays of different shapes, reads nursery rhymes and poems about the sun:
Like a bright orange, the sun came out of the aspens, red, ruddy, called by everyone everywhere! Red, red, Clear, clear!.. (G.R. Lagzdyn)
Bell sun, Rise early, Wake us up early: We should run to the fields, We should welcome spring!
Educator: Guys, we agreed to sculpt portraits of the sun. What must be sculpted in order to get a portrait (children remember that they need to depict eyes, nose and mouth)? How to show that the sun is smiling cheerfully?
Children offer options for depicting a smile using plastic means.
At the end of the lesson, an express exhibition of portraits of the cheerful sun is held.
Notes on sculpting "Sun" (junior group)
Irina Ivanovna Zhabina
Notes on sculpting "Sun" (junior group)
The goal is to introduce children to the “plasticineography” technique.
Tasks:
1. Learn to convey the image of the sun. Continue to develop skills in working with plasticine: rolling with straight and circular movements of the hands. Learn to attach the finished form to a plane by uniformly flattening it over the surface of the base.
2. Develop imagination, attention, memory.
3. Cultivate responsiveness, the ability to sympathize with the characters, the desire to help them. Maintain the desire to complete the work started, following the playful motivation of the lesson.
Equipment: pictures - “sun” (one sun has a sad expression on its “face”, the second has a cheerful one); thick green cardboard (a picture of animals, birds, flowers is glued in the corner) - size 1/4 A4; yellow and orange plasticine; boards for modeling; napkins.
GCD move:
1. Introduction to the game situation. Mystery:
Who gets up earlier than everyone else in the morning?
Who gives warmth and light to everyone?
Children: The sun.
Educator: The sun wakes up before everyone else, washes itself from the clouds to be clean and fresh, and then rises high into the sky. The sun has a lot to do: warm the earth, illuminate it with bright light, wake everyone up with its gentle rays - flowers, birds, bunnies and squirrels, boys and girls. And this happens every day. But one day the sun did not come out into the sky. It was a cloudy morning. The bunnies began to wake up the sun, but it did not hear them. Then they called the kindergarten and asked to help them. Let's call the sun.
2. Physical education minute.
Sunshine, sunshine, look out the window,
Children are waiting for you, youngsters are waiting, “Springs”
Bucket sunshine! Look out the window!
Your children are crying and jumping on the stones. Jumping on two legs.
Sunny, show yourself! Red, appear! Children turn to the window and stretch out their hands forward.
The teacher shows the sun with a sad expression on his face and offers to help the sun. He offers to draw the sun for all the animals and flowers while it is sad and sick.
3. Plasticineography “Sun”.
Educator: We will draw using plasticine. Let's remember what kind of sun it is?
Children: round, yellow, orange, red (in the evening, in the morning).
The teacher shows and comments on the stages of work:
1. Take your choice of red or yellow plasticine. Roll the ball in a circular motion, pressing it with your palms.
2. Place the ball in the middle of the cardboard and lightly press on it to flatten it.
3. Let's pinch off a small piece and roll the flagellum with straight movements, you will get a “ray”, attach it to the “sun” and point it at the squirrel or flower. In the same way we will make many rays.
Children choose who or what they will make the sun for and get to work.
4. Summary.
The teacher changes the picture to “happy sun”. Children show the sun their work, tell who their sun warmed (daisy, fox, etc.).
Educator: The sun has recovered, rejoices and thanks you for helping him and all the little inhabitants of the forest.
Note:
If the weather is sunny, then the teacher plays the outdoor game “Sunny Bunnies”.
Literature used: Davydova G.N. Plasticineography for kids. – M.: Publishing house “Scriptorium 2003”, 2008. – 80 p.
Summary of a lesson on modeling with children of primary preschool age “Sun for animals”
Municipal preschool educational institution
combined kindergarten No. 390
ABSTRACT
modeling classes for preschool children
"Sunshine for animals"
Author-developer:
teacher Shuvalova Nina Mikhailovna
Nizhny Novgorod
2010
SUMMARY OF THE CLASS ON STYLE “SUN FOR ANIMALS” /2 JUNIOR GROUP!
OBJECTIVES: EDUCATIONAL. Teach children
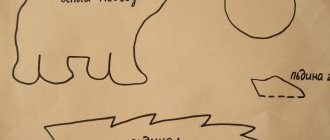
convey the image of the sun in a plastic way, using the technique of smoothing plasticine along the contour. Strengthen the ability to roll out plasticine with straight movements, creating rays. DEVELOPMENTAL. Develop and strengthen fine motor skills of the hands. To develop aesthetic perception in children. EDUCATIONAL. To create in children an emotional attitude towards the poetic image. To foster in children a sense of empathy for the characters and a desire to help them. PRELIMINARY WORK. Reading K. Chukovsky’s fairy tale “The Stolen Sun”, looking at illustrations depicting the sun. Drawing the sun with colored pencils and paints. Conversations with children about fairy tale characters. MATERIAL FOR THE CLASS. For the teacher, illustrations for a fairy tale: sun, cloud, hare, sparrow. Outline of the sun on blue cardstock for display. For children - sheets of blue cardboard with an outline of the sun, yellow plasticine.
PROGRESS OF THE CLASS. 1. Preliminary conversation. Children sit around the teacher on the carpet.
The teacher reads to the children an excerpt from K. Chukovsky’s fairy tale “The Stolen Sun”, showing the corresponding illustrations. The sun walked across the sky and ran behind a cloud. The bunny looked out the window. It became dark for the bunny. The gray sparrow is crying. Come out, sunshine, quickly! We feel sad without the sun. We can’t see a grain in a field. The teacher asks the children what the animals should do now without the sun, inviting the children to join in the discussion of what they read. Next, the teacher asks the children to remember who helped save the sun? The teacher tells the children that the bear that saved the sun cannot help us because it is looking for its cubs. Children offer to help the animals themselves. The sun can be drawn with paints or pencils. You can also cut out the sun from colored paper and give it to animals. The teacher listens carefully to the children's advice, praises them for their resourcefulness and desire to help, and invites the children to go look for the sun. 2. PHYSICAL CLASS In the morning the sun rises Higher, higher, higher. By night the sun will set Lower, lower, lower. Okay, okay, Sunny is laughing. And under the sun everyone sings merrily. After the game, the teacher takes out the sun - a ready-made sample - and invites the children to go to the tables.
3. RESEARCH ACTIVITIES. The teacher offers to look at a sample of the sun. With the help of questions, children determine the shape of the sun, what parts it consists of./circle, sticks-rays./ Next, the children name the color, with the help of the teacher they draw conclusions why the sun is yellow. The color is warm, so it warms everyone up. Then the teacher suggests looking at the contours of the sun laid out on the tables. The teacher asks the children to run their finger along the outline in order to visually and visually remember the shape of the sun. Next, children are asked to move their finger from the contour to the center of the circle, explaining this by saying that so that the sun does not lose the shape of the circle, they should not go beyond the contour line with their finger. After finger research, the teacher reminds the children how to use plasticine when doing work (pinch off small pieces from a large one and smooth them evenly from the outline to the center.) Then the children, together with the teacher, remember rolling out the plasticine with straight movements (sausages) for rays. 4. PRACTICAL ACTIVITY. After all the research and explanations, the teacher invites the children to start working on their own. During independent activities, the teacher encourages children and helps unsure children. At the end of the lesson, the teacher praises the children for their work and reads an excerpt from the fairy tale: The bunnies and squirrels are happy, the boys and girls are happy. Well, thank you guys for the sunshine. The bunny and the sparrow thank the children for the beautiful sunshine and invite the children for a walk. 5
.FOLLOW-UP WORK. After classes, in your free time, offer the children the didactic game “Feed the Hare and the Sparrow.”
Literature.
- Berseneva G.K. Textile. Dough. Paper. Homemade crafts. M.: Astrel Publishing House LLC: AST Publishing House LLC, 2001.
- Dankevich E.V. We make it from salt dough. St. Petersburg: Publishing House "Crystal", 2001.
- Kiscalt Isolde. Salty dough. M.: AST-PRESS, 2001.
- Kozlina A.V. Manual labor lessons. M.: Mosaic-Synthesis.
- Komarova T.S., Savenkov A.I. Collective creativity of children. M.: Pedagogical Society of Russia, 2000.
- Khalezova N.B. and others. Modeling in kindergarten: a book for kindergarten teachers. M.: Education, 1986.
- Khalezova N.B. Folk sculpture and decorative modeling in kindergarten: A manual for teachers. M.: Education, 1984
- Sensorimotor development of preschool children in fine arts classes. Bezrukikh M.M. 2001
- "Childhood. Program for the development and education of children in kindergarten." V.I. Loginova, T.I. Babaeva
- Raising a child’s sensory culture” L.A. Venger, E.G. Pilyugina
- “Theory and methodology of visual activity in kindergarten” V.B. Kosminskaya, E.I. Vasilyeva
Perspective plan for a modeling circle “Clay Fairy Tale”
(children 6-7 years old)
MDOU TsRR d/s No. 6 “Rainbow”.
Compiled by Tatyana Nikolaevna Petrachkova, additional education teacher and head of the fine art studio.
Goal
: Formation of the basis of aesthetic culture in preschoolers through the development of creative abilities and artistic modeling skills.
To achieve this goal, it is necessary to work in four areas:
1. Mastering the skills of various types of artistic modeling;
2.Development of creative thinking, imagination, attention, the ability to express your creative idea;
3. Formation of a culture of perception of the surrounding world;
4.Development of fine motor skills of the fingers and hand.
The main task is to teach children to analyze the shape of an object, to explain the connection between the plastic form and the method of sculpting; improve visual techniques - continue to master relief modeling (still life, portrait), sculptural method of modeling or modeling from a whole piece by stretching and modeling parts; show the method of sculpting on a form or frame to ensure the strength of the structure, offer a choice of methods for decorating the stucco image (relief moldings, cutting or scratching with stacks, brush painting according to design or based on folk arts and crafts). Topics for the “Clay Fairy Tale” circle.
1-2.Merry men/Object modeling. Painting.
3-4. Our favorite toys/Object modeling. Painting.
5-6.Dog with a puppy/Story sculpture. Painting.
7-8.Our pond/story sculpture. Painting. Drawing up a collective composition “Pond”.
9-10.Autumn still life/Object modeling. Painting.
11-12.Leaves dance and turn into trees/Decorative relief sculpture. Painting.
13-14.Who got wet in the rain?/Story modeling.
15-16. Horses/Modeling based on folk toys. Painting. Drawing up the general composition “Merry Carousel”.
17-18.Shaggy bear/Modeling based on the Bogorodsk toy. Painting.
19-20.Feathered, shaggy, prickly.../Sculpting-experimentation.Painting.
21-22. Clay blunder/ Modeling-experimentation.
23-24.Wow picture, wow heat!/Modeling in relief according to the content of the fable. Painting. Creation of fantasy compositions.
25.Snow Bunny/Salt Dough Modeling.
26-27.Ringing bells/Salt dough modeling. Painting.
28-29.We will go, we will rush.../Collective sculpting. Painting. Creation of the plot composition “Reindeer Sleigh”.
30-31.Winter fun/Story modeling. Painting.
32-33.In the circus arena/Collective modeling. Painting. Drawing up the general composition “Circus”.
34-35.Ants in an anthill/Modeling from paper pulp.
36-37. Sandman walks near the house/Sculpting according to plan. Painting.
38. Kryamnyamchiki/Making treats from butter dough.
39-40.Sunshine/Decorative relief molding. Painting.
41-42.Grandfather Mazay and the hares/Sculpting a story on a mirror or foil. Painting. Composition.
43-44.Water carriers at the well/Decorative molding. Painting.
45-46.Pendant as a gift for mom/Decorative relief molding. Painting.
47-48.Spring carpet/Decorative molding.
49-50.The wind blows across the sea and propels the boat.../Relief sculpting.
51-52.Whales and sperm whales swim in the sea.../Collective sculpting. Painting. Drawing up the general composition “Sea World”.
53-54.Monkeys on palm trees/Modeling with applique elements. Painting.
55.Design.
56-57. Elephants and rhinoceroses stomp around the island/Collective sculpting. Painting.
58. Composition of the composition “Desert Island”.
59-60.Wonderful shells/Modeling with natyra. Painting.
61-62.We went to the meadow, we sculpted the meadow/Collective plot sculpting. Painting.
63-64.Elegant butterflies/Collective plot modeling. Painting.
65. Compilation of a collective composition “Our Meadow”.
66-67. modeling according to interests. Children's choice.
68-69. Summing up.
70-72.Reserve time.