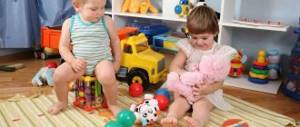
Crafts “Take care of nature”
Children love to color. Therefore, print a poster on this topic in black and white and give the children freedom of creativity. Let them use crayons, pencils, felt-tip pens or paints to add bright colors to the canvas. Tell them what color the elements of the poster should be, but if the children want to show their vision of the plot, do not interfere with them, let them show their individuality. Then teach them how to make crafts with the theme "Take care of nature." Prepare everything you need in advance.
Craft “Waterfall”
If you go on a picnic with your children, after the feast tell them that plant remains can be buried in the forest, they will rot. But this trick won’t work with plastic bottles. Therefore, you need to take them with you to throw them in the trash container or to do a wonderful job for which you need:
- plastic bottle;
- cardboard;
- scissors;
- water;
- cup;
- beads;
- colored paper;
- markers;
- gouache.
Help your child cut the plastic bottle in half crosswise, almost in half, with scissors. The top part should be slightly smaller than the bottom. The child will paint this half with a neck to turn it into a fish, then draw an eye on it with a felt-tip pen. The blue cardboard sheet will turn into water. You need to glue beads at the bottom, and cut out something like pebbles from multi-colored paper.
All that remains is to glue the “fish” onto the blue cardboard and draw air bubbles in the water.
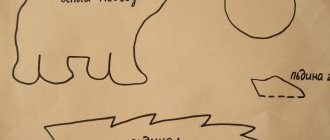
Crafts made from natural materials
To create it you will need:
- Walnut;
- cone;
- dry grass;
- tree branches;
- sawed from a dry tree trunk, which will become a stand;
- glue.
Place a wooden stand on the cut tree, the child will glue dry grass and attach twigs using plasticine.
Lesovichek will live in this forest. The baby will make it out of a walnut, which will become the head and cones - this is the body. These parts need to be connected with plasticine. Facial features are also made from it. But it is necessary to use plasticine of appropriate colors, as for plants and mushrooms that need to be attached to the stand. Use a bright marker along the edge of the stand to write “Take care of the forest!”, and if the child is already familiar with literacy, let him do it himself.
Tasks. Teach children to cut out houses from paper folded like an accordion or twice in half. Improve the technique of cutting with scissors: by eye in a straight line (walls of houses), along an oblique (roofs) and along folds (windows). To develop compositional skills - when creating a panorama of the city, rhythmically arrange houses in rows, starting from the top and partially overlapping the images.
Preliminary work. In independent artistic activity, a small group of children prepares the basis for a future composition - they tint a large sheet of paper or a strip of wallpaper, dividing the space into two parts (2/3 - green or yellow-brown ground; at the very bottom two stripes of a gray road, separated by white markings; 1/3 - blue or dark blue sky - see figure). A city tour or looking at illustrations and postcards with city panoramas.
Materials, tools, equipment. Strips of colored paper of different widths for cutting out buildings, rectangles and strips of colored paper for cutting out windows, simple pencils, scissors, glue, glue brushes, oilcloths, napkins, paper and cloth, a large sheet of paper or a strip of wallpaper to create an overall composition.
Contents of the lesson.
The teacher shows the children the basis for the future composition, explains that now there is space - the earth (the bottom of the sheet) to the horizon (holds his hand, showing the horizon line) and the sky. But soon, soon houses here will rise to the very sky, people will live in the houses, cars will run along the roads... And you and I will do this. Let's create our own city. The city is big, there are also a lot of houses in it. Now I will show you how you can create a big beautiful house.
— I want to build a brick house, so I’ll take an orange sheet. My house will have 2 floors, so I will fold the paper in half. I'll turn it around, you see - this is the first floor, and this is the second. How many entrances will there be in my house? Let's see. I'll fold the paper in the other direction - first in half, and then in half again. I'll unfold it. Help me count the entrances: one, two, three, four - four entrances in total. I'll fold the porches again and cut out the roofs - like this - I cut off a corner on one side, and then on the other. Let me turn it around and it turns out to be a house with a figured roof. Now we need to make the windows. I take a narrow strip of yellow paper. I fold it in half and in half again, smoothing out the fold. I unfold and cut exactly along the folds so that the windows turn out the same. I put up windows on the house. You see, there are not enough windows. I take another strip of paper, a different color (for example, blue, pink) and make exactly the same windows. I lay out the windows, alternating them by color or just as if the light is on in some windows and not in others (or the curtains are pink, blue, green) and glue them. This needs to continue until there is one window in every room of my house - on every floor, in every entrance. I will continue cutting out windows when you start making your houses.
The teacher invites one child to show the children how to make a house, clarifies and comments on his actions so that the children reinforce the idea and repeat the sequence again.
Children independently choose the color of paper for their house and windows. They start cutting. The teacher helps with advice and completes his work, and also cuts out round dances of men (ribbon applique) in order to interest the children in another new way, which they will master in the second half of the school year. Children transfer the houses to the general panorama. The teacher helps place them and explains that first we need to glue the houses on the horizon line, and then lower the next rows lower and lower. Partially overlaying the house on the house, we have a road below, cars will rush along it, which we will cut out on the next lesson.
After class. The composition “Our City” is hung for general review and discussion.
Drawings on the theme “Ecology of Nature”
Such creativity will also instill in children a love for their native land. If they were asked to bring drawings on the topic of environmental ecology to a children's institution, we can recommend the following.
In this poster, the author shows how specifically each person can help preserve normal ecology and nature. To do this you need:
- pick up trash after yourself;
- After relaxing by the fire, be sure to put it out;
- don’t waste water;
- save energy;
- take care of your home.
Reducing harmful emissions into the atmosphere will also help preserve the environment. It is not for nothing that in the summer motorists are encouraged to switch to bicycles in order to get to work using this transport.
Parents can go on bike rides with their children, thus also engaging in outdoor sports.
The following drawing on the theme of natural ecology is symbolic. Under a bright rainbow, the child depicted a representative of animals, birds, insects, plants and calls on everyone to preserve our nature.
The following work is intended for schoolchildren. To make it, you will need:
- a sheet of paper or whatman paper;
- a simple pencil;
- eraser;
- paints.
First, on paper with a pencil you need to outline the main elements of the canvas.
If some of them didn’t work out right away, you can erase them with an eraser and do them again. The picture is divided into 2 thematic parts. On the left is beautiful nature, a grazing horse, birds soaring in the blue sky, and on the right are industrial enterprises that produce harmful emissions into the atmosphere and, as a result, dead trees, bushes, and grass.
The following poster on the topic “Take care of nature” shows children that they need to protect the forest from fire.
If your child is asked to draw a picture on such a topic, you can give him the following idea. There is a forest, a river, a rainbow, and animals.
If this drawing on the topic “Ecology of Nature” is intended for middle school students, the next one can be reproduced by children from elementary school and older groups of kindergarten. Show them how to draw tree canopies with conical fora and lush canopy. Children will also be able to draw lilies of the valley and strawberries.
Another work was done using a very interesting technique. To make the same, take:
- a needle;
- colored threads;
- a sheet of white cardboard;
- simple pencil.
First, barely pressing the pencil, you need to draw a rainbow, below - the rays of the rising sun.
In the center of the picture are open palms and the inscription “Take care of nature!” We start from the bottom of the canvas. Help your child thread the yellow thread through the eye of the needle and tie a knot at both ends of the thread. The rays of the sun can be made long or consisting of several stitches. Children will embroider a rainbow using threads of different colors and finish the work using the same technique.
The following paintings are based on comparison and contrast.
On the right is a corner of the globe. Explain to the children that it will remain like this if we all protect nature. On the left you can see what it will be like if you litter, don’t take care to put out the fire behind you, or burn it in the wrong place. Pollution of water bodies will also lead to such sad consequences. A child will understand all this if he draws such a canvas.
Another work develops this idea and shows that people are able to resist air pollution; they need to reduce the amount of exhaust gases and pick up trash after themselves.
The following drawing is also intended to instill in children the right thoughts regarding the environment.
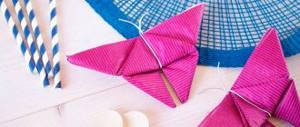
To let the kids know that you can make a lot of interesting things out of waste material, offer them the following ideas.
Application “My City” in the senior group
GCD summary. Paper applications. My city. Senior group.
1. Purpose of the lesson. Learn to convey the image of a city street in an application.
2. Tasks. Develop children's ideas about their hometown; clarify ideas about the size of surrounding objects; practice cutting techniques straight and oblique; strengthen the ability to carefully use scissors, brushes and glue: develop teamwork skills and the joy of joint creativity.
3. Type of lesson - thematic.
4. The form of the lesson is frontal.
5. Duration 25 minutes.
6. Participants are students of senior group No. 13.
7. The age of the students is 5 years.
8. Equipment and materials: A4 sheet of Whatman paper, rectangular sheets of different sizes for houses, blue and yellow stripes for windows, and various rectangles for roofs and doors, scissors, glue brushes, glue, napkins for each child.
9. Preliminary preparation. View slides with views of our city.
10. Methods and techniques for working with children: demonstration, surprise moment, game situation, explanation, questions for children.
11. Progress of the lesson:
1"Houses on our street."
Guys, yesterday we looked at slides about our city.
What did you like? Is our city beautiful?
What is the name of the street where our kindergarten is located? What kind of houses are there?
-Tall, big, beautiful.
Let's all make a big poster together, where we will place: houses, trees,
cars, let's make a traffic light...
The teacher hangs a poster with a marked road and intersection on the board.
This is what our street was like just 50 years ago. There was only a road and
fields around. And now the builders have built houses, a kindergarten, and a school.
Let's be builders and build our houses out of paper.
And in the next lesson we will make cars out of paper, and our city
filled with life...
2. Finger gymnastics.
Today we will work with scissors. We must work carefully.
Let's stretch our fingers.
"Snow" physical education session. We put out our palms and begin to catch snowflakes! One, caught, two, caught! Aren't you tired? Don't get tired! One, caught, two, caught! And of course, not tired! And there are many, many snowflakes! And snowdrifts are growing everywhere. Let's put snow in our palms and start making snowballs! Let's sculpt, sculpt, sculpt into a ball and then throw it up! We played without a care, and now we hurry to work!
3. Clarification of working methods.
Invite each child to choose a rectangle for the wall of the house.
Clarify how they will place it on a piece of paper.
Choose rectangles for roofs, strips for windows and doors.
Find out how to make a roof, how to cut windows so that they are
the same.
4. Independent work of children.
Observation by the teacher of the neat work of the children.
Each child cuts out the roof, windows and doors and sticks them on
house rectangle.
5. Creation of a general composition.
Together with the children, find the place of each house in the overall composition. Paste
at home on whatman paper. Whoever managed it, offer to cut the tree and make
traffic light at the intersection.
Tell the children that in the next applique class they will be cutting out
cars.
6. Physical education minute.
Exercises to relieve general or local fatigue
And the clock goes on and on.
Tick-tock, tick-tock, who in the house can do that?
This is the pendulum in the clock,
Beats every beat (Tilts left and right.) And the cuckoo sits in the clock, She has her own hut. (Children sit down in a deep squat.) The bird will spend time, hide behind the door again, (Squats.) The arrows move in a circle. They don't touch each other. (Rotate your body to the right.) You and I will turn counterclockwise. (Rotate your body to the left.) And the clock goes and goes, (Walks in place.) Sometimes it suddenly lags behind. (Slow down the pace of walking.) And sometimes they are in a hurry, As if they want to run away! (Running in place.) If they are not turned on, then they completely stand up. (Children stop.)
7. Summary of the lesson.
Well done today. Look how beautiful it becomes when you are together
work hard. And the empty sheet turns into a city. Well done.
Literature:
Methodical manuals
"From birth to school." Approximate general educational program for preschool education / Ed. NOT. Veraksy, T.S. Vasilyeva. -3rd ed.-M: Mosaic - Synthesis, 2013.
Kutsakova L.V. Construction and manual labor in kindergarten. – M.: Mosaika-Sintez, 2008.
Lykova I.A. Visual activities in kindergarten: planning, lesson notes, methodological recommendations. – M.: Karapuz-didactika, 2009. – 147 p.
T.
S. Komarova “Art activities in kindergarten.”
Summary of the lesson.
5
Crafts from garbage
Children love Kinder surprises, so they almost always have packaging for the gifts inside. Teach children by showing them what can be made from such waste material.
The result will be wonderful funny chickens. To make them, the kids will need:
- plastic containers for kinder eggs;
- glue;
- beads or pins;
- yellow and red cardboard;
- scissors.
To one plastic package you need to glue wings made of yellow paper and scallops made of red paper, and attach beady eyes in the same way.
You can pierce the top of the Kinder egg package with two pins. Then the remaining beads on the outside will become the chicken's eyes.
To make the shells, have parents cut the top of each package half in a zigzag pattern. This will be more difficult for children. Together with them, make a nest from straw or dry grass, or from thin twigs, fastening the elements with threads or glue.
You can make such a picturesque bouquet out of garbage. To create it, take:
- Kinder egg packaging of different colors;
- scissors;
- sisal or green plastic bottles;
- cocktail straws;
- nail.
Making master class:
- Also cut the egg halves in a zigzag pattern. On the reverse side, use a heated nail to make a hole.
- Insert a straw into each, first push the edge further to cut it into 2 parts. Then tie them in a knot, then this “stem” will be firmly fixed in the flower.
- Arrange them all in the same way. Connect the flowers, cover with sisal, tie with ribbon.
- If there is no sisal, then you need to cut off the top and bottom of the green plastic bottle and cut the remaining part into a thin strip in a spiral.
For the next craft on the theme take care of nature you will need:
- Kinder egg packaging;
- toothpicks;
- scissors;
- plasticine;
- paints;
- thin colored rope;
- flat lid from a cardboard box;
- green colored paper;
- glue.
Step-by-step production:
- Let the child glue colored paper inside the lid of the box, this is a carpet of green grass. Toothpicks need to be pre-painted, when dry, stick along the edge of the box, like a picket fence. These pickets are tied with rope in several rows to form a fence.
- Pierce the bottom parts of the plastic blanks with an awl and have the child insert toothpick legs here. He will coat them with black plasticine, make small circles from it, and attach them to the cow’s body. Then you need to sculpt the horns, and the muzzle from yellow plasticine.
- In the same way, let the child create other animals: a pig, a cat, a dog, a sheep. Then you’ll get a whole village farm, and you already know how to make kinder chickens.
The following crafts, take care of nature, are no less interesting in execution. After all, after a feast or celebration, plastic cups and disposable plates remain. Make a clown out of them together with your children.
For it you will need:
- strong wire;
- disposable plates and glasses;
- plastic tray;
- latex gloves;
- padding polyester;
- buttons;
- multi-colored threads;
- cardboard;
- plastic bottle;
- glue.
Manufacturing sequence:
- Make a frame of a man out of wire. Thread cups onto each wire that became arms and legs, piercing their bottom.
- Glue 2 plates together, first placing plastic hair between them. Glue threads in the shape of a mouth, cheeks, eyelashes onto your face. And the pupils can be made from a plastic bottle.
- Two trays will become the back and front of the clown. Decorate his clothes with buttons, sparkles, cardboard, which will turn into a jacket collar.
- Stuff the gloves with padding polyester and attach them in place. This is how the theme of natural ecology came into play. After all, this garbage will not harm her if you make crafts like this for the dacha or for a competition.
And an empty container from “Toilet Duck” or other household chemicals can easily become a toy bus. And the other bottle - by helicopter.
To make the first toy, you need to take an empty plastic bottle of a similar shape, for example, from a “toilet duck”, rinse it well, and remove the label.
Draw the windows and doors of this minibus with a felt-tip pen, cut them out with a knife and scissors. To prevent your child from getting hurt on the sharp edges of the plastic, sand them first with coarse, then fine sandpaper.
The covers can be glued with super glue, making wheels or using wire axles. Use an awl to make two punctures on one side and the same number on the other side of the bottom of the bottle. Insert one and a second wire into them, onto the ends of which you need to glue the lid, which will become the axes.
And to make a helicopter, you will need:
- 2 bottles of drinking yogurt;
- glue;
- 2 plastic bottle caps;
- cocktail straws;
- 2 nails;
- scissors.
The first bottle of drinking yogurt will be the main one.
You can simply draw a cabin on its bottom or cut off the bottom and glue half of a plastic package from a Kinder egg here. Make runners from two straws, attach them to strips of plastic cut from the second bottle.
Using a hot thin nail with a wide head, make a hole in the lid and its attachment point, as well as at the ends of the straws. Match these parts to create the top propeller. In the tail part, make it out of straws.
If you need to quickly make a craft about the ecology of nature, use plastic bottles. Tell your child that those who throw them away in the forest harm nature. After all, such containers will rot only after 200 years! It’s better to make a craft out of it for a competition. It will take very little time and materials to make the next one, here they are:
- milk bottle;
- plasticine;
- 2 buttons;
- black and white cardboard;
- glue;
- pliers;
- wire in a white winding.
Cut 4 pieces of wire with pliers and glue them to the bottom of the bottle, turning it horizontally.
Make a tail from the thinner wire in the winding. Have your child smear black play dough onto a bottle cap to create a nose for this rat. He will cut out ears from white cardboard, and a mustache for her from black cardboard. Using plasticine, attach the eyes to the muzzle.
To make fun snowmen, show children how to draw on Actimel bottles with a marker to create the characters' facial features. You can teach your child to knit. Cast on 2 knitting needles and show him how to knit a rectangular fabric using garter stitch. Then you need to sew it on the wrong side. After that, thread the needle and pass the thread into the upper part of the cap, tighten it.
How to make a fan from forks was described in the corresponding article. Next to him, such an animal made from a plastic bottle will look wonderful.
You need to cut off the necks from the other two and glue them directly with the partings to the main container. The legs are done. The ears are cut out from the remains of the auxiliary bottle.
It's easy to create an adorable horse using two colorful bottles and a thread mop attachment.
To make a cat you will need:
- 3 identical bottles;
- scissors;
- paints;
- brush;
- glue;
- piece of fur.
The necks of two bottles are cut off; they need to be inserted one into the other to form the body of a cat. From the third bottle you will only need the bottom; glue it instead of the head. Make ears from scraps of plastic and glue them in place. All that remains is to paint the base to make a cat, glue a piece of fur on the head, and the tail can be made from cardboard or plastic.
Flowers from a plastic bottle will also help turn waste into a decorative item or into an entry for a competition. Petals are cut out from this container. In order for them to bend like that, you need to hold the workpieces over the flame for a short time.