During technology lessons (labor lessons) at school, children use various tools, the improper handling of which can lead to injury.
Here we will look at the rules for using scissors, a sewing needle, glue, plasticine, a stationery knife, an awl, and also talk about the rules for preparing the place for work and cleaning it at the end of the lesson.
Teaching students to follow safety rules during technology lessons at school is the key to a successful lesson and, most importantly, children’s experience in the correct use of various tools in the future.
Rules for safe work with scissors
- Keep your work area tidy.
- Before work, check the serviceability of the tools.
- Do not use loose scissors.
- Work only with a serviceable tool: well-adjusted and sharpened scissors.
- Use scissors only in your own workplace.
- Watch the movement of the blades while working.
- Place the scissors with the rings facing you.
- Feed the scissors rings forward.
- Don't leave scissors open.
- Store scissors in a case with the blades facing down.
- Don't play with scissors, don't put scissors near your face.
- Use scissors as intended.
Suitable age
Young children can use any object to create their first masterpieces, but they are most attracted to plasticine. This organic material opens up enormous possibilities for children's creativity. But, besides this, plasticine modeling perfectly develops fine motor skills, which promotes mental development, especially at the age when children are already attending the middle group in kindergarten.
Plasticine is an amazing material. It is easy and convenient to work with, even for little ones. The plastic structure allows you to embody the most unexpected childhood fantasies, come up with new forms and unexpected images. But in order for arts and crafts to bear fruit, you need to know the rules for organizing classes. In this matter, the age at which a child can be introduced to plasticine modeling is of great importance.
Some adults invite babies to experience the properties of this material in the second year of life. Of course, at such an early age, bright, soft bars can arouse purely gastronomic interest in a baby. Small children try to taste the plasticine, but this should not be allowed.
Several useful recommendations will help parents correctly instill creative skills in their child step by step:
- Getting to know any creative material should begin with an explanation of its properties and purpose.
- Plasticine is unique in that in a few minutes you can tell and show all its capabilities. Plasticine modeling lessons for children should begin after two years of age. At this age, the child already understands the meaning of objects and their functions. He remembers well the advice of adults and the sequence of actions. Moments of risk are also well stored in children's memory, but the child must be constantly reminded of them.
- The first lessons should be for informational purposes only. Their duration should not exceed 10 minutes. Moreover, adults must remember that there is no place for dictatorship and violence in creativity.
- The child needs to be set up positively for creative activities and encouraged for his every little success.
- If for some reason the baby does not want to engage in modeling, the event should be rescheduled to a more favorable time.
Rules for cleaning your workplace
- Place the craft made in class in the craft box.
- Collect scraps of material and debris from the table and floor.
- After working with plasticine, clean the work board and desk lid with a drain if there are any traces of plasticine left there. Scrape off the plasticine stuck to the floor - throw the dirty one in the trash, put the clean one in a box.
- Wipe the tools and desk lid with a cloth.
- Dry your hands thoroughly with a cloth and wash them with soap.
- Take off your work clothes.
- Remove all accessories.
Lesson summary on labor training “Working with natural materials. Hedgehog"; 3rd grade
The lesson summary on labor training is compiled on the basis of the Program of special (correctional) educational institutions of the VIII type, preparatory class, grades 1-4, edited by V.V. Voronkova, approved by the Ministry of Education and Science of the Russian Federation, Moscow, “Prosveshchenie”, 2010, recommendations of the Federal State Educational Standard of NOU Education dated December 19, 2014, in accordance with the provisions of the Federal Law of the Russian Federation “On Education” and the Federal Law of the Russian Federation “On the Education of Persons with Disabilities”. The lesson summary is designed for students with mild mental retardation, studying in the 3rd grade of a special (correctional) school for children with intellectual disabilities.
Goal: to teach children to make a “Hedgehog” craft from waste material (spruce cones). Tasks. Correctional - educational:
- teach children to make a hedgehog from waste material (spruce cones);
- teach children to divide the whole into separate parts;
- teach children to select the necessary natural materials.
- developing the ability to sculpt and connect parts in the correct sequence;
- consolidation of knowledge about the rules of working with plasticine.
Corrective and developmental:
- Develop attentiveness when examining a sample;
- Develop fine motor skills of the fingers;
- Develop mental operations (analysis, synthesis, generalization).
Correctional and educational:
- Cultivate accuracy, patience in work, and interest in modeling.
Equipment: presentation, pictures. Equipment for students: spruce cone, plasticine, stack, napkins, backing.
During the classes. I. Organizational part - Hello, dear guests! - Hello, my dear guys! - Let's start our lesson. Please everyone sit down.
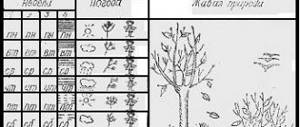
a) Report from the duty officer (to the teacher’s questions). What is today's date? Day of the week? (children's answers) What time of year? (autumn) Guys, name the signs of autumn. (it got colder, it began to rain often, birds flew south; the leaves turned yellow, red, and fell; the grass turned yellow, the water in rivers and lakes became cold. Animals are preparing for winter, stocking up, building and insulating nests and burrows, changing their summer coats for winter ones are fluffier and lighter, so as to become invisible on the white snow) Name all the autumn months. (September, October, November) What is the weather like today? (clear, warm or cold, damp, raining)
b) Teacher inspection of workplaces. Is everyone ready for class? Check if you have everything ready? Today in the lesson you will need: plasticine, a backing, a special knife for plasticine called a stack, a spruce cone, a napkin.
What lesson have you prepared your workplace for? (we have prepared the workplace for the labor lesson) Now we have a manual labor lesson. What other materials do we work with in labor lessons? (in labor lessons we work with plasticine, natural materials, paper, cardboard, fabric) We work under the motto: “Whoever tries, succeeds at 5.” We learn to work carefully, diligently, patiently.
II. Main part. So, we have a labor lesson. In this lesson we will work our fingers a lot and for a long time. Let's do a finger exercise.
1. Finger gymnastics The wind flew through the forest, The wind counted the leaves: Here is an oak one, Here is a maple one, Here is a carved rowan tree, Here is a golden one from a birch tree, Here is the last leaf from an aspen tree, The wind threw it onto the path. Prepared for the lesson. Well done! Guys, let's remember what we did in the last lesson. (in the last lesson we made the flag of the Russian Federation) What did we make it from? (we made the flag from colored paper) What colors does the Russian flag consist of? (the flag consists of white, blue and red) White is the color of purity. Blue - the blue of the sky. The third is bright red, What a beautiful dawn! Three shades of the flag, and the country is happy with them. Our flag is a symbol of valor and national pride.
2. Introduction to the topic of the game “Fourth wheel”. Now we'll play. Look at the screen. What is unnecessary and why? (extra picture of a hedgehog) Why? (because a hedgehog is a wild animal, and a cow, cat, dog are domestic animals)
3. Message about the topic of the lesson Guess the riddle Instead of a fur coat, only needles. Wolves are not afraid of him either. A sharp ball, no legs visible, His name is of course... (Hedgehog)
4. Guys, look at the work plan. Work plan. What should you do first?
- Let's make the head first.
- Then we will make 4 legs.
- Then we will make the nose and eyes.
- Let's make apples and mushrooms.
- Now we attach the head to the body. Apply it.
- We connect the legs and torso.
- Attach the nose and eyes.
- And we plant apples and mushrooms on the hedgehog’s needles.
- Finally we create an exhibition.
A) The game “Who lives in the forest?” The hedgehog walked for so long that he forgot all his friends who live with him in the forest. Let's help him remember. Who lives in the forest?
B) Task for memory development. And so that the hedgehog has a good memory, we will do the task together. Look carefully at the picture. What's written on it? Remember all the details. In a few seconds I will turn away the picture, and you will tell me from memory everything that you remember. (fox, bear, hare...) Hurray! The hedgehog remembered! Well done, now we will have a good memory. The hedgehog says to you: “Thank you”!
B) Physical exercise. Let `s have some rest. And now everyone quietly stood up... And now we’ll go into the forest... And now everyone quietly stood up, together raised their hands up, to the sides, forward, back, turned to the right, to the left, sat down quietly, and got down to business again.
5. Safety rules. Guys, what material will we work with in today's lesson? (today in the lesson we will work with plasticine and natural material - fir cone)
Let's repeat the rules for working with plasticine:
- work on a substrate so as not to stain your desk and clothes;
- before work you need to knead the plasticine;
- After working with plasticine, you need to wipe your hands with a napkin.
Rules for working with natural materials:
- be careful when working with cones so as not to cut your fingers on the scales;
- do not litter.
Rules of personal hygiene.
- work on a substrate.
- keep your hands clean.
- After work, clean the workplace, wash your hands with soap.
Guys, tell the hedgehog how to prepare plasticine for work? (cut off the desired piece of plasticine, knead it well in your hands) How can you cut plasticine? (with a special knife - a stack) How to make a ball? (roll it between your palms, lightly pressing on the plasticine) How to make a small ball? (cut off a smaller piece of plasticine and roll it between your thumb and forefinger) How to make a sausage (flagellum)? (roll out some of the plasticine between your palms or on a backing)
6. Let's repeat the work plan. Work plan. What should you do first?
- Let's make the head first.
- Then we will make 4 legs.
- Then we will make the nose and eyes.
- Let's make apples and mushrooms.
- Now we attach the head to the body. Apply it.
- We connect the legs and torso.
- Attach the nose and eyes.
- And we plant apples and mushrooms on the hedgehog’s needles.
- Finally we create an exhibition.
7. Independent work. Execution: making a hedgehog under the guidance of a teacher according to a model. Look at the picture of the hedgehog. What's his head like? What kind of nose does he have? What legs? Well done! What beautiful work you have done! The hedgehog is happy! Now he has supplies for the winter, and he will not go to waste.
III. Lesson summary. 1. Exhibition of works. We will choose the best job. Who wants to choose? Why is this job the best? This job is neat. All parts are correctly distributed. This work is the best, but we still have good work. Who will find them? Why is this job good? We still have work to do, and they are all good, because you tried. (I put the works on the shelf and give ratings) Look at our wonderful exhibition. Are you satisfied with your job? Everyone received an excellent rating.
2. Reflection. Look at these faces and choose the picture that matches your mood and condition.
3. Gymnastics for the eyes. We've worked a lot with our eyes, now let's rest. We put our elbows on the desk, crossed our fingers, put our chin on our hands, we don’t move our heads, we only move our eyes.
4. Repetition. What was the lesson now?
Remember what we did. The hedgehog is very happy! And he says to you: “Thank you, guys!” Now the hedgehog can go into the forest and prepare for winter. Guys, you worked very well in class! Well done! I wish everyone a nice autumn day! The lesson is over, thank you everyone. We are cleaning the workplace. Getting ready for the next lesson. Full text of the material Lesson summary on labor training “Working with natural materials.
Hedgehog"; For grade 3, see the downloadable file . The page contains a fragment.
| Author: Uskova Tatyana Vladimirovna → TatyanaU9038 11/27/2016 0 6743 426 | Comment |
Thank you for your mark. If you want your name to be known to the author, log in to the site as a user and click Thank you again. Your name will appear on this page.
Login | Registration
Have an opinion? Leave a comment
First crafts
Plasticine is good because if the job is unsuccessful, it can be easily remade. This is the moment that needs to be demonstrated to the baby. Children love magical transformations. Therefore, the child will definitely enjoy the opportunity to sculpt different objects from one piece each time. Training should be gradual, that is, you should first show basic actions with plasticine:
- How to pinch off a small fragment from a whole block. This action must be performed with the thumb and index finger.
- You should try to create something whole from the pieces you receive. It is most convenient to sculpt sausages and balls from plasticine for babies in the first years of life. Then, from several blanks, you can make figures of animals and humans. In the process of creative work, the child must work with his fingers and hands. For example, you need to roll out sausages between your palms.
- Then you need to show the child how to get flat cakes from the balls by kneading the rounds.
- After the baby has mastered these basic modeling techniques well, you can begin more complex actions, that is, create objects from the material. The first creative test could be, for example, an apple. A good work option for this age is a caterpillar figurine.
The child must master all the skills himself, that is, be able to pinch off plasticine, roll it into balls, and make sausages.