Modeling as a way of “manual” creativity
Modeling is an important element of pedagogical work on the development of fine motor skills in children.
It also teaches perseverance, concentration, awakens imagination, and develops imaginative thinking. As a rule, in the classes of the middle group of kindergarten, spatial volumetric modeling is used, when the object is made completely three-dimensional, as in reality. This achieves clarity of objects depicted by children. In addition, it stimulates the development of spatial perception.
It is very important for children to know edible mushrooms
Of the sculpting methods for creating mushrooms, the constructive one is most often used. Children can also be asked to secure the mushrooms they have made to a support so that they can assemble a whole mushroom meadow. Thus, additional materials will include paper and cardboard or plastic.
The main material for modeling will be colored plasticine; tones depend on what composition options the teacher will offer for production. For example, to sculpt fly agarics you will need a basic red tone for the cap with white elements - the stem, dots and bottom of the mushroom cap. White and brown-red are useful for boletus. Brown will be used for the porcini mushroom cap. Well, toadstools can be made in a variety of colors, just like russula.
Modeling: lesson notes, programs, clubs, planning
Contained in sections:
- ISO. Visual activities in kindergarten
- ISO. Lesson notes for fine arts in kindergarten
Includes sections:
- Crafts made from salt dough. Classes, master classes
- Insects. Modeling from plasticine on the theme “Insects”
- Clay crafts
- Plasticine, we sculpt from plasticine. Crafts
By groups:
- Senior group
- Preparatory group
- Middle group
- Junior group
Showing publications 1-10 of 9140. All sections | Modeling. Lesson notes, projects
New
Photo
The best
Summary of a modeling lesson “Tasty treat” for the first junior group Modeling Topic : “Tasty treat”
.
Goal: to develop the skill of sculpting round-shaped objects (circular movements of the palms)
and oval shapes
(movement of the palms back and forth)
;
develop interest in modeling treats for toys;
show a variety of species and treats for enrichment... Summary of the modeling lesson “Birds of Migratory” in a combined group
Goal: To develop in children the ability to use a variety of modeling . Objectives: To develop in children the desire to bring the work started to its logical conclusion; Strengthen children’s ability to roll out balls, as well as attach them using the smearing method; Cultivate accuracy in...
Planning a lesson
It is advisable to conduct a class on sculpting mushrooms in the autumn months, since this topic clearly correlates with this calendar period.
Degree of independence
Children 4–5 years old cannot yet choose their own options for tasks. At the same time, there is no point in suggesting that the whole group sculpt the same thing: someone can be asked to sculpt a fly agaric, and someone else can be asked to sculpt a boletus mushroom. The teacher gives recommendations on the color scheme for future work to students.
On the other hand, variability in the work in terms of the techniques used is quite possible. Whether, for example, to use stacks for additional processing, children themselves can decide.
Collectively or individually?
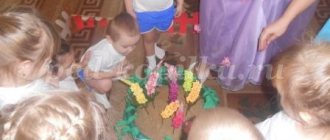
Modeling is a type of creative activity that allows for options for both individual and collective work. Children can work together. Two or even three guys can, for example, prepare a composition from several items. This could be some kind of “magic boletus” from a fairy tale, under which forest animals are hiding from the rain, if there are some small toys the size of Kinder Surprise figurines (they can also be included in a similar composition). It could be the handsome fly agaric from the famous cartoon. Or mushrooms for a squirrel, various mushrooms in a clearing, a basket of mushrooms for the girl Masha from a fairy tale, a composition “mushrooms and berries” and so on.
In the course of such work, the results of any other preliminary classes can be used. This is how we can, in this situation, apply an individual approach to the implementation of the teacher’s ideas within the framework of this topic.
You can use a red plastic container lid as a stand for mushrooms.
Motivation of children
Before starting the lesson, children should get a clear idea of what exactly they should depict in sculpture. To do this, you should precede the actual modeling by showing pictures and a story-explanation on the topic: children should see the mushrooms that they will have to embody in sculpture.
You need to think in advance about how to distribute tasks if children work in pairs and triplets.
Which of the children should be personally entrusted with making a specific mushroom or even several, and which should be entrusted with making small decorative details such as a skirt on a leg or spots on a cap. When working with a group - both when it is divided into microgroups and when children work individually - you should also adhere to a “fairytale mood”, turning modeling work into a kind of magical game, motivating children to achieve a significant result .
The result of the work is not only the small sculptures themselves, but also the relationship between them, which is indicated by the plot of the original fairy tale. All this can and should be beautifully presented - at least in the form of a small exhibition of works in the “art corner” of the group, to the delight of parents who will see the results of their children’s work.
Children's work can be organized into a mini-exhibition
Table: summary of a modeling lesson on the topic “Mushrooms” (middle group, author M. S. Mazur)
| Subject | "Mushrooms" |
| Tasks |
|
| Material |
|
| Progress of the lesson | Educator: Guys, today we are going on a trip to the forest, do you want to go there with me? Children: Yes! Educator: Hello, forest, wonderful forest, all of fairy-tale wonders! Who is hiding in the thicket? Who's snoring under the Christmas tree? (hedgehog), Look who's hiding under the tree? Children: Hedgehog! Educator: That's right, hedgehog. He is happy that we came to visit him! Do you think the hedgehog is living well? What does he do, where does he sleep, what does he eat? (Children answer). Educator: That's right! Preparing for winter, collecting mushrooms. Guys, the hedgehog asks you to help him stock up on more mushrooms. Shall we help? Children: Yes! Educator: Let's see together what mushrooms grow in the forest. Educator: What kind of mushroom is this? Let's guess the riddle: He stands in a red cap, with patches, On a white leg, does not walk anywhere, Only drives away flies (fly agaric) Do you think fly agaric can be eaten? Children: No, it's inedible. Educator: Let's look at the fly agaric together carefully, we need to remember it so that we know it and not confuse it with other mushrooms. How is it different from other mushrooms? Only the fly agaric has a red cap, as if strewn with small grains. Educator: We must remember! The fly agaric is poisonous! This mushroom cannot be used as food. We need to find edible mushrooms so that our hedgehog can survive the winter. Look, a mushroom is hiding under another tree. Now let’s guess what kind of fungus this is. Children guess. Educator: Tell me, tell me. Our mushroom picker knows this, The best mushroom in the world. Well, of course - (boletus) This mushroom is edible, it has a plump stem. And his hat is big and round. Do you think our hedgehog will be happy with such a mushroom? Well, enough of sitting in one place, we’re walking through a big forest. Get up, now we'll look for mushrooms. Physical education lesson: We'll go, let's go, let's go (steps in place) And we'll find mushrooms (claps hands) One - a mushroom (bending forward) Two - a mushroom (bending forward) Three - a mushroom (bending forward) We'll put them in a box (bending to the sides ) How is it, guys, we walked all over the forest, but didn’t collect enough mushrooms for the hedgehog. What should we do, how can we help the hedgehog? Children: You can make mushrooms for a hedgehog from plasticine. Educator: That's right! Sit down at the tables, let's see how we make a mushroom for a hedgehog? First we mold the leg. What color will it be? That's right, white. What shape is the mushroom's stem? Like a column. So, we take some of the white plasticine and roll it into a thick sausage. It must be strong to support the hat. What color will the hat be? Brown. Then we take some of the brown plasticine and roll it into a ball. Now we will flatten this ball in our palms. Have we got a hat? I think it turned out great. Now we can put this hat on the leg. We carefully connect everything. What great fellows you all are! Hedgehog is very grateful to you. |
Summary of a lesson on artistic and aesthetic development in the first junior group (modeling) “Pancakes”
Summary of the modeling lesson “Cakes, big and small” (junior group)
Summary of the modeling lesson “Cakes, big and small” (junior group)
Objectives: Continue teaching children to pinch off large and small lumps from a large piece of clay; roll out lumps of clay in a circular motion. Strengthen the ability to flatten a ball by squeezing it with your palms.
Progress of the lesson.
Educator: Guys, to find out what activity we will have today and what we will do, I suggest you guess a riddle:
I'm ready to blind the whole world:
House, car, two cats.
Today I am the ruler -
I have…
Children: Plasticine.
Educator: Well done. Today we have a lesson called Modeling and we will continue to learn how to make large and small cakes.
(Invite the children to remember and show how they sculpted large and small cakes in the last lesson. Show in the air the techniques for sculpting a cake, how to roll a ball and squeeze it with your palms).
Educator: Look at my two pictures of a ladybug, but how do they differ?
Children: In one picture the ladybug has spots on its back, but in the other there are not.
Educator: Let's fix this. I suggest you make black cakes and stick them on the back of the ladybug.
(The teacher attaches the picture to the magnetic board and the children, one by one, stick the cakes on the back of the ladybug).
Musical physical exercise: “Clap with us”
Educator: Well done guys. I have a couple of pictures of a teapot, an umbrella, a Christmas tree, a tree with apples. See how they differ?
(Children's answers).
Educator: That's right, one tree is decorated with toys and the other is not, one tree is with apples and the other is not, etc. I suggest you choose pictures and work in pairs.
(Invite the children to evaluate each other’s work. Hang the pictures on a magnetic board and admire the work).
Educator: Guys, what else can you make from plasticine cakes?
(Children's answers).
Educator: I have prepared these large cakes for you, and with the help of molds you can make different figures from them (a boat, a butterfly, a car, a house, etc.). How to do this, let’s watch a multimedia presentation.
(After watching, the children cut out figures with molds).
Reflection:
Educator: Guys, what did we do for class today? What have we learned? Did you like it?
What difficulties did you have?
(Children's answers).
Educator: Guys, these are some beautiful pictures and figures that can be made from simple large and small cakes.
The teacher invites the children to look at their work again and admire the result, praises all the children and treats them with vitamins.
Modeling technology
The general procedure for making the mushrooms themselves from plasticine is approximately the following (step 6 can also be performed thirdly):
- We make the leg: we roll a thick sausage out of plasticine.
- For the hat, roll and flatten a ball of a different color. Depending on the type of mushroom, it can be concave, convex, or have other shape features.
- Attach the hat to the stem.
The components for a simple mushroom are very easy to make - You can use a green plasticine “lawn” or a cardboard surface as a stand.
- If necessary, you can add additional elements (leaves, spots).
The ring of the future fly agaric can also be designated as a thin sausage - We fix the mushroom on a stand or cardboard backing.
The base of the mushroom can be indicated by a green molded “grass”. The guys need to clearly explain that fly agaric mushrooms are poisonous
Modeling a boletus mushroom
Materials:
- cardboard,
- stack,
- plasticine: dark,
- white,
- orange,
White mushroom is edible
Instructions:
- Roll out a large ball of dark plasticine.
- Using a stack, cut the ball in half.
- Roll out the small light ball into a thin disk.
- We sculpt a roller, thickened at one end.
- Attach a disk to the bottom of the cap.
- We make a recess for the leg.
- Insert and attach the leg.
- The composition can be mounted on cardboard.
Modeling a fly agaric
Materials:
- cardboard,
- stack,
- plasticine: white,
- red,
- green,
Instructions:
- We make a ball out of red plasticine.
- Flatten the ball into a disk.
- Using a stack, cut out a corner from the disk.
- We fasten the cap along the cut (you should get a cone).
- We make 15 small balls from white plasticine.
- We give the mushroom stem the shape of a roller, widened towards one end.
- The “skirt” of the mushroom is a strip curved by a wave.
- Roll up a green ball and flatten it - this is a stand for the mushroom.
- Cut out green triangles in a stack for the grass.
children should be explained that the bright color of the fly agaric signals danger - Apply the spots to the cap.
- We put the hat on the leg.
- Attach the “skirt”.
- Place the mushroom on the stand.
- We surround the stand with grass.
The conical mushroom cap expands children's understanding of shape
