Creations of time
Crafts made from leaves on paper are an ancient skill, an artistic representation of one’s own worldview, a kind of painting without the use of paints.
To get a more subtle feel for how paintings are created and to present them visually, you can look at photos of crafts made from leaves; there are quite a lot of them on the Internet.
Initially, such a creation had an interpretation of a special state of mind and was a kind of storyteller about the moment that was captured on the canvas.
Where did art come from?
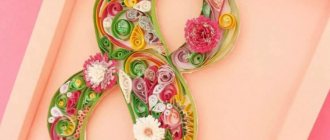
Painting, the instrument of which is not paints, but dried leaves or flowers, is called oshibana.
The language of explanation is very great, it’s like in love you don’t need to talk about it all the time, gentle touches, trembling - everything can be read without words. Japanese samurai used picture speech to interpret events and as a story about themselves.
Nowadays it is a special type of floristry; compositions are created using plants collected and dried using a special technology.
We recommend reading:
Crafts from isolon - a manufacturing master class, nuances of working with the material and step-by-step instructions on how to make a craft (85 photos)- Crafts from saw cuts: stylish and beautiful options for decorating the garden and interior with your own hands (130 photos)
- Crafts from toothpicks - interesting ideas, manufacturing examples and the best crafts for children (120 photos)
The art of creating paintings from foliage in modern times
In the current time of minimalism and rational use of all things that surround us, simple elements of natural origin have become interesting solutions for realizing one’s creative potential and decorating one’s home:
- Leaves;
- Twigs;
- Dried flowers;
- Sea buckthorn berries are all that are around us.
This is autumn decor and a sign that everything around us is beautiful. DIY leaf crafts are interesting displays that enliven the home and give a warm mood.
DIY craft from tree leaves - Children's Crown (master class with step-by-step photos)
Little children probably sometimes want to feel like real kings or kings. Help them with this. Make a wonderful Children's Crown craft with the kids. Decorate it with bright colorful autumn leaves. Autumn is the best time for inspired work and creativity.
Materials for the master class - DIY Children's Crown made of tree leaves and cardboard
To create one crown you will need:
- 2 sheets of cardboard;
- scotch;
- scissors;
- ruler;
- pencil;
- glue;
- autumn leaves.
Master class on creating crafts from leaves Children's Crown. Photos and step-by-step instructions
- Draw the teeth of the crown onto the cardboard using a pencil and ruler.
- Cut the blanks for the crown and glue them with tape, after first measuring the size of the child’s head.
- Apply glue to the surface of maple leaves or other autumn leaves.
- Together with the children, glue the leaves onto the future crown.
- You can also stick other decorations on the crown ─ beads, beads, etc. It all depends on your imagination.
Give each child a crown and you will have a real royal family!
Creation Mastery
The word herbarium is familiar to everyone, but not everyone has seen the stunning paintings created using leaves.
Using PVA glue, plants are applied to a given cardboard base, partially or entirely, thus creating a mosaic puzzle of multi-colored elements, different densities and configurations - this is how a craft from leaves is created.
Master classes on making crafts
The process of making crafts from dry leaves, acorns and berries is a very exciting activity. And although it is painstaking work, making crafts with your own hands is not as difficult as it seems. You just need to follow the instructions, and also have patience, imagination, good mood and self-confidence.
Herbarium collection
My favorite autumn-themed craft is definitely a herbarium. Collecting a herbarium is not only very exciting and interesting, but also educational. After all, by collecting leaves of various trees for his collection, the baby gets acquainted with various types of plants and begins to understand them . In order to assemble a beautiful herbarium, you will need:
- old newspaper to dry the collected leaves;
- album for drying plants;
- sheets of thick cardboard or a special folder for creating a herbarium.
Collecting a beautiful herbarium is not so difficult. First you need to collect the leaves that have fallen from the trees. Then each individual piece of paper is carefully laid out on newsprint. After that, they are folded into a stack and sent under a press in order to dry. On average, leaves for herbarium dry for 2-3 days. After this, the listened sheets of paper are placed in envelopes and signed. It is important to remember that the leaves become very thin and fragile after drying. Therefore, when working with them you need to show maximum delicacy, caution and patience.
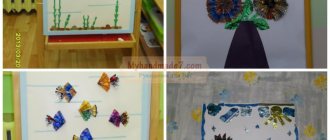
Leaf applications
One interesting and simple type of creativity is making all kinds of applications from autumn leaves. If you wish, you can make a whole series of paintings - appliqués in the same style and use the finished works to decorate your home.
In order to make an applique of autumn leaves you will need the following materials:
- large leaves fallen from trees;
- colored paper;
- stencil;
- bunches of dried rowan;
- colored cardboard;
- dry tree branches (they can be collected along with fallen leaves).
- PVA glue.
Tree leaves need to be dried carefully. Cut out the outline of a bird or any other animal from paper. A silhouette cut out of paper is pasted over with dry leaves of different colors. Then eyes are cut out of colored paper. There were dry twigs left. They will make excellent paws and beaks. A wonderful and bright applique will decorate the walls of the house and delight the eye for many years.
Crafts in the form of animals, birds and insects
Preschoolers and children of primary school age usually show great interest in the animal world. It is at this age, when the child is actively exploring the world, that children learn to love all living things . Children are delighted when recognizable images are obtained from scrap materials (cones, leaves, acorns): a cheerful puppy, a jumping dragonfly, a small perky bird. Making such crafts is very simple, but first you need to find a suitable natural material. It is best to harvest natural material while walking. Let the child himself select the most interesting cones, acorns and pebbles; you can look for interesting branches of bizarre shapes. Here are some interesting crafts:
- Hedgehog made from a pine cone. Eyes and paws can be made from plasticine, and a real small apple from your own garden can be attached to the back. You can also attach a plasticine mushroom to the hedgehog’s back;
- Graceful dragonfly. The body can be a thin branch of a regular oval shape, and instead of wings, oblong leaves can be attached. Eyes can be made from plasticine. On leaves that imitate wings, you can carefully draw a fancy pattern with a felt-tip pen or marker;
- You can make a butterfly in approximately the same way, only for the wings you should take four round leaves. For example, birch leaves are suitable. It is desirable that the leaves be of different colors, then the butterfly will be colorful and elegant;
- You can make a small bird from an acorn. The acorn will be the body. The eyes and beak are made from plasticine, and the wings are made from autumn leaves.
Before you start making crafts, you need to thoroughly dry all natural materials. You need to harvest cones, acorns and leaves for crafts only in dry weather, when there has been no rain in the forest for several days. If you start preparing on a rainy day , the materials will get wet and will soon become unsuitable for work.
For gluing parts, it is best to use PVA glue. If PVA glue does not hold very well, you can also use plasticine. But you need to take very little plasticine so that the joints of the parts are invisible at first glance. Having made several crafts, you can place them in a “clearing” made of colored paper. To do this, you need to take a cardboard box and cover the inside with green colored paper. A fabulous forest clearing for animals and birds is ready!
Decorative autumn wreath
The tradition of decorating a home with decorative wreaths came to Russia from the West and gained great popularity. Of course, you can buy any wreath at a decor store, but it’s best to make an original decoration yourself. For this you will need:
- Round or oval wreath base;
- Dry leaves of maple, rowan, birch, ash;
- Dried flowers, such as immortelle;
- Nuts or chestnuts;
- Any autumn berries, for example, physalis or lingonberry branches.
You can attach materials to the base in any order, as your imagination dictates.
It is desirable that different colors alternate beautifully with each other. The most vibrant fall colors are traditionally red, yellow, green and brown. When the wreath is ready, you need to carefully mask the place where its ends meet. The wreath is closed in a circle or oval and hung on the door to adequately greet the beautiful autumn. But you can hang it at home, so that a glance at the bright sign of autumn will immediately lift the spirits of everyone in the household. You can make a wreath with the whole family, so that everyone contributes to the common creation. And in winter you can make a similar wreath with Christmas symbols.
Leaf Photo Frame
Autumn photographs can be very bright and interesting.
So, you can photograph children collecting autumn leaves, or capture a souvenir of a walk with a dog in the autumn forest. Such photographs will look especially impressive if they are placed in an original frame. Making a fall photo frame is very easy. First you need to make a regular cardboard passe-partout of the desired size, and then stick autumn leaves on the passe-partout. You can use real autumn leaves , or you can cut out leaves using a stencil made of cardboard or colored paper. The latter option is preferable, because such a frame will retain its impressive appearance longer. You can also cut out autumn leaves from gold or silver chocolate foil. You can place more leaves in the corners, and fewer around the perimeter.
Fall crafts are a great way to get creative. Making original souvenirs will help you pass long rainy evenings and truly fall in love with autumn. Such crafts will bring great joy to children and adults, and will also create a cozy atmosphere at home.
Autumn leaf craft
How to start?
The time for collecting material is, of course, autumn - it is a variety of textures and colors, but you should not put off all things for later, spring is also a fruitful time.
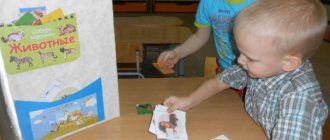
Lesson with children
The most grateful and frantic creators are children; joint creativity will bring you closer to each other, and you will achieve mutual understanding in other areas.
Beautiful crafts made from autumn leaves will not leave you indifferent, believe me. Some of the creations will remain in your home for a long time, like an extraordinary work of art.
We recommend reading:
Crafts from natural materials - a step-by-step master class on creating original crafts for children and adults (100 photos)Wood crafts - the best craft options, instructions for beginners and ideas for making wooden crafts (85 photos)
- Fabric crafts - the best ideas and the most practical crafts and toys made from various types of fabrics
Applique in the form of a hedgehog and an owl
This type of work awakens imagination in children and adults. After you bring the leaves home, see if one of them looks like a prickly hedgehog, and the other just needs a little pruning before it turns into an owl.
Draw a snub-nosed muzzle of a hedgehog on light paper, outline with a pencil the place where its body will be. Start gluing the maple leaves with the sharp edges up, starting from the back of the animal. Place the next sheet a little lower, then another one until you reach the hedgehog’s abdomen. You've got a funny animal with original spines. Their role can be played by the leaves of other trees, the main thing is to place them with the tip up.
Before making the owl, also outline the outline of its head and body on paper. Glue small leaves on them to symbolize feathers. If the leaves are large, trim them with scissors. Glue on eyes made of colored paper, and the pattern of autumn leaves in the form of an owl can be considered complete.
Artworks from leaves and flowers
Don’t be afraid of starting classes; our children get their first acquaintance with work of this kind in kindergartens and schools. Creating collages from dried plants laid out on paper turns into wonderful paintings if you approach creativity with all seriousness.
You shouldn’t limit your imagination, let you do what you want. For some, brightly colored leaves will be preferable; for others, variety is more suitable: twigs, berries, roots.
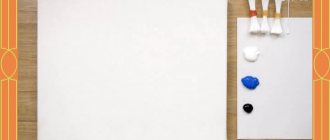
Easy option
An easy option is appliqué on paper. This is any direction of thought and a tool for expressing emotions - you need to prepare PVA glue and you can start creating.
- Take the prepared leaves and glue them in random order; dose the glue, it is better to apply it in a zigzag manner, then the excess will not come out over the edges;
- Watercolor paints are not prohibited; if you want to achieve the effect of wear and tear on the product, they are at your disposal. Once you have tried this technique, further use will not be difficult.
The first piece of work could be a postcard - it’s cute and functional, please your friends or relatives.
Once you see these works of art, they amaze you with their elegance.
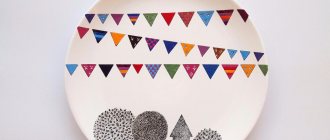
Transformation of mountain ash and acacia into sakura
There are other techniques that can be used to create a pattern of fallen leaves. The photo will help you figure out how to do this kind of work. Collect small fallen acacia and rowan leaves. When you get home, place them between the pages of a magazine or iron them. Once they are dry, you can start creating.
Draw a sakura branch on paper with black paint and let it dry. Put a little PVA glue into an unnecessary container, add red gouache to it, and mix. You should end up with a pink paste. Now you will need tweezers: carefully take the first rowan or acacia leaf and dip it into the sticky mixture. Then attach it to the drawn sakura branch. Next to this, place 3 more improvised flowers, as a result, each of them should consist of four petals. Let the work dry.
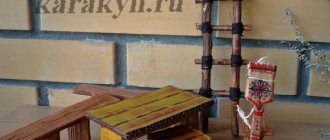
Originality
How to make a craft from leaves without using paper?
We choose the material, it is preferable to take leaves of the same, medium size, so that there is no overabundance and pretentiousness.
To create the composition we need a twig with small shoots. We cut them unevenly, leaving about 5, and somewhere 2-3 cm. The main rule is to bring the created version closer to naturalness, in nature there are no exact sizes, we do it chaotically.
The result is a wonderful decoration for the wall - a spectacular branch with falling leaves.
Join and explore the options yourself, many more interesting discoveries await you.
Mosaic technology
The very name of this technique speaks for itself: the leaves will be fragments of a single whole mosaic composition. When making such an applique, you should use scissors to give the required shape to the leaves.
The Mosaic technology is somewhat complex due to the need to create symmetry of the image relative to the center . You will have to spend a lot of time looking for identical leaves for both sides of the picture. But the result is worth it. You can get a beautiful butterfly with amazing openwork wings.
Photos of crafts made from leaves
0
0