Summary of GCD in the senior group on the topic “My favorite toys!”
Lesson notes for the senior group of preschool educational institutions
Topic: “My favorite toys!”
Educational field : "Artistic creativity." Integration of educational areas : “Reading fiction”, “Communication”, “Labor”, “Physical education”, “Communication”. Types of children's activities: productive, cognitive-research, communicative, motor. Form of organization: subgroup. Goal: to teach the technique of creating an image of a “toy” on a plane in half volume using plasticine. Objectives: - consolidate the ability to create the integrity of an object from individual parts, using existing skills: pressing parts to the base, smearing, smoothing the boundaries of the connection of individual parts; — expand children’s knowledge about toys, teach how to write a descriptive story, select an action to an object, develop fine and gross motor skills, memory, and sensory areas; - cultivate a caring attitude towards toys. Preliminary work : reading a fairy tale by G.Kh. Andersen's "The Steadfast Tin Soldier", educational game "Guess the Toy", riddles about toys, drawing toys. Material and equipment: - cardboard with images of toys, size A-4; - a set of plasticine; - modeling board, stack; — paper and wet hand wipes; — projector, presentation on the topic; - toys. The course of direct educational activities 1. Organizational moment. - Guys, today we will draw with plasticine, but guess what? (Toys.) - Yes, I asked each of you to bring your favorite toy and introduce us to it. Children take turns coming out, showing their toy, reading a poem: 1 child: Here is a funny fat bear, He is my friend, not a little naughty boy. He has a bow on his neck. Well, Mishutka! What a dandy! - What is your bear? (Soft, brown, fat, funny). Why do you love him? 2nd child: He has big ears, He is brown, Everyone in the world loves him, Every mongrel knows Gena’s Friend, Cheburashka. — Describe your Cheburashka. Why is this your favorite toy? 3rd child: Well, this is Tumbler, the Multi-colored cutie. Swing it right, left, and put it on the shelf. - Tell me about your toy. Who gave it to you and when? Child 4: The cubes are always in front of me. Build a tower out of them. And then a huge house for an old gnome to live in. - What, do you like to build with cubes? Child 5: Here is my favorite ball, It is always with me now. Jumps and spins Jumps and spins! - What is your ball? (Round, rubber, multi-colored). — What ball games do you like to play? 6th child: I will assemble a pyramid from multi-colored circles, and then I will remove the top and scatter it on the carpet. — How many rings does your pyramid have, and what color? 2. Main part. Conversation.
- From birth, each of you has toys, but guess what the very first one is:
If you touch it, it will immediately rattle and surprise the baby.
What is this bright toy? - For the baby... (rattle) - Like today, a child’s first toy in ancient times was also a rattle.
In Ancient Greece and Rome, rattles were given to newborns. Mothers sang lullabies while tapping these rattles. It was believed that with their noise they drive away evil spirits from the child. (1 slide). — Ancient Russian toys appeared in the 9th century. They were made of wood and clay, called nursery rhymes. These were wooden horses, cows, deer, swans, birds and other objects. They were used both for games and as talismans. For example, the Russian traditional grain doll, which was given as a gift for holidays associated with the harvest. (2 slide). — The very first animal figurines were carved from bone, and later made from wood, clay or metal. Toys were sewn from fabrics or woven from fiber, and made from any suitable available materials. There were known toys with movable body parts, which have been made since ancient times. They were driven by a simple rope or wire mechanism. — Previously, toys were treated with great respect. They were never left haphazardly, but were stored in special baskets or chests. Moreover, they not only played with toys, they participated in many rituals: honoring dead ancestors, worshiping ancient gods, and also acted as amulets. — Nowadays, toys are made in special factories. These are bright, modern toys that can talk, sing, jump, take off, and drive independently. They are made from a variety of materials, which ones? (Wood, plastic, iron, rubber, fabric, leather, paper, clay, dough). - Guys, imagine if there were no toys. (Children's answers.) - Toys decorate our lives, make it interesting and fun. Toys teach us, develop us, help us. How should we treat toys? (Be careful, always put in place). — We will also open our own small factory and make our own toys, but from what material? (Plasticine). Practical part. Stage 1. - I will distribute the finished outlines of your toys, and you prepare the colors of plasticine that you will need. You can take the same color as your toy, or you can use a different color of plasticine or combine several colors at once. Children think through and express their wishes to the teacher. The teacher encourages children's choice and reminds them of the modeling algorithm. We pinch off a small piece of plasticine, roll it into thin sausages, place it along the contour of the object and spread it in a thin layer. — To get a drawing on a toy, we start working with it. For example, on a ball we first sculpt yellow stripes, and then paint over the remaining 4 parts. The teacher helps each child decide where to start working. Helps during sculpting. Fizkul Tumbler, look, bend it anywhere. (Bending over to exhale, straightening up - inhale.) She will stand up straight again, She is so stubborn. (Tilt to the sides 3 times, back and forth 3 times.) The spinning top began to spin, don’t spin too fast, (Circular rotations of the body 3 times in one direction, 3 in the other.) That’s enough, everyone stop.
Our cheerful ringing ball, Again
it rushed at a gallop.
(Jump 8 times.) The doll Katya suddenly started walking, she stretches her hands towards us. He says it’s time to play, I’m tired of waiting for you here. (Raise your right leg and left hand, then vice versa.) To play with the ball, you need to inflate the ball. (Palms of your hands on your stomach. When you inhale, inflate your stomach, when you exhale, pull your stomach in. 6 times.)
Stage 2. — Guys, don’t forget about the additional details: eyes, nose, mouth, bow on the bear. To make the toy look “lifelike”, place thin sausages along the contour of the color of your toy. 3. Reflection. - So our toys are ready. What kind did you get? (Bright, cheerful, beautiful). — How should you treat toys? - A toy is your friend and comrade, take care and love them. — Let's send our toys to the store (to the exhibition). But first, let’s play the didactic game “What can toys do?” For example, a car: drives, hums, is lucky, rumbles; ball: flies, jumps, jumps, falls, rolls.
We recommend watching:
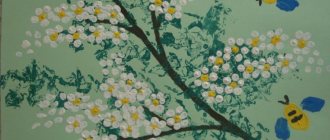
Summary of a lesson in the senior group of compensatory orientation for children with severe speech impairments Dymkovo animals using plasticineography technique for kindergarten. Master class with photo Plasticineography “Apple Tree Branch” for children of the senior preparatory group of kindergarten. Master class Summary of GCD for plasticineography in preschool educational institutions. Senior group
Similar articles:
Plasticineography in kindergarten on the theme Summer
Plasticineography in kindergarten. Master Class
Plasticineography in the middle and senior groups using natural materials
Summary of a comprehensive lesson on familiarization with the outside world and development of speech “Wintering Birds” in the senior group of a preschool educational institution
Summary of an integrated lesson in the senior group on the topic: Russian nesting doll
Application bogatyr step by step instructions.
To get started, you can draw it yourself or use our templates for this application.
The hero looks very good against the backdrop of Russian churches. So if you have such images from magazines or a calendar, I recommend sticking them on the background of your application. Well, if you don’t have such pictures at hand, a hero against the backdrop of the rising sun would be a good alternative.
We glue a yellow semicircle of the sun and yellow stripes-rays onto blue paper (or we glue images of Russian churches and towers onto white cardboard.)
applique base
Cut out a helmet from gray or pale blue paper. A face made of beige paper. Glue it onto our base, leaving space below for the cloak. You can outline the future shoulders lightly with a pencil.
Using a black felt-tip pen we draw eyes, nose, eyebrows. Using a template, we cut out a mustache and beard from white paper and paste it onto the hero’s face.
We cut out a random semicircular piece from crepe paper, which will be the cloak. Crepe paper stretches and folds well. Therefore, it is better to glue the cloak, creating folds of “matter”. It can be made from several pieces of paper.
Cut out a circle from yellow paper. This is a decorative clasp.
Now you can decorate the hero with sequins, creating the image of expensive chain mail. We also decorate the clasp, turning it into a prince’s brooch.
You can finish the chain mail with a felt-tip pen if you prefer. Looks good too.
My children excitedly glued glittery sequins. In the end, this is what happened.
Grand Duke
Option with a picture from a magazine for the background.
Alexander Nevskiy
Dmitry Donskoy
Three heroes
I hope your dad or grandfather will like such a heroic gift.
But don’t forget that very soon we need to congratulate grandmothers and mothers. For them, I have a wonderful applique with tulips on my blog, maybe you can do something similar. Inspiration for this.
Practical benefits of selling crafts
Creative projects, which are implemented in senior and preparatory groups of kindergarten during classes or independently at home, allow children not only to acquire new skills, but also to consolidate previously acquired skills. This approach makes it possible to facilitate the adaptation period at school. During classes they develop:
- memory;
- attentiveness;
- patience;
- perseverance;
- diligence.
To achieve their goals, educators use a variety of materials in project activities. This:
- working with paper;
- natural materials;
- plasticine;
- cotton wool, plastic.
Crafts are made on different topics. Educators strive to unite the children's team, teaching them to work in teams and individually, organizing exhibitions of work done together with parents.
A collection of applique master classes + interesting ideas
It's nice to know that different types of appliques made by children, such as appliqué made from torn paper or from corrugated material, are a good memory. And irrefutable evidence that our little ones have talent. The child is developing. And we help him with this.
Yulia Barinova
Abstract of the educational activity
“Artistic creativity” (
application )
“My
favorite toy ”
. Preparatory group
. Integration of areas: design
, mathematics, speech development.
Topic:"My favorite toy
«
Goal: development of children's creativity.
Tasks :
Continue teaching children how to use scissors and stencils.
Strengthen the ability to carefully pick up glue on a brush, spread ready-made shapes, and press parts with a napkin.
Develop orientation on a sheet of paper.
Cultivate accuracy when doing work.
Materials: toy car
, ball, hare, tumbler, scissors, pencil, colored paper, white cardboard, glue, brushes, napkins.
Plastic as a basis for creativity
Such a modern and simple material as plastic can also be used in crafts. Spoons, plates, forks and other items will be used. It is worth looking around to see something new in familiar things. It would seem, why might a plastic plate be needed? But this is an excellent basis for a new painting.
As a result of such activities, children develop such a skill as “objectification.” In other words, they learn to see new facets in familiar everyday objects. At the same time, as when working with other materials, design techniques are learned.
After all, you have to not only present an idea (visualize), but also combine a plot composition from various materials in a single craft.
The result of all the work is the creation of a three-dimensional figure.
It could be a cartoon character, a forest hut, a spring landscape. At the same time, the preschooler manages to connect individual fragments, elements and parts into a single, holistic image. Applique-style works made from plastic are also unusual. This can be a kind of panel, collage.
The works use various techniques and their combinations. So, an ordinary piece of cotton wool can become a fluffy cloud over a lake or a cap of reeds. Swan wings will be more voluminous if they are made from natural materials. And the waves of a pond can be easily brought to life using plasticine.
The benefits for children from doing crafts in kindergarten are invaluable. Each lesson is a gain of new experience, skills and knowledge. During creative work, not only hand motor skills develop, but also analytical thinking, eye, imagination, and sensory skills.