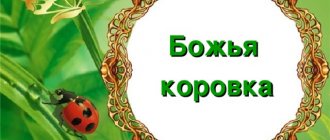
Galina Petrova Application with plasticine elements “Ladybug”, junior group
TOPIC: Insects. Ladybug.
TASKS: clarify children’s knowledge about insects, introduce them to insects: ladybug; develop speech through a description of an insect, a story about it; learn to convey the characteristic features of a given insect in an application; develop a sense of shape and color; develop finger motor skills (spots on the back)
; develop the ability to navigate on a sheet of paper; cultivate a caring attitude towards living beings.
PRELIMINARY WORK: observing insects on a walk, reading nursery rhymes and chants, solving riddles, playing games with images of insects.
MATERIALS, TOOLS, EQUIPMENT: ready-made large red circles, black small semicircles, pieces of black plasticine, jars of glue, glue brushes, napkins, a picture of a clearing with insects, a toy - a ladybug.
LESSON CONTENT: The teacher reads a poem while showing a picture. Children name the missing words, guessing the insects, the teacher puts the guessing picture on the board:
Children, look at the picture: here is a steam locomotive running along the path - It has no steering wheel or wheels, the rails have not yet been laid in the grass, Instead of wheels there are many legs, what kind of locomotive is this? (centipede)
The squad stomps after...
(the ants are pulling the twig - it’s too heavy. The squad needs to get to their anthill by sunset. And lock the door. Here .... (the grasshopper)
laughs at ....
(the snail) The quiet snail is a lazy sleepyhead, doesn't even move, just warms itself on the mushroom.
Well done boys! All insects were named. Oh, who's that moving in my pocket? (takes out a toy ladybug, but does not show it to the children, but hides it in his hands):
I found a beetle on a large daisy. I can’t hold it in my hands, let it sit in my pocket. There are six legs, two eyes, and a crack on the back. - This is good grass, here, eat a blade of grass! Oh, he fell, he fell out of his hands, his nose was smeared with dust. A beautiful beetle flew away, flying away on wings.
The teacher shows the children an image of a ladybug and clarifies their idea of the appearance of this beetle (red round back with black dots, small black head and thin legs). What can he do? (fly, crawl, eat, clean paws, etc.)
. Hands out parts of the body and head and offers to glue the insect.
Fizminutka: finger game:
Ladybug, (1)
black head, fly to heaven,
(2)
bring us bread,
(3)
black and white,
(4)
just not burnt.
(5)
Decorate the back of the beetles with dots made of plasticine balls rolled with your fingers.
SUMMARY: learning nursery rhymes:
She is the cutest of all the bugs, her back is red, and there are circles and black dots on her.
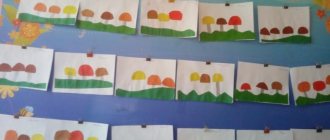
Ladybug is an insect. All insects are alive. They can crawl on the ground or blades of grass, and they can fly. But you can’t just pick them up, you can only look at them. Let's put our ladybug on the daisies (gluing a beetle to a picture with insects)
.
Irina Firsova
Abstract of the NOOD on artistic creativity (application) for children of the junior group “Ladybug”
Educational field " Artistic creativity"
»
sightings while walking
.
Learning the nursery rhyme “ Ladybug”
«.
Expand children's understanding of ladybug
;
Continue to learn how to put together a whole from parts, stick on ready-made blanks, based on a sample;
Consolidating knowledge about the shape of an object - a circle;
Consolidating ideas about red and black colors;
Fastening the count to two;
Reinforcing the concept of “one - many”
,
"big small"
.
Develop the ability to use glue and brush;
Develop fine motor skills, attention, orientation on a sheet of paper.
Foster love and respect for living nature;
Cultivate accuracy and independence in work.
Integration: NGO “Socialization”
, NGO
"Cognition"
, NGO
"
Artistic Creativity "
.
ladybug illustration
, green album sheet in the shape of a plant leaf, ready-made forms for gluing
(red circle, cut in half; black circle)
, black plasticine, glue, brushes, napkins, oilcloth.
Progress:
On a sheet of black paper, using a template, draw circles and cut them out with scissors - this is the body and head of a ladybug .
Using the red paper template, cut out two circles.
Fold the circles in half - these are the wings.
Now let's make the base. Draw a leaf on green cardboard with a pencil. Cut out the leaf with scissors.
Glue the head and body of the ladybug onto the piece of paper .
Cut out 6 circles from black paper and glue them onto the wings.
Cut out 2 circles from white paper - these are the eyes. Glue it.
black felt-tip pen,
Ladybug is ready!
These are the wonderful ladybugs we got .
Thank you for your attention!
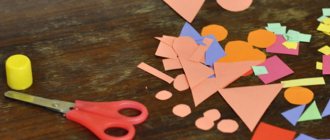
Children's master class on the “Ladybug” applique Material for the master class: a set of colored paper, a sheet of red paper with black polka dots, a printout for the main background.
GCD summary for the application for children of the second junior group “Ladybug” GCD summary for artistic and aesthetic development (applique) for children of the 2nd junior group “Ladybug”. Preliminary work: Observations.
Summary of a lesson on plasticineography with children of senior preschool age “Ladybug” Municipal budgetary educational institution “Kalachevskaya secondary school” preschool department. Lesson notes.
Short-term educational practice of choice for preschool children “Ladybug” Municipal autonomous preschool educational institution “Kindergarten No. 424” Short-term educational practice.
Master class “Ladybug” Hello dear fellow educators. Our long-awaited summer has arrived, the children are delighted with the variety of flowers on the street. Our. Master class “Ladybug made of paper strips” Master class: “Ladybug made of paper strips” This master class is intended for children of senior preschool age, teachers.
Presentation “Master class on making a talisman for the family “Ladybug” Project goals: to help children understand the importance of family, show its value for every person, cultivate love and respect for family members.
Master class on making paper crafts “Ladybug” This master class is designed for educators, additional teachers. education, parents and children. The age at which this work was produced by children. Master class “Volume craft “Ladybug” To make the craft we need: - colored cardboard (black, red, green). Half an A4 sheet will be enough. - black paper.
Project “Ladybug is a useful bug, her jacket is black polka dot” for children of primary preschool age Municipal autonomous preschool educational institution “Kindergarten No. 15 “Sun” “Ladybug is a useful bug, Black.
NOOD move.
Educator. Guys, spring has come outside. The sun began to warm up. You can find amazing bugs on plants. They are red in color and have black spots on them. Guys, have you guessed who it is? (Children answer)
.
Educator. That's right, it's a ladybug
.
Look at her (shows an illustration of
a ladybug )
.
Educator. ladybug has
?
(head and wings)
Educator. What color are the wings of a ladybug
?
(red with black dots.)
Guys, look how many wings a ladybug
?
(Two)
.
How many spots are there on the back of a ladybug
?
(A lot of)
.
Well done! What shape is the back of a ladybug
?
(Round)
.
What color is a ladybug's
?
(black)
.
Right! What shape is the ladybug's
(Round)
.
Ladybug applique made of colored paper with photo and video
Applications in kindergarten are not only a great way to occupy a child’s time, but also a way to develop his skills. One of the most popular appliques is the ladybug applique.
This application can be made in a variety of techniques, and the ladybug itself is even a kind of magical object, it’s not for nothing that when ladybugs sit on your hand, poems are read to them: “Ladybug, fly to the sky, bring bread, black, white, just not burnt!”
And such traditions have existed in Rus' from time immemorial. People asked ladybugs about their fate; these insects are the heroes of omens. In other countries, ladybugs are also something that connects God and people.
For example, the Danes ask the ladybug to convey to God a request for good weather, the Norwegians wish the ladybug to find their love. In France, it is believed that a ladybug on amulets or pendants protects people from misfortune and danger.
In most countries, ladybugs are associated with the beginning of spring, a good year, good luck and a good harvest.
Ladybug applique in the second younger group. Direct educational activities
Lesson notes on the “Ladybug” appliqué. Second junior group
Tasks:
a) educational objectives: continue to cultivate children’s interest in appliqué, use a brush and glue, a napkin correctly, learn to fold a circle in half, and arrange parts in a certain order. Develop compositional skills. b) educational tasks: Teach to treat native nature with care and attention.
Materials for the lesson:
green cardboard, large black circles (abdomen), small black circles (head) Red circles, black and white confetti for dots and eyes, glue, scissors, black markers, ladybug toy, large illustration.
The teacher enters the group with a small basket covered with a colored scarf. IN.
— Guys, an unusual guest has arrived to us, but she doesn’t want to show herself to you until you guess the riddle about her: Little red wings, black peas.
Who is this walking on my palm? V.
- Who is this?
Children: Ladybug. B.
Correct. This is a ladybug. The teacher raises the scarf and shows the toy. Let's look at it. Look, guys, at Ladybug. What shape does she resemble? -Right on the circle. What color is our ladybug?
Red. - That's right. Red, round. Therefore, before, a long time ago, this bug was called the sun. And now we call it ladybug. Why? Why is this insect called a ladybug when it is a beetle? God's blessing is clear: the beetle is small and seems harmless. It runs slowly along the hand. But touch it lightly, and an orange liquid will immediately come out from the folds of its legs - “milk,” as people say. That's why - cow! For a bird or lizard that wants to catch a bug, this “milk” will immediately kill its appetite: it is pungent and smells disgusting. But the bug warns everyone in advance with its bright color: don’t touch me, I’m not edible! So the ladybug spread its rigid back - the elytra, spread the two thin membranous wings hidden under it and flew off. Rigid elytra do not participate in flight, but only help the bug glide. The ladybug, despite its harmless appearance, is a predator. It eats sedentary aphids - plant pests. This baby destroys almost a hundred aphids or three hundred of their larvae per day. One ladybug lays about four hundred eggs in its life. Each of them hatches into a larva, which also feeds on aphids. It grows and pupates in less than a month. The pupa sticks to the leaves and hangs upside down. Soon an adult ladybug emerges from it. -So, our ladybug is round red, it has an abdomen, wings, and legs. Now let's play. Physical exercise “Ladybugs”
We are ladybugs (jumping) - Fast and agile (running in place)! We crawl along the lush grass (wave-like movements with our hands), and then we’ll go for a walk in the forest (we walk in a circle). In the forest there are blueberries (we stretch up) and mushrooms (we squat)… My legs are tired from walking (bending over)! And we’ve been wanting to eat for a long time (we’re stroking our tummy)... We’ll soon fly home (“let’s fly” us to our seats)!
Explanation of the stages of work.
And now we will try to make a ladybug out of paper.
First, take a large black circle and glue it to your clearing. Where will our ladybug sit? Now let's take a small black circle and glue the ladybug's head. Now we need to make the wings. Our ladybug wants to fly up and so she spreads her wings. Glue two semicircles. But you have one red circle on your table. How to make a semicircle from a circle? You need to fold the circle in half. Then glue dots on the wings and eyes on the head. So we got a ladybug. All that remains is to draw on the paws with a felt-tip pen. Summarizing.
The teacher hangs up all the children's work.
- What wonderful ladybugs we got. Just like real ones, this is because you tried very hard, I think your ladybugs will definitely make friends with our guest and she will no longer be sad. Who remembers the rhyme we read to a ladybug when we put her on our finger? Ladybug, fly to heaven, bring us bread, black and white, but not burnt.
In the older group
Paper application “Ladybug” for senior preschool age in kindergarten.
Tasks:
Educational:
- be able to carefully cut out shapes according to a template;
- be able to arrange parts in a certain order;
- know how to use a compass
Educational:
- develop hand motor skills and compositional skills
Educational:
- cultivate respect and care for living nature
For the application lesson we will need:
- colored paper in black, red and white;
- compass;
- a simple pencil;
- ruler;
- liquid corrector or white plasticine.
Open the compass to 3.2 cm in diameter (measure using a ruler). We take a sheet of red colored paper and, according to a well-known pattern, help the child make a circle.
We perform the procedure twice and cut out the resulting stencils of the same format
And now we need to make two different mugs from black paper. First set the compass at 3 cm, then at 2 cm and draw circles.
We received 4 parts for making a ladybug. Assembling the figure. The older child is already a master at this! We glue the parts together, fold the wings in half and glue the halves. We arrange our patterns as in the picture.
Take a sheet of white paper, fold over a strip, from which we cut out white circles. You will get two small circles for the eyes.
Then you need to take a small piece of black paper and cut out circles smaller than the previous ones. We arrange it so that we get eyes.
We bend the next small black strip in half 2 times as shown in the photo. We prepare circles to create dots on the ladybug’s body.
Glue the specks in a chaotic order.
We make eyes by sculpting parts and gluing them. Use corrector or white plasticine to enliven the eyes.
Cut a thin strip of red paper. Fold in half, then cut at the fold.
The result is ladybug antennae. Using a pen and pencil, twist them and give them shape. We coat the edges with glue and place it on the inside of the ladybug's head.
The application is ready.
Preview:
Lesson notes on the “Ladybug” appliqué. Second junior group
Objectives: a) educational objectives: continue to cultivate children’s interest in appliqué, use a brush and glue, a napkin correctly, learn to fold a circle in half, arrange parts in a certain order. Develop compositional skills. b) educational tasks: Teach to treat native nature with care and attention.
Materials for the lesson: green cardboard, large black circles (abdomen), small black circles (head) Red circles, black and white confetti for dots and eyes, glue, scissors, black markers, a toy representing a ladybug, large illustration.
The teacher enters the group with a small basket covered with a colored scarf. V. — Guys, an unusual guest has flown to us, but she doesn’t want to show herself to you until you guess the riddle about her: Little red wings, black peas. Who is this walking on my palm? V. - Who is this? Children: Ladybug. B. Correct. This is a ladybug. The teacher raises the scarf and shows the toy. Let's look at it. Look, guys, at Ladybug. What shape does she resemble? -Right on the circle. What color is our ladybug? - Red. - That's right. Red, round. Therefore, before, a long time ago, this bug was called the sun. And now we call it ladybug. Why? Why is this insect called a ladybug when it is a beetle? God's blessing is clear: the beetle is small and seems harmless. It runs slowly along the hand. But touch it lightly, and an orange liquid will immediately come out from the folds of its legs - “milk,” as people say. That's why - cow! For a bird or lizard that wants to catch a bug, this “milk” will immediately kill its appetite: it is pungent and smells disgusting. But the bug warns everyone in advance with its bright color: don’t touch me, I’m not edible! So the ladybug spread its rigid back - the elytra, spread the two thin membranous wings hidden under it and flew off. Rigid elytra do not participate in flight, but only help the bug glide. The ladybug, despite its harmless appearance, is a predator. It eats sedentary aphids - plant pests. This baby destroys almost a hundred aphids or three hundred of their larvae per day. One ladybug lays about four hundred eggs in its life. Each of them hatches into a larva, which also feeds on aphids. It grows and pupates in less than a month. The pupa sticks to the leaves and hangs upside down. Soon an adult ladybug emerges from it. -So, our ladybug is round red, it has an abdomen, wings, and legs. Now let's play. Fizminutka
“Ladybugs” We are ladybugs (jumping) - Fast and agile (running in place)! We crawl along the lush grass (wave-like movements with our hands), and then we’ll go for a walk in the forest (we walk in a circle). In the forest there are blueberries (we stretch up) and mushrooms (we squat)… My legs are tired from walking (bending over)! And we’ve been wanting to eat for a long time (we’re stroking our tummy)... We’ll soon fly home (“let’s fly” us to our seats)!
Explanation of the stages of work. And now we will try to make a ladybug out of paper. First, take a large black circle and glue it to your clearing. Where will our ladybug sit? Now let's take a small black circle and glue the ladybug's head. Now we need to make the wings. Our ladybug wants to fly up and so she spreads her wings. Glue two semicircles. But you have one red circle on your table. How to make a semicircle from a circle? You need to fold the circle in half. Then glue dots on the wings and eyes on the head. So we got a ladybug. All that remains is to draw on the paws with a felt-tip pen. Summarizing.
The teacher hangs up all the children's work. - What wonderful ladybugs we got. Just like real ones, this is because you tried very hard, I think your ladybugs will definitely make friends with our guest and she will no longer be sad. Who remembers the rhyme we read to a ladybug when we put her on our finger? Ladybug, fly to heaven, bring us bread, black and white, but not burnt.
Fabric applique
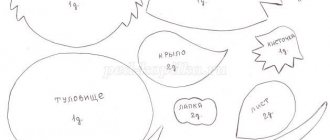
The bug can be sewn from fabric and you will get a small soft toy. There are many ladybug cutting templates on the internet. Having chosen the appropriate one, you need to print it out and cut out one part of the abdomen, head, leaf and two parts of the wings. Then transfer the paper stencil to the felt and cut out the parts from the fabric.
Now you can start stitching the parts together. First, connect the wings to the head. Black dots can be made from beads or knots of thread. Then the wings are sewn together, and the head is sewn along the cut. The abdomen is pinned with the upper part to the head, its edges are sewn to the wings, leaving a hole for the padding polyester.
The insect is stuffed with filler and all edges are connected. The lower part of the cow is sewn to a green leaf. Large white beads are attached to the head, and black beads are attached to them.
The insect's antennae are made from black wire or two pieces of thread (they are coated with PVA glue to keep them in place). The finished cow can be used as a pincushion.
Step-by-step implementation of the application
Step 1
In this lesson we will learn how to fold a square in half and cut a circle out of it. So, to get ladybug wings, fold a square sheet of colored paper in half.
The next step is cutting out the circle. To do this, cut off the corners from the workpiece, slightly rounding them. To help your child cut correctly, mark the lines along which the cut is made on the paper.
Pay attention to the child that it is necessary to cut from the side opposite to the fold. Otherwise, nothing will work out (it will work out, but not what we need).
Step 2
Having cut out the circle, unfold it and cut along the fold. You can cut it to the end, or you can leave a few millimeters so that the wings do not fall apart.
Step 3
In the same way, cut out a circle from a black square (my squares for the body and wings are 6*6 cm in size)
Step 4
We also cut out the cow’s head from a square half the size of the square for the wings and body (mine is 3 cm). You can also use a semicircle for the head. Look at the photos below and choose the option that suits you.
Step 5
We glue the parts onto the cardboard base in the following order: black body - wings, slightly spread apart - head.
Step 6
Now we take cotton wool, tear off small pieces from it and roll balls with our fingers or palms.
If you use a glue stick, then lubricate the wings themselves. If the glue is liquid (for example, PVA), then dip cotton balls into the glue.
Step 7
We make the eyes from cotton wool or small white circles. We trust our parents to glue them on :-))
We draw antennae with a felt-tip pen.
PS
A three-year-old child can also cope with this application, but if he has ready-made forms.
Good luck to you and your children! And let creativity bring joy!
And also write, comment: share your successes, experiences, comments!
The application of a bright red ladybug is a frequent guest in creative classes in kindergarten and school. And this is understandable, because this craft consists of a small number of parts and colors, which is very convenient, especially for novice needlewomen and needlewomen.
For those who want to learn how to make ladybird appliqués, we offer master classes on making this craft using various materials and techniques.
Ladybug with voluminous wings
- We prepare three identical circles from colored paper - two red and one black. This can be done using a template from the lids or by tracing a glass with a pencil.
Then we cut out another circle of smaller diameter for the head.
- We make a leaf from green canvas. It can be made in the same way as in the previous work.
Glue a large black circle onto a green leaf, and onto it a blank head. The last part should extend slightly onto the body.
- We bend the red circles in half and glue them to the body so that one of the halves remains free.
- Using a hole punch, we make a lot of black circles and place them on the wings with glue. We make the insect's eyes from circles of white paper. Another ladybug applique is ready!
Felt applique
A beautiful and simple ladybug (applique) can be easily made not only from paper, but also from fabric, and it is even more convenient to use felt. It is bright, and most importantly, does not require processing of cuts.
The work proceeds as follows:
- Find or draw a contour image of a ladybug yourself and prepare stencils of the component elements. If you make an insect in a simplified way, in the form of geometric shapes, then it is enough to cut out circles of different diameters from cardboard for the body, head and spots.
- Place the resulting blanks on felt of the corresponding color.
- Trace the parts along the contour and cut out all the parts in the required quantity.
- Take the base and glue or sew the head onto it, then the body, and the spots on top.
- Make small parts: antennae, paws, eyes. They are easy to glue.
So, you can make a ladybug (applique) in several ways. It's easy and fun. Keep your child busy with creative activities. Make different versions of products.
Simple application
If you are engaged in artistic creativity with a small child and want to make a ladybug with him, it is better to assemble the applique using a ready-made template. Work like this:
- Find a picture of a ladybug to use as a template.
- Print the image and cut it into individual elements or make patterns from cardboard.
- Trace each detail along the contour, placing it on a sheet of colored paper of the appropriate shade.
- If your baby is still too young to draw on a stencil and cut out the blanks, perform the previous steps yourself and have your child glue the elements onto the sheet. Explain that first you need to take the body and head, then the wings, and lastly, the small circles and spots.
Hanging ladybug
- For this work, you will additionally need beads and wire (18-20 cm long). We make a small loop at one end of the wire.
- From a red paper base, cut 4 long strips approximately 1-1.5 cm wide. Glue small black spots on them. Then we bend all the strips in two places at the same distance from the center (as in the figure). We make holes at the ends and in the middle of the strips and put them on the wire (the loop should be at the bottom to secure the strips).
- We put beads on the wire and on top - the free ends of the strips. Instead of beads, you can also use a cocktail straw - just cut it to the desired height.
After stringing, cut off the excess paper ribbons and cover the top with a circle of colored paper. The final chord is another bead.
- We make a ladybug's head with antennae and eyes from colored paper and glue it to the side. We also bend the second end of the wire into a loop so that the craft can be hung.