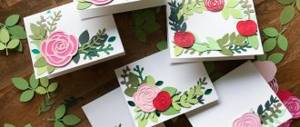
Everyone knows the nesting doll. Russia is associated with it. You can buy it for a lot of money in almost every souvenir shop. If you really want to, you can make a matryoshka doll yourself, spending much less money.
The most beautiful nesting dolls are plasticine or made using the papier-mâché technique. Looking at the photo of a homemade nesting doll, you can safely say that it is quite easy and simple to make, even with small children!
Plasticine matryoshka
To do this, you will need the most ordinary plasticine, which is used by children in kindergartens or schools. You will need a couple of pieces of multi-colored plasticine, a special tool for cutting (most often it is found in boxes with plasticine), a working panel made of wood or plastic, matches and a teaspoon.
We need to make a silhouette of a matryoshka doll. To do this you will need one of the large pieces of plasticine.
To shape the face, you need to take a teaspoon and form an oval dent. It is necessary to place a rolled small ball of white plasticine into it.
Using matches you need to make holes for the eyes. The eyes are tiny balls of dark plasticine.
If the child wants, you can help him with acrylic paints and decorate the nesting doll. Children usually have a lot of ideas for making crafts.
Parents can find not only ideas and instructions for making nesting dolls, but also take part in this wonderful action.
LiveInternetLiveInternet
Quote from Lydia_Kalambet's message
Read in full In your quotation book or community!
How I sew Matryoshka.
Master class on textile matryoshka dolls. Photos by userLydia_Kalambet
Matryoshka height 20 cm, circumference 26 cm. Cotton fabric.
Matryoshka doll pattern assembled.
Pattern details.
We select the fabric, it is desirable that the color of the fabric is harmonious with each other.
We lay out the pattern on the wrong side of the fabric and trace it (with a pencil, tailor’s chalk, or like me, with a gel pen). I love thin lines, the pattern turns out more accurate, and this is important when sewing small toys.
We cut two parts of the lower part of the nesting doll in a mirror image.
We cut the upper part of the nesting doll part. Two details.
Sew the pattern pieces together and press the seam allowances to one side. If it is difficult to sew right away on a machine, you can first baste it by hand.
We correct the sewn and ironed parts by applying the main pattern and the irregularities need to be cut off.
We cut the face of the nesting doll. I cut it from knitted fabric, pre-gluing it with non-woven fabric, so it’s easier to work with it.
To attach the face to the main part of the nesting doll (you can also sew it on), I use double-sided non-woven fabric.
From double-sided non-woven fabric I cut out the same circle as the face.
I put a double-sided interlining on the part and a face on it.
I smooth it with an iron through clean paper.
The face is well glued.
After this, I sew together both parts of the nesting doll, having previously chipped with pins the places where the parts fit exactly together.
The seam is laid exactly along the line drawn when cutting the fabric.
Having retreated 0.5 - 0.7 mm from the seam, we cut off the excess edge; if the nesting doll is sewn from knitwear, then we have retreated 0.4 mm from the seam. Leave the bottom of the nesting doll open.
We turn and straighten the workpiece using a special device or any other. I like to use a medical clamp for this purpose. You can also use long tweezers. We fill it with filler (holofiber, padding polyester, cotton wool).
When the matryoshka blank is filled, we sew up the open cut as follows: stepping back 1 cm from the edge, sew it in a circle with basting stitches and tighten it.
When tightening, tuck the edge inward with your finger and then pull it all the way. I use white thread so that the seam is visible, but the thread needs to be matched to the color of the fabric.
When it is pulled together and sewn up, press with your finger in the middle and use a thick needle to pump the filler onto the side edges of the nesting doll.
The bottom of the nesting doll turns out like this, not quite beautiful, but all this will be covered with further processing.
The matryoshka doll is ready.
Let's start drawing the face. You can draw with acrylic paints on fabric, watercolors or gouache with PVA glue, or, like me, with gel pens for tattooing children. Well, if these pens can be used to draw a child’s body, then drawing a matryoshka doll is just right, without harm to the children.
I'm starting with the eyes...
For white highlights, you can use a text corrector.
There is a lot of information on the Internet on how to draw a face for a doll, if you ask this question in the address bar. There are many ways and everyone can choose the one they like.
And now the best part - the design. We take out all sorts of ribbons, bows, frills from our boxes and chests... and begin to apply and try them on. You can embroider or make flowers and bows yourself... In general, use your imagination...
For gluing, I use a glue gun, it’s very convenient, but thin and small parts can be glued with colorless waterproof Moment glue.
And most importantly, the nesting doll must stand! To do this, cut out a round piece from cardboard or plastic. Its size should be no larger than the circumference of the matryoshka doll.
We select the color of the fabric, preferably knitwear, and cut out a larger round piece.
Using basting stitches, we sew in a circle and pull together tightly. We fasten the thread without tearing it off...
We attach it to the bottom of the nesting dolls and sew it with hidden stitches twice to make it secure and beautiful.
That's all. My collection has been replenished with another nesting doll.
Good luck!
Posted using the I'm a Photographer app
Paper dolls
To make a paper matryoshka doll, you should take:
- Cardboard of different colors.
- Velvet paper.
- Stencil (can be prepared in advance).
- Scissors.
- Plain paper.
- Pencils or paints.
- Glue.
- A simple pencil.
If you plan to work with small children, make sure you have scissors that have rounded tips. It is necessary to remember that with small children you need to put a small amount of glue onto the brush.
In order to stick the part, you can use a soft cloth. If glue accidentally gets on your hands or eyes, you should immediately rinse with running water and consult a doctor.
Step-by-step instructions on how to make a matryoshka doll from paper
- You need to attach a pre-prepared matryoshka stencil to the back of the cardboard.
- Next, you should outline it with a simple pencil.
- Using scissors, the outline should be cut out of cardboard - we have a blank.
- On white paper you need to draw a circle and cut it out. This will be the face of the nesting doll.
- You should glue the circle onto a colored cardboard blank.
- You need to cut out a rectangle from velvet paper. Its width should not be greater than the width of the matryoshka doll.
- The rectangle needs to be glued onto a cardboard matryoshka blank.
- You need to cut strips from plain white paper. The width is arbitrary.
- Using a hole punch, you need to make holes throughout the entire strip.
- Using embossed scissors, you need to make a small pattern on one side of the strip.
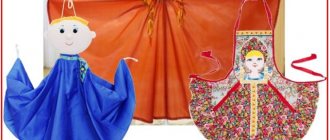
- Next, glue the strips on three sides of the rectangle. The result is a matryoshka apron!
- Using pencils, felt-tip pens or paints, you need to draw the face of the nesting doll.
An important nuance - given that some parts can be quite small, you should more carefully monitor children and what they pick up.
You should not give your child scissors that are intended for adults. For children, there are models with rounded tips.
It is imperative to ensure that children do not put small parts (paper, remnants of fabric or ribbons) into their mouths, and also keep glue away from them.
- Making a diaper cake with your own hands: a step-by-step master class on how to fold a gift for newborns (100 photos)
DIY crafts from egg trays: original toy ideas for children and useful crafts for adults (115 photos)
DIY birch bark crafts - techniques and master class for making crafts for beginners (105 photos)
As you can see, the question should no longer arise about what you can use to make a matryoshka doll for a child - there are quite a lot of detailed instructions and templates on the Internet.
When creating such crafts, you can accompany them with interesting stories and fairy tales. You can come up with your own stories together with your child. It will be a wonderful time together.
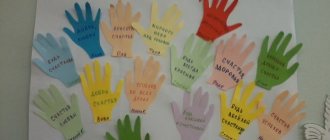
Make a matryoshka applique from a variety of materials (fabric, braid, etc.).
Technology lesson notes
Theme: Matryoshka
Goals of the teacher:
Make a matryoshka applique from a variety of materials (fabric, braid, etc.).
Planned
results:
subject:
- introduce students to the history of the nesting doll;
- strengthen your skills in working with fabric;
personal:
- development of aesthetic taste, development of independence, cultivation of cognitive interest in the subject.
Lesson type:
discovery of new knowledge.
Teacher equipment:
Technology: 2nd grade: Rogovtseva N.I., Bogdanova N.V. Textbook. UMK "Perspective", 2013; projector; computer; board; ready-made nesting doll, materials and tools necessary for work.
Equipment for students:
Technology: 2nd grade: Rogovtseva N.I., Bogdanova N.V. Textbook. UMK "Perspective", 2013; matryoshka templates made of cardboard, fabric, scissors, glue, ruler, colored pencils, white paper, pencil, rag, pincushion, brush, cardboard, tailor's chalk, backing sheet.
| № | Lesson stages, methods and techniques | Time | Content. Teacher activities | Student activities | UUD |
| 1. | Preparing for the lesson. | Control over the preparation of workplaces. | Preparing your personal workplace. | R: self-control. | |
| 2. | Org. moment. | ~1 min |
| Greetings from the teachers. Getting ready for work. | |
| 3. | Formulation of the topic and purpose of the lesson. | ~ 3-5 min |
Wooden girlfriends are so similar to each other. There are many of them or a little, But their names are all... (MATRYOSHKA)
Is this a dream or reality - I can’t understand at all. There was one nesting doll here, and now there are seven of them. Seven wooden dolls, multi-colored and ruddy, live on our table, they are all called matryoshka dolls. We played, frolicked and all fit into one!
| The teachers are listening. Answer questions. | P: extracting the necessary information from the listened text. K: correctly formulate the purpose of the lesson. |
| 3. | Explanation of new material. | ~5 min |
| The teachers are listening. | P: process the information received, draw conclusions. K: listen and understand the speech of others. |
| 4. | Initial check of understanding. | ~ 3 min |
| Answer questions. | K: engage in conversation, express your opinion, listen to the opinions of others. |
| 4. | Ped. show | ~ 3-4 min |
Rules for handling scissors
| The teachers are listening. Check your readiness for work. Repeat the rules for working with scissors. | P: observation and analysis of work, extraction of necessary information. |
| 5. | Physical exercise. | ~1 min |
| They stretch their hands. | L: setting for a healthy lifestyle |
| 7. | Independent creative work. | ~20 min |
| Doing a matryoshka doll. | R: be able to organize your activities |
| 8. | Exhibition of finished works. Evaluation of the work done. | ~ 3-5 min |
| Analyze the work. | R: be able to evaluate the correctness of the work |
| 9. | Summing up the lesson. | ~3 min |
| Summarize the results of their activities. | R: observation and comparison |
| 10. | Cleaning the workplace. | Turn |
|
DIY photo of matryoshka dolls for kindergarten
What can be made from a construction set - methods of application and examples of what things can be created from children's construction sets (135 photos)Crafts from baby food jars - 125 photos of original ideas for using small jars
- Beautiful applications made from colored paper - 120 photo ideas for beginners. Video master class on making appliques using a template
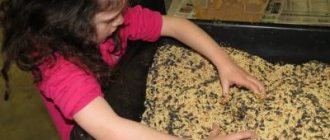
Crafts from pumpkin and sunflower seeds: how to learn to make crafts from seeds with your own hands? 145 photo ideas for beginnersWhat can be made from PVA glue - ways to make crafts. Step-by-step master class on using glue to create crafts (155 photo ideas)
DIY mushroom crafts - master class and tips on how to make a mushroom craft. The best options for beginners (120 photo ideas)