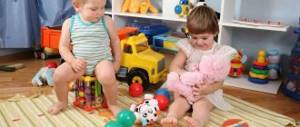
In this lesson we will learn how to sculpt a goat from plasticine. This pet is familiar to all children. Some saw a horned goat alive, others saw it in photographs or in programs about animals. But everyone knows that the goat is a frequent hero of fairy tales and cartoons, for example, “The Wolf and the Seven Little Goats”, “The Goat-Dereza” and others. So, let's make a plasticine figurine of a goat to add to your collection of pets, and at the same time have fun with your child.
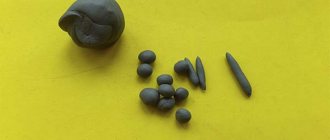
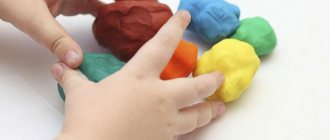
1. You can sculpt a goat from any plasticine that you have available. If your plans include sculpting a believable image, then it is better to use gray, white or beige material. Take some plasticine the size of a nut and roll it into a ball.
2. Using your fingers, draw out one part of the ball, outlining the nose of the goat's face. Stick on the eyes, and cut out the nostrils and nose with a stack.
3. To create the body, take a little more gray plasticine, knead it in your hands and create an oval. Next, spend another gray portion on sculpting a flat cake. Cover the oval with the cake, leaving the bottom part exposed. Make the fur fluffy by streaking it along its entire length.
4. Insert a match where you plan to mount the head.
5. Connect the head to the body by putting it on the free end of the match. Mask the middle part of the fastener with plasticine to create a neck.
6. Glue long brown horns to the top of the head.
7. Add a furry forelock and ears.
8. Prepare 4 matches for sculpting the limbs. Place a thin layer of soft gray plasticine on each match. Attach the hoof to one end and leave the other free.
9. Insert the loose ends of the matches into the body so that the goat stands confidently on its feet.
10. Don’t forget that a goat gives milk to humans. Be sure to mold the udder and attach it to the body between the two hind legs.
11. Using two drops of gray plasticine, make a ponytail and a beard tassel.
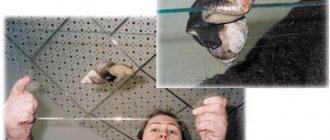
12. Before letting your goat out to pasture, attach a bell to its neck to prevent it from getting lost.
The work of creating a goat from plasticine is completed. All that remains is to clear out your workspace and find a suitable place for your masterpiece.
The final look of the craft. Photo 1.
The final look of the craft. Photo 2.
The final look of the craft. Photo 3.
How to make a Dymkovo goat and ram from plasticine.
When asked for “Dymkovo toys,” Yandex gives first of all , and then goats - such is the popularity. Dymkovo goats come in different varieties - elongated, with large horns, and squat - three-legged, in general, there are many options. The painting of these same goats is just as varied, if not to a greater extent, - a separate article, or even several, will have to be devoted to this painting.
Modeling - Dymkovo goat
Today we will make a Dymkovo goat with you - of course, in fact, our goat will only be conditionally “Dymkovo”, and if you think about it properly, then it can only be called a “goat” conditionally.
Let's take as an example a picture from the Internet - a strong and well-fed goat.
Let's mold it from one piece of plasticine. We bend about one third of the plasticine bar upward at one end: these will be the neck, head and horns.
At the bend and at the other end of the bar we designate two legs. At first, these legs resemble only small protrusions - you should make sure that their location is chosen correctly, and only then lengthen them by moving the plasticine from the body. It is by distilling it with your fingers, and not tearing off pieces. This is how you can distill mashed potatoes or porridge, creating a varied relief on the plate.
The point here is that children, as a rule, learn to sculpt in kindergarten only from parts and have difficulty switching to another method. We are not against sculpting from parts, we have articles on sculpting from parts, but this Dymkovo goat, even from the point of view of common sense, is more convenient to pull out from one piece.
While we were distracted by explanations, the figure acquired the characteristic outlines of a goat: a head with horns was indicated and the legs had grown. Let's extend the torso a little.
Now the “finishing work”: we smooth the surface of the sculpture, “pinching” we pull out the beard from the chin, and the ears from the temples. The head shrank and took on its final shape. Now let's draw the eyes and outline some stripes on the beard.
That’s it, there’s no need to decorate anymore, since the Dymkovo plasticine goat is already quite ready.
Notes on modeling in the middle group “Fairytale Horses”
Anna Melnikova
Notes on modeling in the middle group “Fairytale Horses”
Objectives: technical: reinforce the technique of pulling and pinching, introduce techniques for using stacks.
Fine: teach children how to sculpt a horse using a combined method, decorate it with rings, circles, and dots.
General: develop imagination.
Materials:
Sample of a magic toy - a horse, Gamma plasticine, stacks, boards, hand napkins.
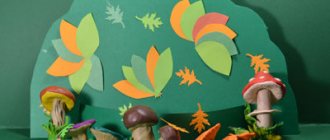
An oval-shaped green sheet of thick “meadow” paper. Progress of the lesson:
Introductory part On the teacher’s table there is a fairy-tale toy - a horse, covered with a napkin. Children are sitting at tables. The teacher quietly knocks on the table and says the words:
- Clack-clack-clack, someone is jumping onto the meadow! Guys, you guessed who it is (children's answers). That's right, it's a horse. But where is she? Find her guys!
The children come to the table, and at this time the teacher lifts the napkin. They see a magic toy. The teacher hangs pictures with homemade horses on the board.
- Look how different, beautiful, diverse they all are. One pink horse
with a pattern in the form of a huge flower. Other horses are decorated with circles, wavy lines, and dots. Some horses have black manes, tails and legs.
- What a beautiful horse galloped up to us (we moved on to discussing the plasticine figures).
- What is this horse’s body? What shape is it (arched) And this? (head). What shape is it (like a hook). What is the horse's body decorated with (spots).
- What a beautiful horse. First I will show you how to sculpt them, look carefully, first I will sculpt the body and paws. I take a large piece, divide it into two equal parts, and roll each into a sausage. Now I connect these sausages together and bend the other one. I smear plasticine on the back. It was my horse who got the body and legs.
- Next, I take a piece of plasticine, a little smaller, and make a sausage in the same way and make an arc out of it. I connect it to the body. This is our head and neck. Then I use my fingers to pull out the mane and tail. You can also draw stripes using a stack (I show). You can also make eyes, mouth and nose with a stack.
Then I will show you how to decorate it. I take it, roll it out into a small ball and stick it to the horse’s body.
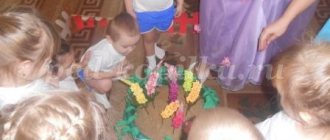
The teacher places the molded figurine on a green sheet and says:
- Here the horse galloped onto the meadow: tsk-tsk-tsk. And now, guys, make a lot of foal horses yourself so that they can run and jump and pluck fresh grass.
Main part:
Talk through the sequence of work performed. During the sculpting process, the teacher helps the children sculpt a more stable figure. When everyone has finished making figurines of foals, the teacher invites them to decorate them.
Final part: Children stand at a separate table and place all the foals on the meadow. The teacher asks:
-Who did we blind today? What were they made from? How did you sculpt the torso and legs? How did you make the mane? What patterns are on your horse?
Rating: Well done everyone! Well done.
Dymkovo ram made of plasticine
They rejoiced at the goat, and it was good. But life on the spot is not time to turn him into a sheep. And here we will already use mixed sculpting techniques. A Dymkovo toy (usually a whistle) may have a mouthpiece or a wide stand instead of hind legs.
So we separate the back legs of the goat, bring the body down into a cone (like a fish tail), and divide the freed plasticine into two pieces.
We roll these pieces into cones and curl them in a steep arc, at the same time slightly flattening them in the bending plane. We apply the horns to the existing goat horns and carefully mask the seam. Since the new horns are very massive, so that they do not sag, we rest them with the lower bend on the back of the toy ram.
Margarita Sergeevna Rudakova
Summary of educational activities modeling in the middle group
.
Topic: " Goat"
»
.
Developed by Rudakova M.S. – teacher of the MBDOU MO Krasnodar, combined kindergarten No. 206. 2020.
Goal: to form an idea about domestic animals; improve motor skills.
Objectives: teach children how to sculpt a baby goat
, develop
imagination
, imagination, consolidate
modeling
.
Clarify knowledge about domestic animals, using the example of a goat
. Arouse positive emotions from work.
Materials and equipment: interactive whiteboard and slide with a picture of a goat
, laptop, toy
goat
, plasticine, board, stack - for each child.
Preliminary work: examining domestic animals, illustrations, including goats, using “pet”
in the game, reading fairy tales, solving riddles, conversations.
Sequence of educational activities
.
Motivation: show the children a toy goat
and tell a story about how his life is boring because he has no friends.
And he really asks the guys to help him make friends. Explain that for this we will need plasticine, with its help we will be able to mold a whole herd of animals, and our goat will not be alone
.
Main part :
Consider a toy goat
.
Ask what parts of the body it consists of, what geometric shapes they resemble. Offer to start the task. Taking a piece of plasticine, warm it up by kneading it in your hands, first divide it in half using a stack, and then one of the parts in half, and one of them into four parts. The result will be a body in the shape of an elongated oval, a head - a ball, which then stretches into a muzzle with horns, four legs - small “sausages”
.
All parts are connected to each other and we get a funny goat
.
Children are encouraged to add other elements: beard, ears, hooves, tail. Praise the children for their good work, for their efforts and desire to help the kid
!
Offer to do finger exercises.
I have a baby goat
,
I love him! (left hand in a fist, place the horns with the right - index and middle fingers
, the rest are bent, move
with “horns”
)
I'm a kid early in the morning
I'll feed you! (open your left hand with your palm up, clap your right hand with your fingers on the left)
And fresh water
I'll pour it for him. (we stroke with one hand over the other)
And then to the green meadow
I'll take you. (with two fingers - the index and middle of the right hand,
“walk”
along the left and vice versa)
There will be - there will be my little goat
,
Jump there, (perform tapping movements with your fingers)
And then he will become
Rest! (calmly place your hands in front of you)
Reflection: ask the children questions - did you like sculpting the goat
?
What materials did we use to make the animals? Did you enjoy helping the kid
? What do you remember?
Publications on the topic:
Summary of an integrated lesson with elements of visual activity in the middle group on “Modeling a hedgehog from plasticine” Synopsis of an integrated lesson in the middle group on the topic: “Modeling a hedgehog from plasticine” Educator: Smolina S. V. MB Preschool Educational Institution No. 32 “Teremok”,.
Goal: to introduce children to the idea of the flag as a state symbol, to the meaning of the flag in modern life; - with the meaning of flowers.
Summary of direct educational activities in the middle group. Modeling based on the fairy tale “Two Greedy Little Bears” Purpose: To consolidate the ability to convey the knowledge and impressions acquired by children in their work, depicting the image of the literary hero - a bear cub.
Summary of educational activities on FEMP in the senior group “Fairy Message” Purpose: Creating conditions for the development of children’s cognitive activity in the process of forming elementary mathematical concepts. Tasks:.
Summary of educational activities “cognitive and physical development” Topic: “Firefighters in training” Objectives: 1. To consolidate children’s knowledge about fire safety rules and rules of behavior in case of fire. 2. Increase personal responsibility for.
Summary of educational activities in the middle group “My Family” Objectives: to clarify and generalize children’s knowledge about the family, about who their relatives are; form ideas about family composition using photographs.
Program objectives: to introduce children to the concept of “small homeland”, continue to acquaint children with the sights of the village; develop coherence.
In this lesson, we invite you to learn another interesting tutorial on sculpting a pet - a goat. Every child has seen this animal in person, so he is very familiar with the features of its appearance. Today it is very popular to create huge compositions from plasticine and add new details to them each time. That is why this lesson will undoubtedly be of interest to children who are creating a plasticine farm, because a goat will be an excellent addition to a mini-farm.
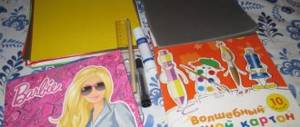
To make a plasticine copy of a goat, you need to prepare the necessary material and tools:
- a set of colored children's plasticine;
- pointed blade;
- skewer;
- a few toothpicks.
Working on crafts based on Dymkovo motifs
Let's make a deer
To create the deer, a combined sculpting method is used, but, nevertheless, the basis is sculptural, that is, kids sculpt parts of the figurine from a single piece.
Instructions:
- “From a piece of plasticine (you can combine the leftovers after doing other crafts into one ball) we roll 2 sausages (thick and slightly thinner) - these are blanks for the body and head with neck.”
- “We form the body and legs from the thicker one. To do this, we make cuts along 1/3 of the entire length at both ends.”
- “We smooth out the resulting elements into cylinders.”
- “We bend the figure slightly in the middle, placing it on its legs.”
- “We cut a small segment of the second sausage with a stack diagonally.”
- “We apply the place of the incision to the body and smooth out the transitions.”
- “We take small pieces of plasticine for the ears. We form a ball, and then roll up small thick sausages, stretching out one part so that the figure begins to resemble a three-dimensional triangle.”
- “We attach the ears to the head, smooth out the transitions well.”
- “We roll the sausage, bend it in the middle and attach it between the ears - these are the horns.”
- “We complement the deer with a small tail. To do this, we roll up a thin sausage and attach it to the body, smoothing out the junction.”
This is interesting. Since the craft will still be painted, the horns, ears and tail should not be thin, otherwise they will break when applying paint.
Let's start painting.
Instructions:
- “Dip the workpiece into a bowl with white gouache.”
- “Let’s get a craft” (it’s better if an adult does this).
- Let it dry and apply the selected design with gouache.
Example of lesson notes
Vedernikova Natalya Summary of a modeling lesson in the senior group based on Dymkovo toys “Oleshek” (fragments)
| Get your ears ready, kids, This is interesting to know: I want to tell you everything about the Dymkovo toy. In Dymkovo, near Vyatka, Four hundred years ago, for the spring holiday, “Whistling,” They were sculpted by young and old. These Vyatka toys are like a rainbow in the spring: Look, here’s a turkey, A tail like a painted fan, An elongated beard, Like a plume, a comb, Wings with bright eyeliner - The whole toy is like a flower! Nearby there is a beautiful young lady, standing with her arms akimbo; Apron, skirt and kokoshnik: Everything sparkles and burns. Black arched eyebrows, eyes, cheeks, scarlet mouth - It seems that he will wave his hand and immediately begin to dance. Buffoons, water bearers, ladies and roosters - They are decorated with stripes, cages, dots and circles. Red, yellow and green, Scarlet, blue, light blue - All colors on a white background of this painted haze . The whole country and the whole world knows the folk craft; You saw this Russian souvenir today. Teacher: - Look, we found ourselves in front of a workshop where Dymkovo toys . And now I invite you to become masters for a while and invite you to the workshop. Teacher: - But the workshop is closed. To enter it, you need to answer questions. Teacher: - What are Dymkovo toys ? Children: - From clay Teacher: - What other materials are needed? Teacher: — What tools are needed for work? Part 3: The workshop opens. Children enter and sit at their work stations. Teacher: - Check if everything is ready for work? (children answer) Teacher: - Guess my riddle and find out what you will sculpt: Stands on slender legs - All the beauty is in the horns. That's right, it's a deer . Teacher: Pay attention to the diagram! (on the poster there are samples and modeling )...> Try to make your work beautiful and neat. A good master's workplace is always clean and tidy. Physical education lesson Teacher: Let’s stretch our fingers before work. We brought clay from a distant hillock (hands on the belt, turns with a spring) Well, let's get to work, miracle masters! (arms forward, to the sides) Blind, dry - and into the oven! (they sculpt with “palms”) And then we will paint (fingers with a pinch, draw wavy lines) We will toys , (sculpt with “palms”) The stove radiates with heat. (they clench and unclench their fists) But there are no rolls in the oven, (they wave their index finger) But in the oven there are toys ! (hands forward) Teacher: - Before we start work, let’s say the following words: “I’ll sit straight, I won’t bend, I’ll get to work.” Teacher: - Now you can get to work. Independent work. Teacher: - And now I’ll see whose fingers are the most dexterous and skillful. Children begin to work, the teacher monitors the work, advises, and shows working techniques. Part 4: Summary of the lesson . Analysis of works. The children finish their work, wipe their hands, and place the reindeer on the stand. Teacher: - Let's see how our masters coped with the work. Teacher: - Are all the toys okay ? Teacher: - Whose work do you like the most? Why? Teacher: - Which toy is the neatest ? Teacher: - Well, guys! We learned a lot of interesting things in Dymkovskaya Sloboda , met with toys , and tried ourselves as craftsmen. It's time for us to go back. Sit down on the carpet quickly. Another minute and he will leave the ground. Children sit on the carpet - an airplane. Teacher: - One, two, three! Fly! Teacher: - Repeat the farewell words after me: We will remember the Dymkovo toy And now, friends - girlfriends, We will finish our story...> |
Photo gallery: ready-made children's crafts
You need to paint the craft only after the first layer of paint, that is, the primer, has dried well, otherwise the painting will flow. Some options for making an oleshka involve large branched horns. Due to its age, the oleshka may not rest firmly on its legs
Let's make a goat
As an option for making a Dymkovo toy, you can invite kids to make a goat. When getting acquainted with domestic animals (or after studying the fairy tale “The Wolf and the Seven Little Goats”) in the junior and middle groups, the children were already making a kid. The technique will be the same, only the Dymkovo toy has large horns. Also, sculpting the torso, limbs, head and tail will be similar to how we made the deer.
Let's dwell on the creation of these largest horns and ears.
Instructions:
- “Roll two long sausages.”
- “We bend them in a circle, but leaving one end free.”
- “We stick this edge to the head.”
- Repeat for the second horn.
- “We form 2 balls from 2 small pieces of plasticine and make pancakes from them.”
- “We pinch the workpiece, grabbing it along the edge of the circle, so that we get a spatula.”
- “We apply the narrow part to the head in the place where the horns are attached.”
- “We sharpen the goat’s muzzle a little, slightly extending it for this purpose.”
An example of a lesson plan for sculpting a Dymkovo goat
- Look guys, a goat has come to visit us. What is he like? - A goat, a steep-horned goat, He has a strict character. His pants are on his feet, look at them, kids! - Do you know that the goat has friends, do you want to meet them? Answer the questions: - A beautiful goat. - We'd like to meet you.
Guys, look at the pictures, you see goat toys in them, what are they? - Yes, they are very unusual. Look, goats are a Dymkovo folk toy. Say in unison: Dymkovo toy! - This toy is not simple, but magically painted: let's look at it. -What does the goat have? - What color are his ears? — What color is the tail and hooves? —Look at the pattern on the goat? What does it consist of? — What colors are in the pattern on the goat? - Which of you liked this toy? Fine! The children say in chorus: “Dymkovo toy.” Children answer: - A goat has a head, neck, torso, legs, tail, ears, horns. — The pattern consists of circles.
Let’s take the plasticine in our hands and knead it better. We'll divide everything into pieces, we'll start sculpting the goat: We'll roll out the head, we'll roll out the legs. The pants are like a bell, we connect them. Perform movements following the teacher: (clench and unclench fingers) (show how to tear off pieces) (movement imitating rolling a ball between the palms) (movement imitating rolling a sausage between the palms) (connect the fingers of two hands with each other in the form of a house)
Take one piece of plasticine in your hands and knead it. - After kneading the plasticine, roll out this lump of plasticine on a modeling board. You will get a figure like this - a cylinder (or column). - Take the cylinder (column) in both hands and with your right hand pull out one end of the cylinder (column). - Now bend it in an arc. You will get the neck and head of a goat. - Below, where the neck connects to the body, the goat has legs. To make the goat's legs, take the stem in your hands and make a cut in the middle of the body. After this, pull the plasticine left and right - these will be the goat’s legs. - On the head we will make a beard and horns from plasticine of a different color, for example, yellow. - Pinch off small pieces and roll into round balls and flatten them to form circles - pucks. Decorate your toy with beautiful colorful circles. -Then take some black and make the eyes, nose and hooves of the goat. Children take plasticine in their hands, knead it, and roll it out. Bend and stretch the goat's neck and head. Children make a cut with a stack and stretch out the goat's legs. They stretch out the horns and beard on the goat's head. Multi-colored circles are sculpted from plasticine to decorate the goat’s body. The eyes, nose, and hooves of a goat are made from black plasticine.
A duck walks in a skirt, in a warm sheepskin coat, a chicken in a vest, a cockerel in a beret, a goat in a sundress, a bunny in a caftan, and the prettiest of them all is a cow in matting. Perform movements after the teacher. For each animal name, bend the fingers on the hands, starting with the thumbs. Rhythmic alternating hand claps and fist bumps. 6.. Independent productive activity of children (7–8 min) Children make a toy from plasticine.
What toy did you meet today, what is it called? - Let's look at the fairy-tale goats you made. - What beautiful toys you made! - Who liked to sculpt a goat? - Well done! Come to me, put the toys on the stand, what wonderful friends you have made for the goat! The children answer: “Dymkovo toy.” Children look at the molded toys...> The features of the face can be drawn in stacks |